
Article Categories
- All Categories
-
 Data Structure
-
 Networking
-
 RDBMS
RDBMS
-
 Operating System
-
 Java
Java
-
 MS Excel
-
 iOS
iOS
-
 HTML
HTML
-
 CSS
CSS
-
 Android
-
 Python
-
 C Programming
-
 C++
C++
-
 C#
C#
-
 MongoDB
-
 MySQL
MySQL
-
 Javascript
-
 PHP
PHP
-
 Economics & Finance
Timer Interrupts in Arduino
As discussed in another article, Timers are basically counters. When they reach the end of the count, they overflow. We can use this event to generate an interrupt. Now, the traditional way of generating the interrupts in Arduino involve changing a lot of registers. Luckily, we have libraries for making our lives easy.
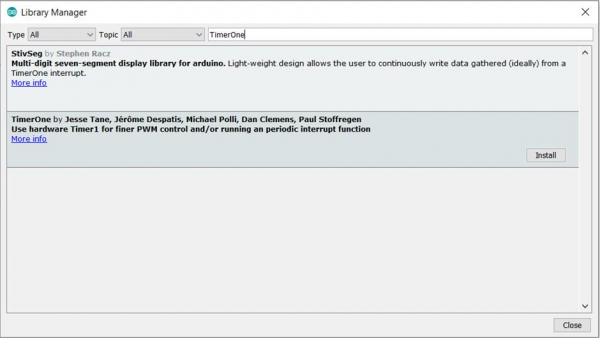
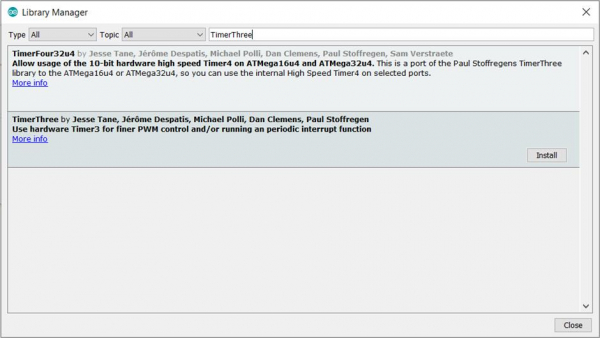
We will use the TimerOne library for generating interrupts on Timer1. Similarly, there is the TimerThree library for generating interrupts on Timer3 (not applicable for Arduino Uno).
Go to Tools -> Manage Libraries and search for TimerOne and TimerThree (optional) and click Install.
Next, import the library in your code by Sketch-> Include library.
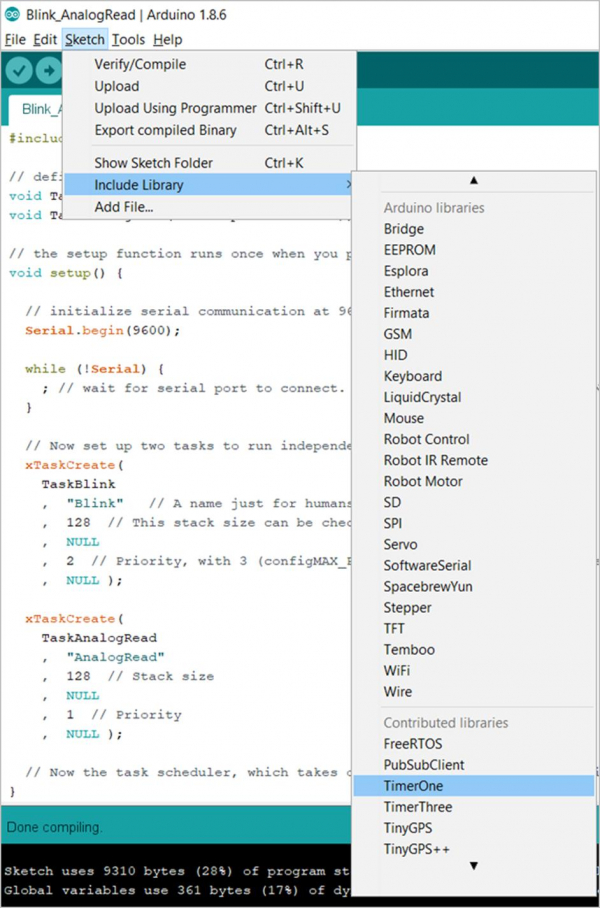
This will add the following line at the top of your code −
#include <TimerOne.h>
Now, there are two functions of importance here: Timer1.initialize() and Timer1.attachInterrupt(). The initialize function takes in the time in microseconds for which the timer should run. In other words, it determines the time after which the interrupt should get triggered.
The attachInterrupt() function takes in the name of the function to be called every time the interrupt gets triggered, as argument.
The sample code below gives you an example −
Example
#include <TimerOne.h>
volatile bool timerTriggered = false;
void setup() {
   // put your setup code here, to run once:
   Serial.begin(9600);
   Timer1.initialize(1000000); //Initialize timer with 1 second period
   Timer1.attachInterrupt(printFunc);
}
void loop() {
   // put your main code here, to run repeatedly:
   if(timerTriggered){
      Serial.println("Timer was triggered");
      delay(1);
      timerTriggered = false;
   }
}
void printFunc(void){
   timerTriggered = true;
}
As you can see, the timer is initialized with a period of 1 second (1,000,000 microseconds). Every time the timer is triggered, the printFunc function is called and the timerTriggered flag is set. Notice that the timerTriggered bool has been declared as volatile, because it is being changed within the interrupt function. Once the flag is set, a print statement is executed in the loop, and the flag is reset.
Just like any other interrupt function, printFunc can’t have any arguments, and can’t return anything.
Please note that the Timer1 can accept a minimum period of 1 microsecond and a maximum period of 8388480 microseconds (about 8.3 seconds).
If you are using the TimerThree library, replace Timer1 with Timer3 in the above code. Of course, TimerThree won’t work with Arduino Uno, because it only has Timer0, Timer1 and Timer2. It can work with other boards which have Timer3 as well (Teensy is a good example).
You can read more about these libraries from the following resources −

4K+ Views
