- Spring WS - Home
- Spring WS - Overview
- Spring WS - Environment Setup
- Spring WS - First Application
- Spring WS - Static WSDL
- Spring WS - Writing Server
- Spring WS - Unit Test Server
- Spring WS - Writing Client
- Spring WS - Unit Test Client
Spring WS - Resources
Spring WS - Static WSDL
In the previous chapter Spring -WS - First Application, we have generated WSDL automatically using the Spring WS Configuration. In this case, we will display how to expose the existing WSDL using the Spring WS.
| Step | Description |
|---|---|
| 1 | Create a project with a name leaveService under a package com.tutorialspoint as explained in the Spring WS - First Application chapter. |
| 2 | Create a WSDL leave.wsdl under the /WEB-INF folder. |
| 3 | Update spring-ws-servlet.xml under the /WEB-INF folder. We are using the static-wsdl tag here instead of the dynamic-wsdl. |
| 4 | The final step is to create content of all source and configuration files and export the application as explained below. |
leave.wsdl
<wsdl:definitions xmlns:wsdl = "http://schemas.xmlsoap.org/wsdl/"
   xmlns:soap = "http://schemas.xmlsoap.org/wsdl/soap/"
   xmlns:schema = "http://tutorialspoint.com/hr/schemas"
   xmlns:tns = "http://tutorialspoint.com/hr/definitions"
   targetNamespace = "http://tutorialspoint.com/hr/definitions">

   <wsdl:types>
      <xsd:schema xmlns:xsd = "http://www.w3.org/2001/XMLSchema">
         <xsd:import namespace = "http://tutorialspoint.com/hr/schemas"
            schemaLocation = "hr.xsd"/>
      </xsd:schema>
   </wsdl:types>

   <wsdl:message name = "LeaveRequest">
      <wsdl:part element = "schema:LeaveRequest" name = "LeaveRequest"/>
   </wsdl:message>

   <wsdl:portType name = "HumanResource">
      <wsdl:operation name = "Leave">
         <wsdl:input message = "tns:LeaveRequest" name = "LeaveRequest"/>
      </wsdl:operation>
   </wsdl:portType>

   <wsdl:binding name = "HumanResourceBinding" type = "tns:HumanResource">
      <soap:binding style = "document"
         transport = "http://schemas.xmlsoap.org/soap/http"/>
      <wsdl:operation name = "Leave">
         <soap:operation soapAction = "http://mycompany.com/RequestLeave"/>
         <wsdl:input name = "LeaveRequest">
            <soap:body use = "literal"/>
         </wsdl:input>
      </wsdl:operation>
   </wsdl:binding>

   <wsdl:service name = "HumanResourceService">
      <wsdl:port binding = "tns:HumanResourceBinding" name = "HumanResourcePort">
         <soap:address location = "http://localhost:8080/leaveService/"/>
      </wsdl:port>
   </wsdl:service>
</wsdl:definitions>
spring-ws-servlet.xml
<beans xmlns = "http://www.springframework.org/schema/beans"
   xmlns:xsi = "http://www.w3.org/2001/XMLSchema-instance"
   xmlns:context = "http://www.springframework.org/schema/context"
   xmlns:sws = "http://www.springframework.org/schema/web-services"
   xsi:schemaLocation = "http://www.springframework.org/schema/beans

   http://www.springframework.org/schema/beans/spring-beans-3.0.xsd
   http://www.springframework.org/schema/web-services
   http://www.springframework.org/schema/web-services/web-services-2.0.xsd
   http://www.springframework.org/schema/context
   http://www.springframework.org/schema/context/spring-context-3.0.xsd">

   <context:component-scan base-package = "com.tutorialspoint.hr"/>
   <sws:annotation-driven/>
   <sws:static-wsdl id = "leave" location = "/WEB-INF/leave.wsdl"/>
</beans>
Running the Project
Once you are done with creating source and configuration files, create the war file using maven install command and save your leaveservice.war file available in /target folder in Tomcat's webapps folder.
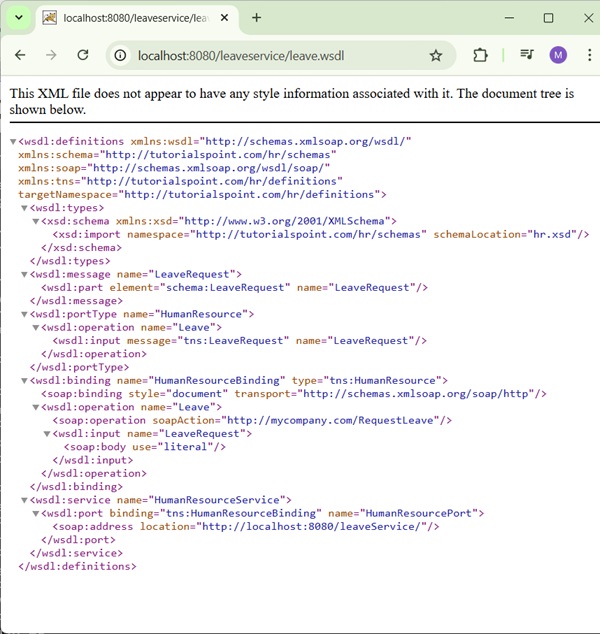
Now start your Tomcat server and make sure you are able to access other webpages from webapps folder using a standard browser. Now, try to access the URL − http://localhost:8080/leaveService/leave.wsdl. If everything is fine with the Spring Web Application, we will see the following screen.

Advertisements