
Article Categories
- All Categories
-
 Data Structure
-
 Networking
-
 RDBMS
RDBMS
-
 Operating System
-
 Java
Java
-
 MS Excel
-
 iOS
iOS
-
 HTML
HTML
-
 CSS
CSS
-
 Android
-
 Python
-
 C Programming
-
 C++
C++
-
 C#
C#
-
 MongoDB
-
 MySQL
MySQL
-
 Javascript
-
 PHP
PHP
-
 Economics & Finance
Simple ways to quickly remove multiple blank or empty rows in Excel
You are going to experience a great deal of frustration if there are hundreds of blank rows that need to be eliminated from the entire worksheet or workbook. In the following section of this article, you will find a listing of some efficient ways that will handle this job for you step by step.
Remove Multiple Blank Rows in Excel with the Go To Special Command
Now, kindly follow the steps below to remove rows that are empty and replace them with "Go To Special" rows.
Let?s understand step by step with an example.
Step 1
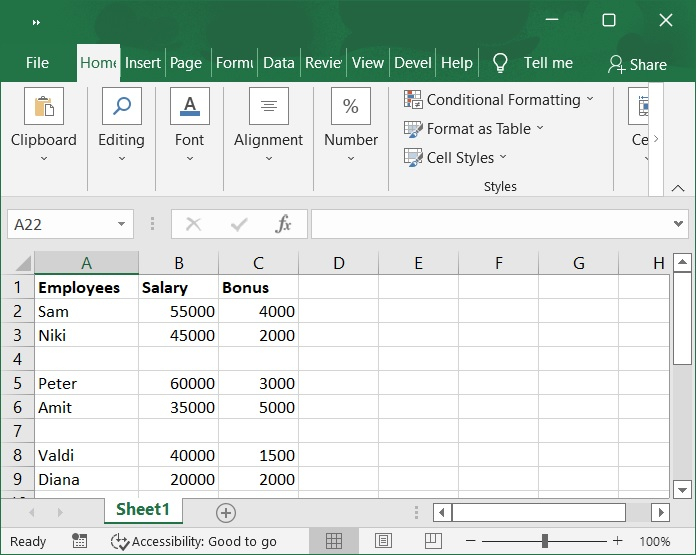
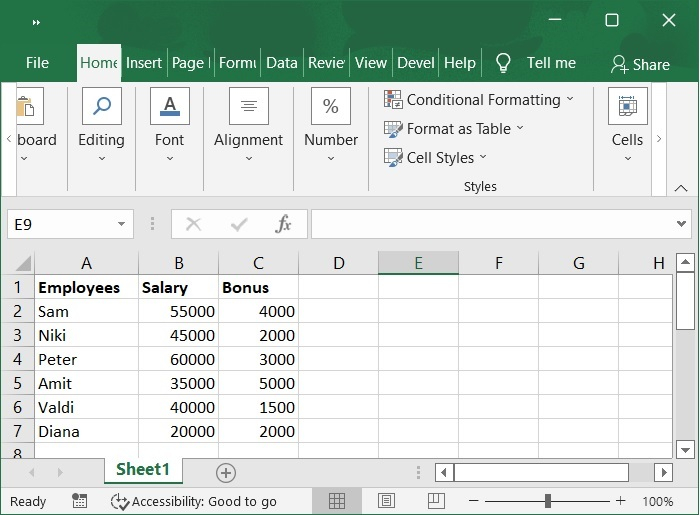
In our example, we have employee?s name, salary, bonus in an excel sheet in columnar format. Refer to the below screenshot.
Step 2
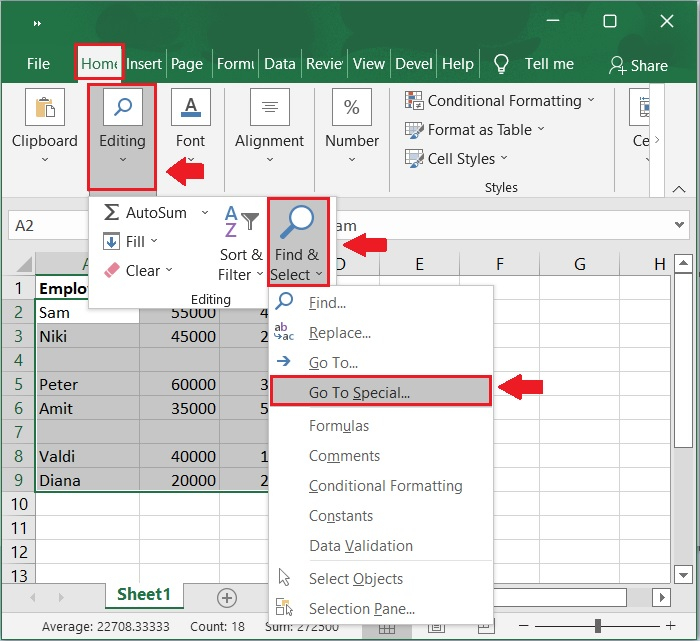
You can remove blank rows by selecting the range from which you wish to remove them, clicking the Home tab, and then under the Editing group clicking the Find & Select Then Select Go To Special button.
Step 3
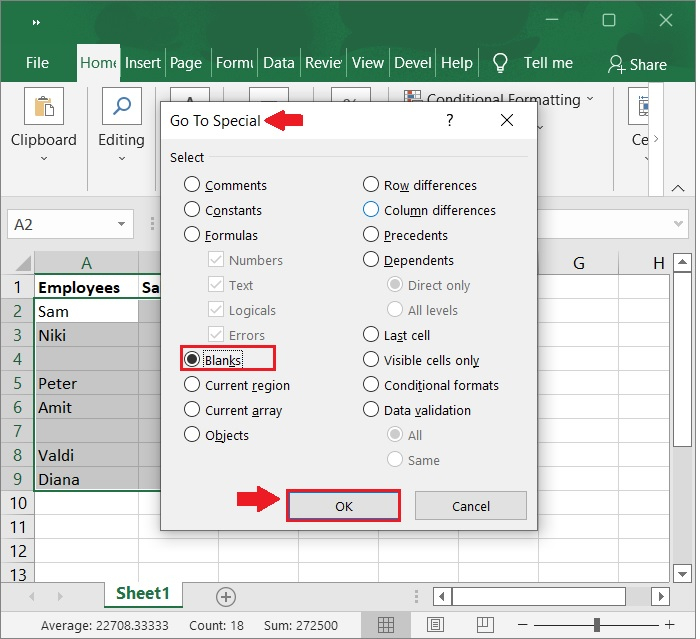
In the Go To Special dialog box, check the Blanks option as shown in the following screenshot.
Step 4
Now, click the OK button to select all of the blank cells in the list.

Step 5
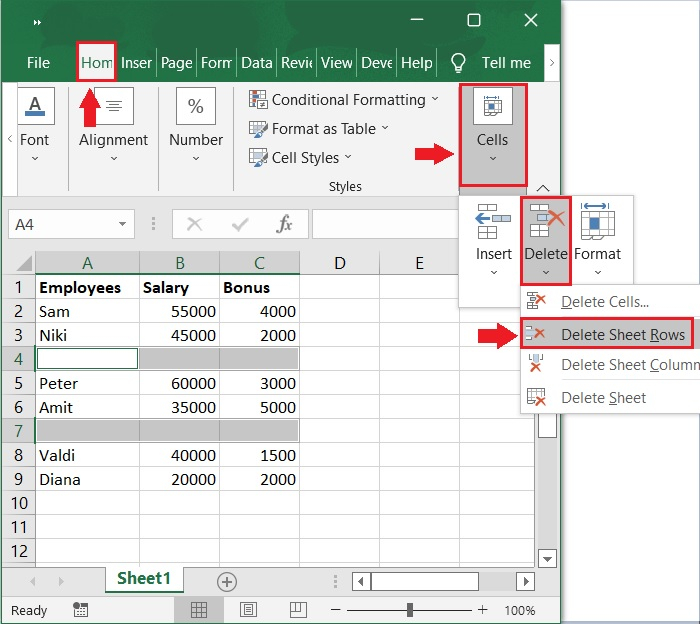
After that, go to the Home tab and select Delete option and click Delete Sheet Rows from the Cells group.
Step 6
The rows that included empty cells have been removed at this point. Refer to the screenshot below.
Important note ? There is a fatal flow occurring while you are attempting to delete blank rows using the Go To Special command. Even if only one cell in a row is blank but the other columns include data, that row will still be removed if it has blank cells in any of its rows.
Conclusion
In this tutorial, we explained in detail some simple ways that you can use to quickly remove multiple blank or empty rows in Excel using the "Go To Special" command.

612 Views
