- Sass - Home
- Sass - Overview
- Sass - Installation
- Sass - Syntax
- Using Sass
- Sass - CSS Extensions
- Sass - Comments
- Sass - Script
- Sass - @-Rules and Directives
- Control Directives & Expressions
- Sass - Mixin Directives
- Sass - Function Directives
- Sass - Output Style
- Extending Sass
- Sass - Interview Questions
- Sass - Quick Guide
- Sass - Cheatsheet
- Sass - Useful Resources
- Sass - Discussion
Sass - Installation
In this chapter, we will learn the step-by-step procedure to install Ruby, which is used for executing the SASS files.
System Requirements for SASS
Operating System − Cross-platform
Browser Support − IE (Internet Explorer 8+), Firefox, Google Chrome, Safari, Opera
Programming Language − Ruby
Installation of Ruby
Step 1 − Open the link https://www.ruby-lang.org/en/downloads/, you will see a screen as shown below −
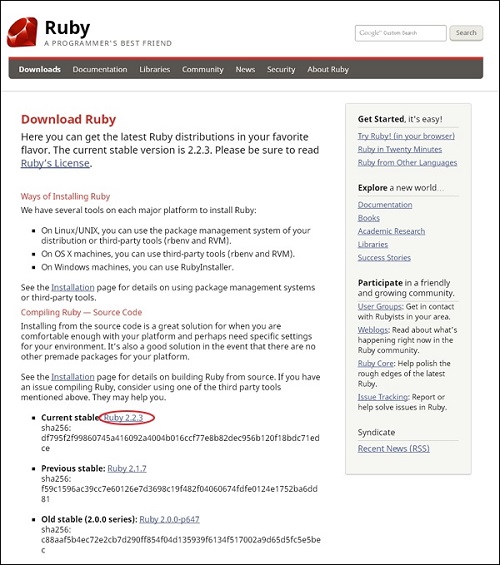
Download the Current stable version of the zip file.
Step 2 − Next, run the setup to install Ruby on the System.
Step 3 − Next, add Ruby bin folder to your PATH User Variable and System Variable to work with gem command.
Path User Variable −
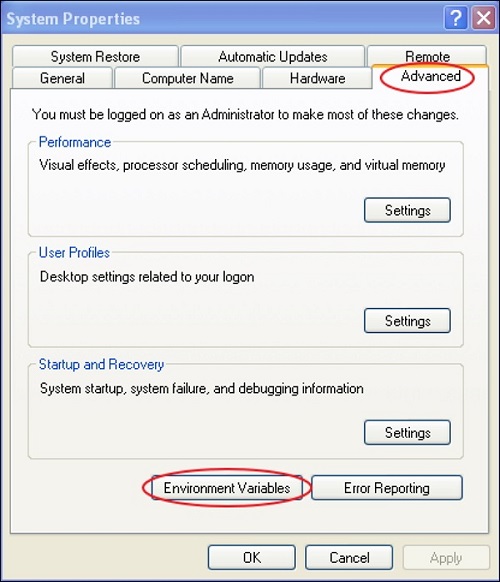
Right Click the My Computer icon.
Select Properties.
Next, click the Advanced tab and click Environment Variables.
In the Environment Variables window, double click the PATH as shown in the screenshot given below −
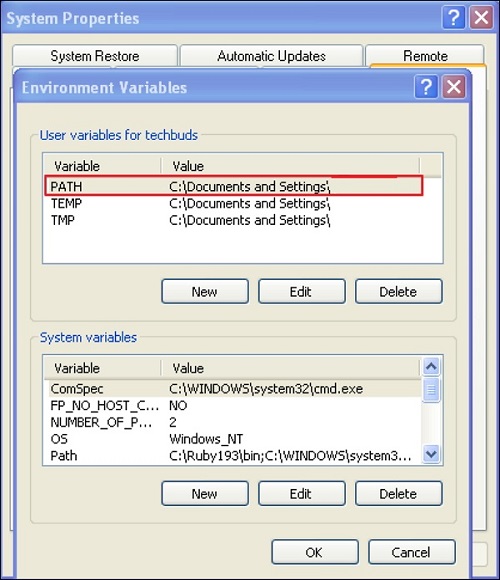
You will get an Edit User Variable box as shown. Add ruby bin folder path in the Variable value field as C:\Ruby\bin. If path is already set for other files, then put semicolon after that and add the Ruby folder path as shown below.
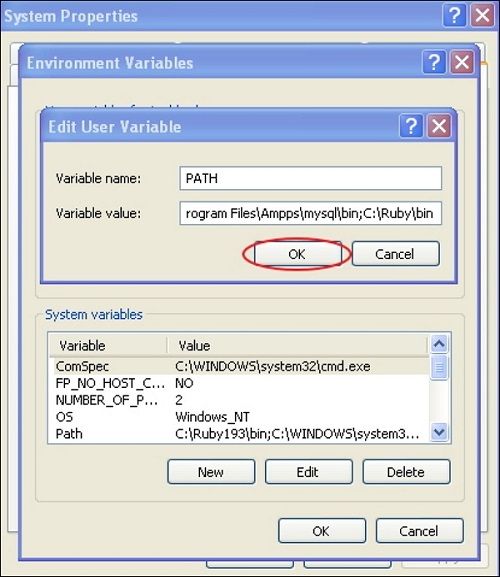
Click the OK button.
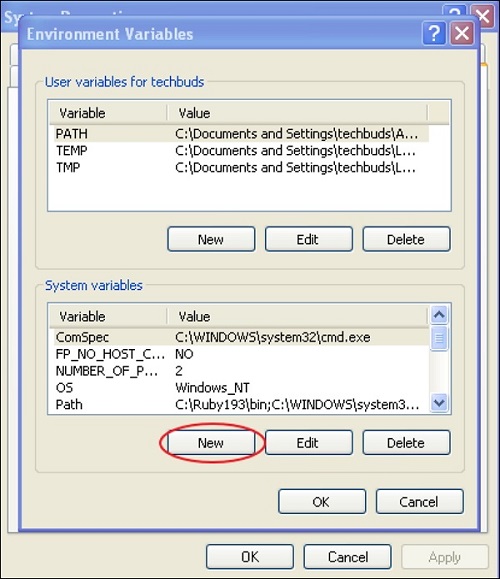
System Variable −
Click the New button.
Next, the New System Variable block is displayed as shown below.
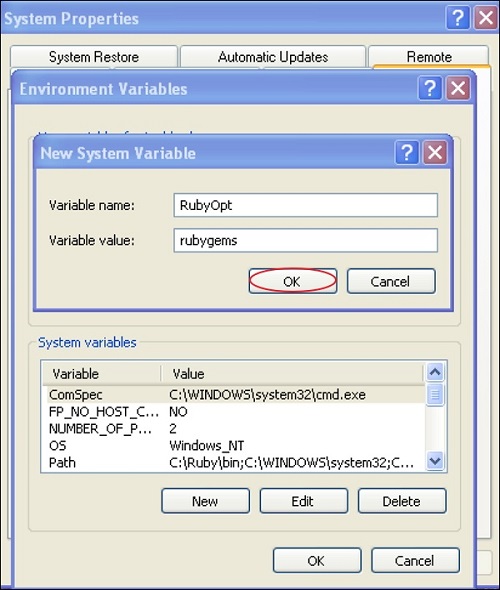
Enter RubyOpt in the Variable name field and rubygems in the Variable value field. After writing the Variable name and value, click the OK button.
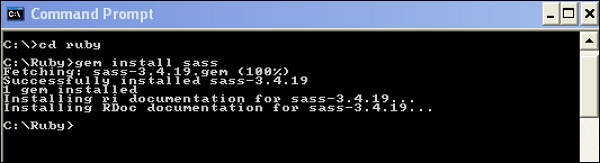
Step 4 − Open the command prompt in your system and enter the following line −
gem install sass
Step 5 − Next, you will see the following screen after installing SASS successfully.
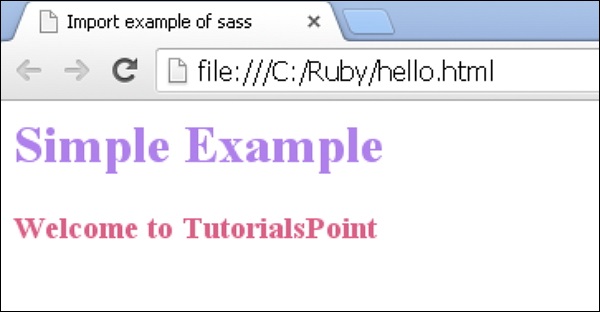
Example
The following is a simple example of SASS.
<html>
   <head>
      <title> Import example of sass</title>
      <link rel = "stylesheet" type = "text/css" href = "style.css"/>
   </head>

   <body>
      <h1>Simple Example</h1>
      <h3>Welcome to TutorialsPoint</h3>
   </body>
</html>
Now, we will create file as style.scss, which is quite similar to CSS and the only one difference is that it will be saved with .scss extension. Both, .htm and .scss files should be created inside the folder ruby. You can save your .scss file in the folder ruby\lib\sass\ (before this process, create a folder as sass in lib directory).
h1{
   color: #AF80ED;
}

h3{
   color: #DE5E85;
}
You can tell SASS to watch the file and update the CSS whenever SASS file changes, by using the following command −
sass --watch C:\ruby\lib\sass\style.scss:style.css
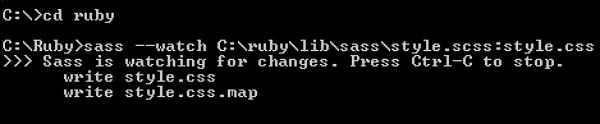
When you run the above command, it will create the style.css file automatically. Whenever you change the SCSS file, the style.css file will be updated automatically.
The style.css file will have the following code when you run the above given command −
style.css
h1 {
   color: #AF80ED;
}
h3 {
   color: #DE5E85;
}
Let us carry out the following steps to see how the above given code works −
Save the above given code in hello.html file.
Open this HTML file in a browser.