- RESTful - Home
- RESTful - Introduction
- RESTful - Environment Setup
- RESTful - First Application
- RESTful - Resources
- RESTful - Messages
- RESTful - Addressing
- RESTful - Methods
- RESTful - Statelessness
- RESTful - Caching
- RESTful - Security
- RESTful - Java (JAX-RS)
- RESTful Useful Resources
- RESTful - Questions and Answers
- RESTful - Quick Guide
- RESTful - Useful Resources
- RESTful - Discussion
RESTful Web Services - Environment Setup
This tutorial will guide you on how to prepare a development environment to start your work with Jersey Framework to create RESTful Web Services. Jersey framework implements JAX-RS 2.0 API, which is a standard specification to create RESTful Web Services. This tutorial will also teach you how to setup JDK, Tomcat and Eclipse on your machine before you the Jersey Framework is setup.
Setup Java Development Kit (JDK)
You can download the latest version of SDK from Oracle's Java site − Java SE Downloads. You will find the instructions for installing JDK in the downloaded files. Follow the given instructions to install and configure the setup. Finally set the PATH and JAVA_HOME environment variables to refer to the directory that contains Java and Javac, typically java_install_dir/bin and java_install_dir respectively.
If you are running Windows and installed the JDK in C:\jdk1.7.0_75, you would have to put the following line in your C:\autoexec.bat file.
set PATH = C:\jdk1.7.0_75\bin;%PATH%
set JAVA_HOME = C:\jdk1.7.0_75
Alternatively, on Windows NT/2000/XP, you could also right-click on My Computer → select Properties → then Advanced → then Environment Variables. Then, you would update the PATH value and press the OK button.
On Unix (Solaris, Linux, etc.), if the SDK is installed in /usr/local/jdk1.7.0_75 and you use the C Shell, you would put the following into your .cshrc file.
setenv PATH /usr/local/jdk1.7.0_75/bin:$PATH
setenv JAVA_HOME /usr/local/jdk1.7.0_75
Alternatively, if you use an Integrated Development Environment (IDE) like Borland JBuilder, Eclipse, IntelliJ IDEA, or Sun ONE Studio, compile and run a simple program to confirm that the IDE knows where you installed Java, otherwise do proper setup as given document of the IDE.
Setup Eclipse IDE
All the examples in this tutorial have been written using the Eclipse IDE. So, I would suggest you should have the latest version of Eclipse installed on your machine.
To install Eclipse IDE, download the latest Eclipse binaries from https://www.eclipse.org/downloads/. Once you downloaded the installation, unpack the binary distribution to a convenient location. For example, in C:\eclipse on windows, or /usr/local/eclipse on Linux/Unix and finally set the PATH variable appropriately.
Eclipse can be started by executing the following commands on a windows machine, or you can simply double click on eclipse.exe.
%C:\eclipse\eclipse.exe
Eclipse can be started by executing the following commands on Unix (Solaris, Linux, etc.) machine −
$/usr/local/eclipse/eclipse
After a successful startup, if everything is fine, then your screen should display the following result −

Setup Jersey Framework Libraries
Now, if everything is fine, then you can proceed to setup the Jersey framework. Following are a few simple steps to download and install the framework on your machine.
Make a choice whether you want to install Jersey on Windows, or Unix and then proceed to the next step to download the .zip file for windows and then the .tz file for Unix.
Download the latest version of Jersey framework binaries from the following link https://eclipse-ee4j.github.io/jersey/.
At the time of writing this tutorial, I downloaded jaxrs-ri-2.17.zip on my Windows machine and when you unzip the downloaded file it will give you the directory structure inside E:\jaxrs-ri-2.17\jaxrs-ri as shown in the following screenshot.
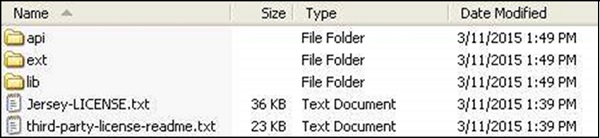
You will find all the Jersey libraries in the directories C:\jaxrs-ri-2.17\jaxrs-ri\lib and dependencies in C:\jaxrs-ri-2.17\jaxrs-ri\ext. Make sure you set your CLASSPATH variable on this directory properly otherwise you will face problem while running your application. If you are using Eclipse, then it is not required to set the CLASSPATH because all the settings will be done through Eclipse.
Setup Apache Tomcat
You can download the latest version of Tomcat from https://tomcat.apache.org/. Once you downloaded the installation, unpack the binary distribution into a convenient location. For example in C:\apache-tomcat-7.0.59 on windows, or /usr/local/apache-tomcat-7.0.59 on Linux/Unix and set CATALINA_HOME environment variable pointing to the installation locations.
Tomcat can be started by executing the following commands on a windows machine, or you can simply double click on startup.bat.
%CATALINA_HOME%\bin\startup.bat
or
C:\apache-tomcat-7.0.59\bin\startup.bat
Tomcat can be started by executing the following commands on a Unix (Solaris, Linux, etc.) machine −
$CATALINA_HOME/bin/startup.sh
or
/usr/local/apache-tomcat-7.0.59/bin/startup.sh
After a successful startup, the default web applications included with Tomcat will be available by visiting http://localhost:8080/. If everything is fine then it should display the following result −
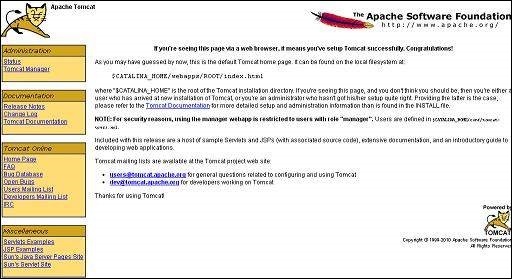
Further information about configuring and running Tomcat can be found in the documentation included on this page. This information can also be found on the Tomcat website − https://tomcat.apache.org.
Tomcat can be stopped by executing the following commands on a windows machine −
%CATALINA_HOME%\bin\shutdown
or
C:\apache-tomcat-7.0.59\bin\shutdown
Tomcat can be stopped by executing the following commands on Unix (Solaris, Linux, etc.) machine −
$CATALINA_HOME/bin/shutdown.sh
or
/usr/local/apache-tomcat-7.0.59/bin/shutdown.sh
Once you are done with this last step, you are ready to proceed for your first Jersey example which you will see in the next chapter.
