- LINQ - Home
- LINQ - Overview
- LINQ - Environment Setup
- LINQ - Query Operators
- LINQ - SQL
- LINQ - Objects
- LINQ - Dataset
- LINQ - XML
- LINQ - Entities
- LINQ - Lambda Expressions
- LINQ - ASP.Net
LINQ - ASP.Net
As a set of .NET framework extensions, LINQ is the preferred mechanism for data access by ASP.NET developers. ASP.NET 3.5 has a built-in tool LINQDataSource control that enables usage of LINQ easily in ASP.NET. ASP.NET uses the above-mentioned control as a data source. Real life projects mostly encompass websites or windows applications and so to understand better the concept of LINQ with ASP.NET, lets start with creating a ASP.NET website that make use of the LINQ features.
For this, it is essential to get installed Visual Studio and .NET framework on your system. Once you have opened Visual Studio, go to File → New → Website. A pop up window will open as shown in below figure.
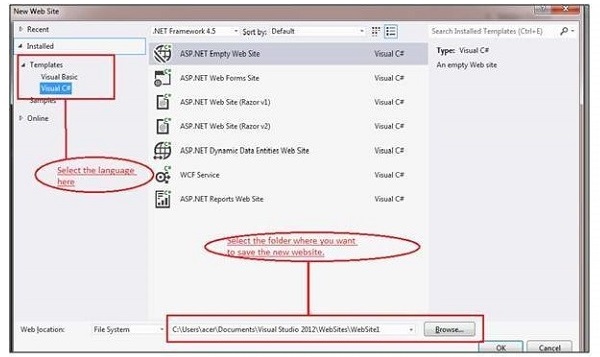
Now, under the templates in the left hand side, there will be two language options to create the website. Choose Visual C# and select ASP.NET Empty Web Site.
Select the folder where you want to save new website on your system. Then press OK and soon Solution Explorer appears on your screen containing all the web files. Right click on Default.aspx in the Solution Explorer and choose View in Browser to view the default ASP.NET website in the browser. Soon your new ASP.NET website will open in the web browser, as shown in the following screenshot.
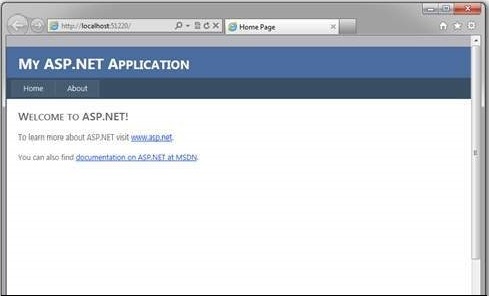
.aspx is in fact the major file extension used in ASP.NET websites. Visual Studio by default creates all the necessary pages for a basic website like Home page and About Us page where you can place your content conveniently. The code for the website is generated automatically here and can be viewed too.
LINQDataSource Control
It is possible to UPDATE, INSERT and DELETE data in the pages of ASP.NET website with the help of LINQDataSource control. There is absolutely no need for specification of SQL commands as LINQDataSource control employs dynamically created commands for such operations.
The control enables a user to make use of LINQ in an ASP.NET web page conveniently by property setting in the markup text. LINQDataSource is very similar to that of controls like SqlDataSource as well as ObjectDataSource as it can be used in binding other ASP.NET controls present on a page to a data source. So, we must have a database to explain the various functions invoked by the LINQDataSource Control.
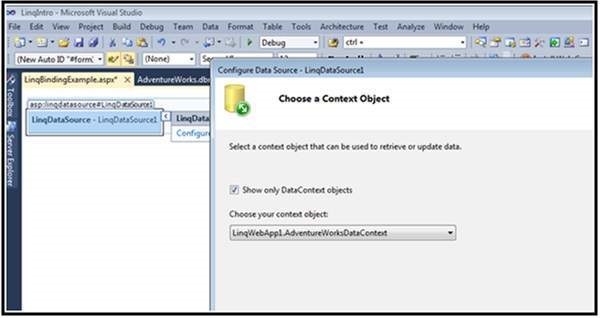
Before going to start explanation of the control usage in ASP.NET web page form, it is essential to open the Microsoft Visual Studio Toolbox and drag and drop LINQDataSource control to .aspx page of ASP.NET website like below figure.
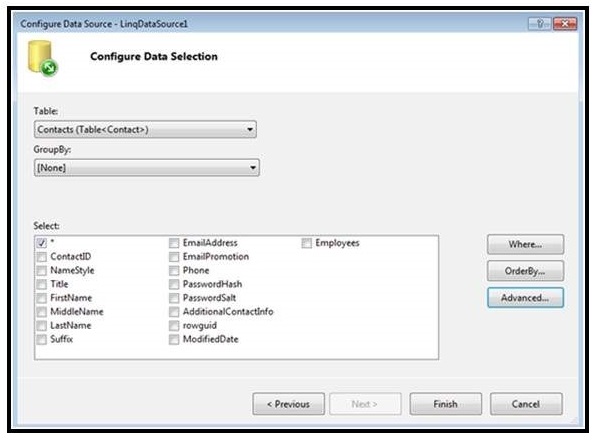
The next step is to configure LINQDataSource by selecting all the columns for the employee record.
Now add a GridView Control to the .aspx page and configure it like shown in below figure. The GridView control is powerful and offers flexibility to work with the data. Soon after configuring the control, it will appear in the browser.

The coding that can be viewed now on your screen for the .aspx page will be −
<!DOCTYPE html>

<html>
   <head runat = "server">
      <title></title>
   </head>

   <body>
      <form id = "form1" runat = "server">
         <div>
            <asp:GridView ID = "GridView1" runat = "server" AutoGenerateColumns = "False"

               DataKeyNames = "ContactID" DataSourceID = "LINQDataSource1">
               <Columns>

                  <asp:BoundField DataField = "ContactID" HeaderText = "ContactID"
                     InsertVisible = "False" ReadOnly="True" SortExpression = "ContactID" />
                  <asp:CheckBoxField DataField = "NameStyle" HeaderText = "NameStyle"
                     SortExpression = "NameStyle" />
                  <asp:BoundField DataField = "Title" HeaderText = "Title" SortExpression = "Title" />
                  <asp:BoundField DataField = "FirstName" HeaderText = "FirstName"
                     SortExpression="FirstName" />
                  <asp:BoundField DataField = "MiddleName" HeaderText = "MiddleName"
                     SortExpression = "MiddleName" />
                  <asp:BoundField DataField = "LastName" HeaderText = "LastName"
                     SortExpression = "LastName" />
                  <asp:BoundField DataField = "Suffix" HeaderText = "Suffix"
                     SortExpression = "Suffix" />
                  <asp:BoundField DataField = "EmailAddress" HeaderText = "EmailAddress"
                     SortExpression = "EmailAddress" />
               </Columns>

            </asp:GridView>

            <br />

         </div>

         <asp:LINQDataSource ID = "LINQDataSource1" runat = "server"

            ContextTypeName = "LINQWebApp1.AdventureWorksDataContext" EntityTypeName = ""
               TableName = "Contacts">

         </asp:LINQDataSource>
      </form>
   </body>
</html>
Here it should be noted that it is vital to set the property ContextTypeName to that of the class representing the database. For example, here it is given as LINQWebApp1.AdventureWorksDataContext as this action will make the needed connection between LINQDataSource and the database.
INSERT, UPDATE, and DELETE data in ASP.NET Page using LINQ
After completing all the above steps rigorously, choose the LINQDataSource Tasks from the LINQDataSource Control and choose all the three boxes for enable insert, enable update and enable delete from the same, as shown in the following screenshot.
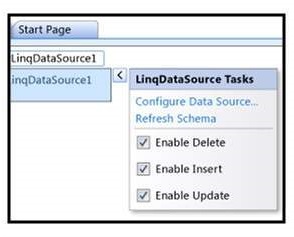
Soon the declarative markup will get displayed on your screen as the following one.
<asp:LINQDataSource
   ContextTypeName = "LINQWebApp1.AdventureWorksDataContext"
   TableName = "Contacts"
   EnableUpdate = "true"
   EnableInsert = "true"
   EnableDelete = "true"
   ID = "LINQDataSource1"
   runat = "server">
</asp:LINQDataSource>
Now since there are multiple rows and columns, it is better to add another control on your .aspx form named as Detail View or Master control below the Grid View control to display only the details of a selected row of the grid. Choose the Detail View Tasks from the Detail View control and select the check boxes as shown below.
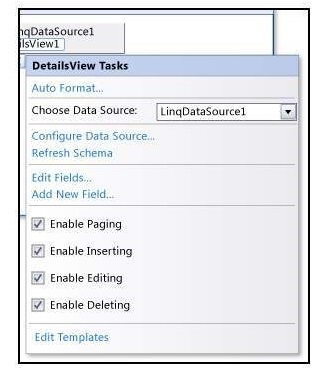
Now, just save the changes and press Ctrl + F5 to view the page in your browser where it is now possible to delete, update, insert any record on the detail view control.
