JPA - Persistence Operations
- JPA - Entity Managers
- JPA - Create Employee Example
- JPA - Update Employee Example
- JPA - Find Employee Example
- JPA - Delete Employee Example
- JPA - Criteria API
JPA - JPQL
- JPA - JPQL
- JPA - Scalar Function
- JPA - Aggregate Function
- JPA - Between Keyword
- JPA - Like Keyword
- JPA - Order By Clause
- JPA - Named Query
JPA - Advanced Mappings
- JPA - Advanced Mappings
- JPA - Single Table Strategy
- JPA - Joined Table Strategy
- JPA - Table per Class Strategy
JPA - Entity Relationships
- JPA - Entity Relationships
- JPA - @ManyToOne Relationships
- JPA - @OneToMany Relationships
- JPA - @OneToOne Relationships
- JPA - @ManyToMany Relationships
JPA - Useful Resources
JPA - Installation
This chapter will guide you on how to prepare a development environment to start your work with JPA. It will also teach you how to set up JDK on your machine before you set up JPA −
Setup Java Development Kit (JDK)
You can download the latest version of SDK from Oracle's Java site − Java SE Downloads. You will find instructions for installing JDK in downloaded files, follow the given instructions to install and configure the setup. Finally set PATH and JAVA_HOME environment variables to refer to the directory that contains java and javac, typically java_install_dir/bin and java_install_dir respectively.
If you are running Windows and have installed the JDK in C:\jdk-24, you would have to put the following line in your C:\autoexec.bat file.
set PATH=C:\jdk-24;%PATH%
set JAVA_HOME=C:\jdk-24
Alternatively, on Windows NT/2000/XP, you will have to right-click on My Computer, select Properties → Advanced → Environment Variables. Then, you will have to update the PATH value and click the OK button.
On Unix (Solaris, Linux, etc.), if the SDK is installed in /usr/local/jdk-24 and you use the C shell, you will have to put the following into your .cshrc file.
setenv PATH /usr/local/jdk-24/bin:$PATH
setenv JAVA_HOME /usr/local/jdk-24
Alternatively, if you use an Integrated Development Environment (IDE) like Borland JBuilder, Eclipse, IntelliJ IDEA, or Sun ONE Studio, you will have to compile and run a simple program to confirm that the IDE knows where you have installed Java. Otherwise, you will have to carry out a proper setup as given in the document of the IDE.
Popular Java Editors
To write your Java programs, you need a text editor. There are many sophisticated IDEs available in the market. But for now, you can consider one of the following −
Notepad − On Windows machine, you can use any simple text editor like Notepad (Recommended for this tutorial), TextPad.
Netbeans − It is a Java IDE that is open-source and free, which can be downloaded from www.netbeans.org/index.html.
Eclipse − It is also a Java IDE developed by the eclipse open-source community and can be downloaded from www.eclipse.org.
Installing JPA
You can go through the JPA installation by using any of the JPA Provider from this tutorial, E.g. Eclipselink, Hibernate. Let us follow the JPA installation using Eclipselink. For JPA programming we require to follow the specific folder framework therefore it is better to use IDE.
Download Eclipse IDE form following link https://www.eclipse.org/downloads/ Choose the EclipseIDE for JavaEE developer that is Eclipse indigo.
Unzip the Eclipse zip file in C drive. Open Eclipse IDE.
Installing JPA using Eclipselink
Eclipselink is a library therefore we cannot add it directly to Eclipse IDE. For installing JPA using Eclipselink you need to follow the following steps.
-
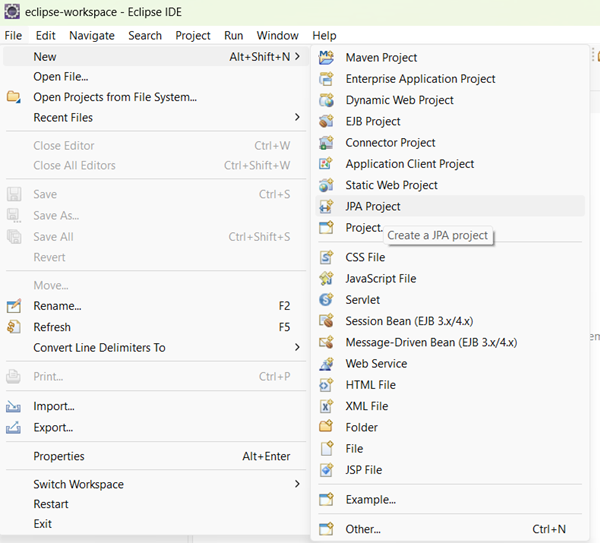
Create a new JPA project by selecting File->New->JPA Project in the Eclipse IDE as follows:
-
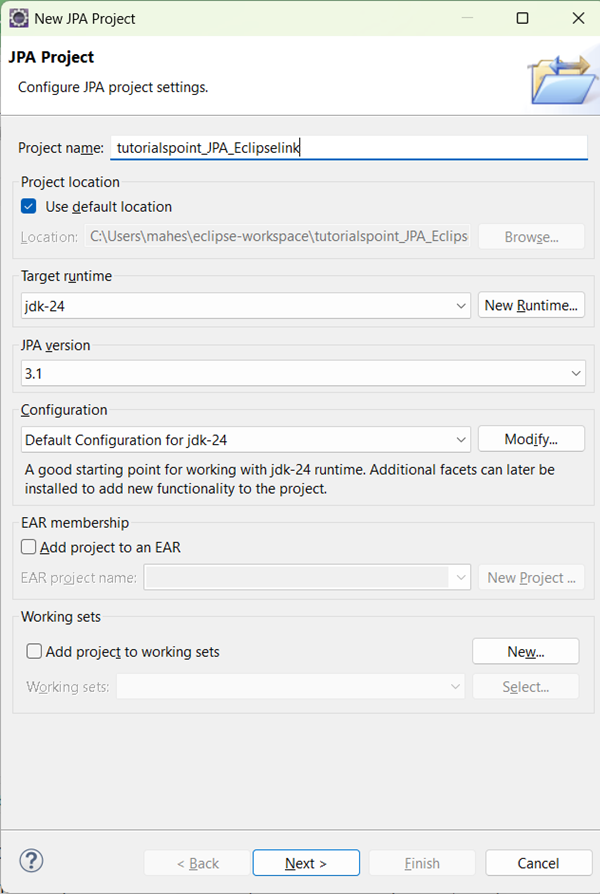
You will get a dialog box named New JPA Project. Enter project name tutorialspoint_JPA_Eclipselink, check the jre version and click next:
-
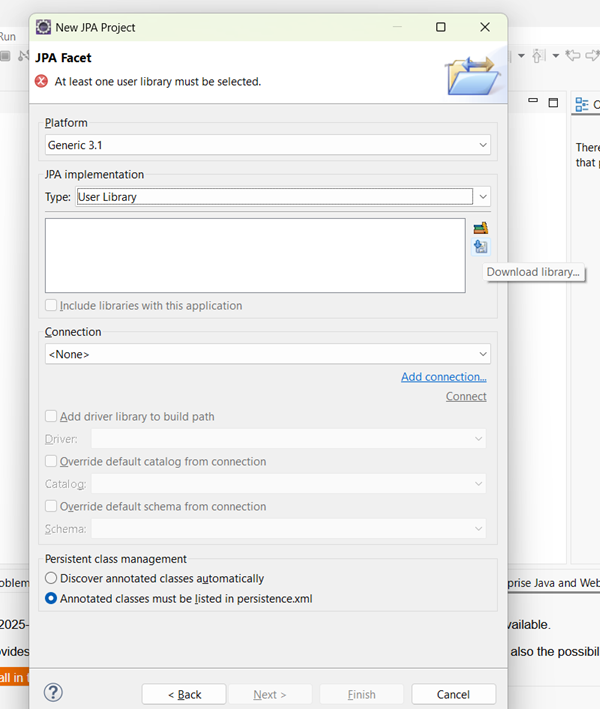
Click on download library (if you do not have the library) in the user library section:
-
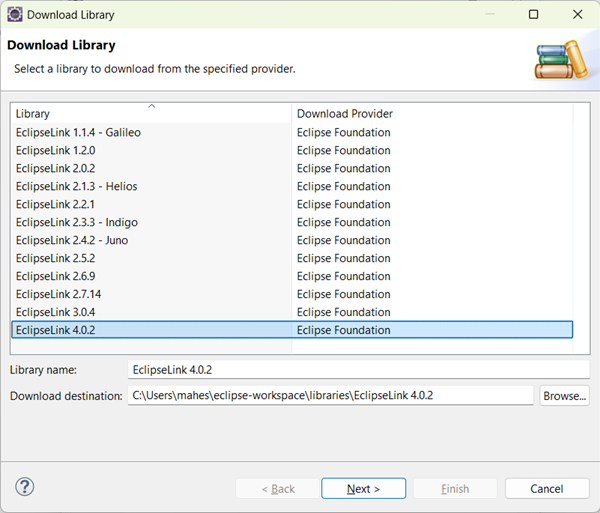
Select the latest version of Eclipselink library in the Download library dialog box and click next as follows:
-
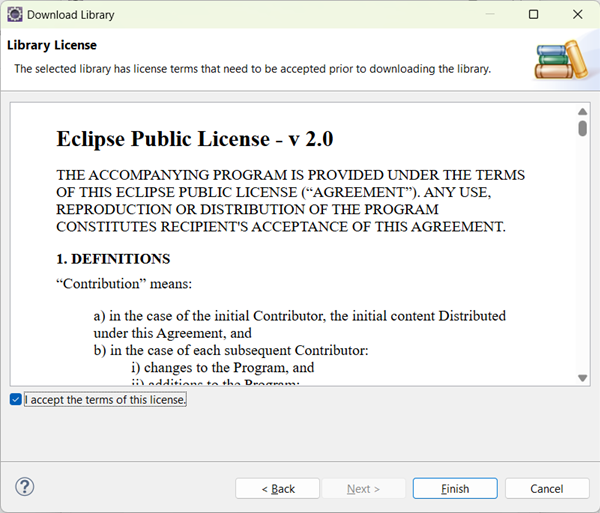
Accept the terms of license and click finish for download library as follows:
-
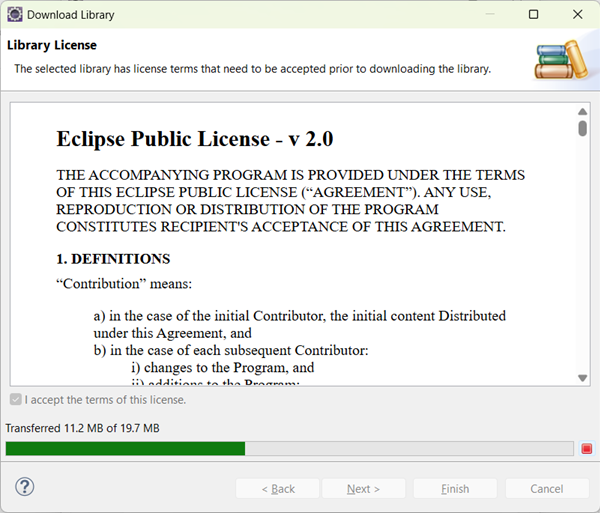
You will find the process of downloading a file as follows:
-
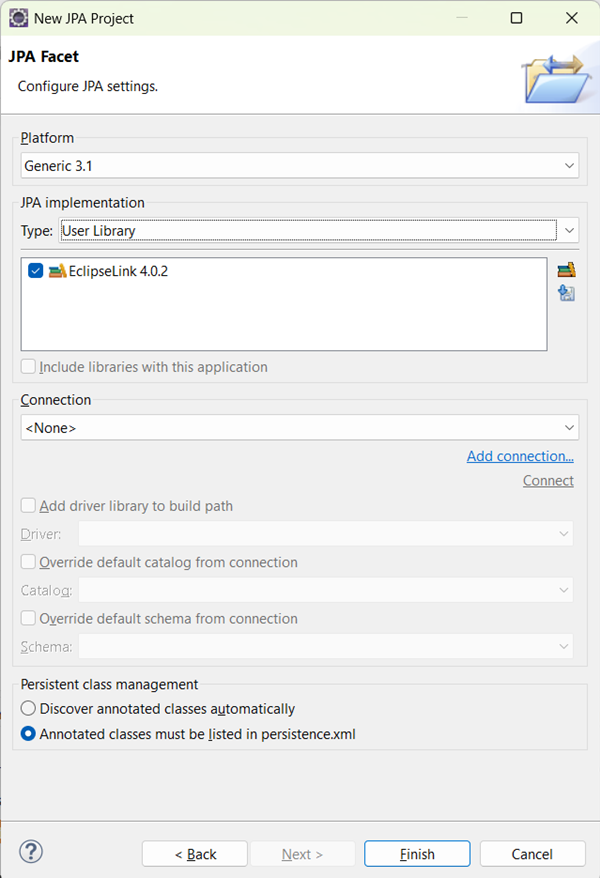
After downloading, select the downloaded library in the user library section and click finish as follows:
-
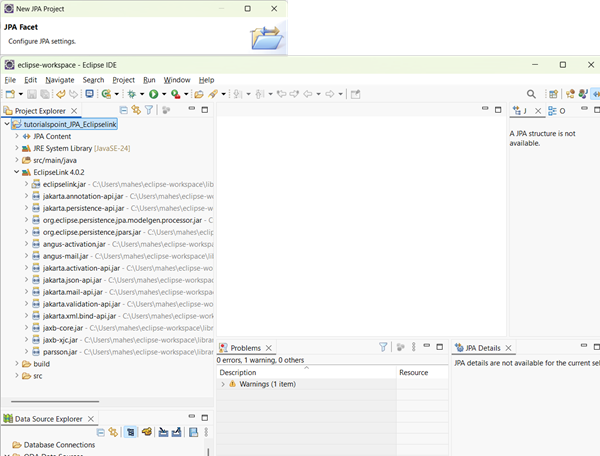
Finally you get the project file in the Package Explorer in Eclipse IDE. Extract all files, you will get the folder and file hierarchy as follows:
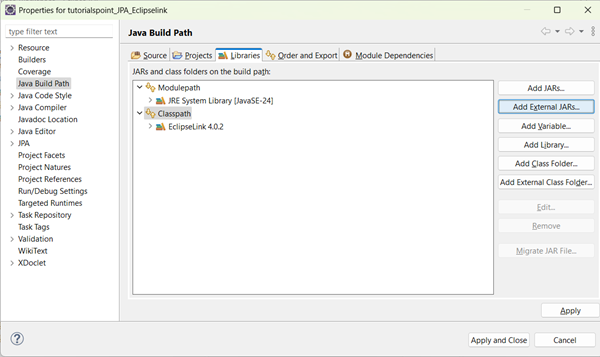
Adding MySQL connector to Project
Any example that we discuss here are mandatory to mingle with database. Let us consider MySQL database for database operations. It requires mysql-connector jar to interact with java program.
Follow the steps to configure database jar to your project.
-
Go to Project properties -> Java Build Path by right click on it. You will get a dialog box as follows: Click on Add External Jars.
-
Go to the jar location in your system memory, select and click on open as follows:
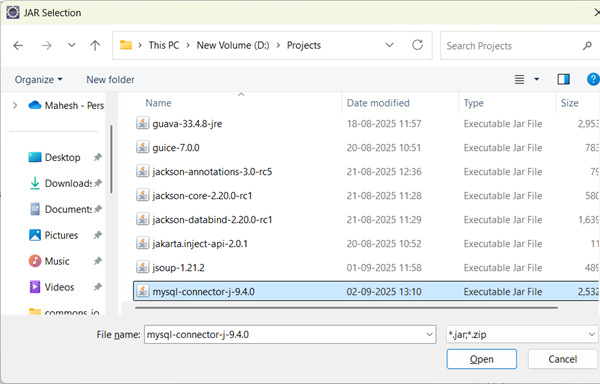
Click ok on properties dialog. You will get the MySQL-connector Jar into your project. Now you are able to do database operations using MySQL.
