 Data Structure
 Networking
 RDBMS
RDBMS Operating System
 Java
Java MS Excel
 iOS
iOS HTML
HTML CSS
CSS Android
 Python
 C Programming
 C++
C++ C#
C# MongoDB
 MySQL
MySQL Javascript
 PHP
PHP
- Selected Reading
- UPSC IAS Exams Notes
- Developer's Best Practices
- Questions and Answers
- Effective Resume Writing
- HR Interview Questions
- Computer Glossary
- Who is Who
JavaFX with eclipse.
To setup JavaFx in eclipse, first of all, make sure that you have installed eclipse and Java in your system successfully.
Maven dependency
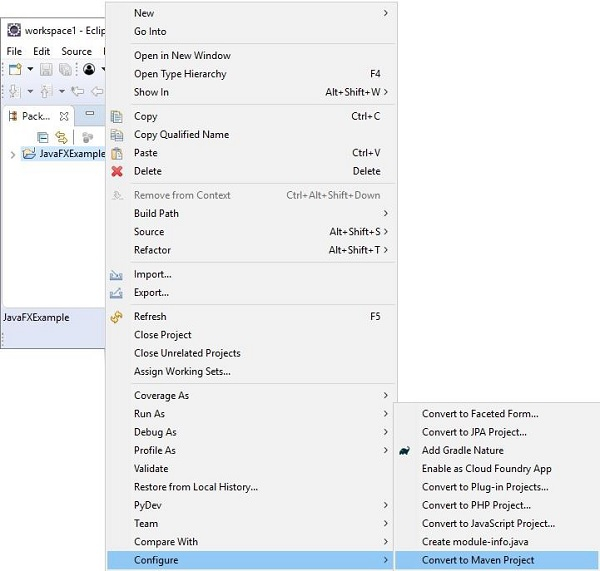
To set up JavaFX environment using maven dependency, create a Java project in eclipse convert it into a maven project as shown below −

Then in the pom.xml file add the following JavaFX dependency and refresh the project.
<dependency>
   <groupId>org.openjfx</groupId>
   <artifactId>javafx-controls</artifactId>
   <version>14</version>
</dependency>
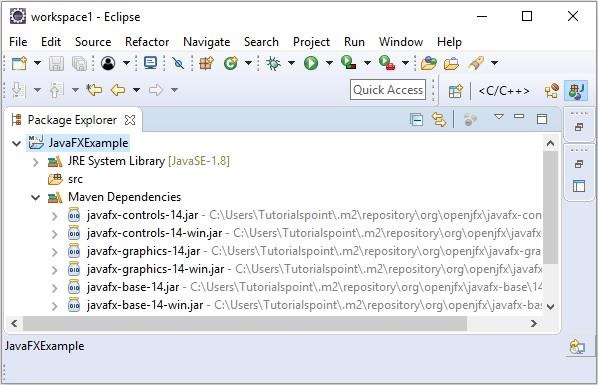
If you observe the Maven Dependencies directory you can find the installed Jar files as shown below −

Adding required Jar files manually
You can also add the required JAR files manually, to do so
Visit the JavaFX home page and click on the Download button.
You will be redirected to a page with JavaFX SDK’s choose the one compatible with your environment and install it.
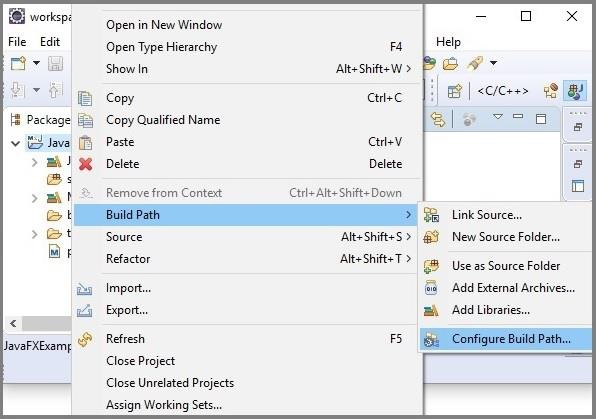
Now, right-click on the Java project and, open the Java Build path window as shown below −

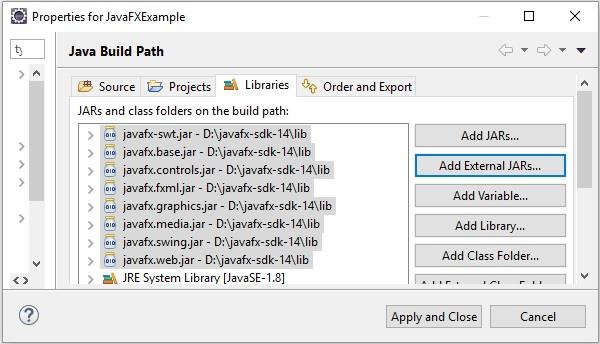
In the Java Build Path window, in the libraries tab click on the Add External JARs… button and add all the JAR files from the lib folder of the downloaded javafx-sdk-14 folder.

And click on Apply and Close button then, you can observe the downloaded JAR files in the Referenced Libraries directory of the project.

