 Data Structure
 Networking
 RDBMS
RDBMS Operating System
 Java
Java MS Excel
 iOS
iOS HTML
HTML CSS
CSS Android
 Python
 C Programming
 C++
C++ C#
C# MongoDB
 MySQL
MySQL Javascript
 PHP
PHP
- Selected Reading
- UPSC IAS Exams Notes
- Developer's Best Practices
- Questions and Answers
- Effective Resume Writing
- HR Interview Questions
- Computer Glossary
- Who is Who
HTML for Attribute
The HTML for attribute bounds the <label> element to the first labelable element which has an id same as the value of for attribute.
Syntax
Following is the syntax −
1. Returning value of for attribute −
labelObject.htmlFor
Example
Let us see an example of for attribute −
<!DOCTYPE html>
<html>
<head>
<title>Label htmlFor</title>
<style>
   form {
      width:70%;
      margin: 0 auto;
      text-align: center;
   }
   * {
      padding: 2px;
      margin:5px;
   }
   input[type="button"] {
      border-radius: 10px;
   }
</style>
</head>
<body>
<form>
<fieldset>
<legend>Label-htmlFor</legend>
<label id="CurrentEditor" for="editorTwo">Current Editor:</label><br>
<input type="text" id="editorOne" placeholder="editorOne">
<input type="text" id="editorTwo" placeholder="editorTwo">
<input type="button" onclick="getEventData()" value="Change Editor">
<div id="divDisplay">Label for attribute set as editor two</div>
</fieldset>
</form>
<script>
   var divDisplay = document.getElementById("divDisplay");
   var labelSelect = document.getElementById("CurrentEditor");
   function getEventData() {
      if(labelSelect.htmlFor === 'editorTwo'){
         divDisplay.textContent = 'Label for attribute set as editor one';
         labelSelect.htmlFor = 'editorOne';
      }
   }
</script>
</body>
</html>
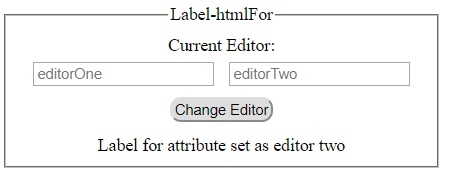
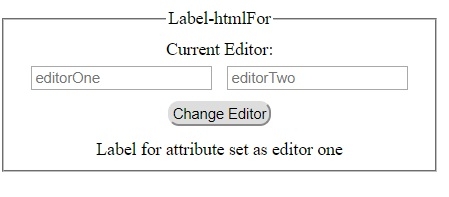
This will produce the following output −
1) Before clicking ‘Change Editor’ button −

2) After clicking ‘Change Editor’ button −


Advertisements
