
 Data Structure
 Networking
 RDBMS
RDBMS Operating System
 Java
Java MS Excel
 iOS
iOS HTML
HTML CSS
CSS Android
 Python
 C Programming
 C++
C++ C#
C# MongoDB
 MySQL
MySQL Javascript
 PHP
PHP
- Selected Reading
- UPSC IAS Exams Notes
- Developer's Best Practices
- Questions and Answers
- Effective Resume Writing
- HR Interview Questions
- Computer Glossary
- Who is Who
How to upload an image using HTML and JavaScript in Firebase?
In this tutorial, you will learn about the procedure to upload images in firebase using HTML and JavaScript.
Firebase ? Firebase is a cloud-based storage platform that is a product of google which provides storage services that are used in various web and mobile application development. It provides NoSQL and real-time hosting of the database, authentication, notification, content, and many more services.
Steps to upload an image using HTML and JavaScript in Firebase
To connect firebase to the project, you should create a project on firebase here is the step-by-step procedure to create and activate the storage service to upload the image on the firebase storage.
STEP 1 ? Visit the Firebase website and click on Get started button, and to create a new project, click on Create a project/ Add project button.

STEP 2 ? Add the name of your project and press continue.

STEP 3 ? Click on continue.

STEP 4 ? Choose the Analytics location option and click on Create project button.

STEP 5 ? Click on continue and then click on the third icon, shown below the image, which is the web button </>, as we will upload our image from a website, so we related configurations we need.

STEP 6 ? Give the name of your app and click on Register app.

STEP 7 ? Save the code as you will use this later during the code part, and click Continue to console.
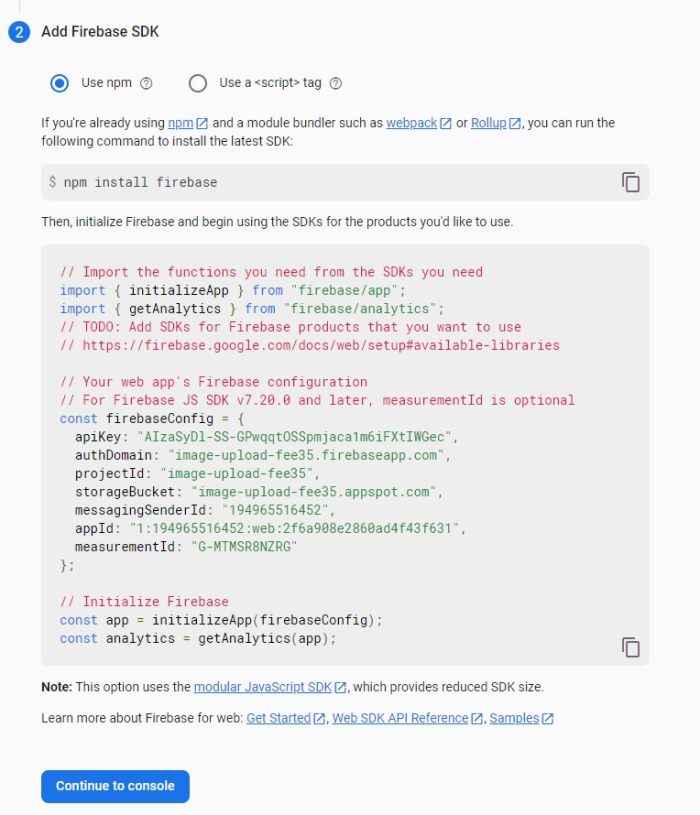
STEP 8 ? From the left pane, extend the Build and click on Realtime Database.

STEP 9 ? Click on Create database. Choose the Realtime Database location and click next.

STEP 10 ? Choose Test mode and click Enable button.
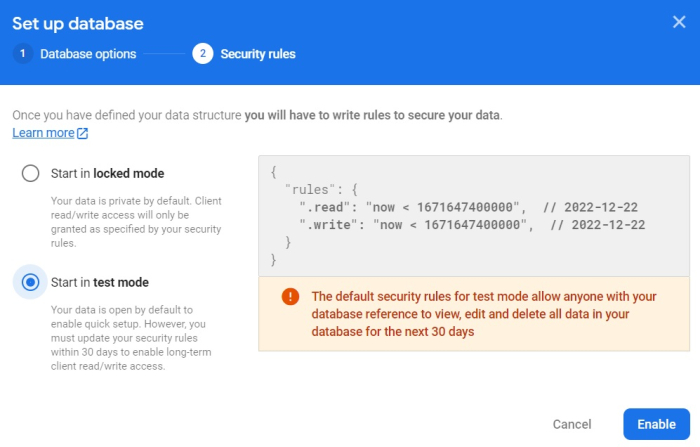
STEP 11 ? From the left pane, extend the Build and click on Storage.

STEP 12 ? Click on Get started. Again, a popup will open choose test mode, and click next click Done.
Coding Part
Note ? Add the values apiKey, authDomain, etc., we already saved in STEP 7.
const firebaseConfig = {
   apiKey: "***",
   authDomain: "**",
   projectId: "**",
   storageBucket: "**",
   messagingSenderId: "**",
   appId: "**",
   measurementId: "**"
};
We will create a fronted part very simple two buttons would be there first file select button and second, upload button select file button will select the chosen file from your system and by clicking on upload button the upload function will be triggered and the image will get uploaded to firebase storage.
Example
<!DOCTYPE html>
<html>
<head>
   <title>Firebase Image Upload using HTML and JavaScript</title>
   <style>
      #photo{
         margin-top: 200px;
         margin-left: 450px;
      }
      #upload{
         margin-top: 20px;
         margin-left: 450px;
      }
   </style>
</head>
<body>
   <input type="file" id="photo" /></br>
   <button id="upload" onclick="uploadImage()">Upload Image</button>
</body>
<script src="https://www.gstatic.com/firebasejs/7.7.0/firebase-app.js"></script>
<script src="https://www.gstatic.com/firebasejs/7.7.0/firebase-storage.js"></script>
<script>

   //paste here your copied configuration code
   const firebaseConfig = {
      apiKey: "***",
      authDomain: "**",
      projectId: "**",
      storageBucket: "**",
      messagingSenderId: "**",
      appId: "**",
      measurementId: "**"
   };

   // Initialize Firebase
   firebase.initializeApp(firebaseConfig);
   console.log(firebase);
   function uploadImage() {
      const ref = firebase.storage().ref();
      const file = document.querySelector("#photo").files[0];
      const name = +new Date() + "-" + file.name;
      const metadata = {
         contentType: file.type
      };
      const task = ref.child(name).put(file, metadata);task
      .then(snapshot => snapshot.ref.getDownloadURL())
      .then(url => {
      console.log(url);
      alert('image uploaded successfully');
      document.querySelector("#image").src = url;
   })
   .catch(console.error);
   }
   const errorMsgElement = document.querySelector('span#errorMsg');
</script>
</html>
After uploading the image, go to the firebase page and click Files to refresh. Here is the image which we have uploaded to the firebase.
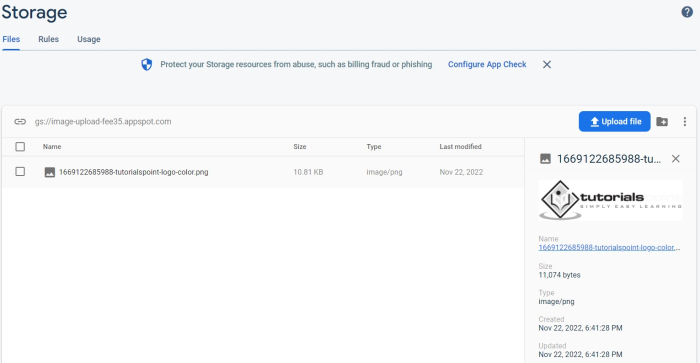
Firebase has a different function for uploading images. So, first, get the bucket and generate a random name using the date function and then use the put method to upload pixels' images. We will use an image source and a constant, which is a URL. This put method returns a promise, and using .then we handle the response. it also returns a call-back function which returns a snapshot variable inside which we will notify the user that the image is successfully uploaded.

