
Article Categories
- All Categories
-
 Data Structure
-
 Networking
-
 RDBMS
RDBMS
-
 Operating System
-
 Java
Java
-
 MS Excel
-
 iOS
iOS
-
 HTML
HTML
-
 CSS
CSS
-
 Android
-
 Python
-
 C Programming
-
 C++
C++
-
 C#
C#
-
 MongoDB
-
 MySQL
MySQL
-
 Javascript
-
 PHP
PHP
-
 Economics & Finance
How to Move Last Character to Front of a Cell or Another Column in Excel?
When working with data that needs rearranging or editing language, this straightforward yet effective technique can be immensely helpful. Moving the last character to the front can help you get the answers you want quickly and effectively, whether you want to change the format of your data or carry out special computations.
In this article, we'll look at a number of approaches and formulas that let you complete this operation with ease. You will be well-equipped to manipulate your data after completing this session if you know how to bring the last character in a cell or column to the front.
Move Last Character to Front of a Cell or Another Column
Here we will use the formula to get the first value, then use the autofill handle. So let us see a simple process to know how you can move the last character to the front of a cell or another column in Excel.
Step 1
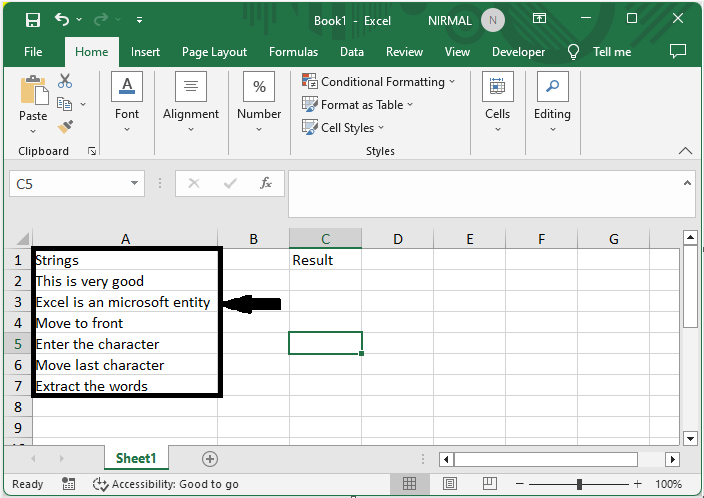
Consider an Excel sheet where the data in the sheet is similar to the below image.
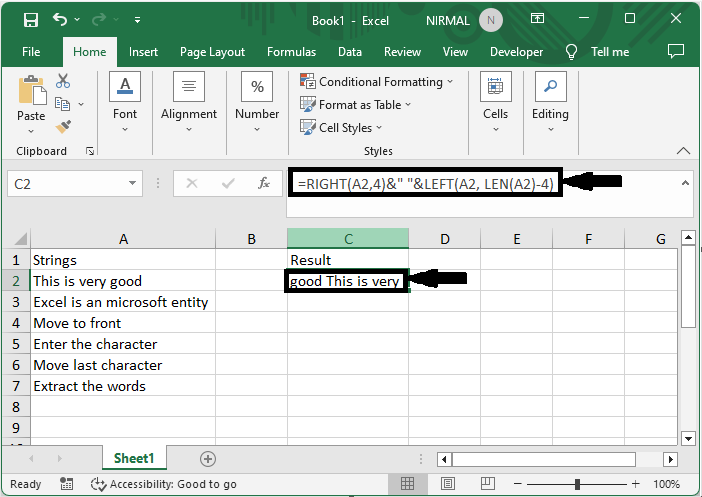
First, to move the last n characters to the front, click on an empty cell, in this case cell C2, and enter the formula as =RIGHT(A2,4)&" "&LEFT(A2, LEN(A2)-4), and click enter to get the first value. Then drag down using the autofill handle.
In the formula, 4 is the value of n.
Empty Cell > Formula > Enter > Drag.
Step 2
Now to move the last character to another column, click on an empty cell, enter the formula as =RIGHT(A2,4) and click Enter. Then drag down using the autofill handle.
Empty Cell > Formula > Enter > Drag.

Conclusion
In this tutorial, we have used a simple example to demonstrate how you can move the last character to the front of a cell or another column in Excel to highlight a particular set of data.

3K+ Views
