
Article Categories
- All Categories
-
 Data Structure
-
 Networking
-
 RDBMS
RDBMS
-
 Operating System
-
 Java
Java
-
 MS Excel
-
 iOS
iOS
-
 HTML
HTML
-
 CSS
CSS
-
 Android
-
 Python
-
 C Programming
-
 C++
C++
-
 C#
C#
-
 MongoDB
-
 MySQL
MySQL
-
 Javascript
-
 PHP
PHP
-
 Economics & Finance
How to integrate PayPal in an Android app?
Introduction
We can get to see different payment gateways used within any android application for collecting payments from the application users for providing the specific services such as Paytm, Razorpay, Paypal and many others. In this article we will take a look on How to integrate PayPal in an android application.
Implementation
We will be creating a simple application in which we will be creating a text view for displaying the heading of our application. After that we will create an edit text which is used to enter the amount for which the user has to make payment and a button to make a payment.
Step 1 : Creating a client id for using PayPal SDK
Navigate to the URL and login with your paypal id and password. Inside this you will get to see an option to create an application. Simply click on that option to create a new application inside this specify the application name and other details which are required. When you have filled all the required data a new application will be created and you will get to see a screen where you can get to see the client id for the application which we have created. We will be using that client id within our project so make sure to copy it.
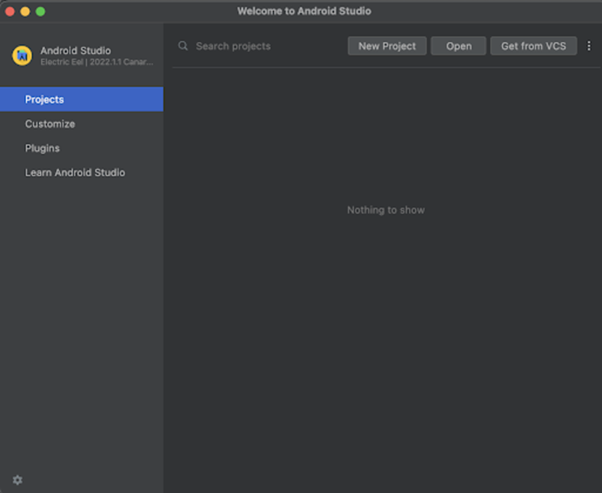
Step 2 : Creating a new project in Android Studio
Navigate to Android studio as shown in below screen. In the below screen click on New Project to create a new Android Studio Project.
After clicking on New Project you will get to see the below screen.
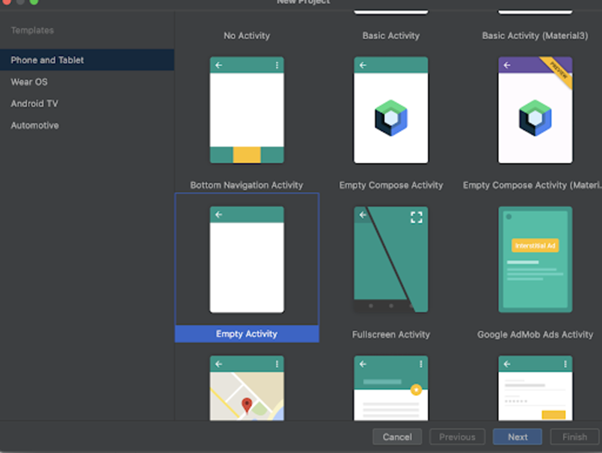
Inside this screen we have to simply select Empty Activity and click on Next. After clicking on next you will get to see the screen below.
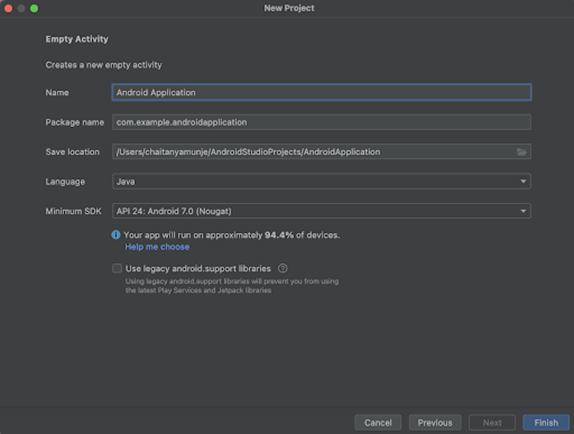
Inside this screen we have to simply specify the project name. Then the package name will be generated automatically.
Note ? Make sure to select the Language as Java.
After specifying all the details click on Finish to create a new Android studio project.
Once our project has been created we will get to see 2 files which are open i.e activity_main.xml and MainActivity.java file.
Step 3 : Adding paypal sdk dependency in build.gradle file
Navigate to Gradle scripts> build.gradle file(app) level and inside the dependencies section add below dependency.
implementation 'com.paypal.sdk:paypal-android-sdk:2.14.2'
After adding the above dependency simply sync your project to install it.
Step 4 : Working with activity_main.xml
Navigate to activity_main.xml. If this file is not visible. To open this file. In the left pane navigate to app>res>layout>activity_main.xml to open this file. After opening this file. Add the below code to it. Comments are added in the code to get to know in detail.
<?xml version="1.0" encoding="utf-8"?>
<RelativeLayout xmlns:android="http://schemas.android.com/apk/res/android"
   xmlns:tools="http://schemas.android.com/tools"
   android:layout_width="match_parent"
   android:layout_height="match_parent"
   android:orientation="vertical"
   tools:context=".MainActivity">
   <!-- on below line creating a text view for displaying the heading of our application -->
   <TextView
       android:id="@+id/idTVHeading"
       android:layout_width="match_parent"
       android:layout_height="wrap_content"
       android:layout_marginStart="10dp"
       android:layout_marginTop="100dp"
       android:layout_marginEnd="10dp"
       android:gravity="center"
       android:padding="4dp"
       android:text="Paypal Integration in Android"
       android:textAlignment="center"
       android:textColor="@color/black"
       android:textSize="20sp"
       android:textStyle="bold" />
   <!-- on below line creating edit text for name -->
   <EditText
       android:id="@+id/idEdtAmount"
       android:layout_width="match_parent"
       android:layout_height="wrap_content"
       android:layout_below="@id/idTVHeading"
       android:layout_margin="10dp"
       android:hint="Enter Name"
       android:inputType="number" />
   <!-- on below line creating a button for making a payment-->
   <Button
       android:id="@+id/idBtnMakePayment"
       android:layout_width="match_parent"
       android:layout_height="wrap_content"
       android:layout_below="@id/idEdtAmount"
       android:layout_margin="10dp"
       android:padding="4dp"
       android:text="Make Payment"
       android:textAllCaps="false" />
</RelativeLayout>
Explanation : In the above code we are creating a root layout as a Relative Layout. Inside this layout we are creating a text view which is used to display the heading of our application. After that we are creating an edit text which is used to enter the amount which the user has to pay. Then creating a button which is used to make payment.
Step 5 : Adding permissions in AndroidManifest.xml file
Navigate to app>AndroidManifest.xml file and add below permissions to it in manifest tag to access internet.
<uses-permission
   android:name="android.permission.INTERNET" />
Step 6 : Working with MainActivity.java file
Navigate to MainActivity.java. If this file is not visible. To open this file. In the left pane navigate to app>res>layout>MainActivity.java to open this file. After opening this file. Add the below code to it. Comments are added in the code to get to know in detail.
package com.example.java_test_application;
import android.app.Activity;
import android.content.Intent;
import android.os.Bundle;
import android.util.Log;
import android.view.View;
import android.widget.Button;
import android.widget.EditText;
import android.widget.Toast;
import androidx.annotation.Nullable;
import androidx.appcompat.app.AppCompatActivity;
import com.paypal.android.sdk.payments.PayPalConfiguration;
import com.paypal.android.sdk.payments.PayPalPayment;
import com.paypal.android.sdk.payments.PayPalService;
import com.paypal.android.sdk.payments.PaymentActivity;
import com.paypal.android.sdk.payments.PaymentConfirmation;
import org.json.JSONException;
import org.json.JSONObject;
import java.math.BigDecimal;
public class MainActivity extends AppCompatActivity {
   // on below line creating a variable for client id of pay pal.
   private static final String clientID = "Paste your client id here";
   // creating variables for edit text on below line.
   private EditText amountEdt;
   // creating variable for button on below line.
   private Button payBtn;
   // on below line creating a variable to store request code for paypal sdk
   public static final int PAYPAL_REQUEST_CODE = 123;
   // on below line creating a Paypal Configuration Object
   private static PayPalConfiguration config = new PayPalConfiguration()
           // Start with mock environment.  When ready,
           // switch to sandbox (ENVIRONMENT_SANDBOX)
           // or live (ENVIRONMENT_PRODUCTION)
           .environment(PayPalConfiguration.ENVIRONMENT_SANDBOX)
           // on below line we are passing a client id.
           .clientId(clientID);
   @Override
   protected void onCreate(Bundle savedInstanceState) {
       super.onCreate(savedInstanceState);
       setContentView(R.layout.activity_main);
       // initializing variables for edit text on below line.
       amountEdt = findViewById(R.id.idEdtAmount);
       // initializing variables for button on below line.
       payBtn = findViewById(R.id.idBtnMakePayment);
       // adding click listener for button on below line.
       payBtn.setOnClickListener(new View.OnClickListener() {
           @Override
           public void onClick(View v) {
               // on below line validating if name and age is empty or not.
               if (amountEdt.getText().toString().isEmpty()) {
                   // if both name and age is empty we are displaying a toast message on below line.
                   Toast.makeText(getApplicationContext(), "Please enter amout to be paid", Toast.LENGTH_SHORT).show();
               } else {
                   makePayment(amountEdt.getText().toString());
               }
           }
       });
   }
   private void makePayment(String amount) {
       // Creating a paypal payment on below line.
       PayPalPayment payment = new PayPalPayment(new BigDecimal(String.valueOf(amount)), "USD", "Course Fees",
               PayPalPayment.PAYMENT_INTENT_SALE);
       // Creating Paypal Payment activity intent on below line
       Intent intent = new Intent(this, PaymentActivity.class);
       //putting the paypal configuration to the intent from the configuration we have created above.
       intent.putExtra(PayPalService.EXTRA_PAYPAL_CONFIGURATION, config);
       // Putting paypal payment to the intent on below line.
       intent.putExtra(PaymentActivity.EXTRA_PAYMENT, payment);
       // Starting the intent activity for result
       // the request code will be used on the method onActivityResult
       startActivityForResult(intent, PAYPAL_REQUEST_CODE);
   }
   @Override
   protected void onActivityResult(int requestCode, int resultCode, @Nullable Intent data) {
       super.onActivityResult(requestCode, resultCode, data);
       // If the result is from paypal request code
       if (requestCode == PAYPAL_REQUEST_CODE) {
           // If the result is OK i.e. user has not canceled the payment
           if (resultCode == Activity.RESULT_OK) {
               // Getting the payment confirmation
               PaymentConfirmation confirm = data.getParcelableExtra(PaymentActivity.EXTRA_RESULT_CONFIRMATION);
               // if confirmation is not null
               if (confirm != null) {
                   try {
                       // Getting the payment details
                       String paymentDetails = confirm.toJSONObject().toString(4);
                       // on below line we are extracting json response and displaying it in a text view.
                       JSONObject payObj = new JSONObject(paymentDetails);
                       String payID = payObj.getJSONObject("response").getString("id");
                       String state = payObj.getJSONObject("response").getString("state");
                       // on below line displaying a toast message with the payment status
                       Toast.makeText(this, "Payment : " + state + "<br> with payment id is : " + payID, Toast.LENGTH_SHORT).show();
                   } catch (JSONException e) {
                       // handling json exception on below line
                       Log.e("Error", "an extremely unlikely failure occurred: ", e);
                   }
               }
           } else if (resultCode == Activity.RESULT_CANCELED) {
               // on below line we are displaying a toast message as user cancelled the payment.
               Toast.makeText(this, "User cancelled the payment..", Toast.LENGTH_SHORT).show();
           } else if (resultCode == PaymentActivity.RESULT_EXTRAS_INVALID) {
               // on below line displaying toast message for invalid payment config.
               Toast.makeText(this, "Invalid payment config was submitted..", Toast.LENGTH_SHORT).show();
           }
       }
   }
}
Explanation : In the above code firstly we are creating a string variable for our client id in which we have to add your client id, then we are creating a variable for our button and an edit text and lastly creating a variable for request code which we will use to check intent. After that we are creating a variable named as config which is used to generate the paypal payment configuration which we will be using for performing the payment using paypal. Now we will get to see the onCreate method. This is the default method of every android application. This method is called when the application view is created. Inside this method we are setting the content view i.e the layout file named activity_main.xml to set the UI from that file. Inside the onCreate method we are initializing the edit text and button variable with the id which we have given in our activity_main.xml file.
After that we are adding an on click listener for both buttons. Inside the on click listener we are firstly checking if the edit text field for amount is empty or not. If the edit text is empty we are displaying a toast message, and in another condition we are calling make payment method and passing our amount in that method.
Inside the make payment method we are creating a variable for paypal payment. Then we are calling a paypal payment activity intent to make a payment. We are calling start activity for the result method to make a paypal payment.
Now we have created an activity result method in which we are checking the status of payment made by the user whether it is made, canceled or failed. Accordingly we are also displaying the toast message to the users.
After adding the above code now we have to simply click on the green icon in the top bar to run our application on a mobile device.
Note ? Make sure you are connected to your real device or emulator and add your client id.
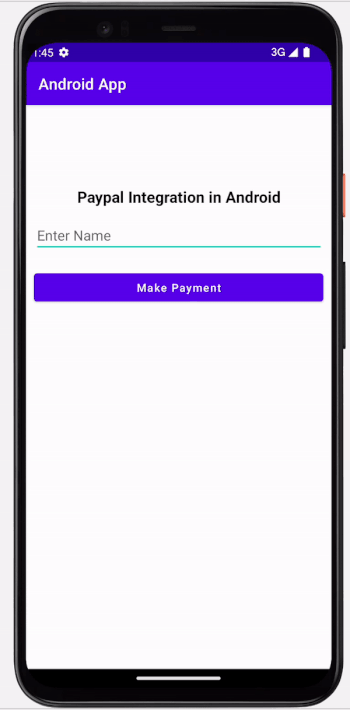
Output
Conclusion
In the above article we have taken a look on How to integrate PayPal in Android application to receive payments.

3K+ Views
