
Article Categories
- All Categories
-
 Data Structure
-
 Networking
-
 RDBMS
RDBMS
-
 Operating System
-
 Java
Java
-
 MS Excel
-
 iOS
iOS
-
 HTML
HTML
-
 CSS
CSS
-
 Android
-
 Python
-
 C Programming
-
 C++
C++
-
 C#
C#
-
 MongoDB
-
 MySQL
MySQL
-
 Javascript
-
 PHP
PHP
-
 Economics & Finance
How To Install and Configure Sysdig to Monitor your Ubuntu 16.04
In this article, we will learn – How to install and configure the Sysdiag tool. Sysdiag is an open-source activity monitoring tool which can be used to capture and analyze application logs which have powerful filtering features with customizable outputs.
Sysdig works from getting the information from the kernel which allows capturing system calls and the information which comes to the kernel. It also monitors the servers which are installed on the system.
Pre-requisites
To complete this demo we need the following requirements − film John Wick − Chapter 2 online.
- Ubuntu 16.04 installed on the machine
- A non-root user with Sudo permission of the machine.
Installation of Sysdig
Sysdig is the package which is available in the Ubuntu repository but which always has the old revisions of one or two older versions than the current version. We can use the official script to install the Sysdig from the project page.
Before we proceed further, we need to update the Ubuntu machine with the below command –
$ sudo apt-get update
Once the update is completed, we need to download the installation script for the Sysdig with the curl using the below command.
$ curl <a href="https://s3.amazonaws.com/download.draios.com/stable/install-sysdig" rel="nofollow noopener noreferrer" target="_blank">https://s3.amazonaws.com/download.draios.com/stable/install-sysdig</a> -o install-sysdig
Output:
   % Total    % Received % Xferd    Average Speed       Time     Time       Time       Current
                                    Dload Upload       Total     Spent      Left       Speed
   100    4871    100 4871 0 0       736    0          0:00:06   0:00:06   --:--:--    1190
Once the installation script is downloaded for the Sysdig, we need to install the Sysdig using this below command –
$ cat ./install-sysdig | sudo bash
Output:
* Detecting operating system
* Installing Sysdig public key
OK
* Installing sysdig repository
* Installing kernel headers
* Installing sysdig
Selecting previously unselected package libasan0:amd64.(Reading database ... 59103 files and directories currently installed.)
Preparing to unpack .../libasan0_4.8.4-2ubuntu1~14.04.3_amd64.deb ...
Unpacking libasan0:amd64 (4.8.4-2ubuntu1~14.04.3) ...
Selecting previously unselected package libatomic1:amd64.
Preparing to unpack .../libatomic1_4.8.4-2ubuntu1~14.04.3_amd64.deb ...
Unpacking libatomic1:amd64 (4.8.4-2ubuntu1~14.04.3) ...
Selecting previously unselected package libgmp10:amd64.
Preparing to unpack .../libgmp10_2%3a5.1.3+dfsg-1ubuntu1_amd64.deb ...
Unpacking libgmp10:amd64 (2:5.1.3+dfsg-1ubuntu1) ...
Selecting previously unselected package libisl10:amd64.
Preparing to unpack .../libisl10_0.12.2-1_amd64.deb ...
Unpacking libisl10:amd64 (0.12.2-1) ...
Selecting previously unselected package libcloog-isl4:amd64.
Preparing to unpack .../libcloog-isl4_0.18.2-1_amd64.deb ...
Unpacking libcloog-isl4:amd64 (0.18.2-1) ...
Selecting previously unselected package libgomp1:amd64.
Preparing to unpack .../libgomp1_4.8.4-2ubuntu1~14.04.3_amd64.deb ...
Unpacking libgomp1:amd64 (4.8.4-2ubuntu1~14.04.3) ...
Selecting previously unselected package libitm1:amd64.
Preparing to unpack .../libitm1_4.8.4-2ubuntu1~14.04.3_amd64.deb ...
….
….
….
Setting up libc6-dev:amd64 (2.19-0ubuntu6.9) ...
Setting up manpages-dev (3.54-1ubuntu1) ...
Setting up sysdig (0.15.0) ...
Loading new sysdig-0.15.0 DKMS files...
First Installation: checking all kernels...
Building only for 4.4.0-31-generic
Building initial module for 4.4.0-31-generic
Done.
sysdig-probe:
Running module version sanity check.
   - Original module
   - No original module exists within this kernel
   - Installation
   - Installing to /lib/modules/4.4.0-31-generic/updates/dkms/
depmod........
DKMS: install completed.
Processing triggers for libc-bin (2.19-0ubuntu6.9) ...
Real-Time Monitoring using Sysdig.
Sysdig will show the live events and it needs the root permission to read and display a lot, which scrolls down to stop the scrolling you needed to press Ctrl+C.
$ sudo sysdig
Output:
213255 14:48:08.119708299 0 sshd (26013) > clock_gettime
2213256 14:48:08.119708499 0 sshd (26013) < clock_gettime
2213257 14:48:08.119708799 0 sshd (26013) > select
2213258 14:48:08.119709599 0 sshd (26013) > switch next=31634(sysdig) pgft_maj=0 pgft_min=463 vm_size=106844 vm_rss=5588 vm_swap=0
2213260 14:48:08.119710899 0 sysdig (31634) > switch next=25919 pgft_maj=1 pgft_min=1045 vm_size=54480 vm_rss=7396 vm_swap=0
2213261 14:48:08.119711699 0 <NA> (25919) > switch next=31634(sysdig) pgft_maj=0 pgft_min=0 vm_size=0 vm_rss=0 vm_swap=0
2213265 14:48:08.119719899 0 sysdig (31634) > switch next=25919 pgft_maj=1 pgft_min=1045 vm_size=54480 vm_rss=7396 vm_swap=0
2213266 14:48:08.119720699 0 <NA> (25919) > switch next=26013(sshd) pgft_maj=0 pgft_min=0 vm_size=0 vm_rss=0 vm_swap=0
2213267 14:48:08.119721599 0 sshd (26013) < select res=1
2213268 14:48:08.119722099 0 sshd (26013) > rt_sigprocmask
2213269 14:48:08.119722299 0 sshd (26013) < rt_sigprocmask
2213270 14:48:08.119722399 0 sshd (26013) > rt_sigprocmask
2213271 14:48:08.119722599 0 sshd (26013) < rt_sigprocmask
2213272 14:48:08.119722899 0 sshd (26013) > clock_gettime
2213273 14:48:08.119722999 0 sshd (26013) < clock_gettime
2213274 14:48:08.119723299 0 sshd (26013) > read fd=11(<f>/dev/ptmx) size=16384
2213275 14:48:08.119723699 0 sshd (26013) < read res=59 data=..2178117 14:48:02.502229699 0 sshd (26013) < select res=1…
….
….
$ sudo sysdig –l
Output:
----------------------
Field Class: fd
fd.num              the unique number identifying the file descriptor.
fd.type             type of FD. Can be 'file', 'directory', 'ipv4', 'ipv6', 'unix',
                    'pipe', 'event', 'signalfd', 'eventpoll', 'inotify' or 'signal
                    fd'.
fd.typechar         type of FD as a single character. Can be 'f' for file, 4 for IP
                    v4 socket, 6 for IPv6 socket, 'u' for unix socket, p for pipe,
                    'e' for eventfd, 's' for signalfd, 'l' for eventpoll, 'i' for i
                    notify, 'o' for uknown.
fd.name             FD full name. If the fd is a file, this field contains the full
                    path. If the FD is a socket, this field contain the connection
                    tuple.
fd.directory        If the fd is a file, the directory that contains it.
fd.filename         If the fd is a file, the filename without the path.
fd.ip               matches the ip address (client or server) of the fd.
fd.cip              client IP address.
fd.sip              server IP address.
fd.lip              local IP address.
fd.rip              remote IP address.
fd.port             (FILTER ONLY) matches the port (either client or server) of the
                    fd.
…
…
This will show a list of available filters with the Sysdig, For example, here I am checking the “proc.name” variable –
$ sudo sysdig proc.name=vi
By default, it won’t display anything as vi is not running on the machine. Hence, open one more terminal and run the below command.
$ vi demo.txt
Now you can see the output in the terminal where we are running the sysdig command.
Output:
Code=0
55068 14:56:59.185080399 0 vi (31724) > switch next=7 pgft_maj=26 pgft_min=268 vm_size=39364 vm_rss=4944 vm_swap=0
55070 14:56:59.185091599 0 vi (31724) > stat
55071 14:56:59.185096899 0 vi (31724) < stat res=0 path=/usr/share/vim
55072 14:56:59.185159499 0 vi (31724) > switch next=0 pgft_maj=26 pgft_min=268 vm_size=39364 vm_rss=4944 vm_swap=0
55074 14:56:59.185892299 0 vi (31724) > getcwd
55075 14:56:59.185894399 0 vi (31724) < getcwd res=13 path=/home/ubuntu
55076 14:56:59.185897599 0 vi (31724) > stat
55077 14:56:59.185907799 0 vi (31724) < stat res=-2(ENOENT) path=test.txt(/home/ubuntu/test.txt)
55078 14:56:59.185992999 0 vi (31724) > rt_sigaction
55079 14:56:59.185995199 0 vi (31724) < rt_sigaction
55080 14:56:59.185995699 0 vi (31724) > rt_sigprocmask
55081 14:56:59.185997099 0 vi (31724) < rt_sigprocmask
55082 14:56:59.185997699 0 vi (31724) > rt_sigaction
55083 14:56:59.185998199 0 vi (31724) < rt_sigaction
55084 14:56:59.185998499 0 vi (31724) > rt_sigprocmask
55085 14:56:59.185998999 0 vi (31724) < rt_sigprocmask
55086 14:56:59.185999399 0 vi (31724) > rt_sigaction
55087 14:56:59.186000199 0 vi (31724) < rt_sigaction
55088 14:56:59.186000499 0 vi (31724) > rt_sigprocmask
55089 14:56:59.186000999 0 vi (31724) < rt_sigprocmask
55090 14:56:59.186001399 0 vi (31724) > rt_sigaction
55091 14:56:59.186001899 0 vi (31724) < rt_sigaction
55092 14:56:59.186002199 0 vi (31724) > rt_sigprocmask
55093 14:56:59.186002599 0 vi (31724) < rt_sigprocmask
55094 14:56:59.186003099 0 vi (31724) > rt_sigaction
55095 14:56:59.186003599 0 vi (31724) < rt_sigaction
..
..
Using Sysdig to Capture System Activity.
Sysdig can capture the output to a file where we can use this file to analyze the errors using the –w option with sysdig command.
If we want to capture a particular no of line – we can use the –n xxx option to capture xxx no of lines in the sysdig output.
If we want to break the file into different files after the particular, size we can use the – C x (x is the size of file in MB’s).
If we want to keep only the latest of the files which are split into difference files using the – C option we can use the – W x where x is the no of latest files to keep.
To store the sysdig output to file
$ sudo sysdig -w sysdig_capture.scap
To Store the first 200 line to the output file.
$ sudo sysdig -n 200 -w sysdig_capture.scap
To split the file into part after a size.
$ sudo sysdig -C 1 -w sysdig_capture.scap
To split the files into part after the size and keep the latest 5.
$ sudo sysdig -C 1 -W 5 -w sysdig_capture.scap
Analyzing the Sysdig data We Captured
We can use the old captured data files to read and analyze the data using the –r option to the sysdig command –.
$ sudo sysdig -r sysdig_capture.scap
Output:
1 15:04:33.894775099 0 sysdig (31733) > switch next=12473(mongod) pgft_maj=0 pgft_min=906 vm_size=54480 vm_rss=6884 vm_swap=0
2 15:04:33.894783299 0 mongod (12473) < futex res=-110(ETIMEDOUT)
3 15:04:33.894790999 0 mongod (12473) > clock_gettime
4 15:04:33.894810499 0 mongod (12473) < clock_gettime
5 15:04:33.894814999 0 mongod (12473) > gettimeofday
6 15:04:33.894816099 0 mongod (12473) < gettimeofday
7 15:04:33.894817799 0 mongod (12473) > clock_gettime
8 15:04:33.894818399 0 mongod (12473) < clock_gettime
9 15:04:33.894819999 0 mongod (12473) > futex addr=563CA6EBD888 op=129(FUTEX_PRIVATE_FLAG|FUTEX_WAKE) val=1
10 15:04:33.894822599 0 mongod (12473) < futex res=0
11 15:04:33.894823399 0 mongod (12473) > futex addr=563CA6EBD8B4 op=393(FUTEX_CLOCK_REALTIME|FUTEX_PRIVATE_FLAG|FUTEX_WAIT_BITSET) val=254170959
12 15:04:33.894849799 0 mongod (12473) > switch next=31733(sysdig) pgft_maj=0 pgft_min=0 vm_size=942732 vm_rss=224680 vm_swap=0
13 15:04:33.897110099 0 sysdig (31733) > switch next=7 pgft_maj=0 pgft_min=915 vm_size=54476 vm_rss=6884 vm_swap=0
14 15:04:33.897120099 0 <NA> (7) > switch next=3 pgft_maj=0 pgft_min=0 vm_size=0 vm_rss=0 vm_swap=0
15 15:04:33.897139899 0 <NA> (3) > switch next=7 pgft_maj=0 pgft_min=0 vm_size=0 vm_rss=0 vm_swap=0
16 15:04:33.897143899 0 <NA> (7) > switch next=31733(sysdig) pgft_maj=0 pgft_min=0 vm_size=0 vm_rss=0 vm_swap=0
17 15:04:33.898006299 0 sysdig (31733) > switch next=12481(mongod) pgft_maj=0 pgft_min=915 vm_size=54476 vm_rss=6884 vm_swap=0
18 15:04:33.898013199 0 mongod (12481) < nanosleep res=0
19 15:04:33.898060499 0 mongod (12481) > gettimeofday
20 15:04:33.898062499 0 mongod (12481) < gettimeofday
…
…
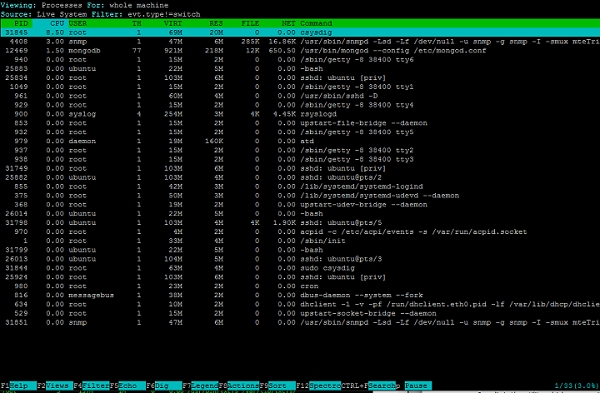
Csydig for System Monitoring and Analysis
Csysdig is the utility which comes with the sysdig packages, which has an interface where we can interactively use the features which are available with the sysdig, which looks like the top command but has very good features.
$ sys csysdig
In this article, we have learnt – how to read the system information using the sysdig toll which helps us to read and analyze the system information and troubleshoot the issues related to the server and also we have learned csysdig tools which have the user interface to read analyze to read the system log and find the solutions to the issues.

287 Views
