
Article Categories
- All Categories
-
 Data Structure
-
 Networking
-
 RDBMS
RDBMS
-
 Operating System
-
 Java
Java
-
 MS Excel
-
 iOS
iOS
-
 HTML
HTML
-
 CSS
CSS
-
 Android
-
 Python
-
 C Programming
-
 C++
C++
-
 C#
C#
-
 MongoDB
-
 MySQL
MySQL
-
 Javascript
-
 PHP
PHP
-
 Economics & Finance
How to implement the Drag and Drop functionality over a Recycler View in an Android App ?
Many times in an android application we can get to see the data is being displayed in the form of a list such as in task tracker application we can get to see different types of tasks arranged in the form of a list in a specific order. Now inside those applications we can change the priority of tasks by simply changing their priority. We will add the task with highest priority at the top. So we can simply drag and drop that task to the top most position. So in this way Drag and Drop functionality is used for arranging these items of RecyclerView.
Implementation
We will be creating a simple application in which we will be displaying the list of programming languages in the form of recycler view. We will be adding functionality to that recycler view so that the user can drag and drop the items from this recycler view according to his preference.
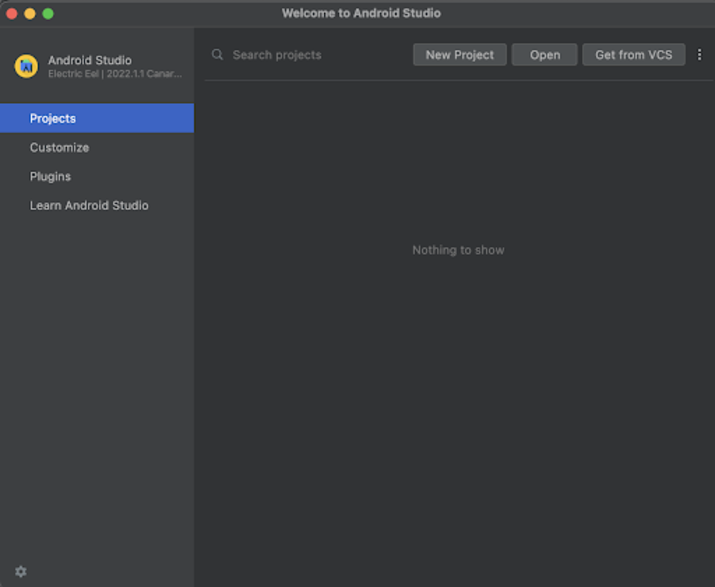
Step 1 : Creating a new project in Android Studio
Navigate to Android studio as shown in below screen. In the below screen click on New Project to create a new Android Studio Project.
After clicking on New Project you will get to see the below screen.
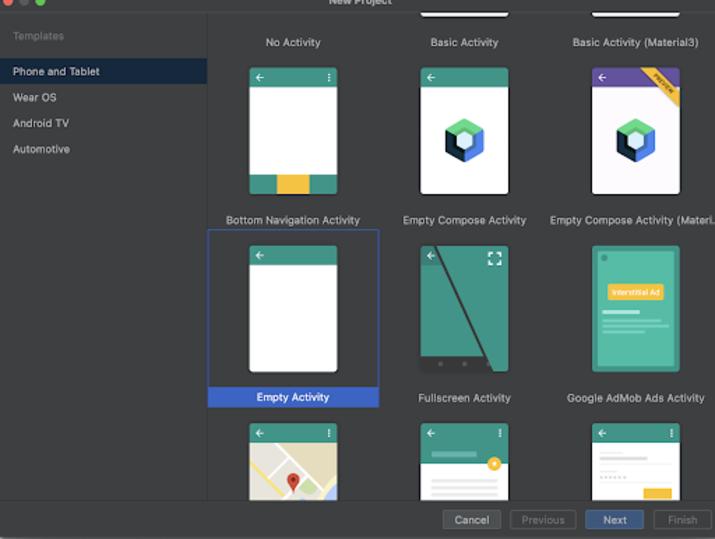
Inside this screen we have to simply select Empty Activity and click on Next. After clicking on next you will get to see the screen below.
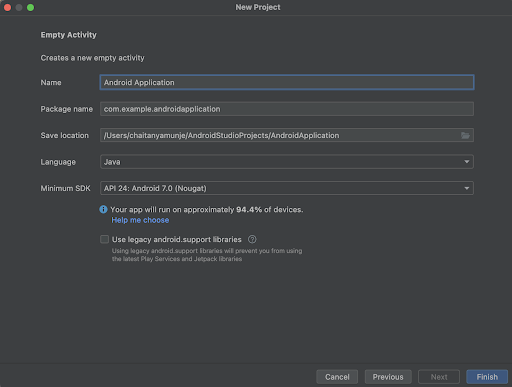
Inside this screen we have to simply specify the project name. Then the package name will be generated automatically.
Note ? Make sure to select the Language as Java.
After specifying all the details click on Finish to create a new Android studio project.
Once our project has been created we will get to see 2 files which are open i.e activity_main.xml and MainActivity.java file.
Step 2 : Working with activity_main.xml
Navigate to activity_main.xml. If this file is not visible. To open this file. In the left pane navigate to app>res>layout>activity_main.xml to open this file. After opening this file. Add the below code to it. Comments are added in the code to get to know in detail.
<?xml version="1.0" encoding="utf-8"?>
<RelativeLayout xmlns:android="http://schemas.android.com/apk/res/android"
   xmlns:app="http://schemas.android.com/apk/res-auto"
   xmlns:tools="http://schemas.android.com/tools"
   android:layout_width="match_parent"
   android:layout_height="match_parent"
   tools:context=".MainActivity">
   <!-- creating a recycler view on below line -->
   <androidx.recyclerview.widget.RecyclerView
       android:id="@+id/idRVLanguages"
       android:layout_width="match_parent"
       android:layout_height="match_parent" />
</RelativeLayout>
Explanation : In the above code we are creating a root layout as a Relative Layout. Inside this layout we are creating a RecyclerView inside which we will be displaying the list of programming languages.
Step 3 : Creating a Modal class for the data of our Recycler View
Navigate to app>java>your app?s package name>Right click on it>New>Java class and name it as LanguageRVModal and add below code to it. Comments are added in the code to get to know in detail.
package com.example.java_test_application;
public class LanguageRVModal {
   // on below line creating a variable for language name.
   private String languageName;
   // on below line creating constructor, getter and setters for it.
   public LanguageRVModal(String languageName) {
       this.languageName = languageName;
   }
   public String getLanguageName() {
       return languageName;
   }
   public void setLanguageName(String languageName) {
       this.languageName = languageName;
   }
<b>}
</b>
Explanation : In the above code we are creating a variable for our language name and creating constructor, getter and setter methods for that specific variable.
Step 4 : Creating a layout file for each item of RecyclerView
Navigate to app>res>layout>Right click on it>New Layout Resource file and name it as language_rv_item and add below code to it. Comments are added in the code to get to know in detail.
<?xml version="1.0" encoding="utf-8"?>
<androidx.cardview.widget.CardView xmlns:android="http://schemas.android.com/apk/res/android"
   xmlns:app="http://schemas.android.com/apk/res-auto"
   android:id="@+id/idCVCard"
   android:layout_width="match_parent"
   android:layout_height="wrap_content"
   android:layout_margin="5dp"
   app:cardCornerRadius="5dp">
   <!-- creating a relative layout on below line-->
   <RelativeLayout
       android:layout_width="match_parent"
       android:layout_height="wrap_content"
       android:layout_margin="4dp">
       <!-- creating a text view on below line -->
       <TextView
           android:id="@+id/idTVLanguage"
           android:layout_width="match_parent"
           android:layout_height="wrap_content"
           android:padding="10dp"
           android:text="Language Name"
           android:textColor="@color/black"
           android:textSize="16sp"
           android:textStyle="bold" />
   </RelativeLayout>
</androidx.cardview.widget.CardView>
Explanation : In the above code we are creating a Card View as a root layout. Inside this Card View we are creating a Relative Layout and inside this relative layout we are creating a text view which we will be using to display the programming language within our Recycler View.
Step 5 : Creating an Adapter class for setting data to each item of RecyclerView
Navigate to app>java>your app?s package name>Right click on it>New Java class and name it as LanguageRVAdapter and add below code to it. Comments are added in the code to get to know in detail.
package com.example.java_test_application;

import android.content.Context;
import android.graphics.Color;
import android.view.LayoutInflater;
import android.view.View;
import android.view.ViewGroup;
import android.widget.TextView;
import androidx.annotation.NonNull;
import androidx.cardview.widget.CardView;
import androidx.recyclerview.widget.RecyclerView;
import java.util.ArrayList;
import java.util.Collections;
public class LanguageRVAdapter extends RecyclerView.Adapter<LanguageRVAdapter.ViewHolder> implements RecyclerRowMoveCallback.ItemTouchHelperContract {
   // creating variables for array list and context on below line.
   private Context context;
   private ArrayList<LanguageRVModal> languageRVModals;
   // creating a constructore for recycler view on below line.
   public LanguageRVAdapter(Context context, ArrayList<LanguageRVModal> languageRVModals) {
       this.context = context;
       this.languageRVModals = languageRVModals;
   }
   @NonNull
   @Override
   public LanguageRVAdapter.ViewHolder onCreateViewHolder(@NonNull ViewGroup parent, int viewType) {
       // creating and initializing view for inflating layout.
       View view = LayoutInflater.from(context).inflate(R.layout.language_rv_item, parent, false);
       return new ViewHolder(view);
   }
   @Override
   public void onBindViewHolder(@NonNull LanguageRVAdapter.ViewHolder holder, int position) {
       // setting data to our recycler view item.
       holder.languageTV.setText(languageRVModals.get(position).getLanguageName());
   }
   @Override
   public int getItemCount() {
       // returning the size of array list.
       return languageRVModals.size();
   }
   @Override
   public void onRowMoved(int fromPosition, int toPosition) {
       // on below line setting on row moved and swaping the items of recycler view.
       if (fromPosition < toPosition) {
           for (int i = fromPosition; i < toPosition; i++) {
               Collections.swap(languageRVModals, i, i + 1);
           }
       } else {
           for (int i = fromPosition; i > toPosition; i--) {
               Collections.swap(languageRVModals, i, i - 1);
           }
       }
       // on below line notifying item has been moved.
       notifyItemMoved(fromPosition, toPosition);
   }
   @Override
   public void onRowSelected(ViewHolder viewHolder) {
       // on below line setting selected item back color
       viewHolder.cardView.setBackgroundColor(Color.GRAY);

   }
   @Override
   public void onRowClear(ViewHolder viewHolder) {
       // on below line setting color for cleared row.
       viewHolder.cardView.setBackgroundColor(Color.WHITE);
   }
   public class ViewHolder extends RecyclerView.ViewHolder {
       // on below line creating variable for text view and card view.
       private TextView languageTV;
       private CardView cardView;
       public ViewHolder(@NonNull View itemView) {
           super(itemView);
           // on below line initializing this variables.
           languageTV = itemView.findViewById(R.id.idTVLanguage);
           cardView = itemView.findViewById(R.id.idCVCard);
       }
   }
}
Explanation ? In the above code we are inflating the layout file which we have created to be displayed for each item of our Recycler View. Along with that it is used to set the data to each item of our Recycler View.
Step 6 : Creating a new java class for moving the items within our Recycler View
Navigate to app>java>your app?s package name>Right click on it>New Java class and name it as RecyclerRowMoveCallback and add below code to it. Comments are added in the code to get to know in detail.
package com.example.java_test_application;
import androidx.annotation.NonNull;
import androidx.annotation.Nullable;
import androidx.recyclerview.widget.ItemTouchHelper;
import androidx.recyclerview.widget.RecyclerView;
public class RecyclerRowMoveCallback extends ItemTouchHelper.Callback {
   // on below line creating variable for item touch helper contract.
   private final ItemTouchHelperContract itemTouchHelperContract;
   // on below line creating a constructor for it.
   public RecyclerRowMoveCallback(ItemTouchHelperContract adapter) {
       itemTouchHelperContract = adapter;
   }
   @Override
   public boolean isItemViewSwipeEnabled() {
       return false;
   }
   @Override
   public boolean isLongPressDragEnabled() {
       return true;
   }
   @Override
   public int getMovementFlags(@NonNull RecyclerView recyclerView, @NonNull RecyclerView.ViewHolder viewHolder) {
       // on below line setting drag flags to move up and down.
       int dragFlags = ItemTouchHelper.UP | ItemTouchHelper.DOWN;
       return makeMovementFlags(dragFlags, 0);
   }
   @Override
   public boolean onMove(@NonNull RecyclerView recyclerView, @NonNull RecyclerView.ViewHolder viewHolder, @NonNull RecyclerView.ViewHolder target) {
       // on below line setting on row moved.
       this.itemTouchHelperContract.onRowMoved(viewHolder.getAdapterPosition(), target.getAdapterPosition());
       return true;
   }
   @Override
   public void onSwiped(@NonNull RecyclerView.ViewHolder viewHolder, int direction) {

   }

   @Override
   public void onSelectedChanged(RecyclerView.ViewHolder viewHolder,
                                 int actionState) {
       // on below line changing the selected item.
       if (actionState != ItemTouchHelper.ACTION_STATE_IDLE) {
           if (viewHolder instanceof LanguageRVAdapter.ViewHolder) {
               LanguageRVAdapter.ViewHolder myViewHolder =
                       (LanguageRVAdapter.ViewHolder) viewHolder;
               this.itemTouchHelperContract.onRowSelected(myViewHolder);
           }

       }
       super.onSelectedChanged(viewHolder, actionState);
   }
   @Override
   public void clearView(RecyclerView recyclerView,
                         RecyclerView.ViewHolder viewHolder) {
       super.clearView(recyclerView, viewHolder);
       // on below line clearing the view.
       if (viewHolder instanceof LanguageRVAdapter.ViewHolder) {
           LanguageRVAdapter.ViewHolder myViewHolder =
                   (LanguageRVAdapter.ViewHolder) viewHolder;
           this.itemTouchHelperContract.onRowClear(myViewHolder);
       }
   }
   // on below line creating an interface and creating methods in it.
   public interface ItemTouchHelperContract {
       void onRowMoved(int fromPosition, int toPosition);
       void onRowSelected(LanguageRVAdapter.ViewHolder myViewHolder);
       void onRowClear(LanguageRVAdapter.ViewHolder myViewHolder);
   }
<b>}
</b>
Explanation : In the above code we are creating different methods which we will be using to drag and drop the items for our RecyclerView.
Step 7 : Working with MainActivity.java file
Navigate to MainActivity.java. If this file is not visible. To open this file. In the left pane navigate to app>res>layout>MainActivity.java to open this file. After opening this file. Add the below code to it. Comments are added in the code to get to know in detail.
package com.example.java_test_application;
import android.os.Bundle;
import androidx.appcompat.app.AppCompatActivity;
import androidx.recyclerview.widget.ItemTouchHelper;
import androidx.recyclerview.widget.LinearLayoutManager;
import androidx.recyclerview.widget.RecyclerView;
import java.util.ArrayList;
public class MainActivity extends AppCompatActivity {
   // creating variables on below line for recycler view and adapter.
   private RecyclerView recyclerView;
   private LanguageRVAdapter languageRVAdapter;
   @Override
   protected void onCreate(Bundle savedInstanceState) {
       super.onCreate(savedInstanceState);
       setContentView(R.layout.activity_main);
       // initializing variables on below line.
       recyclerView = findViewById(R.id.idRVLanguages);
       // creating an array list and initializing it
       ArrayList<languagervmodal> languageRVModals = new ArrayList<>();
       // adding data to array list on below line.
       languageRVModals.add(new LanguageRVModal("Java"));
       languageRVModals.add(new LanguageRVModal("C"));
       languageRVModals.add(new LanguageRVModal("C++"));
       languageRVModals.add(new LanguageRVModal("Python"));
       languageRVModals.add(new LanguageRVModal("Kotlin"));
       languageRVModals.add(new LanguageRVModal("Dart"));
       // initializing adapter for recycler view.
       languageRVAdapter = new LanguageRVAdapter(this, languageRVModals);
       // setting layout manager for recycler view.
       recyclerView.setLayoutManager(new LinearLayoutManager(this));
       // setting item touch helper for recycler view
       ItemTouchHelper.Callback callback = new RecyclerRowMoveCallback(languageRVAdapter);
       // initializing item touch helper on below line.
       ItemTouchHelper touchHelper = new ItemTouchHelper(callback);
       // attaching the touch helper to recycler view.
       touchHelper.attachToRecyclerView(recyclerView);
       // setting adapter for recycler view on below line.
       recyclerView.setAdapter(languageRVAdapter);
   }
}
</languagervmodal>
Explanation : In the above code firstly we are creating variables for our recycler view and adapter. Now we will get to see the onCreate method. This is the default method of every android application. This method is called when the application view is created. Inside this method we are setting the content view i.e the layout file named activity_main.xml to set the UI from that file. Inside the onCreate method we are initializing the variables for our RecyclerView as well as adapter. We are creating an array list and adding the data to it. Along with that we are setting this adapter to our Recycler View. We are also adding an item touch helper to it so that we can drag and drop the items within our Recycler View.
After adding the above code now we have to simply click on the green icon in the top bar to run our application on a mobile device.
Note ? Make sure you are connected to your real device or emulator.
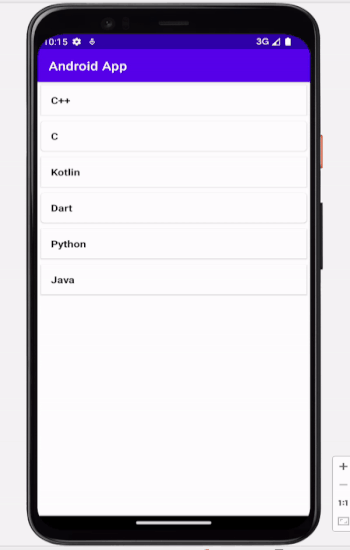
Output
Conclusion
In the above article we have taken a look on How to implement Drag and Drop functionality for our RecyclerView in our android application.

962 Views
