
Article Categories
- All Categories
-
 Data Structure
-
 Networking
-
 RDBMS
RDBMS
-
 Operating System
-
 Java
Java
-
 MS Excel
-
 iOS
iOS
-
 HTML
HTML
-
 CSS
CSS
-
 Android
-
 Python
-
 C Programming
-
 C++
C++
-
 C#
C#
-
 MongoDB
-
 MySQL
MySQL
-
 Javascript
-
 PHP
PHP
-
 Economics & Finance
How to get the value of a specific pixel in OpenCV using C++?
To read the value of a specific pixel, we can use either 'at' or 'direct access' method. Here, we will learn both of the approaches.
Let's start with 'at' method. The following program reads the pixel value located at (10, 29) of an RGB image.
Example
#include<iostream>
#include<opencv2/highgui/highgui.hpp>
using namespace std;
using namespace cv;
int main() {
   Mat image;//taking an image matrix//
   image = imread("sky.jpg");//loading an image//
   int x = image.at<Vec3b>(10, 29)[0];//getting the pixel values//
   int y = image.at<Vec3b>(10, 29)[1];//getting the pixel values//
   int z = image.at<Vec3b>(10, 29)[2];//getting the pixel values//
   cout << "Value of blue channel:" << x << endl;//showing the pixel values//
   cout << "Value of green channel:" << x << endl;//showing the pixel values//
   cout << "Value of red channel:" << x << endl;//showing the pixel values//
   system("pause");//pause the system to visualize the result//
   return 0;
}
Output
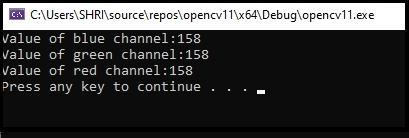
The result of the program will show up in the console window. Here using the following three lines, we are getting the pixel form values of three different channels.
int x = image.at<Vec3b>(10, 29)[0];
int y = image.at<Vec3b>(10, 29)[1];
int z = image.at<Vec3b>(10, 29)[2];
In the first line, we read the pixel's value located at (10, 29) of the first channel (blue) and storing the value at 'x' variable. The second and third line is storing the value of 2nd and 3rd channel, respectively. Now let's learn how to read a pixel value using the 'direct access' method.
The following program reads the pixel value located at (10, 29) directly −
Example
#include<iostream>
#include<opencv2/highgui/highgui.hpp>
using namespace std;
using namespace cv;
int main() {
Mat_<Vec3b>image;//taking an image matrix//
image = imread("sky.jpg");//loading an image//
Vec3b x = image(10, 29);//getting the pixel values//
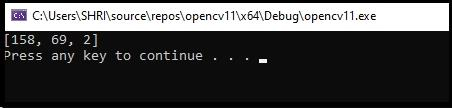
cout << x << endl;//showing the pixel values//
system("pause");//pause the system to visualize the result//
return 0;
}
Output

5K+ Views
