
Article Categories
- All Categories
-
 Data Structure
-
 Networking
-
 RDBMS
RDBMS
-
 Operating System
-
 Java
Java
-
 MS Excel
-
 iOS
iOS
-
 HTML
HTML
-
 CSS
CSS
-
 Android
-
 Python
-
 C Programming
-
 C++
C++
-
 C#
C#
-
 MongoDB
-
 MySQL
MySQL
-
 Javascript
-
 PHP
PHP
-
 Economics & Finance
How to Export All Images at Once from Excel
Excel is a powerful tool that offers a variety of functions for data manipulation and analysis. Supposing you have a lot of pictures in your workbook and want to save them to a specific folder at a time, usually, you can copy and paste the pictures one by one manually for saving, but it is time?consuming to copy and paste them repeatedly like this. Here, I will introduce you some tips to solve this job. With the Excel built?in Save As function, you can save a workbook as Web Page to save all pictures including charts, shapes and other objects in a folder.
Export All Images at Once from Excel
Let us see how to export all images at once from Excel.
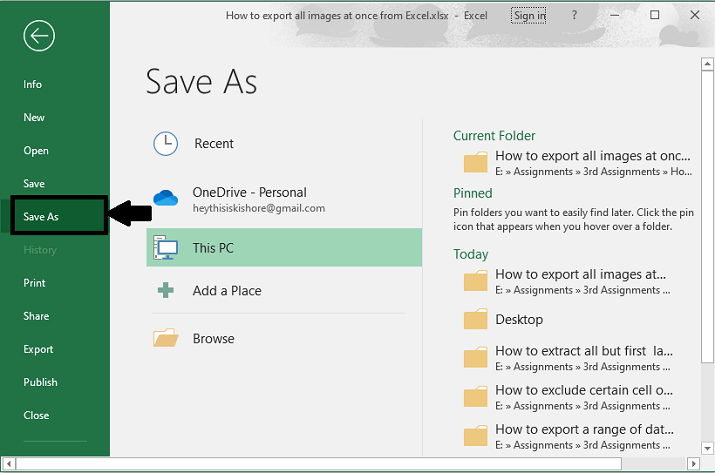
Step 1
Open the workbook with the pictures you want to save. Click File > Save As > Browse.
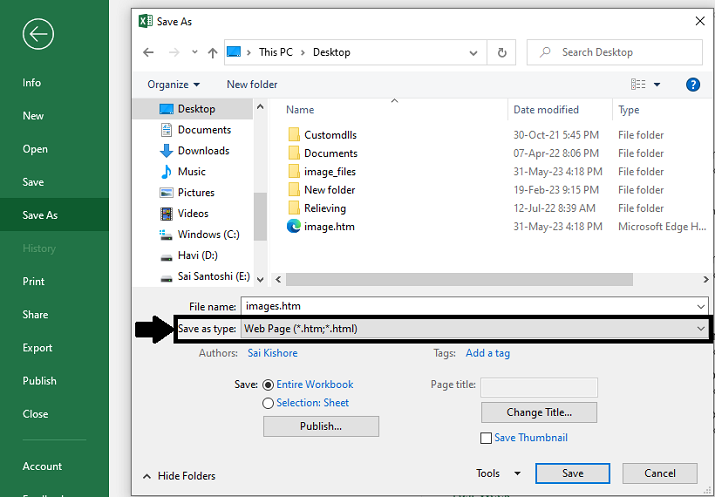
Step 2
In the Save As dialog box, you need to:
Choose a folder to save the exported images;
Choose Web Page from the Save as type drop?down list;
Click the Save button.
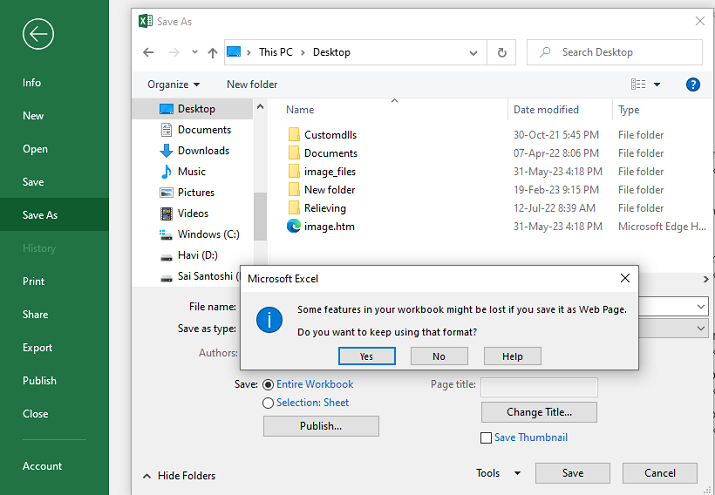
Step 3
In the popping up Microsoft Excel dialog box, click the Yes button .See screenshot:
Step 4
Open the folder where the exported files are saved and you can see a folder and a HTML format file listed inside. All pictures in the workbook including charts, shapes or objects are saved in this folder.
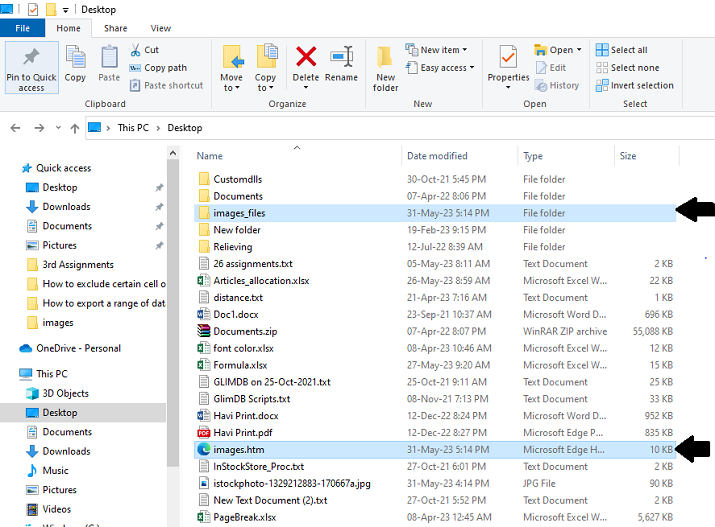
You can keep the pictures you need in the folder and delete others you don?t need.
Conclusion
To export all images at once from Excel, you can use the "Save As" feature and choose the "Web Page" format. After selecting the desired folder, Excel will generate an HTML file and a corresponding folder containing the exported images. This method allows for easy retrieval of all pictures, including charts and shapes, in one go. By following these steps, you can efficiently export and save all images from your Excel workbook, providing a convenient way to organize and utilize the images outside of Excel.

12K+ Views
