
Article Categories
- All Categories
-
 Data Structure
-
 Networking
-
 RDBMS
RDBMS
-
 Operating System
-
 Java
Java
-
 MS Excel
-
 iOS
iOS
-
 HTML
HTML
-
 CSS
CSS
-
 Android
-
 Python
-
 C Programming
-
 C++
C++
-
 C#
C#
-
 MongoDB
-
 MySQL
MySQL
-
 Javascript
-
 PHP
PHP
-
 Economics & Finance
How To Edit Video Category And Audiences For The Published YouTube Videos?
Social media channels like YouTube have become powerful marketing and sales tools for businesses. Video content not only entertains but also provides important information almost about every topic. Making awesome and knowledgeable video content is the first hurdle to overcome. Getting people to watch and make them to subscribe your channel is the next and a much bigger obstacle in the creator?s path. To improve growth a creator needs to edit videos several times. In this article, we will tell you how to edit video categories and audiences for the growth of any channel.

VIDEO CATEGORY
YouTube creators who monetize their content must ensure that they select the right category for their video before publishing. But it happens sometimes that the creator can forget or select the wrong category for their video.

YouTube categories don?t give a direct boost to your channel. However, when it comes to advertisers placing the videos in a video category is important. So, to make sure a creator gets marketing-related adverts from their marketing content, they should make sure to put them in the marketing category to get more clicks from the specific adverts and earn more money. There are almost 15 categories in the YouTube choice list.
Now let?s see how to change YouTube categories after publishing the video ?
Steps To Edit Category Of Youtube Video After Publishing
Step 1
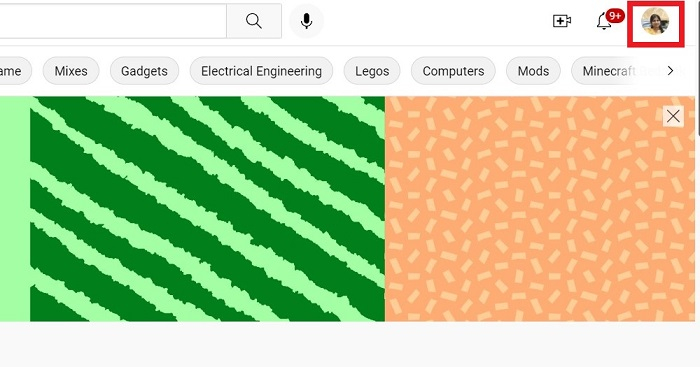
Open YouTube and click on the profile image after logging in to your account.

Step 2
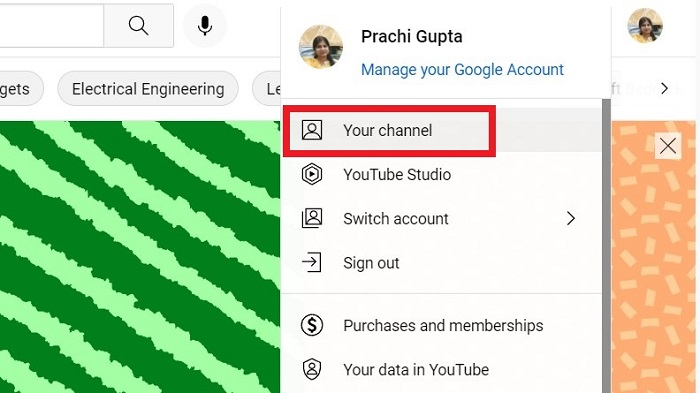
Open your channel by clicking on your profile picture.

Step 3
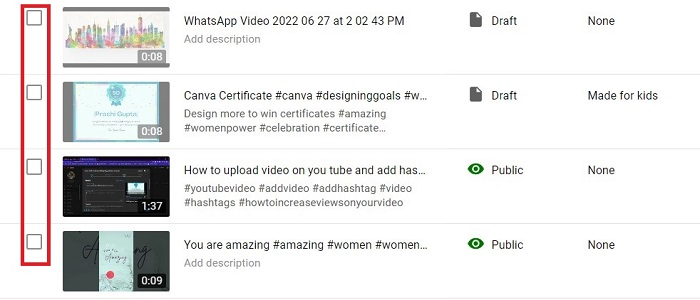
Click on MANAGE VIDEOS after clicking your channel. When you click on it a list of all published videos will open.

Step 4
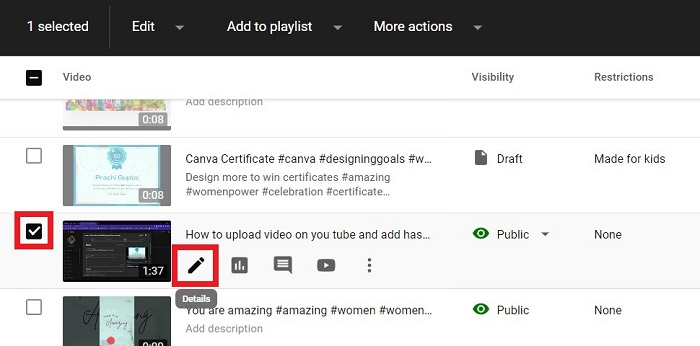
A list of all your videos will open. Select the video, whose category you want to change. Hover your mouse on that video and the pen like image will appear, click on that to edit.


Step 5
The video details page will open of your selected video. Scroll down.
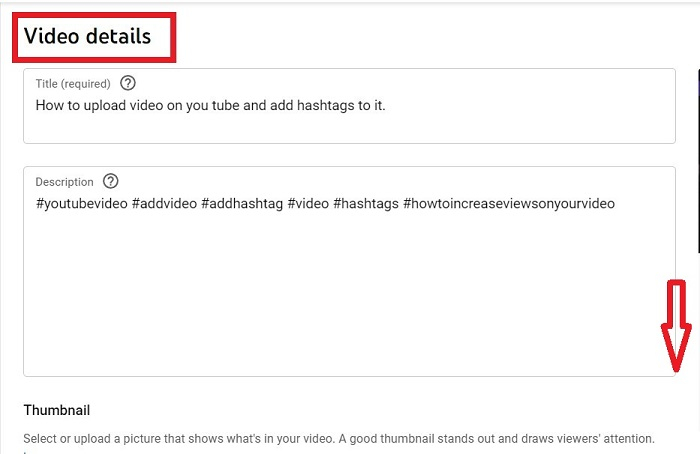
Step 6
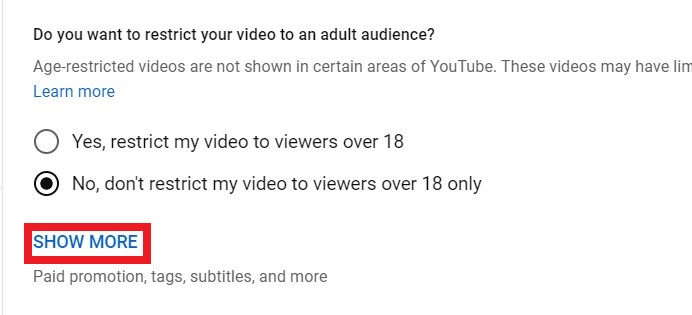
Click on SHOW MORE, to go to the bottom of the page.
Step 7
You can see the category box. Click on the drop-down beside the default.
YouTube assigns every video to the People and Blogs category.

Step 8
Select the new category for your video.

Step 9
Click on SAVE. Your category had been changed.

AUDIENCES
If the creator publishes a video on YouTube and realizes that its content is not suitable for all viewers, they should apply age restrictions. Doing so ensures that the video content is only viewed by the right audience.
As a YouTube creator, it is required to set future and existing videos as "it is made for kids or not". Even creators who don?t make content for kids need to set their audience at the utmost priority. This will help to ensure that the creator offers the appropriate content to their audience. For kid?s audience settings on your YouTube channel, you can set your audience on every video level.

Why Every Creator Must Set Their Audience Settings?
These audience settings are required as part of a settlement with the US Federal Trade Commission (FTC) and NY Attorney General, and this will help you to comply with the Children?s Online Privacy Protection Act (COPPA) and other applicable laws. Regardless of the creator?s location, YouTube requires the creator to tell them whether or not the content videos of their channel are made for kids. If a creator fails to set their audience accurately, they may face compliance issues with the FTC or other authorities, and YouTube can take action on the specific channel account.
To learn how to edit the audiences? settings for a video on YouTube, follow the steps below.
Steps For Editing Audience For Published Youtube Videos
Step 1
Open the browser and then YouTube, click on the profile image after logging in to your account.
Step 2
Open your channel by clicking on your profile picture.
Step 3
Click on MANAGE VIDEOS.

Step 4
A list of all your videos will open. Select the video, whose audiences you want to change.
Step 5
Hover your mouse on that video, edit option will be visible.
Step 6
The video details page will open of your selected video. Scroll down till the end.

Step 7
You can see the Audience option. Select from Yes or No for kids.
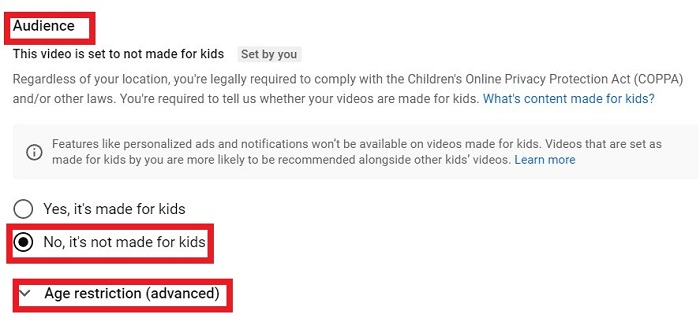
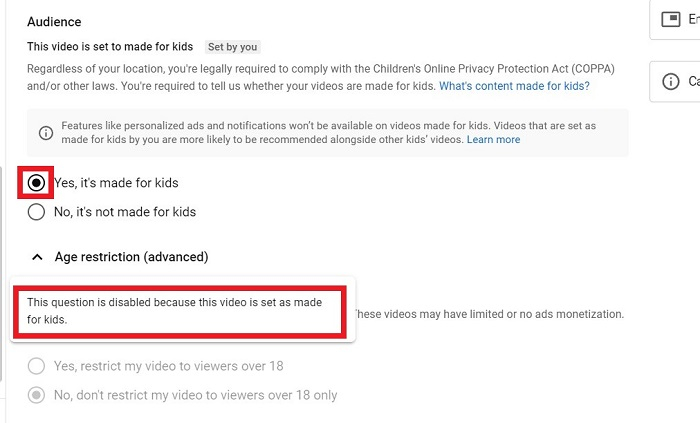
Step 8
If you select No then immediately Age restriction (Advanced) will open, where you have to select the age limit as 18 years or not. As you can see YouTube is very particular about this option under many acts all over the world.
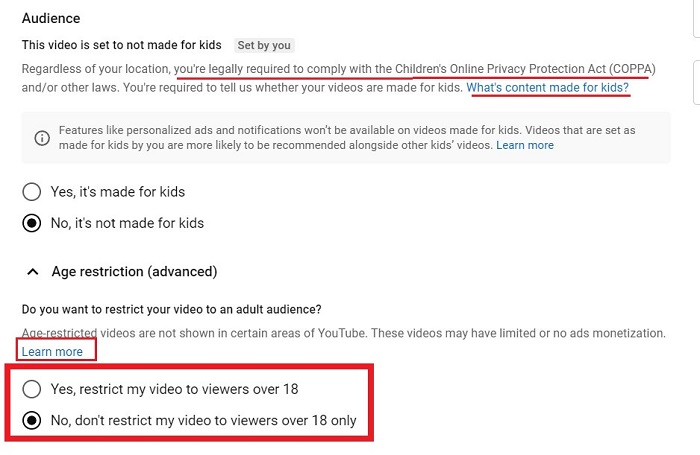
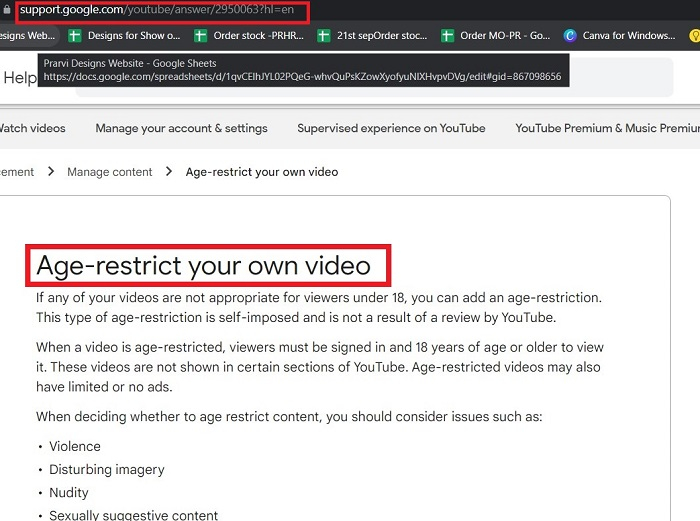
If you click on LEARN MORE, you can see the support page of YouTube giving guidelines.
If you select yes as the option that the video is made for kids the age restriction(advanced) will be disabled.
Step 9
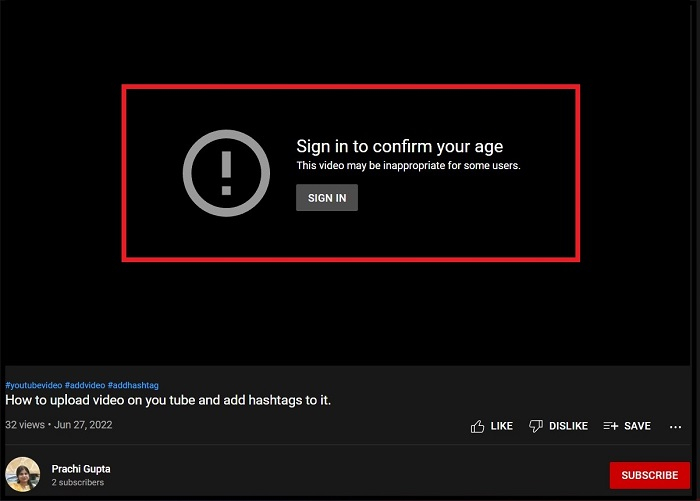
Select the settings according to your video. Click Save and you are done. If a child opens the video, it will not open and show the warning.
Conclusion
Take some time to perfect your settings on YouTube before publishing the video and see how many views, after that, the creator should make constant efforts in editing the settings to observe what boost it can give to channel views. Optimize and keep the settings that have worked for you!

917 Views
