
Article Categories
- All Categories
-
 Data Structure
-
 Networking
-
 RDBMS
RDBMS
-
 Operating System
-
 Java
Java
-
 MS Excel
-
 iOS
iOS
-
 HTML
HTML
-
 CSS
CSS
-
 Android
-
 Python
-
 C Programming
-
 C++
C++
-
 C#
C#
-
 MongoDB
-
 MySQL
MySQL
-
 Javascript
-
 PHP
PHP
-
 Economics & Finance
How to dismiss ViewController in Swift?
In Swift, we have a dismiss method of the class UIViewController that can be used to dismiss a ViewController in Swift. In this method, a Boolean value is used as an argument. There is an argument in this argument that asks whether the dismissed controller should be animated. By default, this is true in this method.
The following example shows how to dismiss a UIViewController screen in Swift.
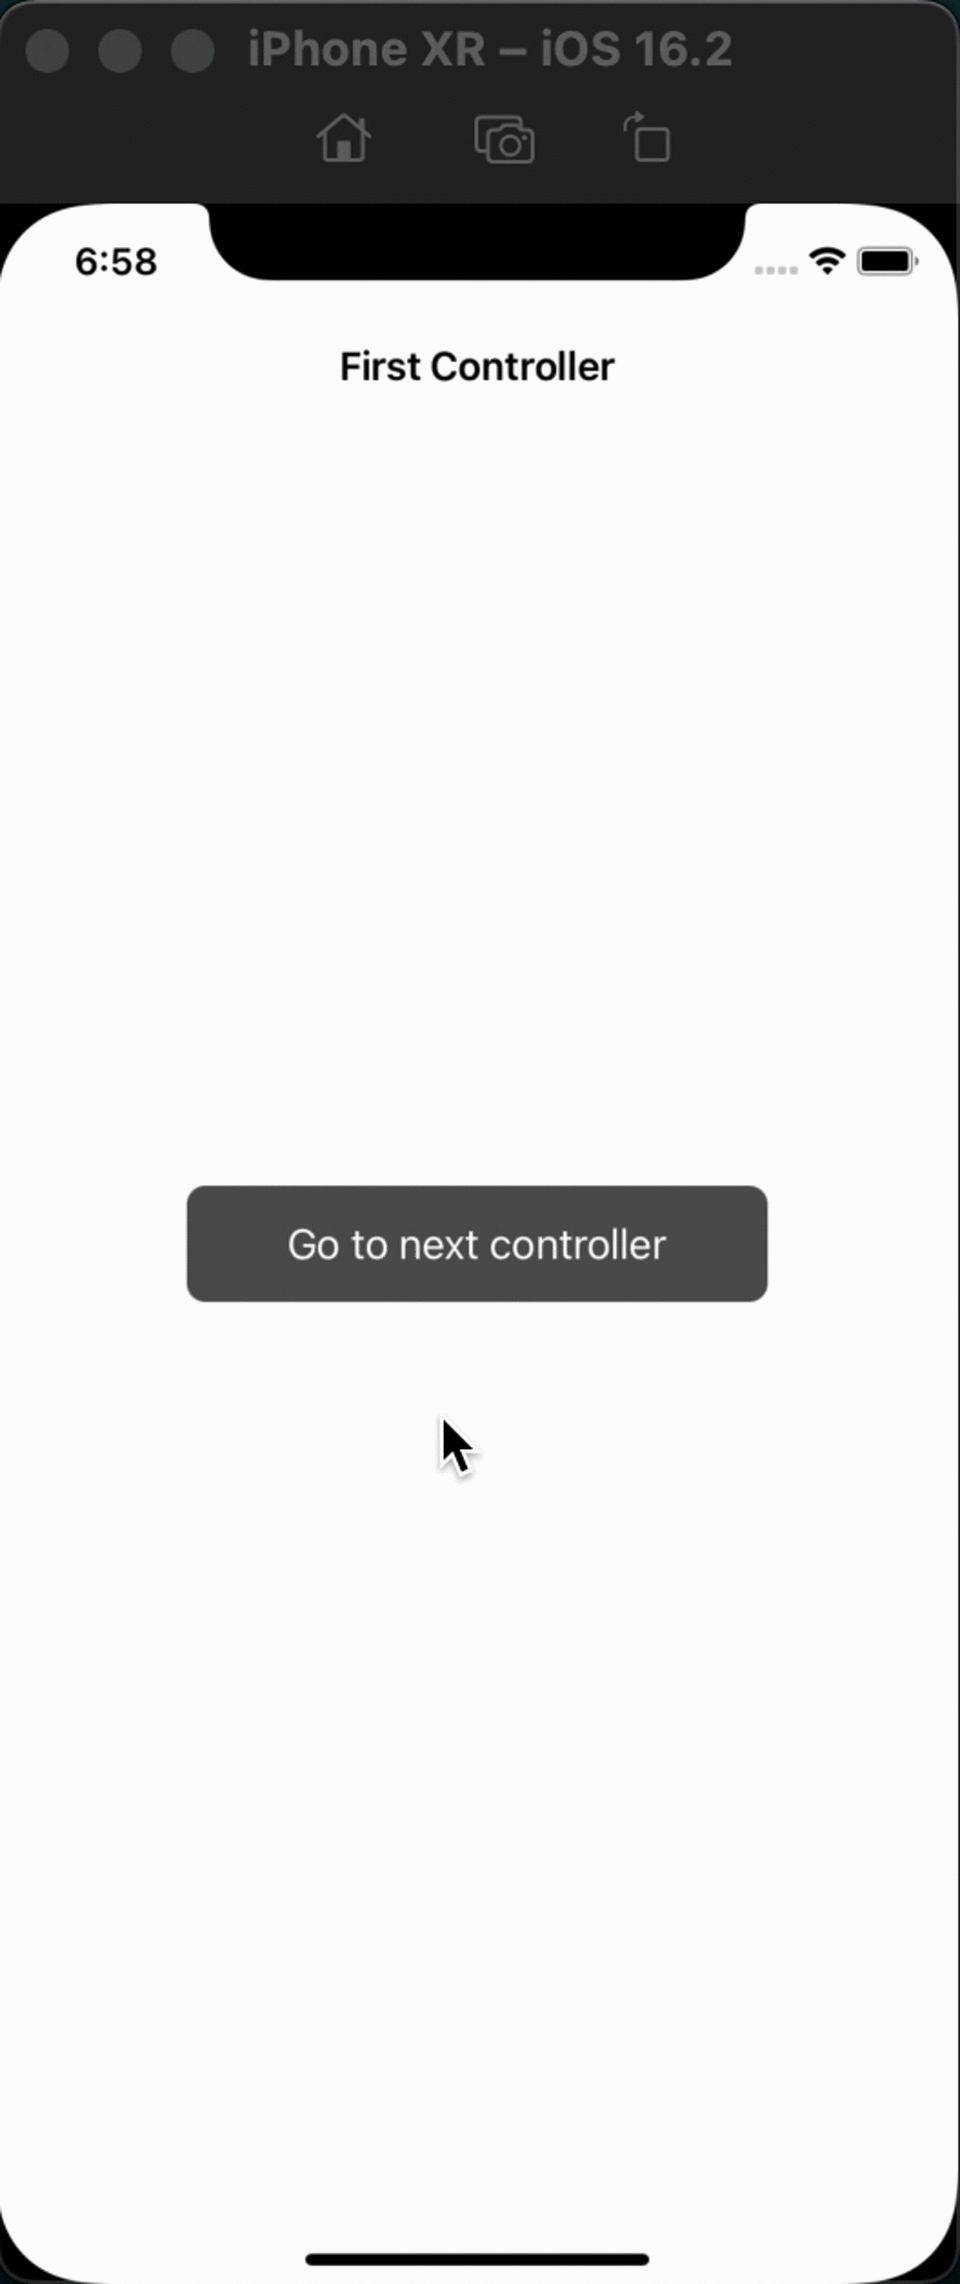
First view controller setup
In this step, we will set up the first view controller to present the second view controller. We will add a button to the first view controller, which will present the target controller when you click it.
Example
import UIKit
class FirstViewController: UIViewController {
   private let clickButton = UIButton()
   override func viewDidLoad() {
      super.viewDidLoad()
      initialSetup()
   }
   private func initialSetup() {

      // basic setup
      view.backgroundColor = .white
      navigationItem.title = "First Controller"

      // button customization
      clickButton.backgroundColor = .darkGray
      clickButton.setTitle("Go to next controller", for: .normal)
      clickButton.setTitleColor(.white, for: .normal)
      clickButton.layer.cornerRadius = 8
      clickButton.addTarget(self, action: #selector(handleClickButtonTapped), for: .touchUpInside)

      // adding the constraints to the button
      view.addSubview(clickButton)
      clickButton.translatesAutoresizingMaskIntoConstraints = false
      clickButton.heightAnchor.constraint(equalToConstant: 50).isActive = true
      clickButton.widthAnchor.constraint(equalToConstant: 250).isActive = true
      clickButton.centerXAnchor.constraint(equalTo: view.centerXAnchor).isActive = true
      clickButton.centerYAnchor.constraint(equalTo: view.centerYAnchor).isActive = true
   }

   @objc private func handleClickButtonTapped() {
      let secondController = SecondViewController()
      self.present(secondController, animated: true)
   }
}
In the above code, we added a button to the controller's view to present the target controller. We applied some basic customization to the button to give it a better look. After customization, we added some required constraints to the button.
Our second view controller is created in the method handleClickButtonTapped. A presentation with animation follows.
Second View Controller Setup
In this step, we will set up the second view controller with a basic user interface. In this controller, we will add a button in the center to dismiss the controller (self).
import UIKit
class SecondViewController: UIViewController {
   private let backButton = UIButton()
   override func viewDidLoad() {
      super.viewDidLoad()
      initialSetup()
   }
   private func initialSetup() {

      // basic setup
      view.backgroundColor = .white
      navigationItem.title = "Second Controller"

      // button customization
      backButton.backgroundColor = .darkGray
      backButton.setTitle("Dismiss", for: .normal)
      backButton.setTitleColor(.white, for: .normal)
      backButton.layer.cornerRadius = 8
      backButton.addTarget(self, action: #selector(handleBackButtonTapped), for: .touchUpInside)

      // adding the constraints to the button
      view.addSubview(backButton)
      backButton.translatesAutoresizingMaskIntoConstraints = false
      backButton.heightAnchor.constraint(equalToConstant: 50).isActive = true
      backButton.widthAnchor.constraint(equalToConstant: 200).isActive = true
      backButton.centerXAnchor.constraint(equalTo: view.centerXAnchor).isActive = true
      backButton.centerYAnchor.constraint(equalTo: view.centerYAnchor).isActive = true
   }

   @objc private func handleBackButtonTapped() {
      self.dismiss(animated: true)
   }
}
The dismiss method is used to dismiss a presented view controller and navigate back to the presented view controller. When dismissing a view controller, you can specify whether the dismissal should be animated and provide a completion block that is executed after the dismissal is completed.
Output
Conclusion
The dismiss method takes two parameters
animated ? A boolean value that determines whether the dismissal should be animated.
completion ? An optional closure that is called after the dismissal has been completed.
By passing true to the animated parameter, you are asking the parent view controller to animate the dismissal of the child view controller. The completion parameter is optional and can be used to perform additional tasks after the dismissal has been completed.

4K+ Views
