
Article Categories
- All Categories
-
 Data Structure
-
 Networking
-
 RDBMS
RDBMS
-
 Operating System
-
 Java
Java
-
 MS Excel
-
 iOS
iOS
-
 HTML
HTML
-
 CSS
CSS
-
 Android
-
 Python
-
 C Programming
-
 C++
C++
-
 C#
C#
-
 MongoDB
-
 MySQL
MySQL
-
 Javascript
-
 PHP
PHP
-
 Economics & Finance
How To Delete All Rows Except The First Header Row In Excel ?
Microsoft Excel is a robust spreadsheet programme that is frequently used for data organisation and manipulation. It is typical to include a header row that summarises the contents of each column when working with huge datasets. There might be circumstances, nevertheless, in which you must eliminate all rows of data behind the header row while leaving the header alone. Manually removing rows can take a while, especially if the dataset is large. This tutorial will show you how to quickly and effectively erase all rows in Excel other than the initial header row. You may easily tidy up your data and concentrate on the information that matters the most by following these steps. Please make sure you have Microsoft Excel installed on your computer and have a fundamental understanding of using spreadsheets before continuing. Let's get going!
Delete All Rows Except The First Header Row
Hear how we will first create a VBA module and then run it to complete the task. So let us see a simple process to know how you can delete all rows except the first header row in Excel.
Step 1
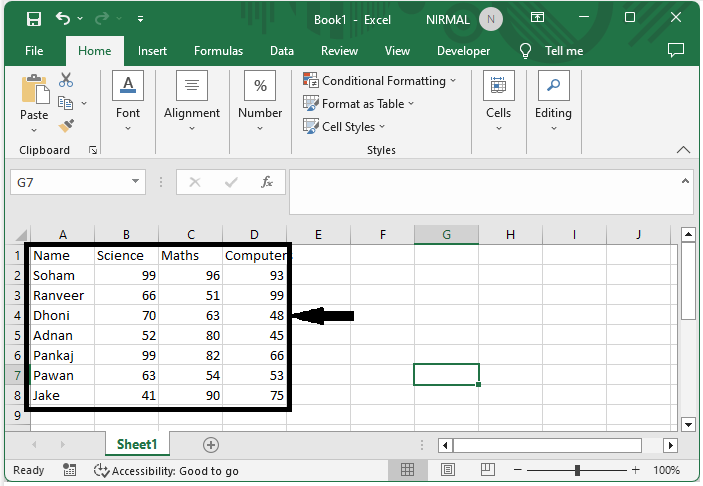
Consider an Excel sheet where the data in the sheet is similar to the below image.
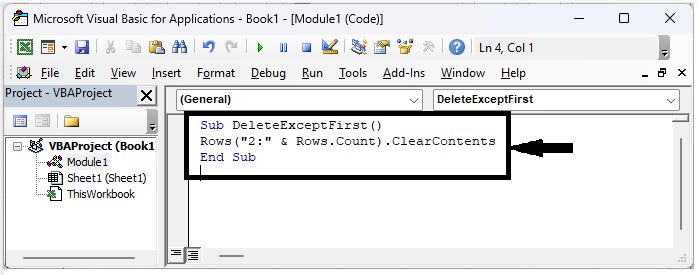
First, right?click on the sheet name and select View Code to open the VBA application. Then, click on Insert, select Module, and copy the below code into the textbox as shown in the below image.
Right click > View code > Insert > Module > Copy.
Code
Sub DeleteExceptFirst()
   Rows("2:" & Rows.Count).ClearContents
End Sub
Step 2
Then save the sheet as a macro?enabled template and click F5 to run the code and complete the task.

Save > F5.
Conclusion
In this tutorial, we have used a simple example to demonstrate how you can delete all rows except the first header row in Excel to highlight a particular set of data.

2K+ Views
