
Article Categories
- All Categories
-
 Data Structure
-
 Networking
-
 RDBMS
RDBMS
-
 Operating System
-
 Java
Java
-
 MS Excel
-
 iOS
iOS
-
 HTML
HTML
-
 CSS
CSS
-
 Android
-
 Python
-
 C Programming
-
 C++
C++
-
 C#
C#
-
 MongoDB
-
 MySQL
MySQL
-
 Javascript
-
 PHP
PHP
-
 Economics & Finance
How to create a parents and kid's profile on YouTube kids' app?
Parents generally give their youngsters their mobile or tablet and let them watch videos via the regular YouTube app using the parent's Google account. Since the children might be exposed to material unsuitable for their age, this might be harmful. YouTube Kids is a kid-friendly app offered by YouTube. It can help parents or guardians avoid the need to constantly check YouTube for inappropriate material and instead allow children to access it.

Parents with signed in accounts may build a unique profile for each kid in their family via YouTube Kids. Each kid can get the most out of the YouTube Kids app by customizing their profile to suit their preferences and recommendations. The YouTube Kids app is installed on any device, and profiles are accessible from there. Only when a parent is signed in to the YouTube Kids app can kid profiles be viewed. Each account can support up to eight profiles.
Each profile is only viewing relevant material appropriate for the age range specified in the profile by the parent or guardian, according to the YouTube Kids app. One of the best features of YouTube Kids is the timer, which lets you set a limit (up to an hour) for your kids to play on the app. Your kids' experience can be customized using Kid Profile. To access their profile, kids can set a secret passcode. In this article, I will show you step by step how you can create a parent and kids? profile on YouTube Kids app. So, let us get started.
How to set up parents and kid?s profile
The step-by-step procedure to make parent and kid profile is as follows ?
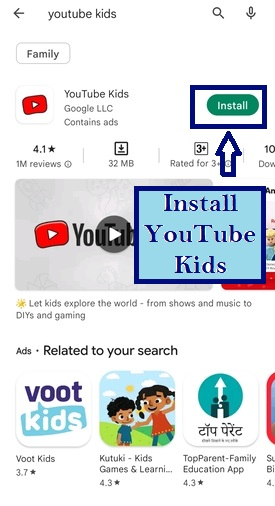
Step 1 ? First, download and install the YouTube Kids app on your device if you do not have it already.
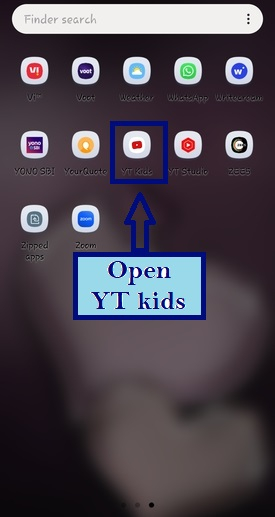
Step 2 ? After installation double tap on the "YouTube Kids" app to launch it.
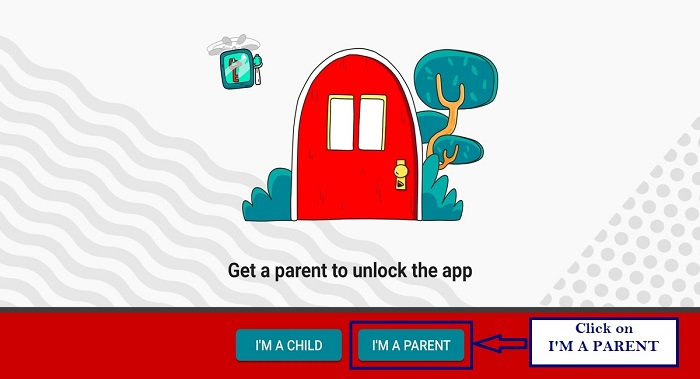
Step 3 ? On the first screen tap on the "I?M A PARENT" button to identify yourself as the parent and to be able to configure profiles for your kids.
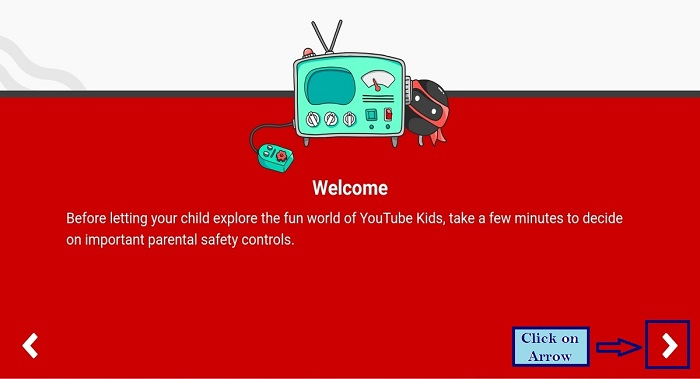
Step 4 ? Next you will be shown a welcome message. Tap on the next arrow to the bottom right of the screen to proceed.
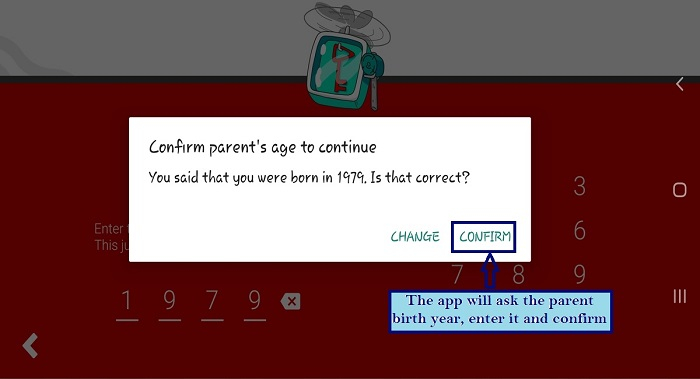
Step 5 ? The app will confirm that you are indeed the parent by asking you to enter your age by letting you enter your birth year. Enter the answer and tap on confirm.
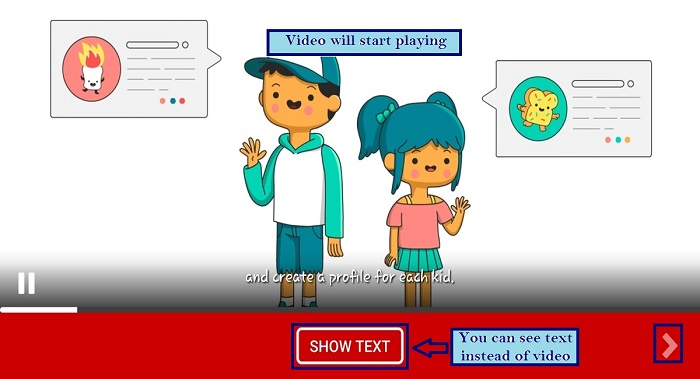
Step 6 ? You will be now briefly introduced to the YouTube kids? app with the help of a short animation. You can also view text instead of video. Tap on the next arrow to continue.
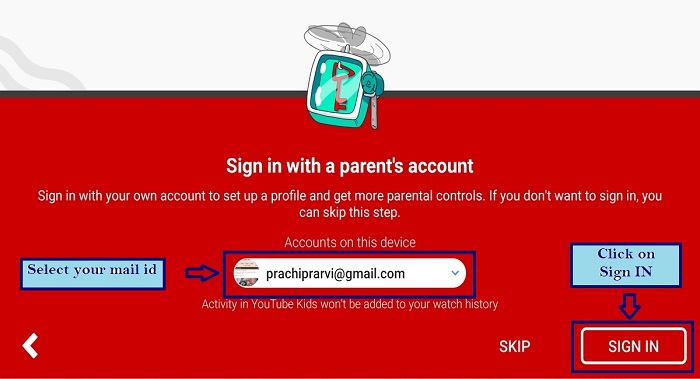
Step 7 ? On the next screen select the Google profile you want to use with this app. Click on Sign In.
Step 8 ? Google will ask you for your consent. Read the text on the screen carefully, tap on the "More" button to reveal the rest of the text. At the bottom of page, you will find DONE. Click on it.
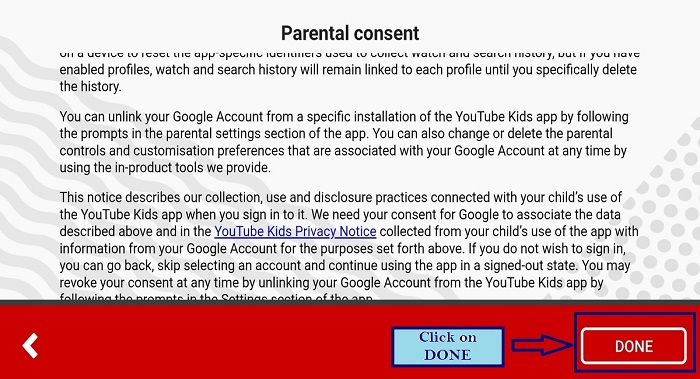
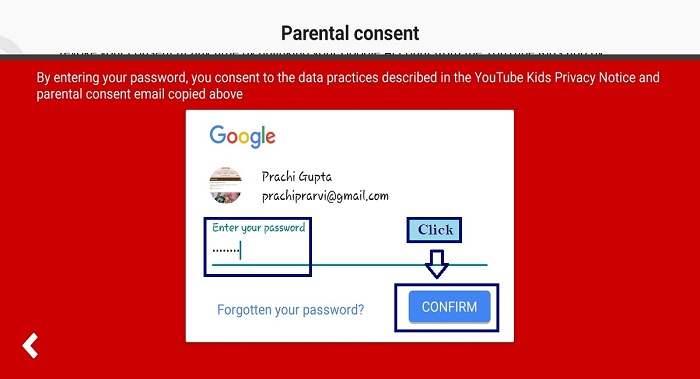
Step 9 ? When you are done reading the text, tap on the "Done" button towards the bottom right of the screen. Next enter the password for your Google account and then tap on the blue "Confirm" button.
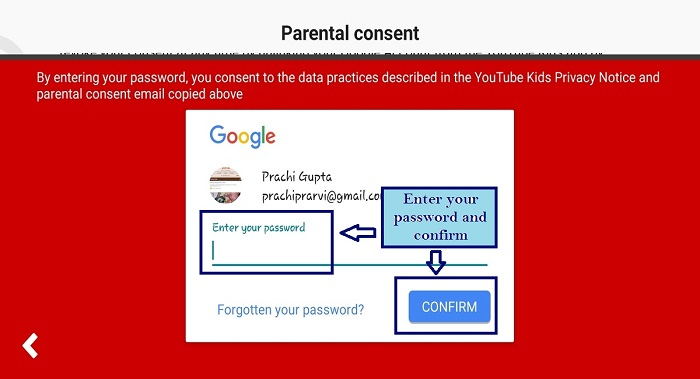
Step 10 ? Click on Confirm
Step 11 ? Create a profile of your kid.
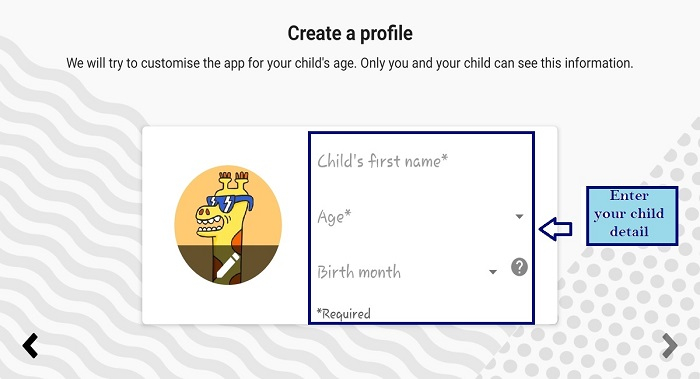
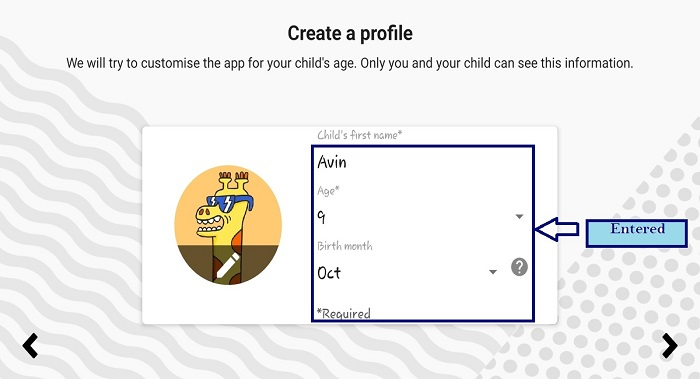
Step 12 ? Now enter the first name, age, and the birth month of your kid in the appropriate text boxes, and then tap on the next arrow button.
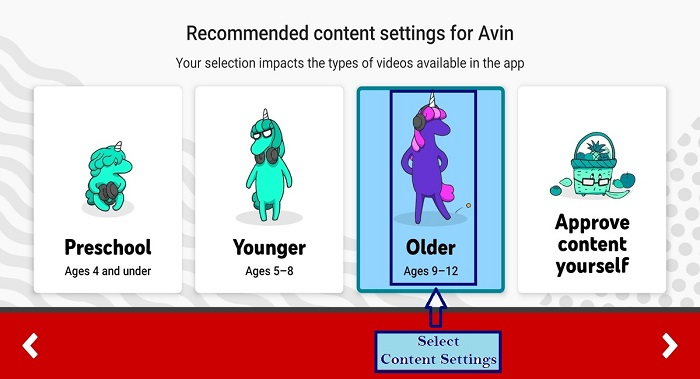
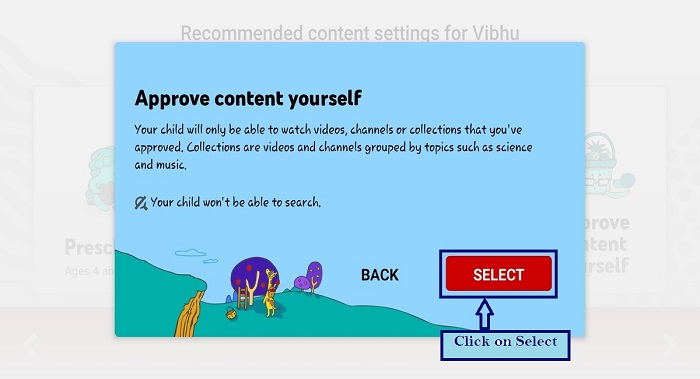
Step 13 ? Select the appropriate age range and recommended content setting that applies to your kid by tapping on the appropriate tab and then tapping on the next arrow button.
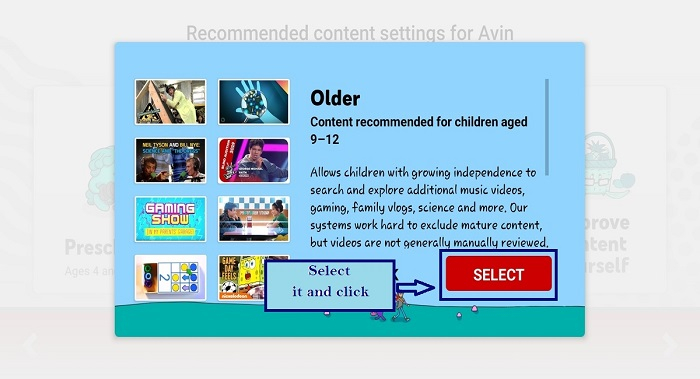
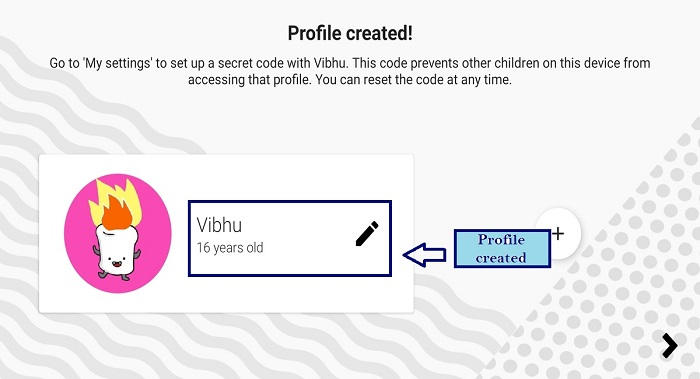
Step 14 ? Confirm your selection by tapping on the red "SELECT" button and now you will be notified that the profile has been created.
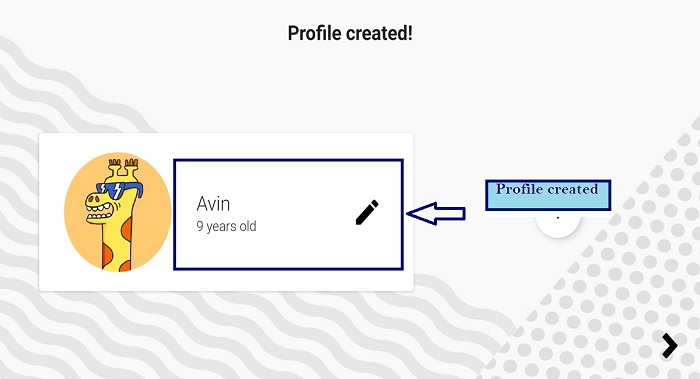
Step 15 ? Profile created. If you wish to change anything in the profile just created tap on the pencil icon to edit it. Tap on the next arrow button to proceed.
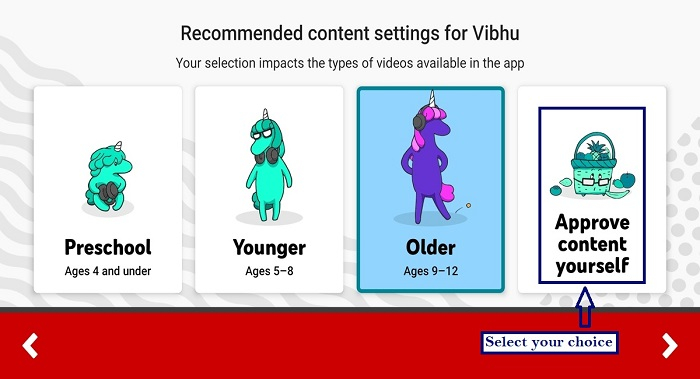
Step 16 ? If you want to make other kid profile, make it.

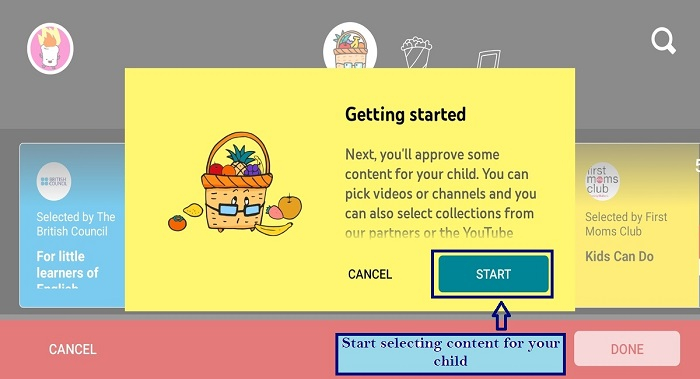
Step 17 ? Select the content settings for your kid.
Step 18 ? Click on select.
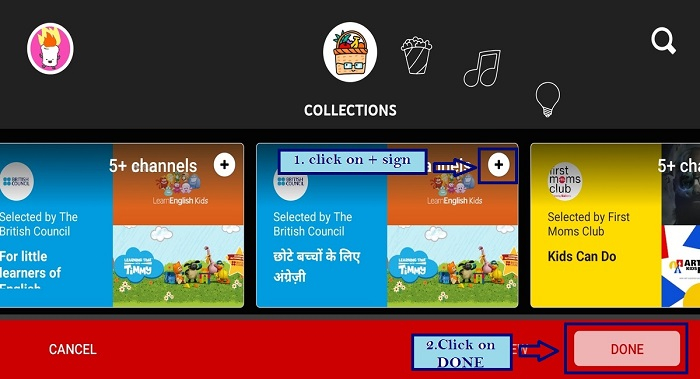
Step 19 ? Start selecting content for your child?s profile.
Step 20 ? Click on Done after selecting videos and channel.
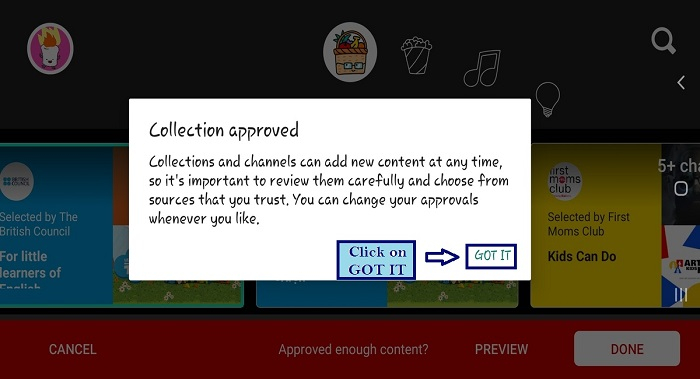
Step 21 ? Click on Got it on the next screen.
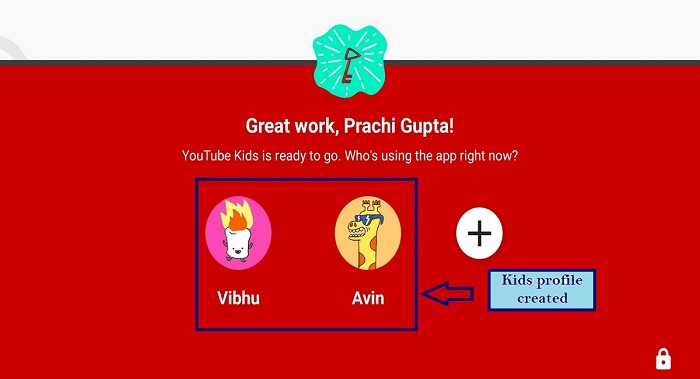
Step 22 ? The profile has been created.
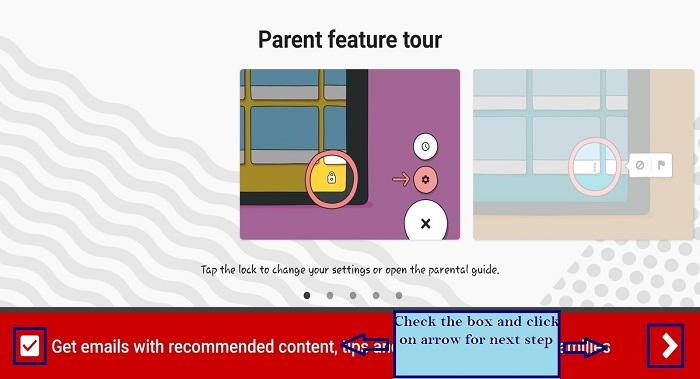
Step 23 ? You will be given a tour of the app and its main features. Tap on the next arrow button.
Step 24 ? On the next screen select the profile you just created by tapping on it and the YouTube Kids app will now start displaying the most appropriate content for this profile.
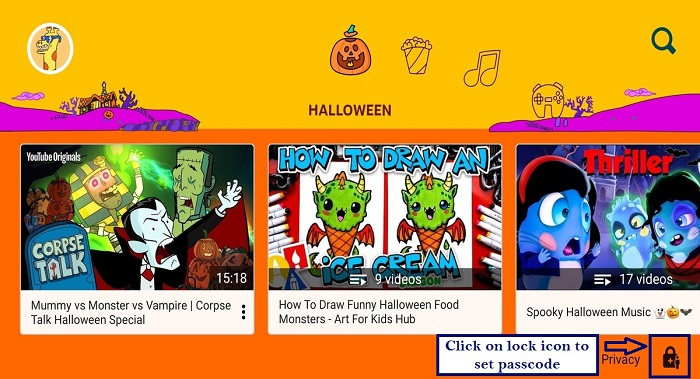
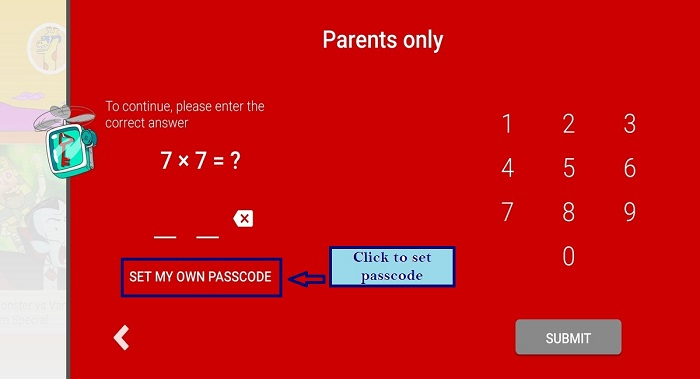
Step 25 ? For setting passcode so that kids don?t change settings, click on the icon of lock.
Step 26 ? Click on set my own passcode.
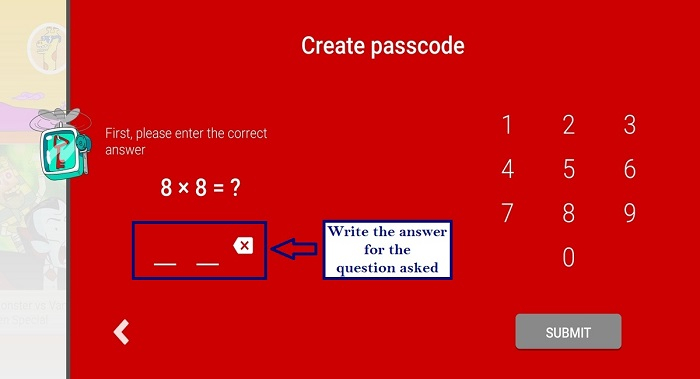
Step 27 ? Input the answer for the question asked.
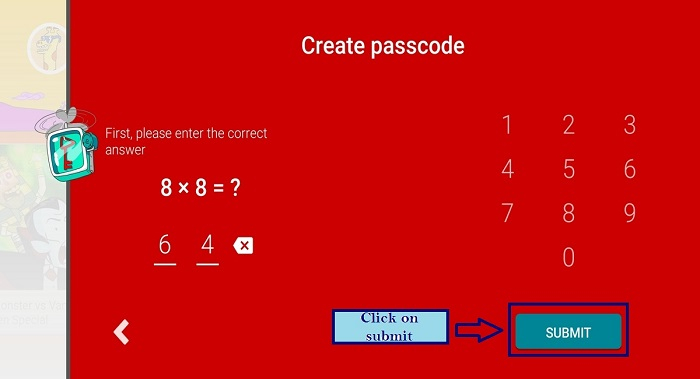
Step 28 ? Click on submit.
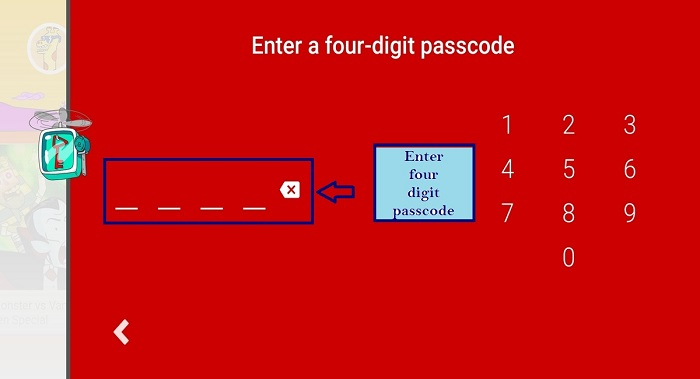
Step 29 ? Enter your 4-digit passcode.
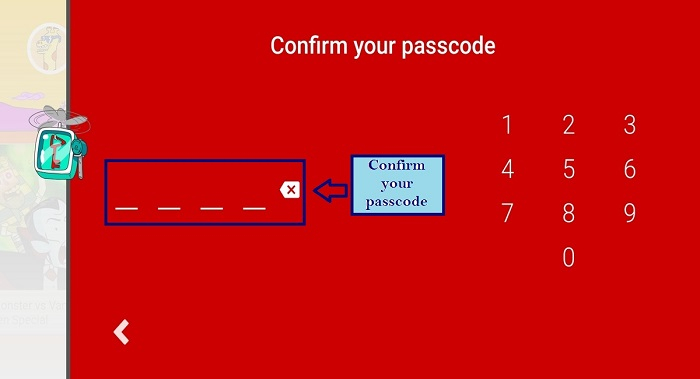
Step 30 ? Confirm your passcode.
Step 31 ? The passcode had been set.
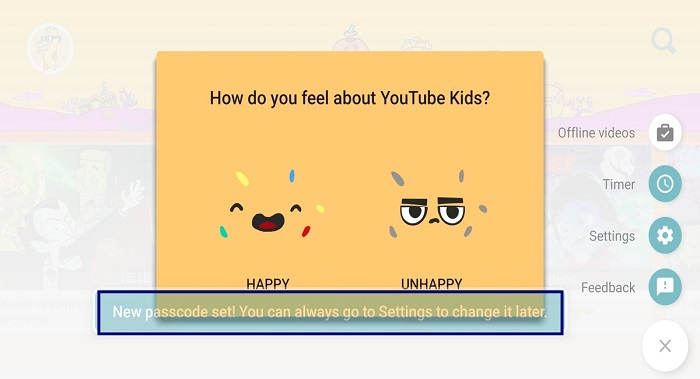
Step 32 ? Parents and kids? profile had been set. Enjoy.
Conclusion
I have demonstrated how to set up the parent and kids? profile on YouTube Kids app based on your kid's age in this article. Although the number of steps required to get there is greater than one, the overall procedure is simple to execute and new profiles may be created in a few minutes.

2K+ Views
