
Article Categories
- All Categories
-
 Data Structure
-
 Networking
-
 RDBMS
RDBMS
-
 Operating System
-
 Java
Java
-
 MS Excel
-
 iOS
iOS
-
 HTML
HTML
-
 CSS
CSS
-
 Android
-
 Python
-
 C Programming
-
 C++
C++
-
 C#
C#
-
 MongoDB
-
 MySQL
MySQL
-
 Javascript
-
 PHP
PHP
-
 Economics & Finance
How to Convert Date Stored as Text to Date in Excel?
When we need to conduct trend analysis, dates act as essential elements. Dates play an important role and you need to make sure that they are conveyed in the best possible way. There are times when dates might end up being formatted as text and saved in the cells.
You may have, for instance, placed a date into a cell in text format, or the date may have been imported or pasted from an external data source as text.
Convert Text Dates with Two-Digit Years by Using Error Checking
In this tutorial, we will discuss two methods to convert text formatted dates to date format.
First Method
If enter dates with two-digit years into cells or you import data into Excel from another source that were previously formatted as text, you might see a small green triangle in the upper-left corner of the cell. According to this error signal, the date is being recorded in text format, as is demonstrated by the following screenshot.
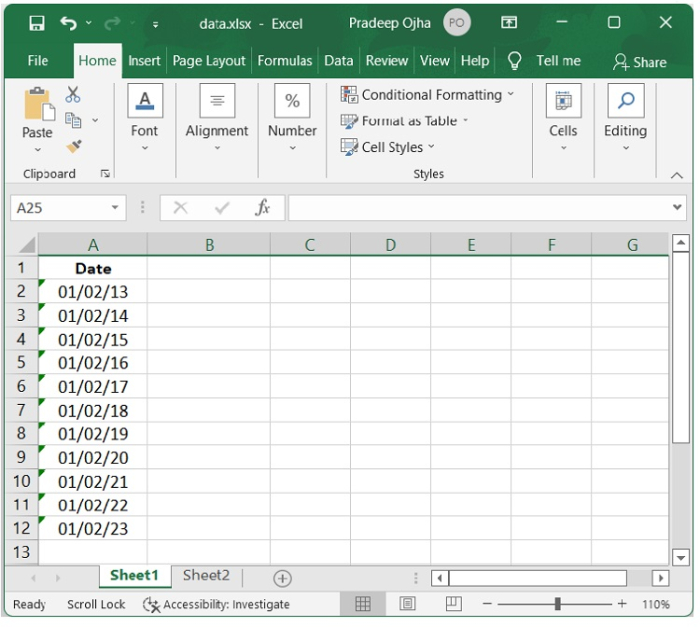
Let’s convert these text dates into standard date format.
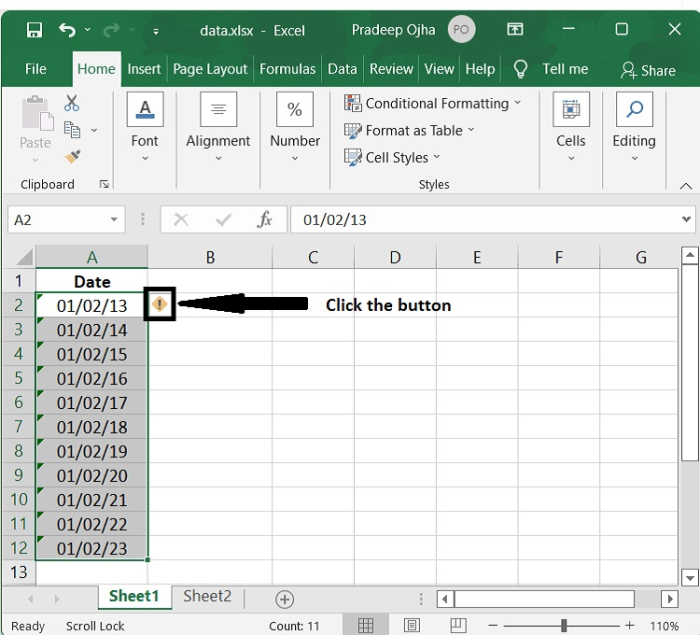
Step 1 Find a single cell or a range of adjacent cells on the worksheet that has an error indicator in the upper-left corner, and select that cell or range of cells.

Step 2 To correct the error, click the button that is displayed close to the cell that has been selected.
Step 3 After clicking on the error option, you will get various options as shown in the following screenshot. Click on either Convert XX to 20XX or Convert XX to 19XX to convert two-digit year text date format to date format as per your requirement.
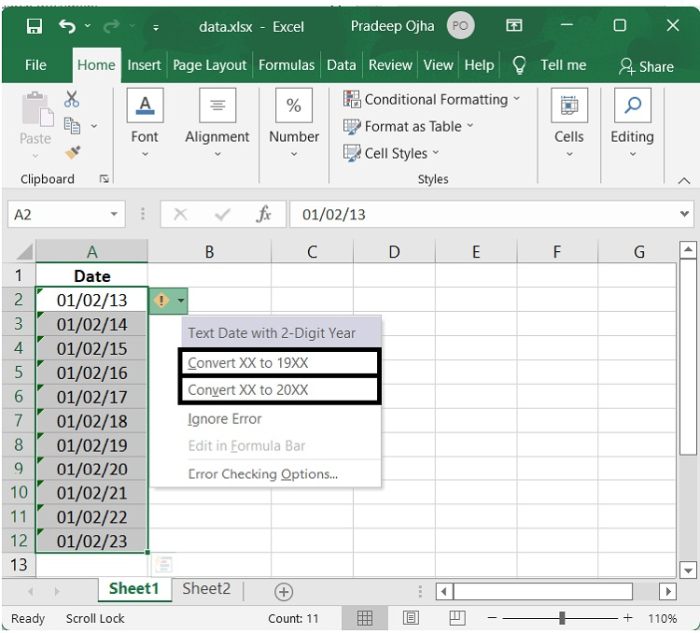
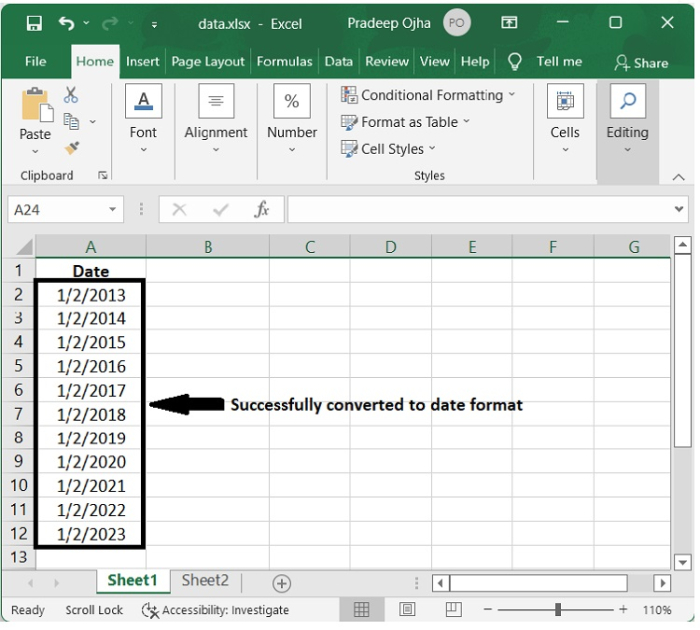
In this case, we have selected Convert XX to 20XX option and we have successfully converted the text dates with two-digit years to standard date format with four-digit years as shown below.
Second Method
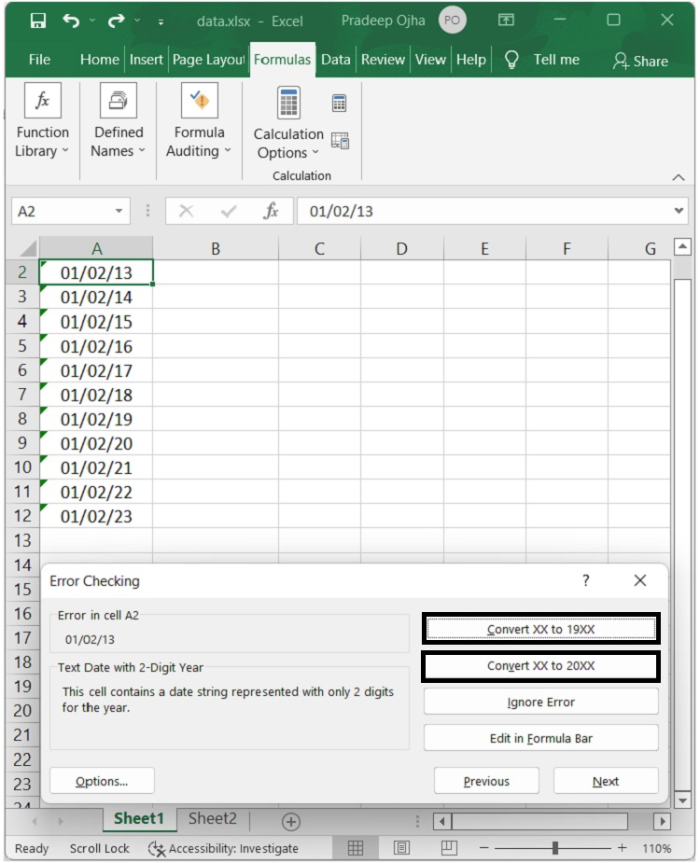
We can also convert the text dates with two-digit years to standard date format with four-digit years using Error Checking utility with the following steps.
Step 1 Open the sheet containing text dates with two-digit years and click on the Formulas option and select Error Checking option present in Formula Auditing group as shown in the screen shot below

Step 2 You can click on either Convert XX to 19XX or Covert XX to 20XX as per your need in the dialog box.
Step 3 Repeat the process of clicking either Convert XX to 19XX or Covert XX to 20XX until all the dates are converted to the standard dates. When all dates are converted it will pop up a dialog box displaying that “The error check is complete for the entire sheet” as shown below
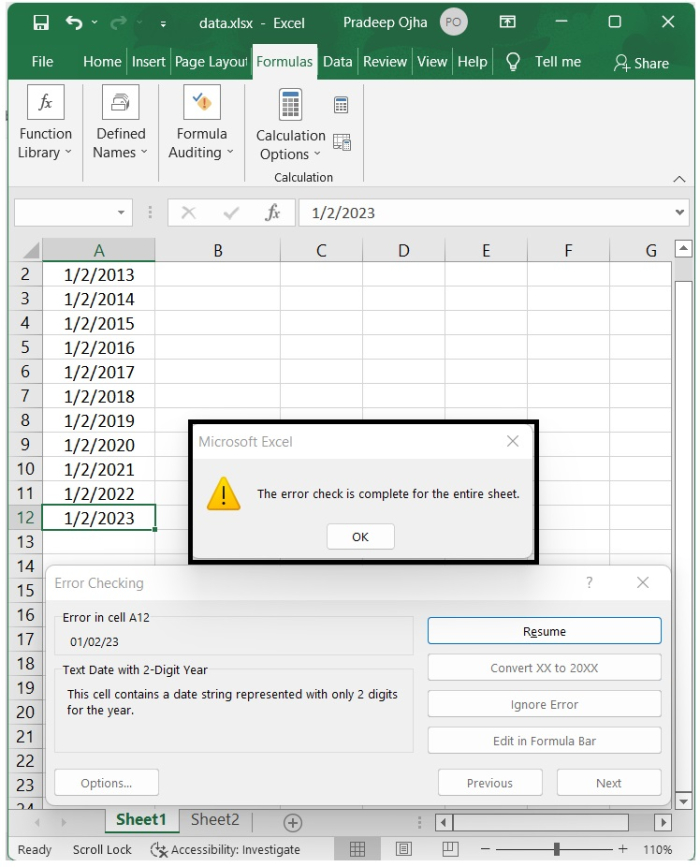
Now standard dates have been applied to all of the text dates that previously only had two digits for the year.
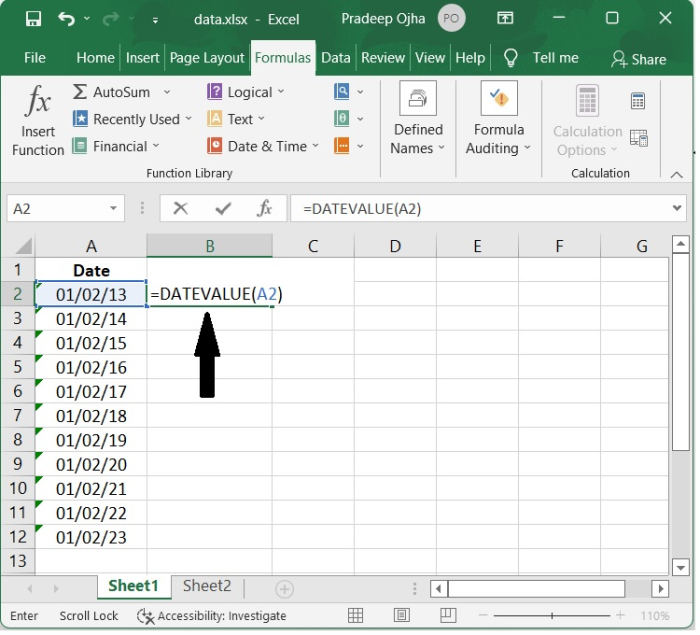
Using DATEVALUE Function
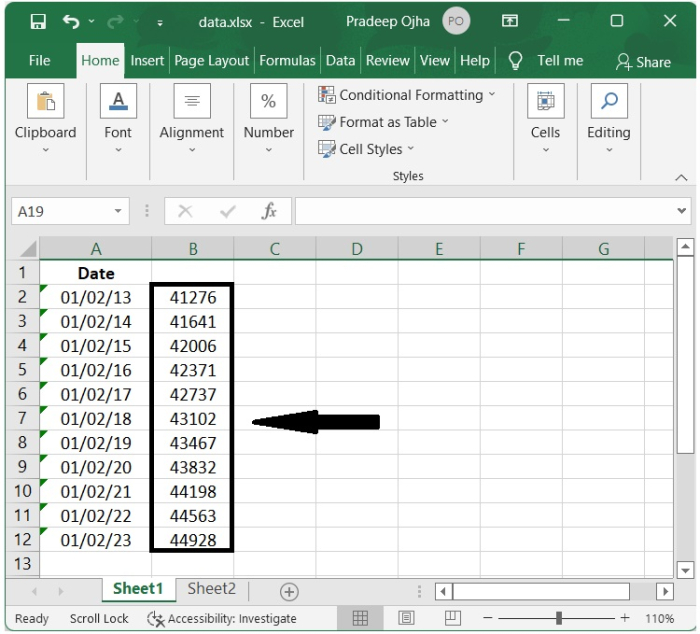
Step 1 Select a blank cell next to the text dates. In the blank cell, type this formula =DATEVALUE (and select the cell containing the text date). Here we have selected blank cell B2 in this case.
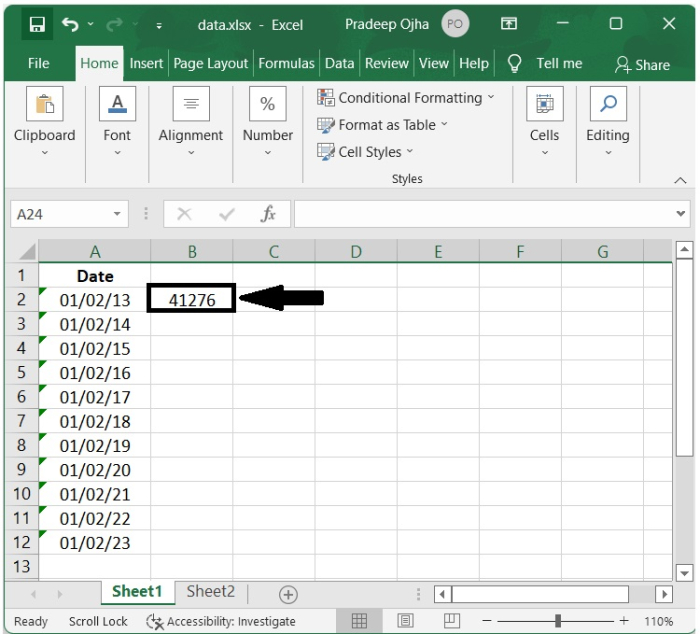
Step 2 Press the Enter key to get a 5-digits number as shown in the screenshot below.
Step 3 Then drag this cell’s AutoFill handle as per your need to convert all the text dates to 5-digits number.
Step 4 Then select all the number cells that are generated from the text dates, and press Ctrl + 1 to open Format Cells dialog box.
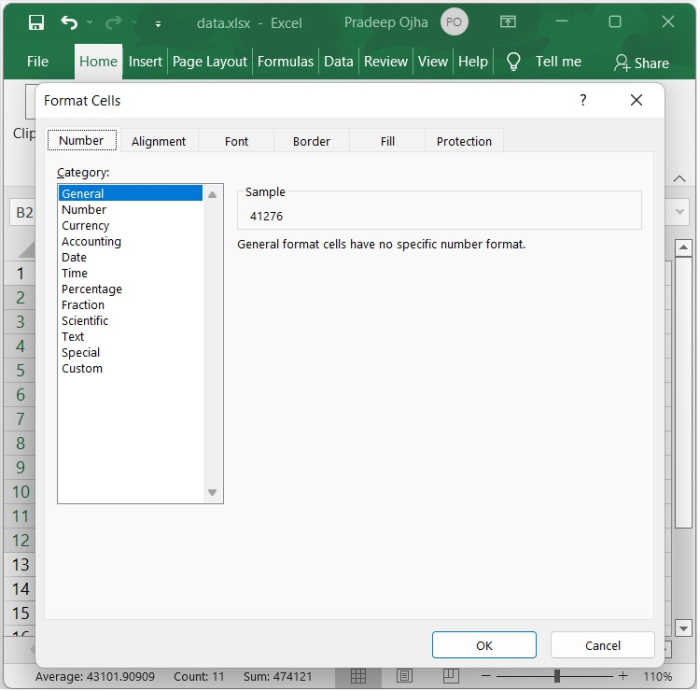
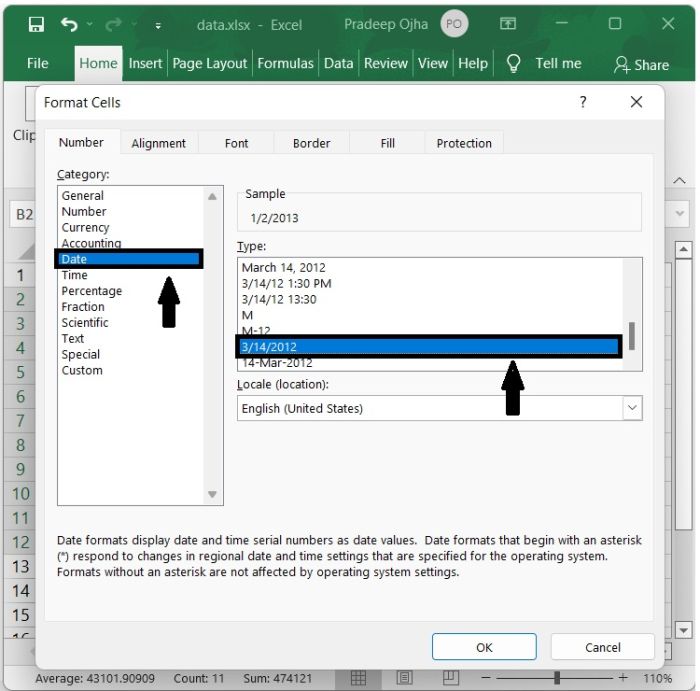
Step 5 In the dialog box select Date option from Category list and select a date format of your need from the Type list in the right section as shown in screenshot below
Step 6 Press OK to convert all these numbers to selected date format.
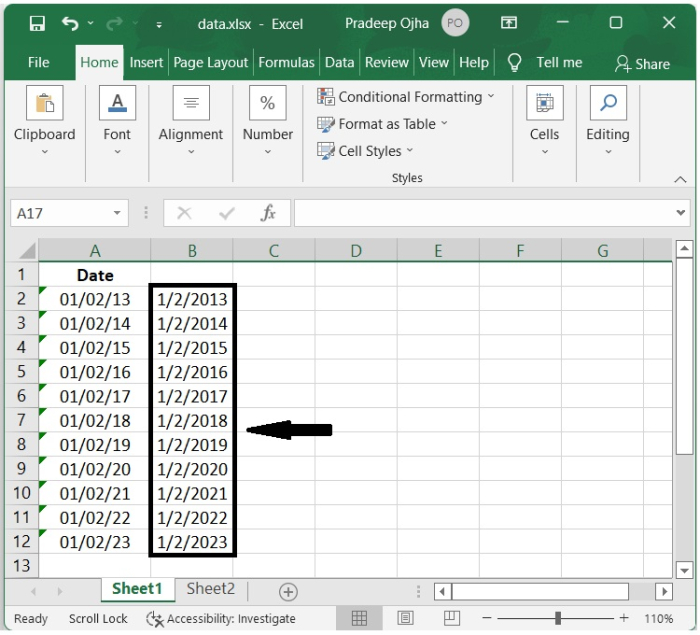
Now you have successfully converted the text date to date format using the DATEVALUE function.
Conclusion
In this tutorial, you learnt two different methods to convert the dates that are stored in text format to date format.

1K+ Views
