
Article Categories
- All Categories
-
 Data Structure
-
 Networking
-
 RDBMS
RDBMS
-
 Operating System
-
 Java
Java
-
 MS Excel
-
 iOS
iOS
-
 HTML
HTML
-
 CSS
CSS
-
 Android
-
 Python
-
 C Programming
-
 C++
C++
-
 C#
C#
-
 MongoDB
-
 MySQL
MySQL
-
 Javascript
-
 PHP
PHP
-
 Economics & Finance
How to Apply a Button to Clear Specific Cells in Excel?
Generally, when we need to edit multiple cells very frequently, we will be selecting the cells using the ctrl command and clicking on delete, but sometimes it can be a problem when we select different cells or when we miss selecting some cells. We can solve this problem by following the process mentioned in this article. This article will help you understand how we can apply a button to clear specific cells in Excel. This process has two parts: creating a button and assigning a macro to the button.
Applying a Button to Clear Specific Cells in Excel
Here we will first insert a shape and then assign a macro to it. Let us see a simple process to see how we can apply a button to clear specifics in cells. As this process can?t be done easily, we need to use the VBA application to complete our process.
Step 1
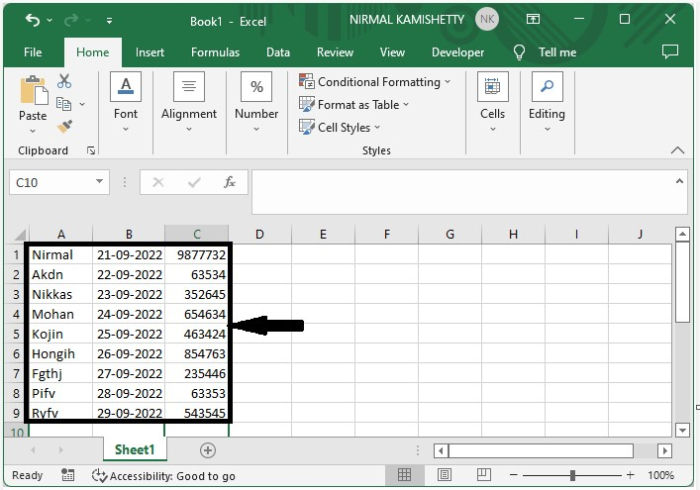
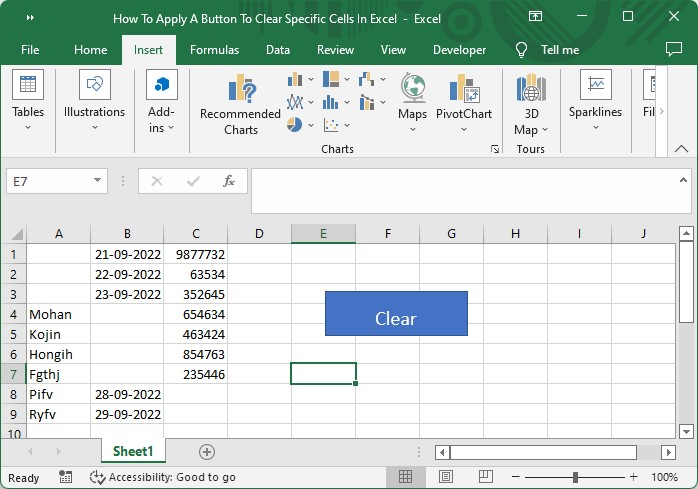
Assume we have an excel sheet with data similar to that shown in the image below.
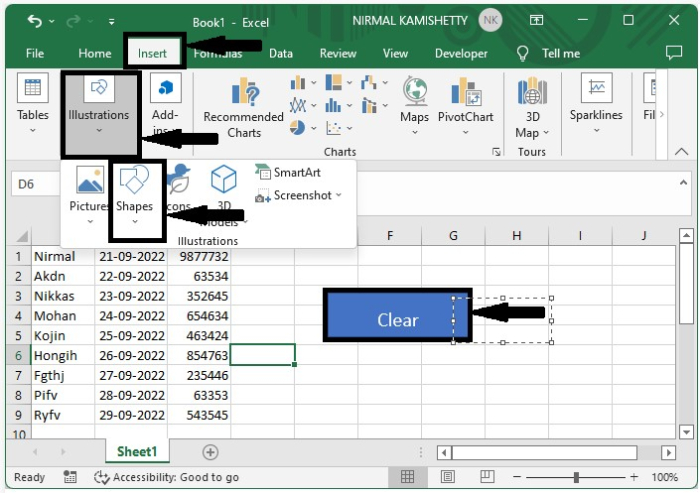
Now to create a button, click on "Insert" and "Illustrations," then select "Rectangle" under "Shapes," then draw a rectangle and name it "Clear," as shown in the below image.
Step 2
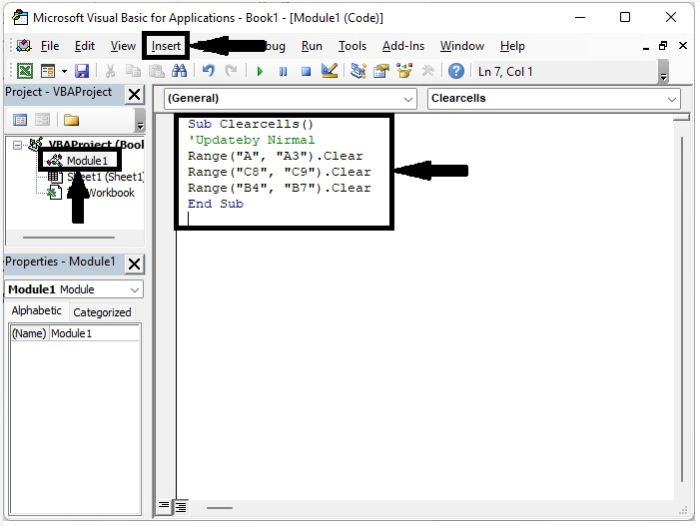
Now, right-click on the sheet name and select view code, then click on insert and select module, then enter the programme in the window as shown in the below image.
Program
Sub Clearcells()
'Updateby Nirmal
Range("A1", "A3").Clear
Range("C8", "C9").Clear
Range("B4", "B7").Clear
End Sub
Then save the sheet and close the VBA application.
Step 3
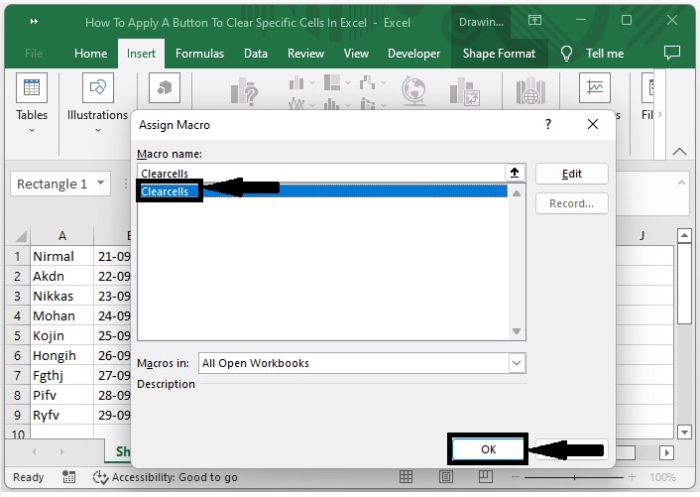
Now right-click on the button and select "Assign macro" from the menu; then, in the pop-up, select the macro name "Clear cells" and click on "OK" to successfully create the "Clear" button.
Step 4
Now, every time we click on the clear button, the data in the cells will be cleared.
Conclusion
In this tutorial, we used a simple example to demonstrate how we can create a "Clear" button in Excel to highlight a particular set of data.

51K+ Views
