 Data Structure
 Networking
 RDBMS
RDBMS Operating System
 Java
Java MS Excel
 iOS
iOS HTML
HTML CSS
CSS Android
 Python
 C Programming
 C++
C++ C#
C# MongoDB
 MySQL
MySQL Javascript
 PHP
PHP
- Selected Reading
- UPSC IAS Exams Notes
- Developer's Best Practices
- Questions and Answers
- Effective Resume Writing
- HR Interview Questions
- Computer Glossary
- Who is Who
How to add an active class on click event in a custom list group in Bootstrap?
We can add an active class to a custom list group item in Bootstrap 4 by using JavaScript or jQuery. This can be achieved by adding an onclick event to each list group item and then using the "addClass" method to add the active class to the item that was clicked. By doing this, we can easily create a custom list group with an active state that changes based on user interaction.
Bootstrap Intro
Bootstrap is a popular open-source front-end development framework.
It helps to create responsive and mobile-first webpages by providing a set of pre-designed CSS and JavaScript components.
Bootstrap provides a grid system for creating responsive and flexible layouts, as well as a wide range of UI components like forms, buttons, navigation, and models.
Bootstrap also has a large collection of pre-designed themes and templates that can be used to quickly create professional-looking websites.
Bootstrap is widely used and supported by a large community, making it easy to find resources, tutorials, and examples online.
Approach 1 (jQuery)
In Bootstrap, you can add an active class to a list group item on click by using JavaScript or jQuery. Here's an example of how you might do this using jQuery ?
<div class="list-group">
   <a href="#" class="list-group-item">Item 1</a>
   <a href="#" class="list-group-item">Item 2</a>
   <a href="#" class="list-group-item">Item 3</a>
</div>
<script>
   $('.list-group-item').click(function() {
      $('.list-group-item').removeClass('active');
      $(this).addClass('active');
   });
</script>
Explanation
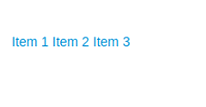
In this example, the jQuery click function is used to attach an event listener to all elements with the class list-group-item. When one of these elements is clicked, the removeClass function is used to remove the active class from all list group items, and the addClass function is used to add the active class to the element that was clicked.
Approach 2 (Vanilla JS)
You can also use plain JavaScript to achieve the same ?
<div class="list-group">
   <a href="#" class="list-group-item" onclick="makeActive(event)">Item 1</a>
   <a href="#" class="list-group-item" onclick="makeActive(event)">Item 2</a>
   <a href="#" class="list-group-item" onclick="makeActive(event)">Item 3</a>
</div>
<script>
   function makeActive(event) {
      var previous = document.getElementsByClassName("active");
      if (previous.length > 0) {
         previous[0].className = previous[0].className.replace(" active", "");
      }
      event.target.className += " active";
   }
</script>
In this example, the onclick attribute is used to attach an event listener to all elements with the class list-group-item. When one of these elements is clicked, the makeActive function is called with the event object passed as an argument. The function first remove the active class from previously selected element, then it add active class to the current element.
Both examples above will add the "active" class to the list group item that is clicked, which will change its appearance according to the Bootstrap styles. Please note that in both examples, you need to make sure that jQuery or Bootstrap is loaded on your page in order for the code to work.
Output


