
Article Categories
- All Categories
-
 Data Structure
-
 Networking
-
 RDBMS
RDBMS
-
 Operating System
-
 Java
Java
-
 MS Excel
-
 iOS
iOS
-
 HTML
HTML
-
 CSS
CSS
-
 Android
-
 Python
-
 C Programming
-
 C++
C++
-
 C#
C#
-
 MongoDB
-
 MySQL
MySQL
-
 Javascript
-
 PHP
PHP
-
 Economics & Finance
How to add a Library Project to an Android Project?
Introduction
Many times while building an android application we use open source libraries which are present on github to add certain functionalities within our application. These libraries can be added in our project by simply specifying the dependency and then we can the functionalities of that library within our application. In this article we will take a look on How to add a Library Project to an Android Project.
Implementation
In this article we will be creating a simple Android Project and inside this project we will be creating a Library Project and using that Library Project within our main Android studio project. We will be displaying the simple text view within our application and displaying a toast message from this library within our application.
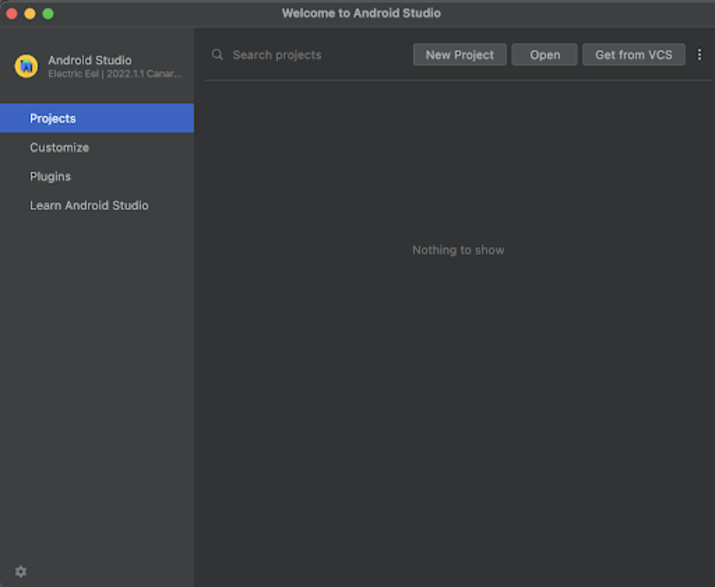
Step 1 : Creating a new project in Android Studio
Navigate to Android studio as shown in below screen. In the below screen click on New Project to create a new Android Studio Project.
After clicking on New Project you will get to see the below screen.
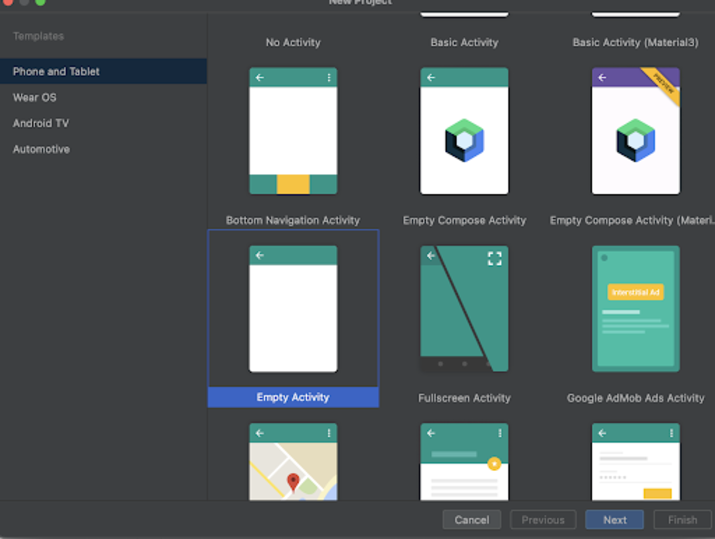
Inside this screen we have to simply select Empty Activity and click on Next. After clicking on next you will get to see the screen below.
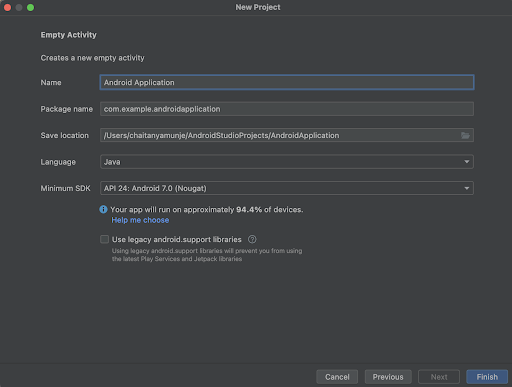
Inside this screen we have to simply specify the project name. Then the package name will be generated automatically.
Note ? Make sure to select the Language as Java.
After specifying all the details click on Finish to create a new Android studio project.
Once our project has been created we will get to see 2 files which are open i.e activity_main.xml and MainActivity.java file.
Step 3 : Working with activity_main.xml
Navigate to activity_main.xml. If this file is not visible. To open this file. In the left pane navigate to app>res>layout>activity_main.xml to open this file. After opening this file. Add the below code to it. Comments are added in the code to get to know in detail.
<?xml version="1.0" encoding="utf-8"?>
<RelativeLayout xmlns:android="http://schemas.android.com/apk/res/android"
   xmlns:tools="http://schemas.android.com/tools"
   android:id="@+id/idRLLayout"
   android:layout_width="match_parent"
   android:layout_height="match_parent"
   android:orientation="vertical"
   tools:context=".MainActivity">

   <!-- text view for displaying  heading of the application -->
   <TextView
      android:layout_width="match_parent"
      android:layout_height="wrap_content"
      android:text="Library Project in Android"
      android:padding="5dp"
      android:textAlignment="center"
      android:textAllCaps="false"
      android:layout_centerInParent="true"
      android:textColor="@color/black"
      android:textSize="18sp"
      android:textStyle="bold" />

</RelativeLayout>
Explanation ? In the above code we are creating a root layout as Relative layout. Inside this relative layout we are creating a text view in which we will be displaying the heading of our application.
Step 4 : Creating a Library Project
Now we will move towards creating a new Library Project within our existing android studio project. For creating a new Library Project. Navigate to File>New>New Module and a dialog will be open. Inside this dialog specify the package name for the library. Similarly specify the library name and make sure to select Android Library in the left window. After you have specified the library name and package name click on Next and then Finish to create your Library Project. Once your Library project has been created you will get to see that project within Project Navigator Tab.
Step 5 : Adding the dependency for the library which you have created
Navigate to app>Gradle Scripts>build.gradle file and inside that in the dependencies section specify the below dependency to add your Library inside the main project.
<span class="pln">implementation project</span><span class="pun">(</span><span class="pln">path</span><span class="pun">:</span><span class="pln"> </span><span class="str">':MyLibrary'</span><span class="pun">)</span>
In the above dependency specify your library name in the place of MyLibrary. Once you have added the above dependency simply sync your project to install it. Now we will use this library within our project.
Step 5 : Creating a new class in our Library Project
Now we have created a library project and we will have to create the java class in our Library project which we will be using to display a toast message within our application. So for that navigate to your library project>java>library package name>Right click on it>New>Java class and name it as PrintMessage and add below code to it. Comments are added in the code to get to know in detail.
package com.example.mylibrary;

import android.content.Context;
import android.widget.Toast;

public class PrintMessage {
   // on below line creating a method to display message
   public void displayToastMessage(String message, Context context) {
      // on below line we are displaying a toast message.
      Toast.makeText(context, message, Toast.LENGTH_SHORT).show();
   }
}
Now we will be using this function inside our applications onCreate method.
Step 6 : Working with MainActivity.java file
Navigate to MainActivity.java. If this file is not visible. To open this file. In the left pane navigate to app>res>layout>MainActivity.java to open this file. After opening this file. Add the below code to it. Comments are added in the code to get to know in detail.
package com.example.androidjavaapp;

import android.os.Bundle;
import androidx.appcompat.app.AppCompatActivity;
import com.example.mylibrary.PrintMessage;

public class MainActivity extends AppCompatActivity {
   @Override
   protected void onCreate(Bundle savedInstanceState) {
      super.onCreate(savedInstanceState);
      setContentView(R.layout.activity_main);

      // on below line we are creating and initializing variable for print message class
      PrintMessage mg = new PrintMessage();

      // on below line calling method to display toast message
      mg.displayToastMessage("Hello World", this);
   }
}
Explanation ? In the above code we can see the onCreate method inside which we are inflating the layout file which we have to display. After that onCreate method we are creating a variable for the PrintMessage class which we have created inside our Library Project. Then we are calling a displayToastMessage method which inside which we will be passing the message which we have to display along with the context of it.
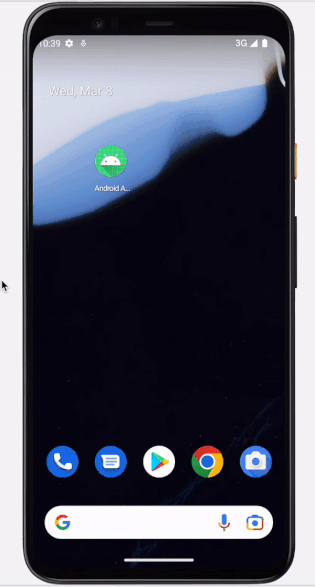
After adding the above code now we have to simply click on the green icon in the top bar to run our application on a mobile device.
Note ? Make sure you are connected to your real device or emulator.
OutputM
Conclusion
In the above article we have taken a look at How we can create a Library Project in Android Studio and How we can use this Library Project to use it inside our Android Studio Project.

963 Views
