
Article Categories
- All Categories
-
 Data Structure
-
 Networking
-
 RDBMS
RDBMS
-
 Operating System
-
 Java
Java
-
 MS Excel
-
 iOS
iOS
-
 HTML
HTML
-
 CSS
CSS
-
 Android
-
 Python
-
 C Programming
-
 C++
C++
-
 C#
C#
-
 MongoDB
-
 MySQL
MySQL
-
 Javascript
-
 PHP
PHP
-
 Economics & Finance
How to add a digital signature in Excel?
MS-Excel has features that you can use to add passwords to your documents, configure auto-recovery parameters, and add signature lines. When a signature is added to an Excel document, no changes to the document are permitted without invalidating the signature. This lets you and others know that a document has been reviewed and approved by the signer.
Adding the Signature Line
In Excel, you can add a signature that is either visible or not visible. You can also just make a line for people to sign, which will let them give their approval. Follow the steps given below.
Step 1
Open the worksheet to which you want to add a digital signature and make sure that no more changes can be made to the information.
Step 2
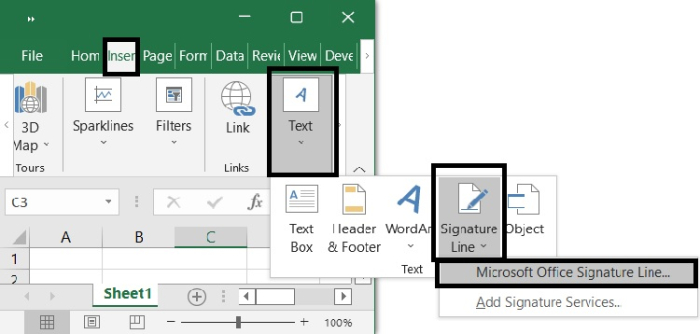
Choose Microsoft Office Signature Line from the drop-down menu that appears when you choose Insert > Text > Signature Line on the ribbon. According to what is seen in the screenshot below
Step 3
(Digital signature setup)
A dialogue window with the heading Signature Setup will appear. Please provide the information that you would want to appear in the blanks.

Suggested signer ? The name of the recipient (If you are going to sign this paper, your name will appear here.).
Suggested signer?s title ? The recipient's occupational designation, such as "manager" or "CEO."
Suggested signer?s e-mail address ? The recipient's e-mail address if the message was sent electronically.
Instructions to the signer ? Any specific instructions that you would want to be included.
Step 4
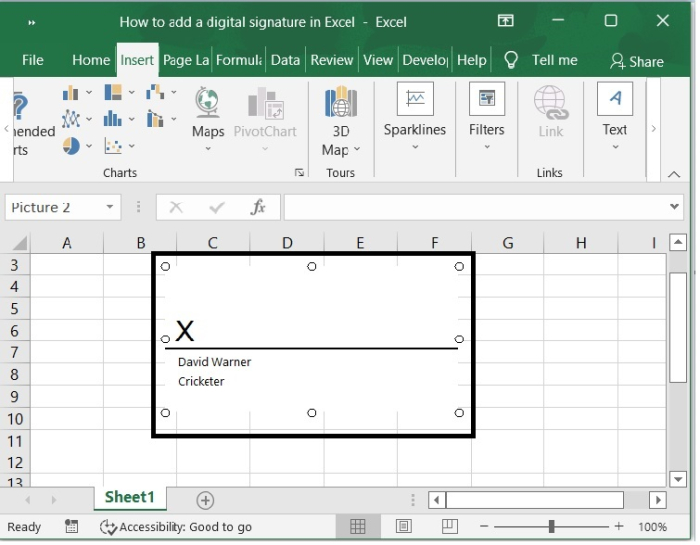
Then click OK to close the Signature Setup dialog box. Then you can see Excel adds a signature line graphic object in the vicinity of the cell you place the cursor with a big X that contains your name and title. See the screenshot below.
Conclusion
In this tutorial, we used an example to demonstrate how you can add a Digital signature in Excel.

638 Views
