
Article Categories
- All Categories
-
 Data Structure
-
 Networking
-
 RDBMS
RDBMS
-
 Operating System
-
 Java
Java
-
 MS Excel
-
 iOS
iOS
-
 HTML
HTML
-
 CSS
CSS
-
 Android
-
 Python
-
 C Programming
-
 C++
C++
-
 C#
C#
-
 MongoDB
-
 MySQL
MySQL
-
 Javascript
-
 PHP
PHP
-
 Economics & Finance
How to add a border to cells by using IF statement in Excel
To add a border around the cells is easy and handy for most Excel users, however how about including a border to cells with the aid of the usage of the IF function. In this article, you will learn how to add a border to cells via an IF statement in Excel.
Add a Border to Cell Using the IF Statement
To add a border to cells through the IF statement, you can observe the effective Conditional formatting feature, and then add the IF statement to its rule
Step 1
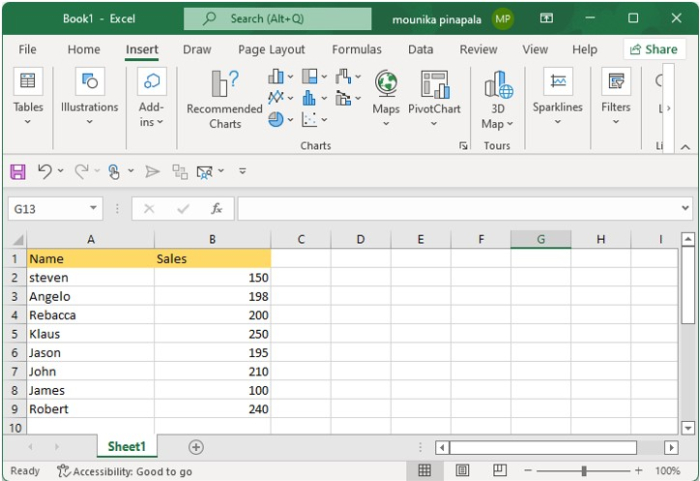
For example, consider you have a range of cells and you want to add a border to the cell if it is greater than 200.
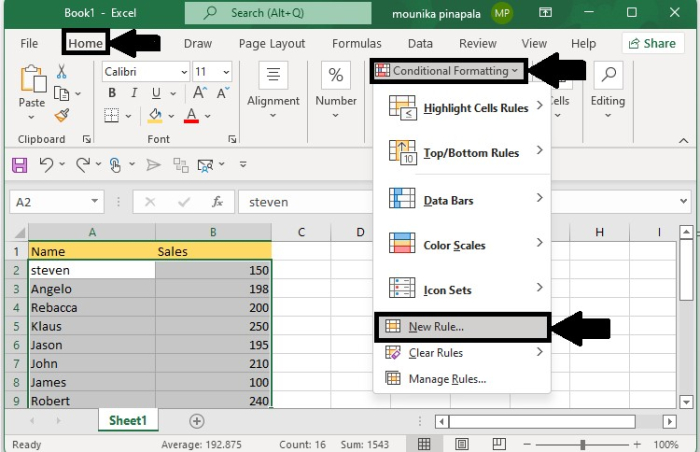
Step 2
Select all the names and sales in the Excel workbook, and click Home > Conditional formatting > New Rule as shown below.
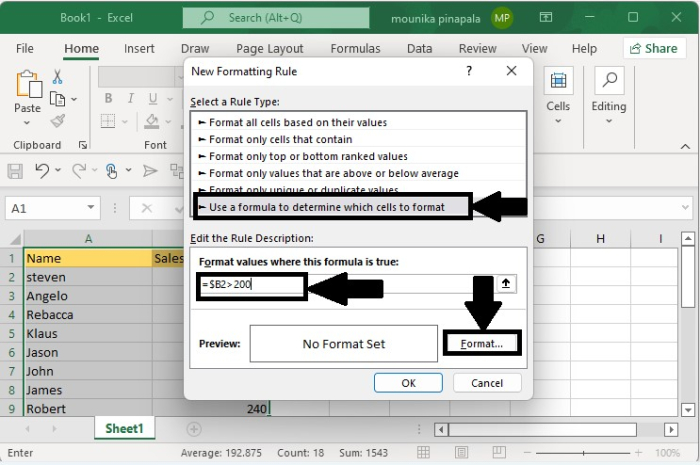
Step 3
Then in the New Formatting Rule dialog, select Use a formula to determine which cells to format and type the formula =$B2>200 into the Format values where this formula is true textbox as shown in the below screenshot.
In the formula, B2 is the first cell of the range that you want to add a border by IF function.
Step 4
Click Format to open the Format Cells dialog box, click the Border tab, and then specify the border style you desire.

Step 5
Click OK to close the dialog boxes. You will notice that those cells with a value greater than 200 will have a border around them, as shown in the following screenshot.
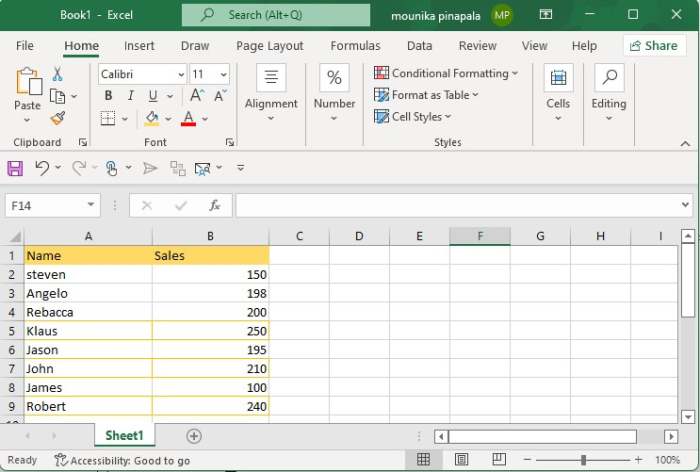
Since I have selected both the Name and Sales it has bordered names and sales if you want only sales to be boarded then you can select only sales.
Likewise, if you want to border any name or specific you can enter the formula =$A4="Klaus" and repeat the above steps. The border will be placed around the name Klaus.

6K+ Views
