
Article Categories
- All Categories
-
 Data Structure
-
 Networking
-
 RDBMS
RDBMS
-
 Operating System
-
 Java
Java
-
 MS Excel
-
 iOS
iOS
-
 HTML
HTML
-
 CSS
CSS
-
 Android
-
 Python
-
 C Programming
-
 C++
C++
-
 C#
C#
-
 MongoDB
-
 MySQL
MySQL
-
 Javascript
-
 PHP
PHP
-
 Economics & Finance
How many types of intent are in Android?
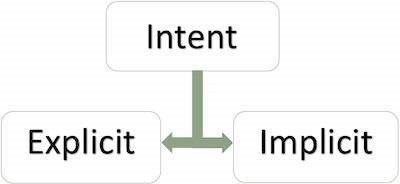
Before getting into types of intent, we should know what is an intent?. Intent is to perform an action. It is mostly used to start activity, send broadcast receiver, start services and send message between two activities. There are two intents available in android as Implicit Intents and Explicit Intents.
Explicit Intent − It going to connect the internal world of an application such as start activity or send data between two activities. To start new activity we have to create Intent object and pass source activity and destination activity as shown below −
Intent send = new Intent(MainActivity.this, SecondActivity.class);
startActivity(send);
And we should declare about second activity in Manifest.xml file or else it going to show run time exception. sample declaration is as shown below.
<activity android:name = ".SecondActivity"></activity>
Implicit Intents − It going to connect with out side application such as call, mail, phone,see any website ..etc. In implicit intent we have to pass an action using setAction() as shown below example.
Intent i = new Intent();
i.setAction(Intent.ACTION_VIEW);
i.setData(Uri.parse("www.tutorialspoint.com"));
startActivity(i);
In the above example we are giving action as view. so it going to show something which we have given in setData method.
setData() - This method is only to specifies a URI.
setType()- This method specifies a MIME type.
setDataAndType()- This method i specifies both a URI and a MIME type.
This example demonstrate about how to integrate use explicit intent.
Step 1 − Create a new project in Android Studio, go to File ⇒ New Project and fill all required details to create a new project.
Step 2 − Add the following code to res/layout/activity_main.xml.
<?xml version = "1.0" encoding = "utf-8"?>
<android.support.constraint.ConstraintLayout
xmlns:android = "http://schemas.android.com/apk/res/android" xmlns:tools = "http://schemas.android.com/tools" android:layout_width = "match_parent"
   android:layout_height = "match_parent">
<LinearLayout
   android:layout_width = "match_parent"
   android:layout_height = "match_parent"
   android:gravity = "center"
   android:orientation = "vertical">
   <Button
      android:layout_width = "wrap_content"
      android:layout_height = "wrap_content"
      android:text = "Start website"
      android:id = "@+id/send"/>
</LinearLayout>
</android.support.constraint.ConstraintLayout>
Step 3 − Add the following code to src/MainActivity.java
import android.content.Intent;
import android.net.Uri;
import android.os.Bundle;
import android.support.v7.app.AppCompatActivity;
import android.view.View;
import android.widget.Button;
public class MainActivity extends AppCompatActivity {
   @Override
   protected void onCreate(Bundle savedInstanceState) {
      super.onCreate(savedInstanceState);
      setContentView(R.layout.activity_main);
      Button send = findViewById(R.id.send);
      send.setOnClickListener(new View.OnClickListener() {
         @Override
         public void onClick(View v) {
            Intent i = new Intent();
            i.setAction(Intent.ACTION_VIEW);
            i.setData(Uri.parse("https://www.tutorialspoint.com"));
            startActivity(i);
         }
      });
   }
}
Step 4 − To start website, It required internet permission.Add an internet permission in AndroidManifest.xml as shown below.
<?xml version = "1.0" encoding = "utf-8"?>
<manifest xmlns:android = "http://schemas.android.com/apk/res/android"
   package = "com.example.andy.myapplication">
<uses-permission android:name = "android.permission.INTERNET"/>
   <application
      android:allowBackup = "true"
      android:icon = "@mipmap/ic_launcher"
      android:label = "@string/app_name"
      android:roundIcon = "@mipmap/ic_launcher_round"
      android:supportsRtl = "true"
      android:theme = "@style/AppTheme">
      <activity android:name = ".MainActivity">
         <intent-filter>
            <action android:name = "android.intent.action.MAIN" />
            <category android:name = "android.intent.category.LAUNCHER" />
         </intent-filter>
      </activity>
   </application>
</manifest>
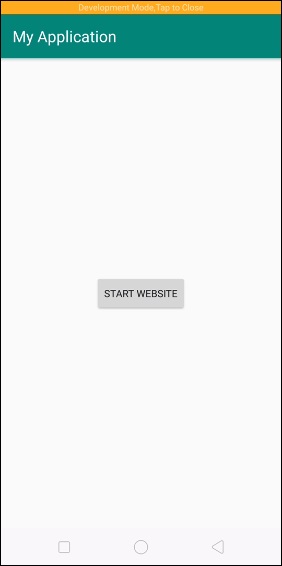
Let's try to run your application. I assume you have connected your actual Android Mobile device with your computer. To run the app from android studio, open one of your project's activity files and click Run ![]() icon from the toolbar. Select your mobile device as an option and then check your mobile device which will display your default screen −
icon from the toolbar. Select your mobile device as an option and then check your mobile device which will display your default screen −
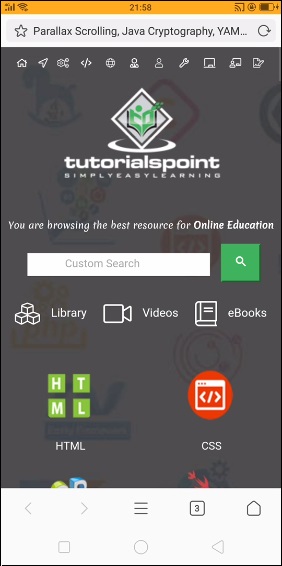
Now click on start website button, it will redirect to tutorialspoint website as shown below.
Click here to download the project code

20K+ Views
