
Article Categories
- All Categories
-
 Data Structure
-
 Networking
-
 RDBMS
RDBMS
-
 Operating System
-
 Java
Java
-
 MS Excel
-
 iOS
iOS
-
 HTML
HTML
-
 CSS
CSS
-
 Android
-
 Python
-
 C Programming
-
 C++
C++
-
 C#
C#
-
 MongoDB
-
 MySQL
MySQL
-
 Javascript
-
 PHP
PHP
-
 Economics & Finance
How do I install selenium latest version?
We can install the Selenium latest version in our machine. It involves the below step by step processes −
Java Installation.
Eclipse IDE installation.
Selenium Webdriver installation.
Selenium is supported by multiple languages, here we shall discuss Selenium installation with Java.
Navigate to the link −https://www.oracle.com/java/technologies/downloads/?er=221886 and then select JDK Download link. All the list of downloadable links get populated under the Java SE Development Kit Section.
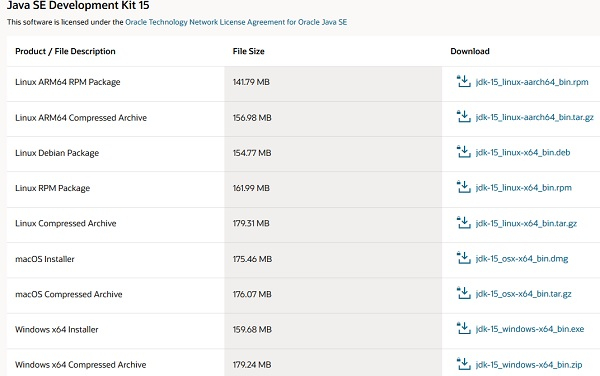
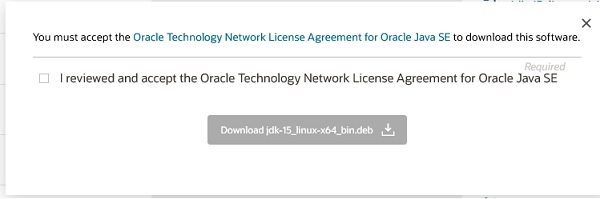
Next choose the download link as per the system configuration and accept the license agreement checkbox.
Navigate to Start and find the System and navigate to it. Then select Advanced System Settings. Next under Advanced Tab click on Environment Variables.
Under the System variables, click on New and type variable name as JAVA_HOME and enter the Java installation directory path as per our system.
Next we have to do the configuration of the environment variables. Select Path from the System Variables, then click on Edit. Inside the Variable value add %JAVA_HOME%bin and then click on OK.
Run the command java-version to confirm successful installation of Java.

Next we shall install the Eclipse IDE in the system by following these steps one by one −
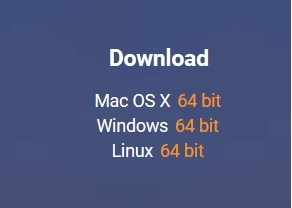
Navigate to the link − https://www.eclipse.org/downloads/packages/ and select the download link as per the system configuration.
As the download is complete, the zipped file is to be extracted and saved in a directory.
Click on the eclipse.exe file residing inside the folder.

Next we shall install the Selenium in the system by following these steps one by one −
Navigate to the link − https://www.selenium.dev/ and click on the Download button appearing below Selenium WebDriver section.
From the Selenium Server section select the latest stable version of Selenium link available. The selenium-server-standalone jar should be downloaded and saved to a location.
Next move to the Selenium Client & WebDriver Language Bindings section and click on the Download link beside the Java.
After the download is completed, the zip file is extracted and saved in a folder.
Then we have to download a browser driver available below in the same page under the Browsers section −

All the latest versions of the browser drivers shall be available. We have to select the version which is compatible with the system, save it to a location and then proceed.
A new project is to be created in the Eclipse IDE and all the external jars have to be added by the following the below steps −
Create a new project in Eclipse from the File menu.
Provide a name of the project and then a class should be created.
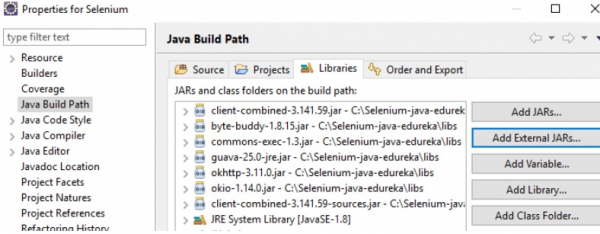
Finally we have to add all the external libraries to the project [Select Project → Build Path → Configure Build Path → click on Add External Jars → select Apply and Close].

502 Views
