- GoogleTest - Home
- GoogleTest - Overview
- GoogleTest - Environment Setup
- GoogleTest - Running First Test
- GoogleTest - Nomenclature
- GoogleTest - Disabling Test
- GoogleTest - Assertions
- GoogleTest - Death Tests
- GoogleTest - Test Fixtures
- GoogleTest - Event Listeners
- GoogleTest Useful Resources
- GoogleTest - Quick Guide
- GoogleTest - Useful Resources
- GoogleTest - Discussion
GoogleTest - Quick Guide
GoogleTest - Overview
GoogleTest or gtest is a testing framework developed by Google. It is mainly used for unit testing of C++ programs. It is based on the xUnit architecture, which is a widely adopted framework for writing and executing automated tests. This tutorial explains the basics as well as advanced topics related to GoogleTest such as its nomenclature, assertions, test fixtures and much more.
Purpose of GoogleTest
Focus on Unit Testing − GoogleTest primarily focuses on unit testing of the component of an application. A unit of code is to be tested in isolation to check if it is functioning as per the requirements.
Improved Code Quality − GoogleTest provides a structured way to write unit tests. Makes it easy for developers to catch bugs early in developement stage and allows refactoring of code with confidence.
Core Concepts of GoogleTest
Assertions − GoogleTest provides assertions to check success or failure conditions. Following are important assertions −
ASSERT_* macros − Used to identify fatal failures. If an ASSERT_ fails, current function test will abort immidiately.
EXPECT_* macros − Used to identify non-fatal failures. If an EXPECT_ fails, current function test continues and allow to find further failures.
Examples − ASSERT_TRUE(condition), ASSERT_NEAR(value1, value2, abs_error), EXPECT_EQ(expected, actual), EXPECT_NE(value1, value2)
TEST() macro − defines a function contains assertions to verify a behavior.
Syntax
TEST(TestSuiteName, TestName)
Where TestSuiteName is name of the group carrying tests and TestName is a unique test name with the test suite.
TEST_F() macro − Used to define a test fixture. When we need to perform multiple tests on same object, we can define and use test fixtures.
Syntax
TEST_F(FixtureName, TestName)
Test Suites − Test suites is a set of related tests often sharing common setup logic using test fixtures.
Automatic Test Discovery − gtest automatically registers the test cases defined in test executables and runs them. Manually listing is not required.
Key Features of GoogleTest
Platform Independent − gtest works seemlessly on all major platforms including linux, macOS and windows and different types of compilers.
Informative Failure Messages − gtest produces informations like file name, line number, values used in assertions when test cases fails. This helps greatly while debugging the failed test cases.
Terminal Tests − In gtest, we can write test cases which if failed, terminates the process using ASSERT_* macros.
Value-Parameterized Tests −gtest allows to pass different values to same test test making it easier to test different values of inputs.
Type-Parameterized Tests − In case of templates testing, gtest type passing feature can be used to create type parameterized tests.
XML Test Report Generation − gtest test reports can be generated in XML Formats making integration easy with Continous Integration,CI systems.
Integration with Google Mock (gmock) − gtest is often used in conjunction with gmock and provides a seemless integration.
Command-Line Arguments − gtest comes with various command-line flags to control test execution like filtering the tests, repeating tests, breaking on failure, output results and so on.
GoogleTest - Environment Setup
This tutorial will guide you through whole process of setting up your own environment for running test cases in GoogleTest framework. It is important to configure all the necessary dependencies in one place before running your tests. For this, please follow the steps mentioned in this tutorial.
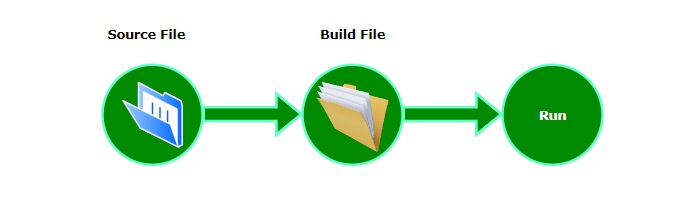
There are two primary ways in which you can run your tests on GoogleTest, which are Bazel and CMake. In this tutorial, we will use the CMake. Let's start installing CMake in your local system.
Setting Up CMake for GoogleTest
The CMake is a cross-platform and open-source software which is used to generate build files of another systems. On integrating CMake with GoogleTest, you will be able to perform automated testing within the build process. Here is the step-by-step guide to install and configure CMake for GoogleTest −
Step 1
Search CMake on your favorite browser or go to this link: https://cmake.org/download/. Download the binary distribution according to your system configuration.
Step 2
Locate the downloaded folder in your system and double click on it to start the installation process.
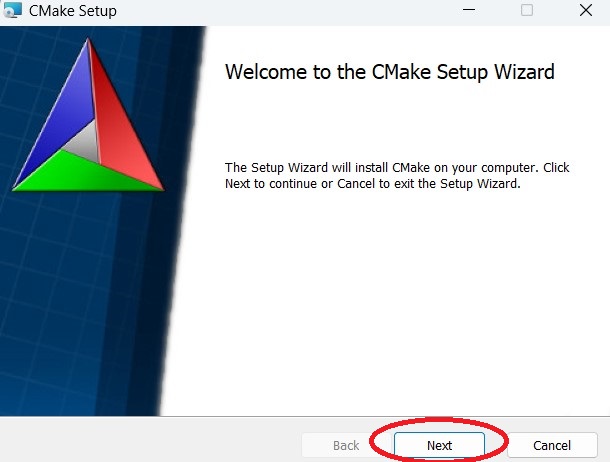
Step 3
On double click, following window will pop-up. Here, click the next button.
Step 4
Accept the terms in License Agreement by clicking on the checkbox and click next.

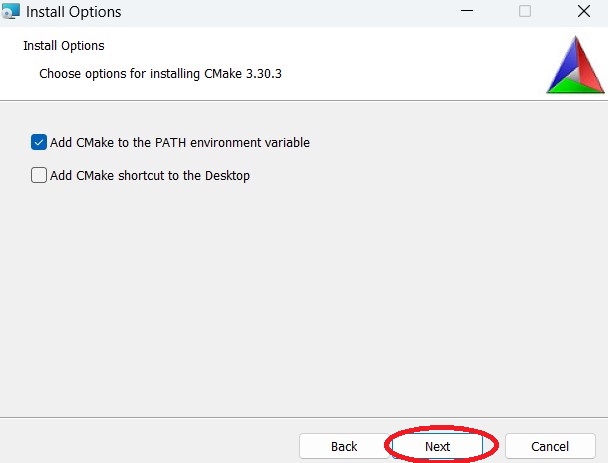
Step 5
Next, you will see the below window. Here, choose the option of adding CMake to the PATH environment variable.
Step 6
In this step, choose the destination folder where you want to install the CMake and click next button.

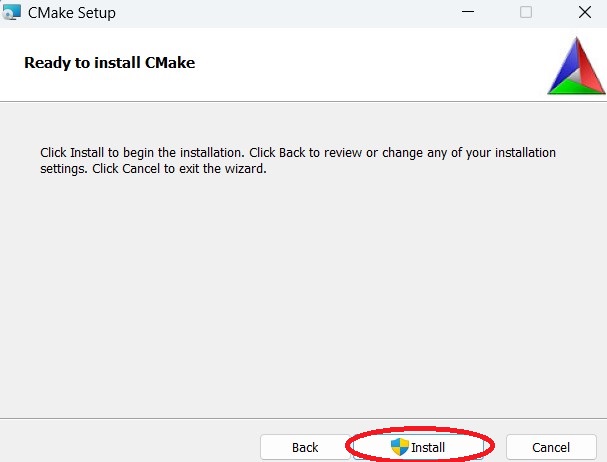
Step 7
Now, click the install button to start the installation.
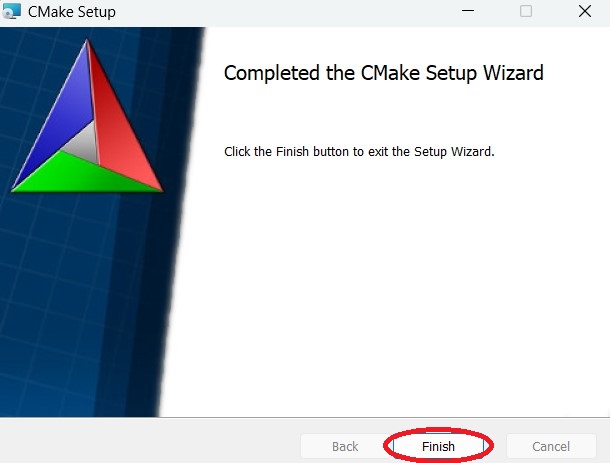
Step 8
On successful completion of the CMake, you will see the below window. Here, click finish button.
Creating "CMakeLists.txt" File
The "CMakeLists.txt" file in CMake is used to configure the build system for a project. This file determine which source files to compile, and how to handle dependencies within the project.
For every project, you need to create "CMakeLists.txt" file and declare the dependency on GoogleTest. To express the dependencies in the CMake, use the FetchContent module. Copy and paste the github link of the GoogleTest inside this module −
cmake_minimum_required(VERSION 3.14)
project(your_project_name)

# GoogleTest requires at least C++14
set(CMAKE_CXX_STANDARD 14)
set(CMAKE_CXX_STANDARD_REQUIRED ON)

include(FetchContent)
FetchContent_Declare(
  googletest
  URL https://github.com/google/googletest/archive/03597a01ee50ed33e9dfd640b249b4be3799d395.zip
)
# For Windows: Prevent overriding the parent project's compiler/linker settings
set(gtest_force_shared_crt ON CACHE BOOL "" FORCE)
FetchContent_MakeAvailable(googletest)
Build Project using CMake
To build your GoogleTest code, you need to add the following code to the end of your "CMakeLists.txt" file −
enable_testing()

add_executable(
  test_file
  test_file.cc
)
target_link_libraries(
  test_file
  GTest::gtest_main
)

include(GoogleTest)
gtest_discover_tests(test_file)
NOTE: We are assuming your GoogleTest code is saved with the "test_file.cc" name.
GoogleTest - Running First Test
In this tutorial, we will learn how to use GoogleTest for testing C++ code with the help of an example. We will go through all the required steps, commands and methods that are used while running a basic test.
Creating a Basic Test
Follow the steps given below to create a basic test in GoogleTest for a C++ function −
Step 1:
First, create a folder or directory where you want to save your project. Type the following command on your system's command prompt to create a folder −
mkdir test1
Here, we are using name of the folder as "test1".
Step 2:
Create a "test_case.cc" file which will contain a C++ function and unit tests for that function. You can give any name of your choice.
// header of the GoogleTest
#include <gtest/gtest.h>

// function for which we write unit tests
int add(int num1, int num2) {
    return num1 + num2;
}

// to test addition of positive numbers
TEST(SumTest, ForPositiveNumbers) {
    EXPECT_EQ(35, add(23, 12));
}

// to test addition of negative numbers
TEST(SumTest, ForNegativeNumbers) {
    EXPECT_EQ(-1, add(-1, 0));
}

// to test addition of positive and negative numbers
TEST(SumTest, ForMixedNumbers) {
    EXPECT_EQ(0, add(-1, 1));
}

// main() function to run all tests
int main(int argc, char **argv) {
    ::testing::InitGoogleTest(&argc, argv);
    return RUN_ALL_TESTS();
}
In the above code, the first unit test checks if the given C++ function is able to handle two positive numbers properly or not. The second test checks if the add() function correctly adds a negative number and zero. The last unit test checks whether the add() function correctly adds a negative and a positive numbers together. Lastly, the main() function initializes Google Test and runs all the test cases.
Create "CMakeLists.txt" File
As discussed in previous chapter, your each GoogleTest project requires "CMakeLists.txt" file. In this file, we declare the dependency on GoogleTest by using its github link as shown below −
cmake_minimum_required(VERSION 3.14)
project(test1)

# GoogleTest requires at least C++14
set(CMAKE_CXX_STANDARD 14)
set(CMAKE_CXX_STANDARD_REQUIRED ON)

include(FetchContent)
FetchContent_Declare(
  googletest
  URL https://github.com/google/googletest/archive/03597a01ee50ed33e9dfd640b249b4be3799d395.zip
)
# For Windows: Prevent overriding the parent project's compiler/linker settings
set(gtest_force_shared_crt ON CACHE BOOL "" FORCE)
FetchContent_MakeAvailable(googletest)

# to enable test
enable_testing()

# defining executable target and its source file
add_executable(
  test_case
  test_case.cc
)
# to link the executable with GoogleTest main library
target_link_libraries(
  test_case
  GTest::gtest_main
)

# to include GoogleTest module
include(GoogleTest)

# to discover and register all tests in the executable
gtest_discover_tests(test_case)
Build & Run the Tests
To build and run your test, follow the steps given below −
Step 1:
Navigate to the project folder using the following command −
cd test1
Step 2:
Then, use the below command to generate a build file −
cmake -S . -B build
-S specifies the source directory, which is "." and -B specifies the build directory, which is named "build".
Step 3:
Now, compile and build the project with the help of build file generated by CMake in the previous step −
cmake --build build
Step 4:
Move to the build directory −
cd build
Step 5:
Lastly, run all tests using the given command −
ctest
The above mentioned command runs the tests that have been defined in the "CMakeLists.txt" file using the enable_testing() commands.
Output:
The output would appear like this on cosole −
Test project D:/gTest/test1/build
    Start 1: SumTest.ForPositiveNumbers
1/3 Test #1: SumTest.ForPositiveNumbers .......   Passed    0.02 sec
    Start 2: SumTest.ForNegativeNumbers
2/3 Test #2: SumTest.ForNegativeNumbers .......   Passed    0.01 sec
    Start 3: SumTest.ForMixedNumbers
3/3 Test #3: SumTest.ForMixedNumbers ..........   Passed    0.01 sec

100% tests passed, 0 tests failed out of 3

Total Test time (real) =   0.13 sec
You can check the result of each test in the LastTest.log file. This file is available at the location: /build/Testing/Temporary.
GoogleTest - Nomenclature
There are several terms related to GoogleTest that might confuse its users especially Test, Test Case and Test Suite. Meaning of these terms can differ from other testing frameworks. In this tutorial, we will understand them to avoid any confusion that may arise in further chapters.
Test & Test Case
A Test refers to a piece of code written to verify that another piece of code (usually a function or a class) works as expected. The term "test" in GoogleTest is the same as the term "test case" from International Software Testing Qualifications Board (ISTQB) materials and various textbooks on software quality.
To create a simple test in GoogleTest, use the TEST() macro. It defines and names a test function. This macro accepts name of the test suite and name of the test as parameter values. Note that it does not return any value.
Syntax
Syntax of the TEST() macro is given below −
TEST(TestSuiteName, TestName) {
  ... test body ...
}
Both test suite name and the test name must be valid C++ identifiers, and they should not contain any underscores (_).
Example
Following code shows an basic example of test in GoogleTest −
#include <gtest/gtest.h>

// function to be tested
int divideNum(int nums1, int nums2) {
    if (nums2 == 0) {
        throw std::invalid_argument("Denominator cannot be zero");
    }
    return nums1 / nums2;
}

// test
TEST(CheckDivison, ForPositiveInput) {
    EXPECT_EQ(12, divideNum(24, 2));
}

// main() function to run the test
int main(int argc, char **argv) {
    ::testing::InitGoogleTest(&argc, argv);
    return RUN_ALL_TESTS();
}
Output of the above code is as follows −
Test project D:/gTest/test2/build
    Start 1: CheckDivison.ForPositiveInput
1/1 Test #1: CheckDivison.ForPositiveInput .......   Passed    0.02 sec

100% tests passed, 0 tests failed out of 1

Total Test time (real) =   0.2 sec
TestSuite & Test Case
From the initial days, GoogleTest was using the term "TestCase" for a group of related tests. However, ISTQB materials and various software quality textbooks use the term "test suite" for the same.
Therefore, recent versions of the GoogleTest started replacing the term "TestCase" with the "test suite". Now, the preferred API is TestSuite.
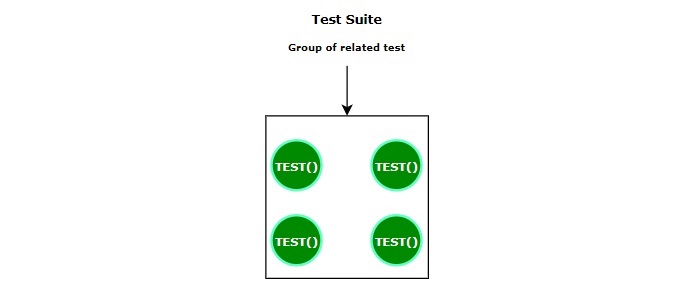
To create a test suite, write multiple tests with the single test suite name. But, each test should have a unique name as shown below −
// test 1
TEST(TestSuiteName, FirstTestName) {
  ... test body ...
}
// test 2
TEST(TestSuiteName, SecondTestName) {
  ... test body ...
}
Example
In the following code, we are creating a test suite to test a division function in GoogleTest −
#include <gtest/gtest.h>

// function to be tested
int divideNum(int nums1, int nums2) {
    if (nums2 == 0) {
        throw std::invalid_argument("Denominator cannot be zero");
    }
    return nums1 / nums2;
}

// test 1
TEST(CheckDivison, ForPositiveInput) {
    EXPECT_EQ(12, divideNum(24, 2));
}

// test 2
TEST(CheckDivison, ForNegativeInput) {
    EXPECT_EQ(-2, divide(4, -2));
    EXPECT_EQ(-2, divide(-4, 2));
    EXPECT_EQ(2, divide(-4, -2));
}

// test 3
TEST(CheckDivison, ForZeroDenominator) {
    EXPECT_THROW(divide(4, 0), std::invalid_argument);
}

// main() function to run the test
int main(int argc, char **argv) {
    ::testing::InitGoogleTest(&argc, argv);
    return RUN_ALL_TESTS();
}
On running this code, it will display the following output −
Test project D:/gTest/test2/build
    Start 1: CheckDivison.ForPositiveInput
1/3 Test #1: CheckDivison.ForPositiveInput .....   Passed    0.03 sec
    Start 2: CheckDivison.ForNegativeInput
2/3 Test #2: CheckDivison.ForNegativeInput .....   Passed    0.01 sec
    Start 3: CheckDivison.ForZeroDenominator
3/3 Test #3: CheckDivison.ForZeroDenominator ...   Passed    0.02 sec

100% tests passed, 0 tests failed out of 3

Total Test time (real) =   0.10 sec
GoogleTest - Disabling Test
A good testing framework should have the feature of disabling a test temporarily. Let's say there is a test which is failing due to a bug and it is blocking the other tests. In this situation, only one solution would be possible and that is disabling the test so that other tests continue to run. It is also helpful where a feature is still under development and not ready for testing.
In GoogleTest, you can disable a test either by using DISABLED_ prefix or using GTEST_SKIP() Macro. GoogleTest is a testing framework used to test C++ code.
Using DISABLED_ Prefix
A test can be marked disabled by changing its name to DISABLED_*, where, "*" represents name of a test. By doing this GoogleTest will skip the specified test when you run the test binary. However, the test will still be compiled.
Syntax
Syntax of the DISABLED_ prefix is as follows −
DISABLED_TestName
Example
In this code, we disable a test in GoogleTest using DISABLED_ prefix.
#include <gtest/gtest.h>

// function to be tested
int divideNum(int nums1, int nums2) {
    if (nums2 == 0) {
        throw std::invalid_argument("Denominator cannot be zero");
    }
    return nums1 / nums2;
}

// test 1
TEST(CheckDivison, ForPositiveInput) {
    EXPECT_EQ(12, divideNum(24, 2));
}

// test 2
TEST(CheckDivison, ForNegativeInput) {
    EXPECT_EQ(-2, divideNum(4, -2));
    EXPECT_EQ(-2, divideNum(-4, 2));
    EXPECT_EQ(2, divideNum(-4, -2));
}

// test 3
TEST(DISABLED_CheckDivison, ForZeroDenominator) {
    EXPECT_THROW(divideNum(4, 0), std::invalid_argument);
}

// main() function to run the test
int main(int argc, char **argv) {
    ::testing::InitGoogleTest(&argc, argv);
    return RUN_ALL_TESTS();
}
On running, output will be displayed as follows −
Test project D:/gTest/test2/build
    Start 1: CheckDivison.ForPositiveInput
1/3 Test #1: CheckDivison.ForPositiveInput .....   Passed    0.02 sec
    Start 2: CheckDivison.ForNegativeInput
2/3 Test #2: CheckDivison.ForNegativeInput .....   Passed    0.02 sec
    Start 3: CheckDivison.ForZeroDenominator
3/3 Test #3: CheckDivison.ForZeroDenominator ...***Not Run (Disabled)   0.00 sec

100% tests passed, 0 tests failed out of 2

Total Test time (real) =   0.13 sec

The following tests did not run:
          3 - CheckDivison.ForZeroDenominator (Disabled)
Using GTEST_SKIP() Macro
The GTEST_SKIP() macro is a newer feature added in GoogleTest with the release of version 1.10.0. It is used to skip a test at runtime based on the given condition.
Syntax
Syntax of the GTEST_SKIP() macro is given below −
GTEST_SKIP() << "Text to display";
Example
Following code shows how to use the GTEST_SKIP() to disable a test in GoogleTest −
#include <gtest/gtest.h>

// function to be tested
int prod(int num1, int num2) {
    return num1 * num2;
}

// to disable test
bool disableTest(int num1, int num2) {
    if(num1 == num2) {
        return true;
    } else {
        return false;
    }
}

// Test suite
TEST(ProductTest, ForEqualNumbers) {
    int num1 = 3;
    int num2 = 3;
    if (disableTest(num1, num2)) {
        GTEST_SKIP() << "Disabling test";
    }
    ASSERT_EQ(prod(num1, num2), 9);
}

int main(int argc, char **argv) {
    ::testing::InitGoogleTest(&argc, argv);
    return RUN_ALL_TESTS();
}
Output of the above code is as follows −
Test project D:/gTest/test3/build
    Start 1: ProductTest.ForEqualNumbers
1/1 Test #1: ProductTest.ForEqualNumbers ......***Skipped   0.03 sec

100% tests passed, 0 tests failed out of 1

Total Test time (real) =   0.10 sec

The following tests did not run:
          1 - ProductTest.ForEqualNumbers (Skipped)
GoogleTest - Assertions
The assertions in GoogleTest are macros that are similar to function calls. They are used to verify the behavior of your code in various ways. It can check Boolean conditions, compare values, verify string and floating-point values.
Here, the term macro refers to a pre-processor directive. It defines a piece of code that you can reuse multiple times throughout your tests.
If an assertion fails, a failure message will be printed along with the assertion's source file and line number where it failed. It is also possible to give a custom failure message which will be appended to failure message.
Types of Assertions
There are two types of assertion in GoogleTest, which are as follows −
- EXPECT_*
- ASSERT_*
Between both assertions, EXPECT_* is preferred as it allow to report more than one failure.
EXPECT_* Assertion
The EXPECT_* is a non-fatal assertion, which means that even if they fail, the test continues to run. In other words, it produces non-fatal failures. Due to this feature, you can use it to test multiple conditions without blocking the code.
Additionally, you are also allowed to provide custom failure messages to be appended to assertions using the << operator.
Common EXPECT_* Assertions
Some of the commonly used EXPECT_* assertions are −
- EXPECT_TRUE(condition) − To test if the condition is TRUE.
- EXPECT_EQ(val1, val2) − To perform equality test.
- EXPECT_LT(val1, val2) − Tests if val1 is less than val2.
- EXPECT_GT(val1, val2) − Tests if val1 is greater than val2.
- EXPECT_THROW(statement, exception_type) − Expects a specific exception to be thrown.
- EXPECT_STREQ(str1, str2) − Tests whether two given strings are equal.
Example
The following example demonstrates the use of EXPECT_* assertion.
#include <gtest/gtest.h>

// to test basic assertions
TEST(Test1, ExpectAssertions) {
  // expect two strings to be equal
  EXPECT_STREQ("DDaaCC", "DDaaCC");
  // expect equality
  EXPECT_EQ(12, 2 * 6);
}
On running, following output will be displayed −
Test project D:/gTest/test4/build
    Start 1: Test1.ExpectAssertions
1/1 Test #1: Test1.ExpectAssertions ...........   Passed    0.02 sec

100% tests passed, 0 tests failed out of 1

Total Test time (real) =   0.08 sec
ASSERT_* Assertion
Unlike EXPECT_*, the ASSERT_* assertions are fatal. If a failure occurs, it will immediately abort the current test function which will also prevents any further code from executing within that test suite.
You should use ASSERT_* if it doesn't make sense to continue or proceeding with the test could lead to misleading results.
Common ASSERT_* Assertions
Some of the commonly used ASSERT_* assertions are −
- ASSERT_TRUE(condition) − Verifies if the condition is TRUE.
- ASSERT_EQ(val1, val2) − Asserts that two values are equal.
- ASSERT_LT(val1, val2) − Checks if the first value is less than the second.
- ASSERT_GT(val1, val2) − Tests if the first value is greater than the second or not.
- ASSERT_THROW(statement, exception_type) − Expects that a specific exception is thrown by the specified statement.
Example
Let's see a practical example of ASSERT_* assertion.
#include <gtest/gtest.h>

// to test basic assertions
TEST(Test1, AssertAssertions) {
  // assert that the condition is true
  ASSERT_TRUE(strcmp("DDaaCC", "DDaaCC") == 0);
  // assert first value is less than second
  ASSERT_LT(2 * 6, 13);
}
On running this code, it will produce the following result −
Test project D:/gTest/test4/build
    Start 1: Test1.AssertAssertions
1/1 Test #1: Test1.AssertAssertions ...........   Passed    0.03 sec

100% tests passed, 0 tests failed out of 1

Total Test time (real) =   0.07 sec
GoogleTest - Death Tests
Death tests in GoogleTest are used to verify that a program terminates in the expected way under certain conditions to ensure consistency. This type of assertion checks if a proper error message is displayed in case of wrong input to a routine or if the process exits with a proper exit code.
How to Write Death Tests?
You can write death tests in GoogleTest using the following assertions −
- EXPECT_DEATH() or ASSERT_DEATH() − It accepts two parameters a statement and a matcher. This assertion tests if the statement causes the process to terminate with a nonzero exit status and produces stderr output that matches matcher.
- EXPECT_DEATH_IF_SUPPORTED() or ASSERT_DEATH_IF_SUPPORTED() − It first checks whether death tests are supported or not. If so behaves the same as EXPECT_DEATH.
- EXPECT_DEBUG_DEATH() or ASSERT_DEBUG_DEATH() − It also behaves the same as EXPECT_DEATH but, in debug mode. When not in debug mode only the statement executed.
- EXPECT_EXIT() or ASSERT_EXIT() − It takes three parameters a statement, a predicate and a matcher. It verifies that statement causes the process to terminate with an exit status that satisfies predicate, and produces stderr output that matches matcher. Here, the parameter predicate is a function that accepts an integer exit status and returns a boolean value.
Example
The following example illustrates how to write death tests in GoogleTest.
#include <gtest/gtest.h>
#include <iostream>

int divideNum(int numerator, int denominator) {
  if (denominator == 0) {
    std::cerr << "Error Occured: Denominator should not be zero" << std::endl;
    exit(1);
  }
  return numerator / denominator;
}

TEST(CheckDivison, ForZeroDenominator) {
  // death test
  ASSERT_DEATH(divideNum(25, 0), "Cannot be divided by zero");
}

TEST(CheckDivison, WithZeroDenominator) {
  // death test
  ASSERT_EXIT(divideNum(74, 0), ::testing::ExitedWithCode(1), "Cannot be divided by zero");
}
When you run this code, following output will be displayed on console −
Test project D:/gTest/test5/build
    Start 1: CheckDivison.ForZeroDenominator
1/2 Test #1: CheckDivison.ForZeroDenominator ....***Failed    0.06 sec
    Start 2: CheckDivison.WithZeroDenominator
2/2 Test #2: CheckDivison.WithZeroDenominator ...***Failed    0.03 sec

0% tests passed, 2 tests failed out of 2

Total Test time (real) =   0.19 sec

The following tests FAILED:
          1 - CheckDivison.ForZeroDenominator (Failed)
          2 - CheckDivison.WithZeroDenominator (Failed)
GoogleTest - Test Fixtures
Test Fixtures in GoogleTest are used when you need to write two or more tests that works on similar data. It allows developers to reuse the same data configuration for several different tests. The fixture class is derived from the ::testing::Test class available in the gtest.h header file.
How to Create Test Fixtures?
Follow the steps given below to create test fixtures in GoogleTest −
- Create a class that derives from testing::Test class. Its body should be protected.
- Declare objects you want to use inside this class.
- Then, define setup logic which is placed inside the constructor or SetUp() function. It will prepare the objects for each test.
- To release any resources you allocated using SetUp(), write a destructor or TearDown() function. It is optional.
- At last, define subroutines for your tests to share.
Syntax
Syntax to create test fixture is as follows −
// Define a test fixture class
class FirstTestFixture : public ::testing::Test {
protected:
    // SetUp() function
    void SetUp() override {
        // setup code comes here
    }

    // TearDown() function
    void TearDown() override {
        // teardown code comes here
    }

    // define common data members for the tests
    data_type variable = value;
};
Role of TEST_F() Macro in Test Fixtures
The TEST_F() macro in GoogleTest is used to define a test that uses the test fixture class. The _F here stands for Fixture. It accepts two parameters which are test name and name of the test fixture class. Both arguments must be valid C++ identifiers and must not contain underscores (_).
Syntax
Let's see the syntax of TEST_F macro −
TEST_F(TestFixtureName, TestName) {
  ... code to be tested ...
}
Generally, TEST() macro is used to define a test in GoogleTest. However, TEST_F() macro is used while working with test fixtures as it allows you to access objects and subroutines defined in that particular test fixture. You can observe that the syntax of TEST_F() macro where name of a test fixture class is declared instead of test suite name.
For each test defined with TEST_F(), GoogleTest creates a new test fixture at runtime, initializes it using SetUp() function, runs the test, cleans up by calling TearDown() function, and then deletes the test fixture.
Any changes made to the one test in fixture do not affect other tests because different tests in the same test suite have different test fixture objects. Also, GoogleTest always deletes a test fixture before it creates the next one.
Example
The following example illustrates how to write test fixtures using TEST_F() in GoogleTest.
#include <gtest/gtest.h>

// test fixture class
class FixtureDemo : public ::testing::Test {
protected:
    int* test_var;

    // SetUp() function
    void SetUp() override {
        // dynamically allocating an integer
        test_var = new int(42);
    }

    // TearDown Function
    void TearDown() override {
        // deallocate the integer
        delete test_var;
        test_var = nullptr;
    }
};
// to verify equality
TEST_F(FixtureDemo, ForEquals) {
    EXPECT_EQ(42, *test_var);
}
// to verify less than
TEST_F(FixtureDemo, ForLessThan) {
    EXPECT_LT(42, *test_var);
}

// main function
int main(int argc, char **argv) {
    ::testing::InitGoogleTest(&argc, argv);
    return RUN_ALL_TESTS();
}
When you run this code, following output will be displayed on console −
Test project D:/gTest/test6/build
    Start 1: FixtureDemo.ForEquals
1/2 Test #1: FixtureDemo.ForEquals ............   Passed    0.03 sec
    Start 2: FixtureDemo.ForLessThan
2/2 Test #2: FixtureDemo.ForLessThan ..........***Failed    0.02 sec

50% tests passed, 1 tests failed out of 2

Total Test time (real) =   0.13 sec

The following tests FAILED:
          2 - FixtureDemo.ForLessThan (Failed)
GoogleTest - Event Listeners
The event listener in GoogleTest is an API that let you receive notifications about the progress of a test program and its success and failures. Using this API, you can get notified for the various events such as start and end of the test program, a test suite, or a test method, among others.
Additionally, it also helps you to replace the standard console output to XML output, or provide a completely different format of output, such as a GUI or a database.
Each event in GoogleTest is associated with an handler function. When an event is fired, its context is passed to these functions as an argument. The argument types are −
- UnitTest − It represents the state of the entire test program.
- TestSuite − It provides information about a test suite.
- TestInfo − It contains the state of a single test.
- TestPartResult − It represents the result of a test assertion.
Defining Event Listeners
In GoogleTest, an event listener can be defined by inheriting either testing::TestEventListener interface or testing::EmptyTestEventListener interface.
TestEventListener Interface
The TestEventListener interface is used to track execution of tests. It provides the below listed virtual methods that can be overridden to handle a test event −
- OnTestProgramStart − This method is fired prior to the start of any activity.
- OnTestIterationStart − It is fired before each iteration of tests starts.
- OnEnvironmentsSetUpStart − Fired before environment set-up for each iteration of tests starts.
- OnEnvironmentsSetUpEnd − Fired after environment set-up for each iteration of tests ends.
- OnTestSuiteStart − Called before the starting of a test suite.
- OnTestEnd − It is fired when the specified test ends.
EmptyTestEventListener Interface
The EmptyTestEventListener interface in GoogleTest provides an empty implementation of all methods in the TestEventListener interface. To use this, you simply need to override the methods.
How to Use Defined Event Listeners
To use the event listener you have defined, add an instance of it to the GoogleTest event listener list in your main() function, before calling RUN_ALL_TESTS(). This event listener list is represented by TestEventListeners class.
Example
Let's see how to write event listeners in GoogleTest.
#include <gtest/gtest.h>
#include <iostream>

class FirstTestEventListener : public ::testing::EmptyTestEventListener {
    // Called before a test starts
    void OnTestStart(const ::testing::TestInfo& test_info) override {
        std::cout << "test is starting : " << test_info.name() << std::endl;
    }

    // Called after a test ends
    void OnTestEnd(const ::testing::TestInfo& test_info) override {
        std::cout << "test finished : " << test_info.name() << std::endl;
    }
};

int main(int argc, char **argv) {
    ::testing::InitGoogleTest(&argc, argv);

    // Create and register the custom test event listener
    ::testing::TestEventListeners& listeners = ::testing::UnitTest::GetInstance() -> listeners();
    listeners.Append(new FirstTestEventListener);

    int result = RUN_ALL_TESTS();
}
This code will not produce any output as we haven't given any test.
