
Article Categories
- All Categories
-
 Data Structure
-
 Networking
-
 RDBMS
RDBMS
-
 Operating System
-
 Java
Java
-
 MS Excel
-
 iOS
iOS
-
 HTML
HTML
-
 CSS
CSS
-
 Android
-
 Python
-
 C Programming
-
 C++
C++
-
 C#
C#
-
 MongoDB
-
 MySQL
MySQL
-
 Javascript
-
 PHP
PHP
-
 Economics & Finance
Get input value from TextField in iOS alert in Swift
Generally, we use UIAlertController to show an alert with a dismiss action button. But UIAlertController provides you with more flexibility to add UITextFields to the alert. Let's see some examples of different use cases.
When you add a text field to the UIAlertController, you can take the input value entered in the text field. It is also possible to add multiple text fields.
In this example, we will use the following steps to get input values from the text field in iOS.
Basic Setup
In this step, you will add a button object to the controller's view to present the alert controller by clicking it. Here is the basic setup code ?
Example
import UIKit
class TestController: UIViewController {
   private let clickButton = UIButton()
   override func viewDidLoad() {
      super.viewDidLoad()
      initialSetup()
   }

   private func initialSetup() {

      // basic setup
      view.backgroundColor = .white
      navigationItem.title = "UIAlertController"

      // button customization
      clickButton.backgroundColor = .darkGray
      clickButton.setTitle("Show Alert", for: .normal)
      clickButton.setTitleColor(.white, for: .normal)
      clickButton.layer.cornerRadius = 8
      clickButton.addTarget(self, action: #selector(handleClickButtonTapped), for: .touchUpInside)

      // adding constraints to the button
      view.addSubview(clickButton)
      clickButton.translatesAutoresizingMaskIntoConstraints = false
      clickButton.heightAnchor.constraint(equalToConstant: 50).isActive = true
      clickButton.widthAnchor.constraint(equalToConstant: 250).isActive = true
      clickButton.centerXAnchor.constraint(equalTo: view.centerXAnchor).isActive = true
      clickButton.centerYAnchor.constraint(equalTo: view.centerYAnchor).isActive = true
   }

   @objc private func handleClickButtonTapped() {
   }
}
Output
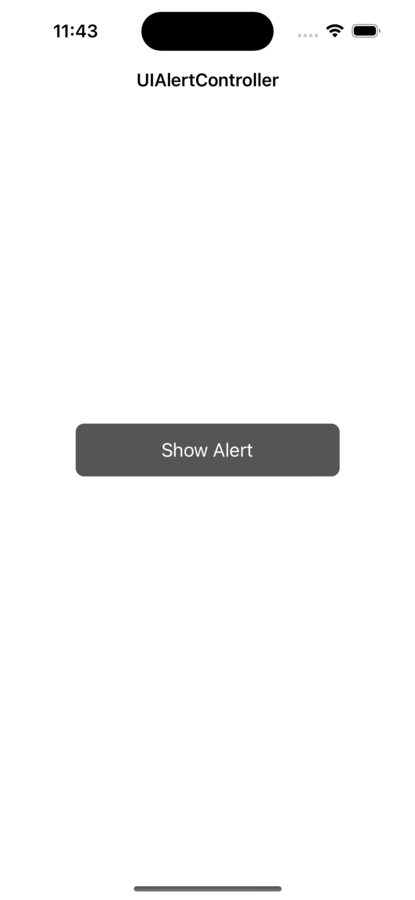
In the above code, we added a button with a target action method. In the next step, we will implement the handleClickButtonTapped method to show an alert.
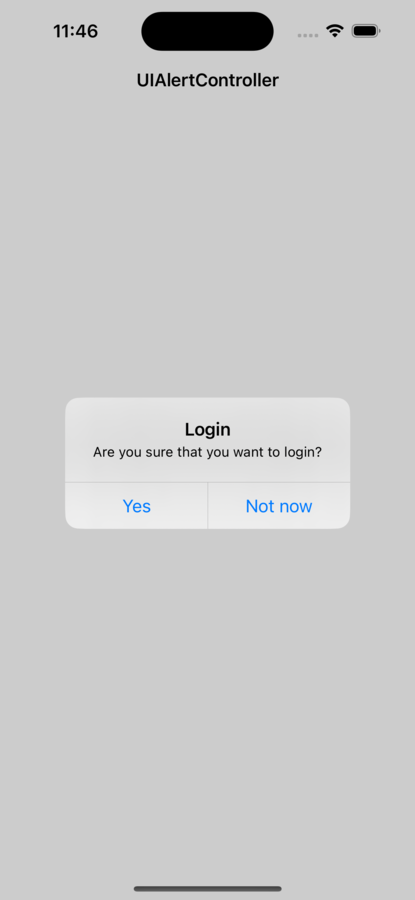
Show Basic Alert
In this step, we will show a simple alert with the title and message. Also, we will add some actions to dismiss the alert
Example
@objc private func handleClickButtonTapped() {

   // creating an alert controller object
   let alertController = UIAlertController(title: "Login", message: "Are you sure that you want to login?", preferredStyle: .alert)

   // adding actions to alert
   alertController.addAction(UIAlertAction(title: "Yes", style: .default))
   alertController.addAction(UIAlertAction(title: "Not now", style: .default))

   // present the alert on the screen
   self.present(alertController, animated: true)
}
Output
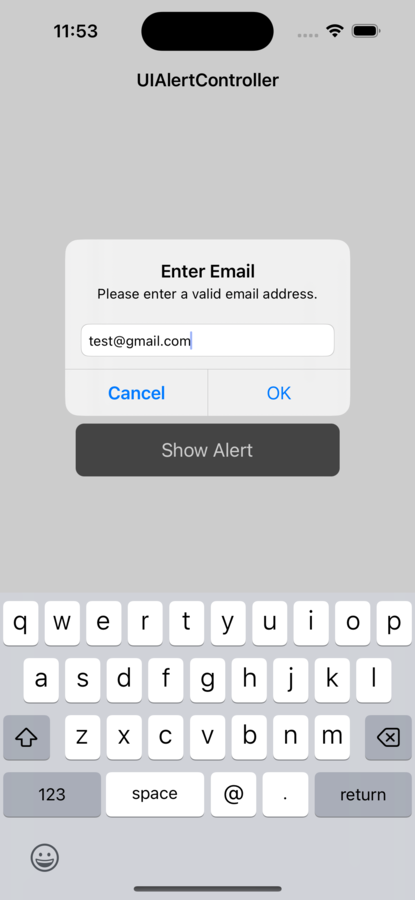
Enter an Email Address
In this step, we will add a text field to enter the email address and get its value. Here is the code ?
Example
@objc private func handleClickButtonTapped() {

   // creating an alert controller object
   let alertController = UIAlertController(title: "Enter Email", message: "Please enter a valid email address.", preferredStyle: .alert)

   // adding a textField for an email address
   alertController.addTextField { textField in

      // configure the text field
      textField.placeholder = "Email Address"
      textField.keyboardType = .emailAddress
      textField.autocorrectionType = .no
   }
   // creating OK action
   let okAction = UIAlertAction(title: "OK", style: .default) {
      action in guard let textField = alertController.textFields?.first,
      let text = textField.text else {
         print("No value has been entered in email address")
         return
      }

      print("Entered email address value: \(text)")
   }
   // creating a Cancel action
   let cancelAction = UIAlertAction(title: "Cancel", style: .cancel, handler: nil)
   // adding actions to alert
   alertController.addAction(okAction)
   alertController.addAction(cancelAction)
   // showing the alert
   present(alertController, animated: true, completion: nil)
}
Output
Here is the Output Printed on the Console
Entered email address value: test@gmail.com
In this example, we create an alert controller with a text field and two actions: OK and Cancel. When the user taps the OK button, the handler block is called, and we can access the text field's value by using alertController.textFields?.first?.text. We then use the value of the text to do whatever we need to do with the input.
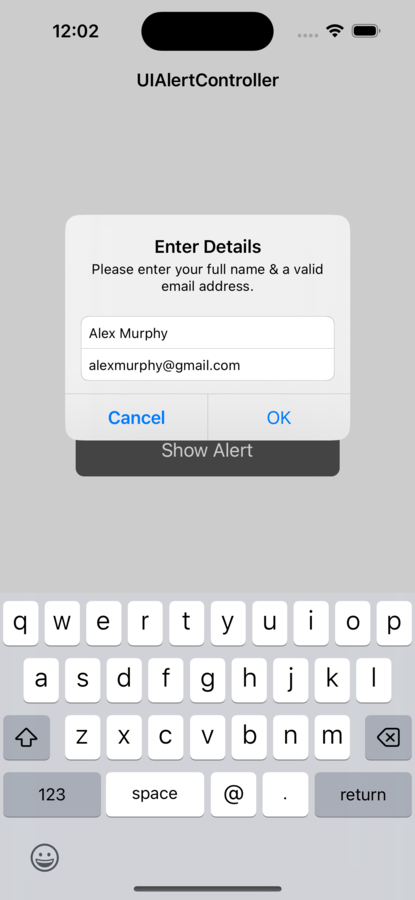
Add Multiple Text Fields
In this step, we will add two text fields to the alert. The first text field will be for the name and the second will be for the email address. Here is the code ?
Example
@objc private func handleClickButtonTapped() {

   // creating an alert controller object
   let alertController = UIAlertController(title: "Enter Details", message: "Please enter your full name & a valid email address.", preferredStyle: .alert)

   // adding a textField for name
   alertController.addTextField { textField in
      textField.placeholder = "Full Name"
      textField.autocorrectionType = .no
      textField.autocapitalizationType = .words
   }

   // adding a textField for email address
   alertController.addTextField { textField in
      textField.placeholder = "Email Address"
      textField.keyboardType = .emailAddress
      textField.autocorrectionType = .no
   }

   // creating OK action
   let okAction = UIAlertAction(title: "OK", style: .default) { action in
      guard let nameTextField = alertController.textFields?[0],
      let emailTextField = alertController.textFields?[1],
      let name = nameTextField.text,
      let email = emailTextField.text else {
         return
      }

      print("Entered name: \(name) and email address: \(email)")
   }

   // creating Cancel action
   let cancelAction = UIAlertAction(title: "Cancel", style: .cancel, handler: nil)

   // adding actions to alert
   alertController.addAction(okAction)
   alertController.addAction(cancelAction)

   // showing the alert
   present(alertController, animated: true, completion: nil)
}
Output
Here is the output printed on the console
Entered name: Alex Murphy and email address: alexmurphy@gmail.com
In this example, we have two text fields in our alert, and we access their values by using their corresponding indexes in the textFields array.
Conclusion
In conclusion, it is simple to obtain input data from a TextField in an iOS alert using Swift. There are other ways to tweak the input, such as adding more text fields, enabling secure text entry, or limiting it to numbers only. You may retrieve the value of the text field using the handler argument of the UIAlertController. You may design adaptable and engaging user interfaces for your iOS applications using these methods.

2K+ Views
