
Article Categories
- All Categories
-
 Data Structure
-
 Networking
-
 RDBMS
RDBMS
-
 Operating System
-
 Java
Java
-
 MS Excel
-
 iOS
iOS
-
 HTML
HTML
-
 CSS
CSS
-
 Android
-
 Python
-
 C Programming
-
 C++
C++
-
 C#
C#
-
 MongoDB
-
 MySQL
MySQL
-
 Javascript
-
 PHP
PHP
-
 Economics & Finance
First Hello World project in Arduino
In every language, generally, the first Hello World project is a simple program that prints "Hello World"! We will see what such a code would look like for Arduino. The below code will print "Hello World" on the screen every time your board is powered ON.
Example
void setup() {
   Serial.begin(9600);
   Serial.print("Hello World!");
}
void loop() {
}
However, this is not a very good choice of Hello World project for Arduino. We essentially use Arduino for firmware programming (in layperson terms, firmware is the permanent software inside any chip). Now, one characteristic of firmware is to do tasks repeatedly. That is why Arduino has a loop function (for continuously executing code) along with the setup function (for the code to be executed once during start-up). Therefore, a better choice of Hello World Project for Arduino would be following −
Example
void setup() {
   Serial.begin(9600);
}
void loop() {
   Serial.println("Hello World!");
   delay(1000);
}
Once you've written the above code in the Arduino IDE, select the correct board from Tools -> Board, connect your board to your machine and select the port corresponding to your board from Tools -> Port.
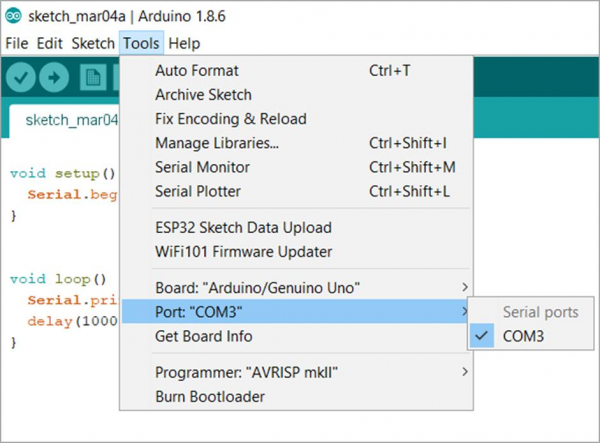
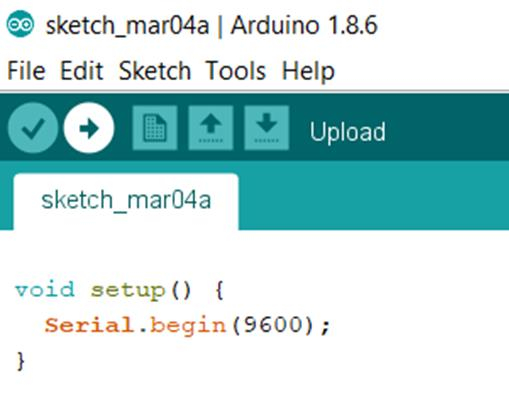
Next, click the Upload button on top left, and your board will start getting programmed after code compilation.
Once the code is uploaded, open Serial Monitor from Tools-> Serial Monitor, or by pressing Ctrl+Shift+M on your keyboard. Set the baud rate at the bottom right of the serial monitor to 9600.
The Serial Monitor output for the above code will be −
Output
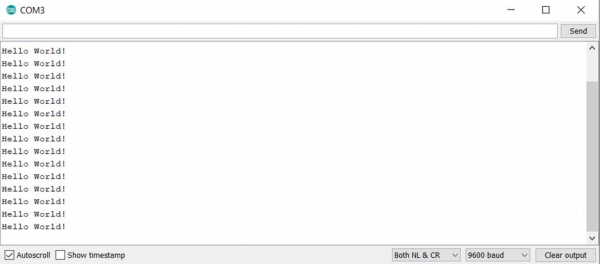
Congratulations on your first Hello World project in Arduino.

10K+ Views
