
- Excel Macros - Home
- Excel Macros - Overview
- Excel Macros - Creation
- Macros in a Single Workbook
- Excel Macros - Security
- Excel Macros - Absolute References
- Excel Macros - Relative References
- Excel Macros - VBA
- Excel Macros - Understanding Codes
- Assigning Macros to Objects
- Excel Macros - Running a Macro
- Creating a Macro Using VBA Editor
- Excel Macros - Editing
- Excel Macros - UserForms
- Excel Macros - Debugging a Code
- Excel Macros - Configuring a Macro
Excel Macros - UserForms
At times, you might have to collect information repeatedly from others. Excel VBA provides you with an easy way of handling this task- UserForm. As any other form that you fill up, UserForm makes it simple to understand, what information is to be provided. UserForm is user friendly in the way that the controls provided are self-explanatory, accompanied by additional instructions where necessary.
Major advantage of UserForm is that you can save on time that you spend on what and how the information is to be filled.
Creating a UserForm
To create a UserForm, proceed as follows −
- Click the DEVELOPER tab on the Ribbon.
- Click Visual Basic. A Visual Basic window for the workbook opens.
- Click Insert,
- Select UserForm from the dropdown list.
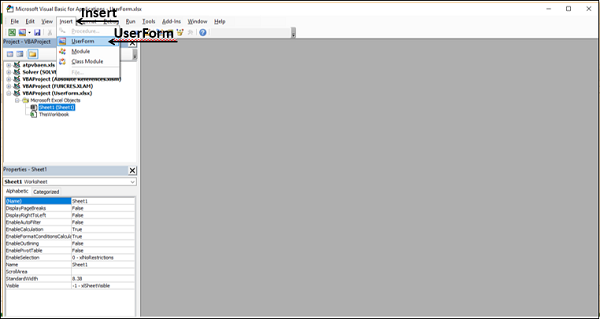
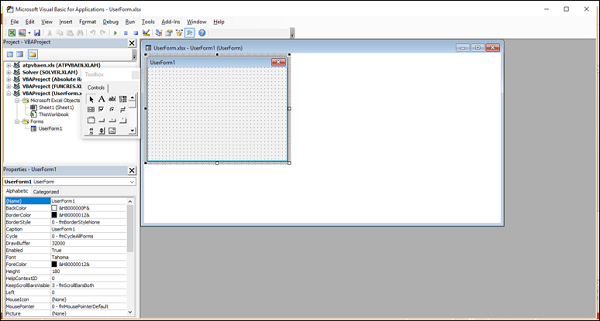
The UserForm appears on the right side of the window.
Understanding the UserForm
Maximize the UserForm.xlsx UserForm1 window.
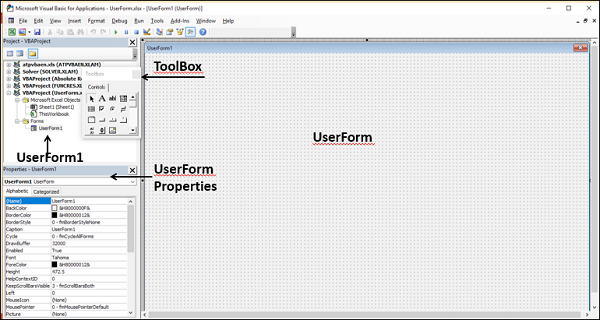
You are in the design mode now. You can insert controls on the UserForm and write code for the respective actions. The controls are available in the ToolBox. Properties of UserForm are in the Properties window. UserForm1 (caption of the UserForm) is given under Forms in the Projects Explorer.
- Change the caption of the UserForm to Project Report Daily in the properties window.
- Change the name of the UserForm to ProjectReport.
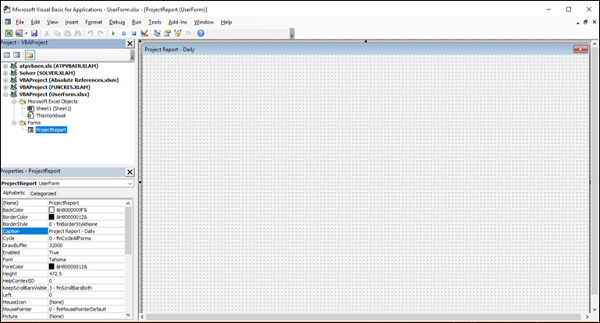
The changes are reflected in the UserForm, properties and project explorer.
Controls in the ToolBox
A UserForm will have different components. As and when you click on any of the components, either you will be provided with instructions on what and how the information is to be provided or you will be provided with options (choices) to select from. All these are provided by means of ActiveX controls in the ToolBox of the UserForm.
Excel provides two types of controls Form controls and ActiveX controls. You need to understand the difference between these two types of controls.
Form controls
Form controls are the Excel original controls that are compatible with earlier versions of Excel, starting with Excel version 5.0. Form controls are also designed for use on XLM macro sheets.
You can run macros by using Form controls. You can assign an existing macro to a control, or write or record a new macro. When the control is clicked, the macro. You have already learnt how to insert a command button from Form controls in the worksheet to run a macro. However, these controls cannot be added to a UserForm.
ActiveX controls
ActiveX controls can be used on VBA UserForms. ActiveX controls have extensive properties that you can use to customize their appearance, behavior, fonts and other characteristics.
You have the following ActiveX controls in the UserForm ToolBox −
- Pointer
- Label
- TextBox
- ComboBox
- ListBox
- CheckBox
- OptionButton
- Frame
- ToggleButton
- CommandButton
- TabStrip
- MultiPage
- ScrollBar
- SpinButton
- Image
In addition to these controls, Visual Basic provides you with MsgBox function that can be used to display messages and/or prompt the user for an action.
In the next few sections, you will understand these controls and MsgBox. Then, you will be in a position to choose which of these controls are required to design your UserForm.
Label
You can use Labels for identification purpose by displaying descriptive text, such as titles, captions and / or brief instructions.
Example

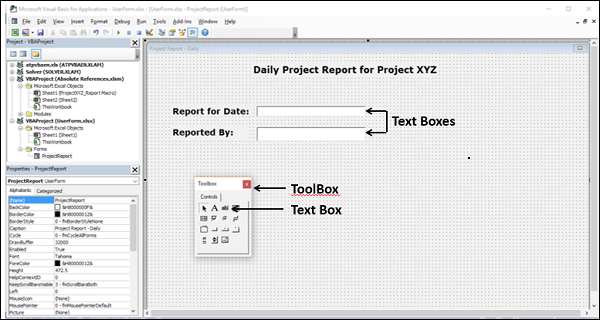
TextBox
You can use a TextBox that is a rectangular box, to type, view or edit text. You can also use a TextBox as a static text field that presents read-only information.
Example
List Box
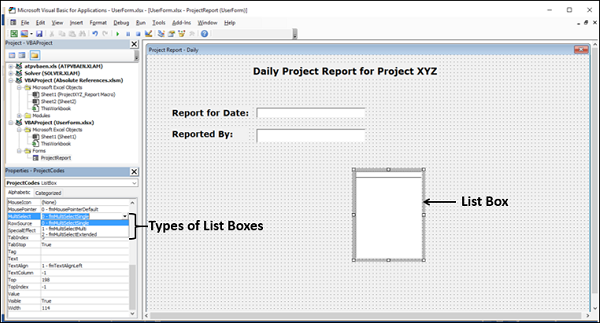
You can use a List Box to display a list of one or more items of text from which a user can choose. Use a list box for displaying large numbers of choices that vary in number or content.
- Insert a ListBox on the UserForm.
- Click on the ListBox.
- Type ProjectCodes for Name in the Properties window of the ListBox.
There are three types of List Boxes −
Single-selection List box − A single-selection List Box enables only one choice. In this case, a list box resembles a group of option buttons, except that a list box can handle a large number of items more efficiently.
Multiple selection List Box − A multiple selection List Box enables either one choice or contiguous (adjacent) choices.
Extended-selection List Box − An extended-selection List Box enables one choice, contiguous choices and noncontiguous (or disjointed) choices.
You can select one of these types of List Boxes, from the Properties window.
- Right click on the UserForm.
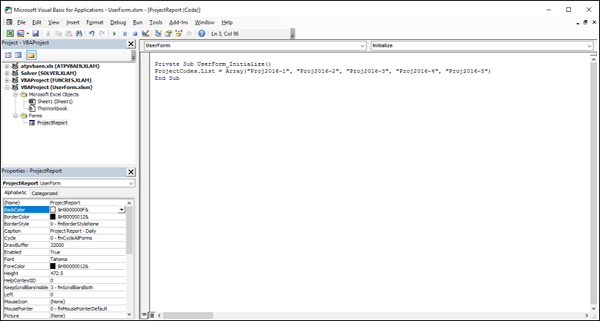
- Select View Code from the dropdown list. The code window of UserForm opens.
- Click Initialize in the top right box of the code window.
- Type the following under Private Sub UserForm_Initialize().
ProjectCodes.List = Array ("Proj2016-1", "Proj2016-2", "Proj2016-3", "Proj20164", "Proj2016-5")
- Click the Run tab on the Ribbon.
- Select Run Sub/UserForm from the dropdown list.
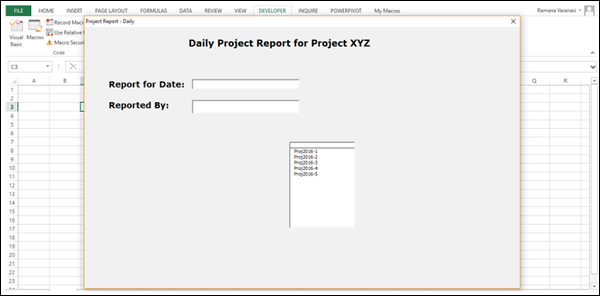
Next, you can write code for actions on selecting an item in the list. Otherwise, you can just display the text that is selected, which is the case for filling the Project Code in the Report.
ComboBox
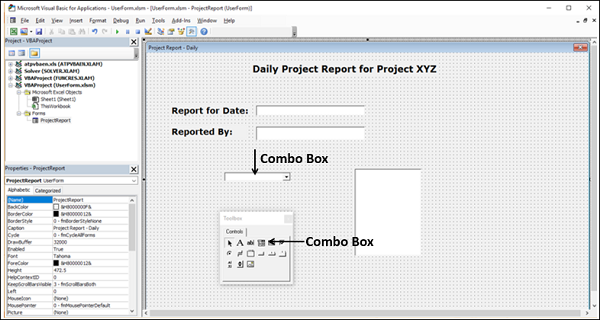
You can use ComboBox that combines a text box with a list box to create a dropdown list box. A combo box is more compact than a list box but requires the user to click the down arrow to display the list of items. Use a combo box to choose only one item from the list.
- Insert a ComboBox on the UserForm.
- Click the ComboBox.
- Type ProjectCodes2 for Name in the Properties window of the ComboBox.
- Right click on the UserForm.
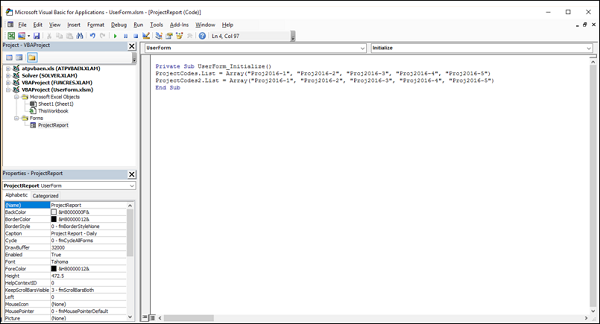
- Select View Code from the dropdown list.
- The code window of UserForm opens.
Type the following as shown below.
ProjectCodes2.List = Array ("Proj2016-1", "Proj2016-2", "Proj2016-3", "Proj20164", "Proj2016-5")
- Click the Run tab on the Ribbon.
- Select Run Sub/UserForm from the dropdown list.
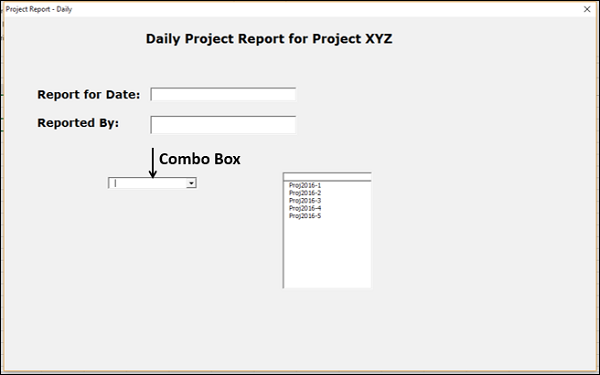
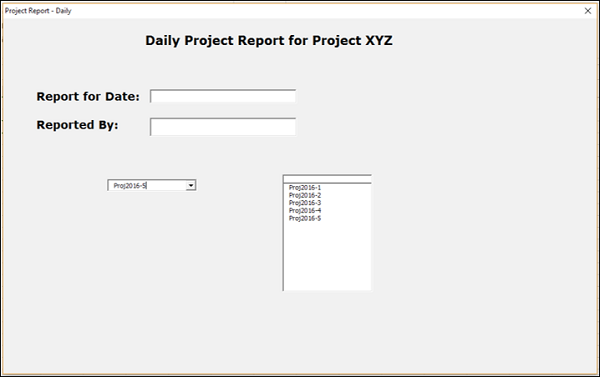
Click the down arrow to display the list of items.
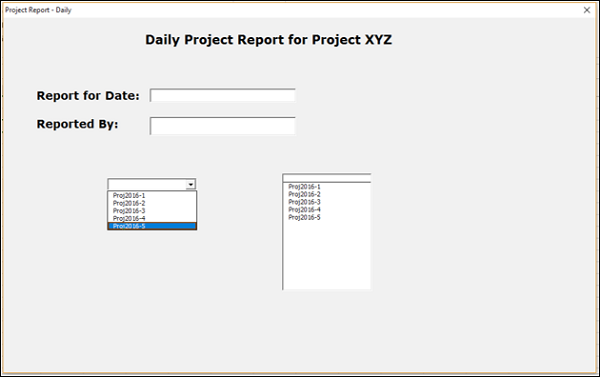
Click on the required item, say, Project2016-5. The selected option will be displayed in the combo box.
CheckBox
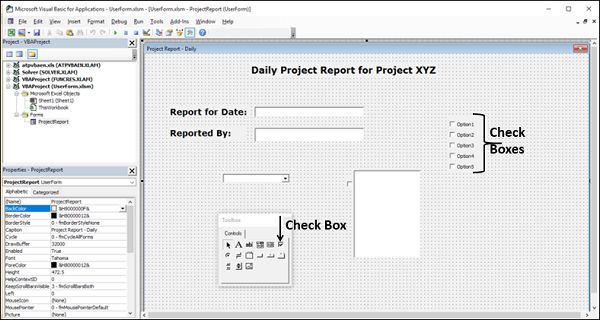
You can use check boxes to select one or more options that are displayed by clicking in the boxes. The options will have labels and you can clearly visualize what options are selected.
A check box can have two states −
- Selected (turned on), denoted by a tick mark in the box
- Cleared (turned off), denoted by a clear box
You can use check boxes for selection of options in a combo box to save space. In such a case, the check box can have a third state also −
Mixed, meaning a combination of on and off states, denoted by a black dot in the box. This will be displayed to indicate multiple selections in the combo box with check boxes.
Insert check boxes in the UserForm as shown below.
- Click the Run tab on the Ribbon.
- Select Run Sub/UserForm from the dropdown list.
- Click in the boxes for your selected options.

OptionButton
You can use an option button, also known as the radio button to make a single choice within a limited set of mutually exclusive choices. An option button is usually contained in a group box or a frame.
An option button is represented by a small circle. An option button can have one of the following two states −
- Selected (turned on), denoted by a dot in the circle
- Cleared (turned off), denoted by a blank
Frame
You can use a frame control, also referred to as a group box to group related controls into one visual unit. Typically, option buttons, check boxes or closely related contents are grouped in a frame control.
A frame control is represented by a rectangular object with an optional label.
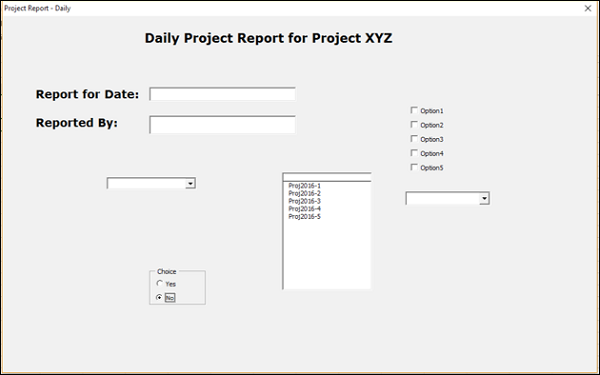
Insert a frame with caption Choice.
Insert two option buttons with captions Yes and No in the frame control. The options Yes and No are mutually exclusive.

- Click the Run tab on the Ribbon.
- Select Run Sub/UserForm from the dropdown list.
- Click on your selected option.
ToggleButton
You can use a toggle button to indicate a state, such as Yes or No, or a mode, such as on or off. The button alternates between an enabled and a disabled state when it is clicked.
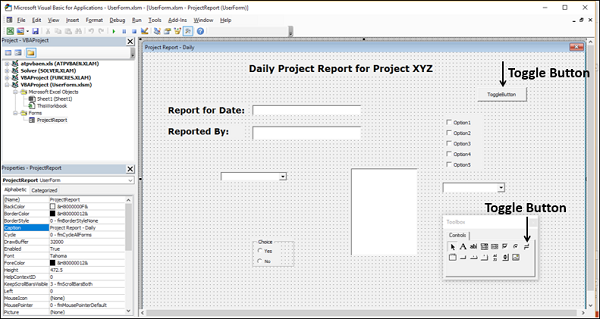
Insert a toggle button on UserForm as shown below −
Click the Run tab on the Ribbon.
Select Run Sub/UserForm from the dropdown list. The toggle button will be in enabled state by default.

Click the toggle button. The toggle button will be disabled.
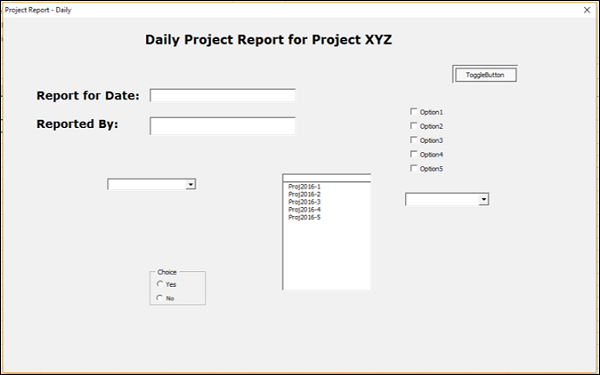
If you click the toggle button again, it will be enabled.
CommandButton
You can use a command button to run a macro that performs some actions when the user clicks on it. You have already learnt how to use a command button on a worksheet to run a macro.
Command button is also referred to as a push button. Insert a command button on the UserForm as shown below −
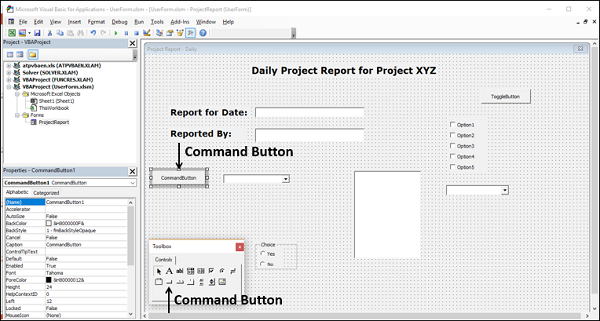
- Right click on the command button.
- Type the following code in the sub Commandbutton1_click ().
ProjectCodes2.DropDown
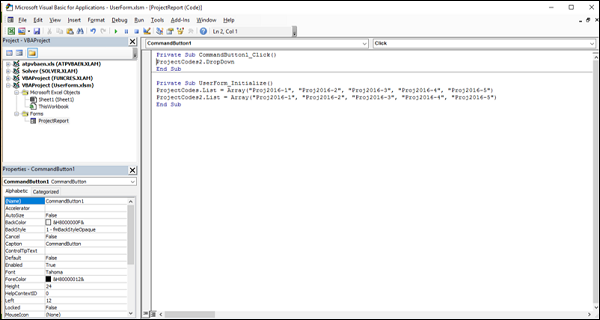
- Click the Run tab on the Ribbon.
- Select Run Sub/UserForm from the dropdown list.
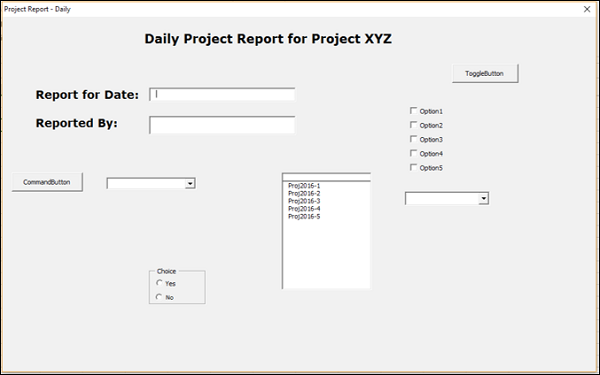
Click the command button. The dropdown list of combo box opens, as it is the action that you have written in the code.
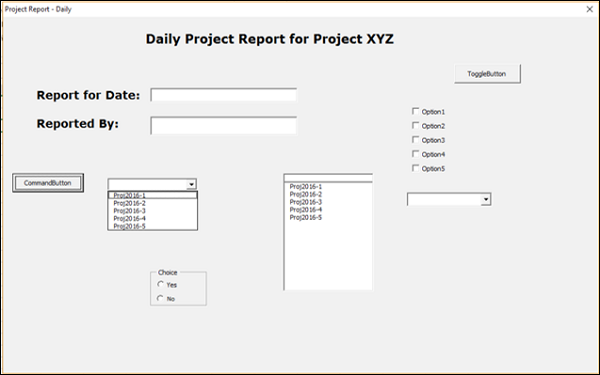
TabStrip
You can insert a tab strip that resembles Excel tabs on the UserForm.
ScrollBar
You can use a scroll bar to scroll through a range of values by clicking on the scroll arrows or by dragging the scroll box.
Insert a scroll bar on the UserForm by drawing it at the required position and adjust the length of the scroll bar.
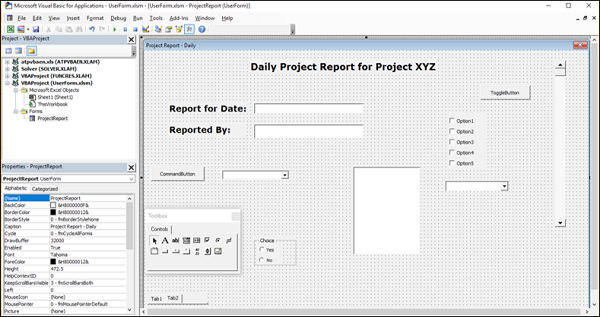
- Right click on the scroll bar.
- Select View Code from the dropdown list. The Code window opens.
- Add the following line under sub ScrollBar1_Scroll().
TextBox2.Text = "Scrolling Values"
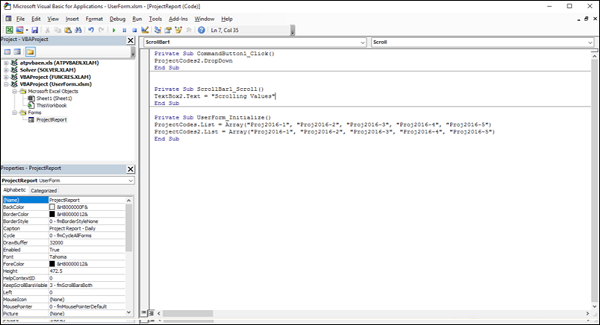
- Click the Run tab on the Ribbon.
- Select Run Sub/UserForm from the dropdown list.
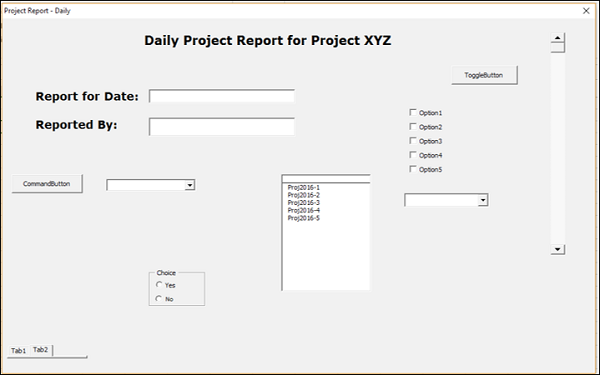
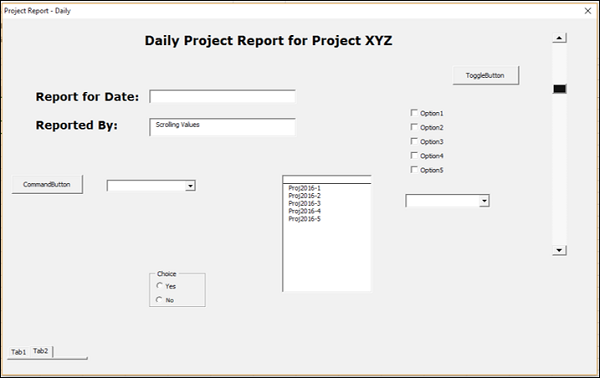
Drag the scroll box. The Text Scrolling Values will be displayed in the text box as you specified it as the action for scroll bar scroll.
MsgBox ()
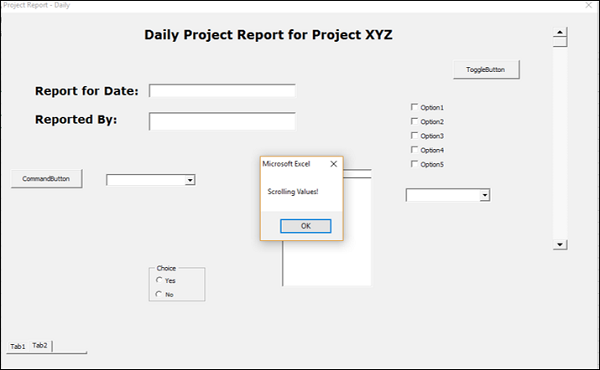
You can use the MsgBox () function to display a message when you click on something. It can be a guideline or some information or a warning or an error alert.
For example, you can display a message that values are being scrolled when you start scrolling the scroll box.
Message Box Icon Displays
You can use message-box icon displays that portray the specific message. You have the multiple message box icons to suit your purpose −
- Type the following code under ScrollBar1_scroll.
MsgBox "Select Ok or Cancel", vbOKCancel, "OK  - Cancel Message"
MsgBox "It's an Error!", vbCritical, "Run time result"
MsgBox "Why this value", vbQuestion, "Run time result"
MsgBox "Value Been for a Long Time", vbInformation, "Run time result"
MsgBox "Oh Is it so", vbExclamation, "Run time result"
- Click the Run tab on the Ribbon.
- Select Run Sub/UserForm from the dropdown list.
- Drag the scroll box.
You will get the following message boxes successively.

Designing UserForm
Now, you have an understanding of the different controls that you can use on a UserForm. Select the controls, group them if required and arrange them on the UserForm as per some meaningful sequence. Write the required actions as code corresponding to the respective controls.
Refer to the VBA tutorial in this tutorials library for an example of UserForm.