
Article Categories
- All Categories
-
 Data Structure
-
 Networking
-
 RDBMS
RDBMS
-
 Operating System
-
 Java
Java
-
 MS Excel
-
 iOS
iOS
-
 HTML
HTML
-
 CSS
CSS
-
 Android
-
 Python
-
 C Programming
-
 C++
C++
-
 C#
C#
-
 MongoDB
-
 MySQL
MySQL
-
 Javascript
-
 PHP
PHP
Excel tutorial: split text, number, and date cells (separate into multiple columns)
It's possible that, for certain reasons, you'll need to divide the text in a single cell into many cells. This lesson is broken down into three sections: dividing text cells, dividing numeric cells, and dividing date and time cells. You will have a better understanding of how to approach the task of splitting when you are presented with a variety of examples, which are provided throughout each section.
Split text
You may use any one of the following techniques to divide a single text cell into numerous columns based on a certain delimiter, such as a comma, a space, a dash, or another character.
Step 1
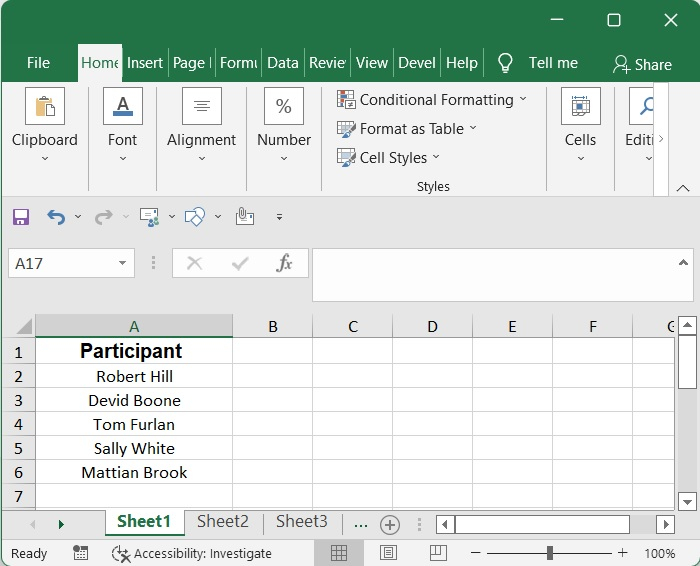
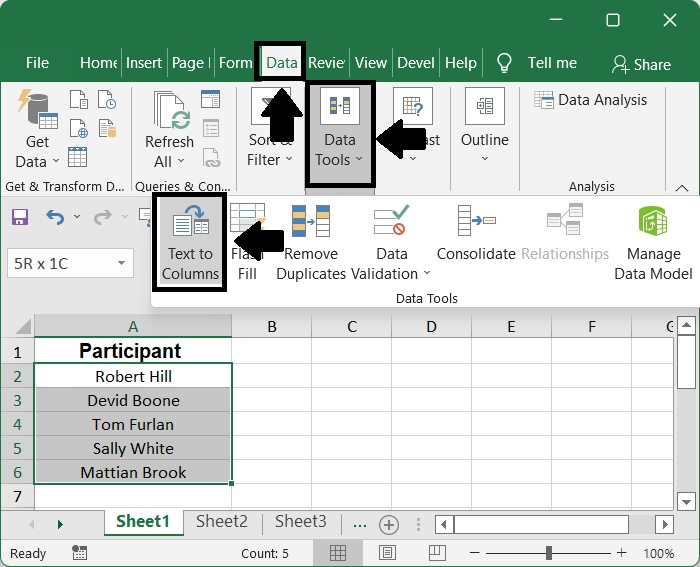
When dividing cells, one of the most common tools that people turn to is Excel's built-in Text to Columns option. You may use the Text to Columns function in the manner described here to divide the cells in the Text Strings column according to commas, as seen in the screenshot that follows.
Step 2
After selecting the range of columns you want to divide by comma, go to the Data menu and choose Text to Columns.
Step 3
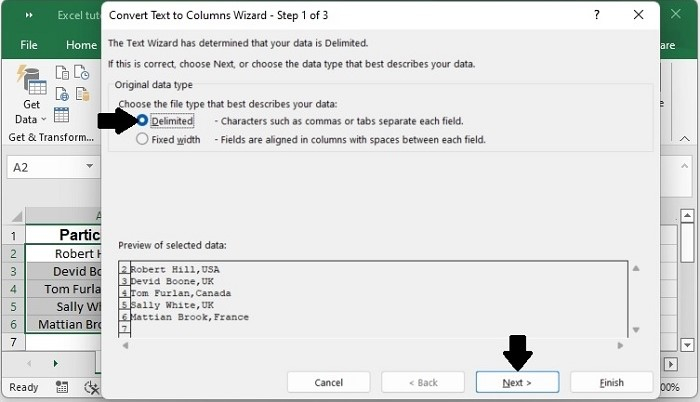
Keep the Delimited radio button selected in the Convert Text to Columns Wizard - Step 1 of 3 dialogue box, and then click the Next button after making your selection.
Step 4
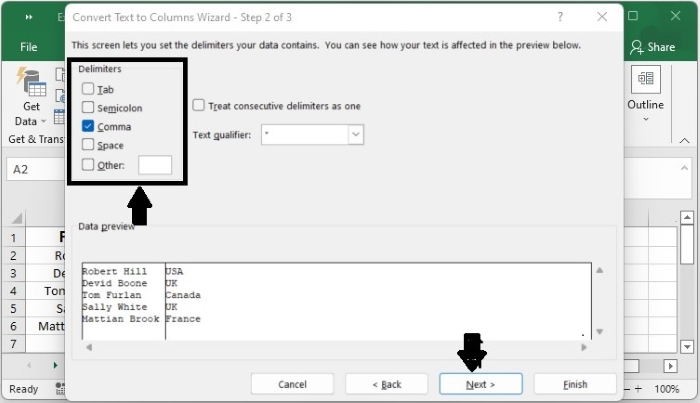
In the Convert Text to Columns Wizard - Step 2 of 3 dialogue box, pick a delimiter according to your requirements (in this particular instance, I merely check the Comma option), and then click the Next button.
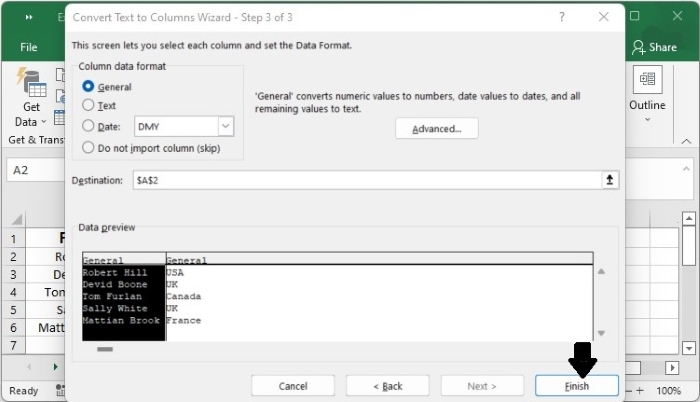
Step 5
Click the "up arrow" button in the dialogue box for the last step to choose a cell to output the split texts, and then click the "Finish" button at the bottom of the box.
Step 6
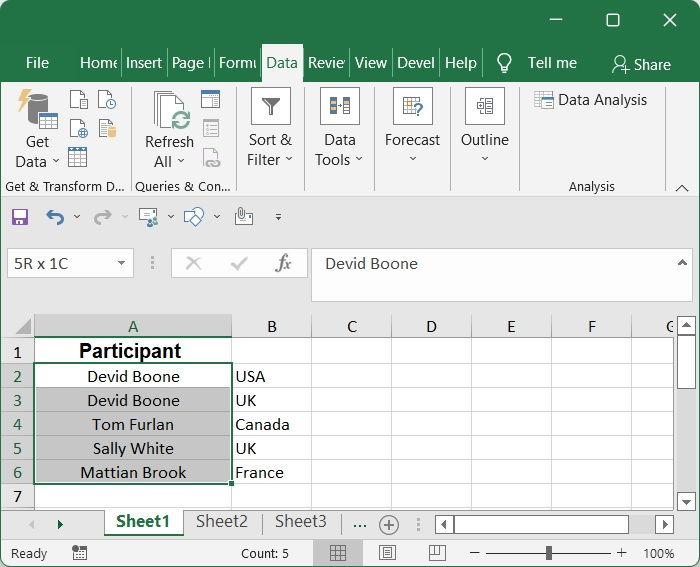
The texts that fall within the specified range are then separated using commas and arranged in the various columns, as is seen in the following example.
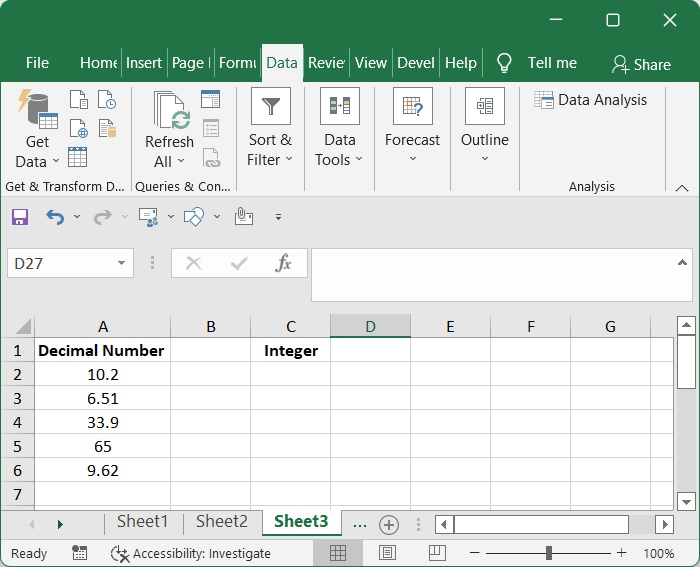
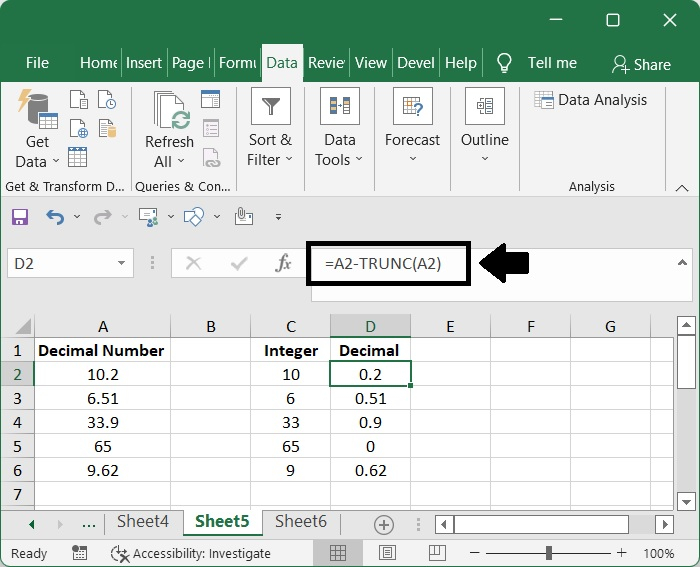
Split number
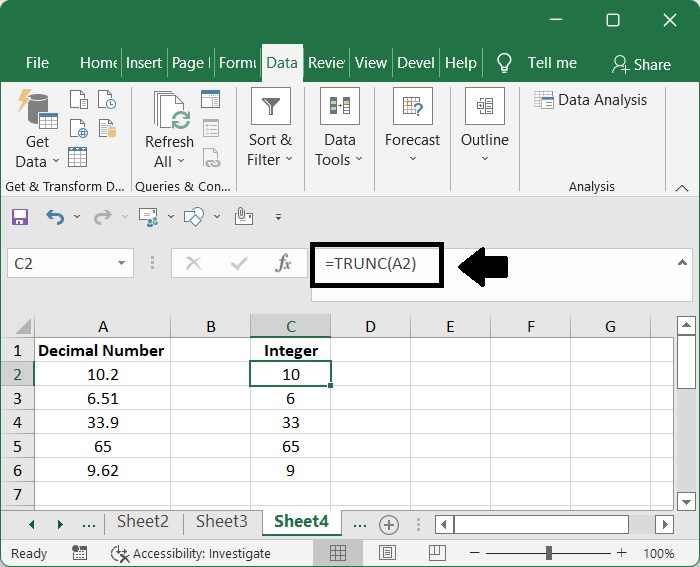
You may use the TRUNC function to divide a number at a decimal point in the spreadsheet.
Determine the part that is an integer.
To determine a number that is an integer, use this formula.
=TRUNC(A2)
Determine the portion down to the decimal place.
To determine a number that is an decimal, use this formula.
=A2-TRUNC(A2)
Split date
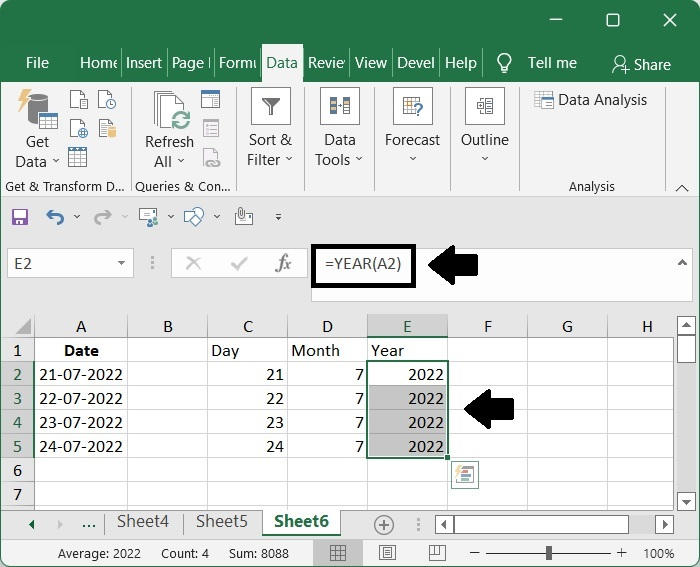
Suppose you have a list of dates in the range A2:A5, and you want to divide the values for each date into three independent columns: one for the day, one for the month, and one for the year. Following are three different approaches that might assist you in reaching your goal of dividing dates.
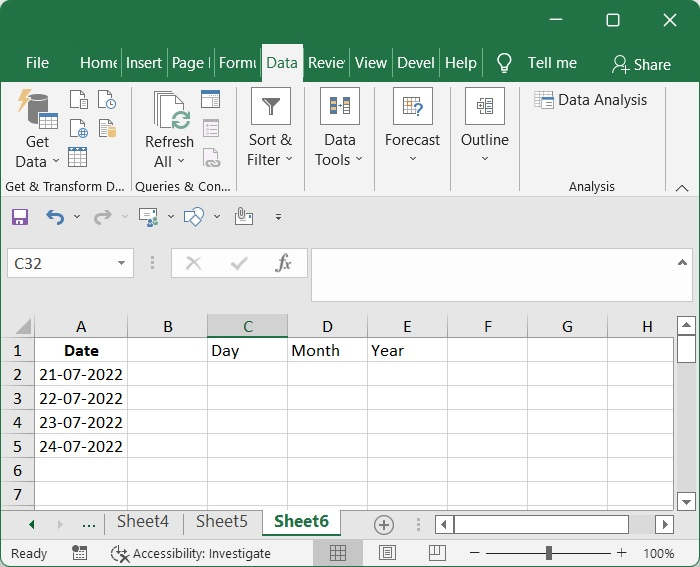
In Excel, you may break up a date into its component parts of day, month, and year by using three different formulae that are based on the DATE function, the MONTH function, and the YEAR function, respectively.
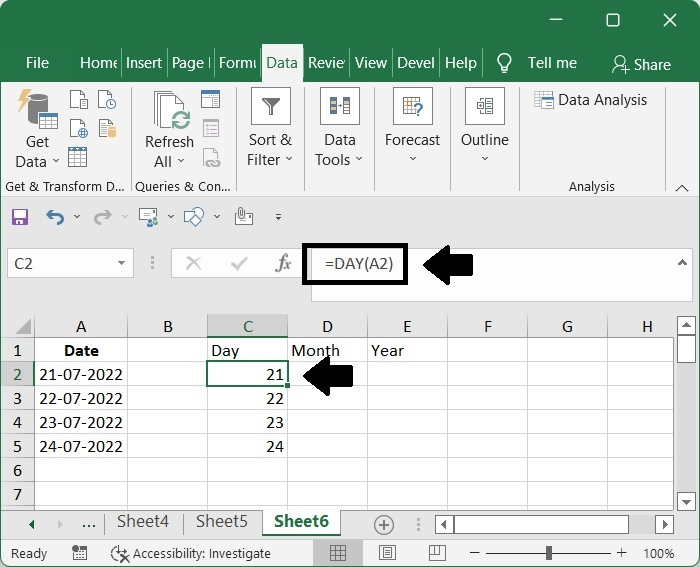
For DAY
Utilizing this technique, determine the month that is included inside the date.
=DAY(A2)
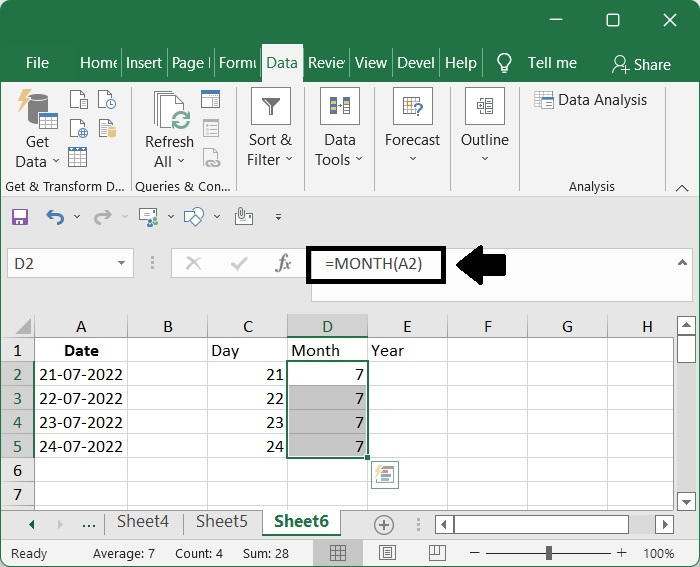
For MONTH
Utilizing this technique, determine the day that is included inside the date.
= MONTH(A2)
For YEAR
Utilizing this technique, determine the year that is included inside the date.
=YEAR(A2)

1K+ Views
