- Ethereum - Home
- Ethereum - Introduction
- Ethereum - Smart Contracts
- Ethereum - Solidity for Contract Writing
- Ethereum - Developing MyContract
- Ethereum - Compiling the Contract
- Ethereum - Deploying the Contract
- Ethereum - Interacting with the Contract
- Ethereum - Limitations of Remix
- Ethereum - Ganache for Blockchain
- Ethereum - Ganache Server Settings
- Ethereum - A Quick Walkthrough
- Ethereum - MyEtherWallet
- Ethereum - Creating Wallet
- Attaching Wallet to Ganache Blockchain
- Ethereum - Deploying Contract
- Interacting with Deployed Contract
- Ethereum - Creating Contract Users
- Ethereum - Summary
- Ethereum Useful Resources
- Ethereum - Quick Guide
- Ethereum - Useful Resources
- Ethereum - Discussion
Ethereum - Deploying Contract
To deploy the contract, select the Contracts menu option as shown in the screenshot below −
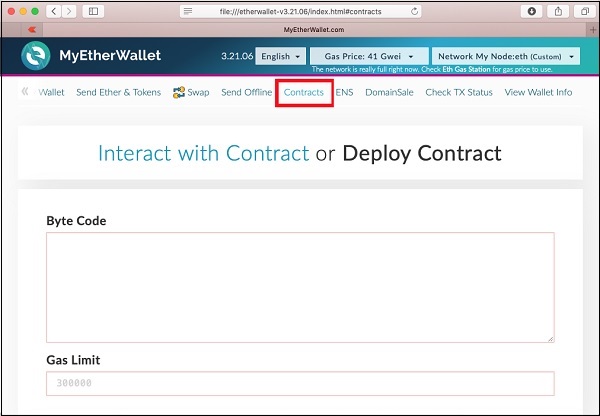
You will need to enter the contracts bytecode on this screen. Remember, when you compile your Solidity contract code, it generated a bytecode that runs on EVM. You will now need to obtain this bytecode from Remix IDE.
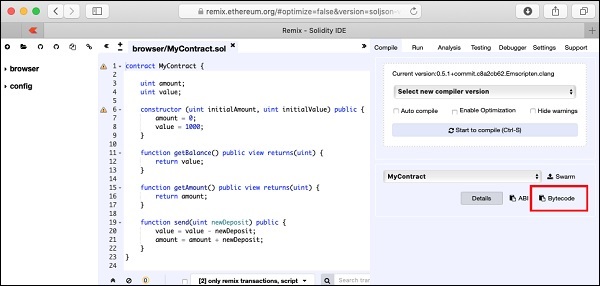
Go to the Remix IDE screen, your earlier typed contract should be there in the code window. If not, retype the contract in the code window. Click on the Bytecode button as shown in the following screenshot −
The bytecode for your compiled source is copied to the clipboard along with some other information. Paste the copied code into your favorite text editor. Following is the screenshot of the text editor −
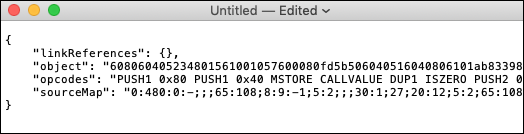
The value of the object tag contains the desired bytecode. Copy this carefully making sure that you do not copy the enclosing quotes. The bytecode is really long, so make sure that you copy right upto the last byte inclusive of it. Now, paste this bytecode in the Deploy Contract screen as shown below −
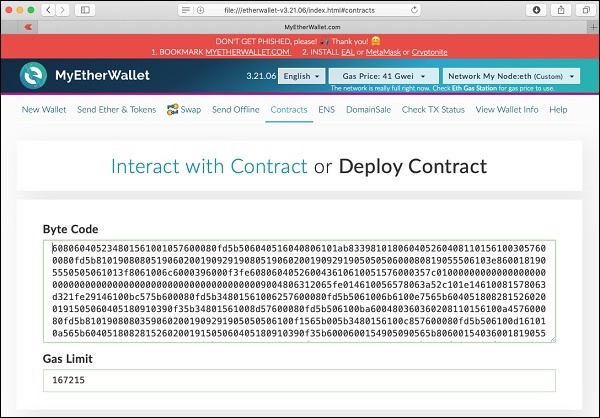
The Gas Limit field is automatically set.
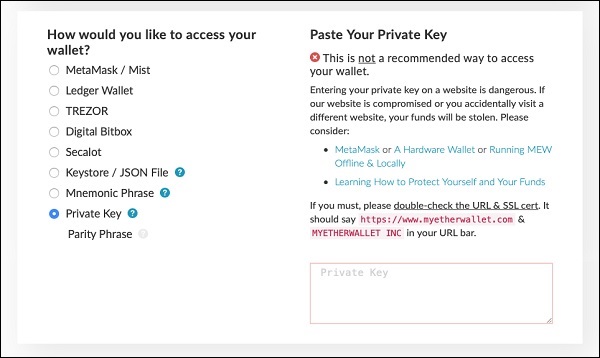
Below the Gas Limit field, you will find the selection for accessing the wallet.
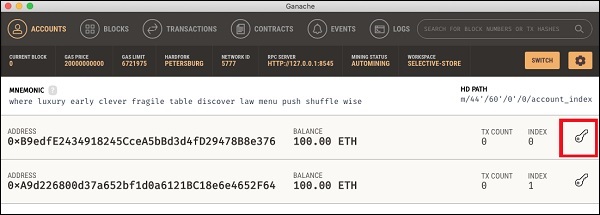
Now, access the wallet using the Private Key of the Ganache account on which this contract will be deployed. To get this private key, go back to the Ganache window. Click on the keys icon of the first account as shown below −
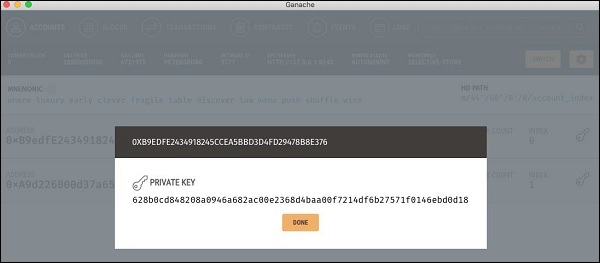
You will see the private key of the user account # 1 as seen in the screenshot below −
Copy this private key and paste it in the Paste Your Private Key section as shown below −

You will see the Unlock button at the bottom of the screen. After unlocking, a success message will appear at the bottom of the screen. At this point, your wallet is attached to account #1 of the Ganache Blockchain.
Now, you are ready to sign and deploy the contract. Click on the Sign Transaction button as shown in the screenshot below −
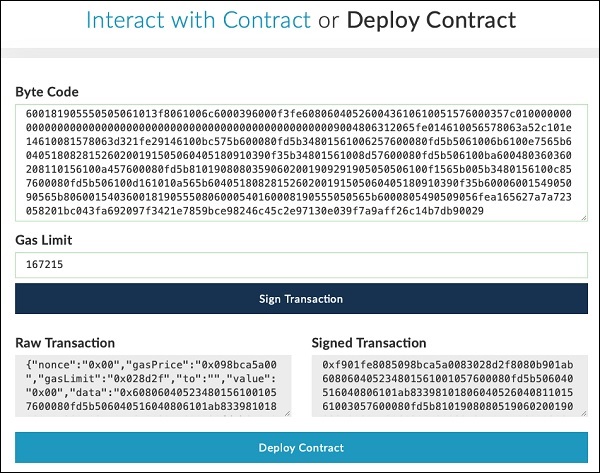
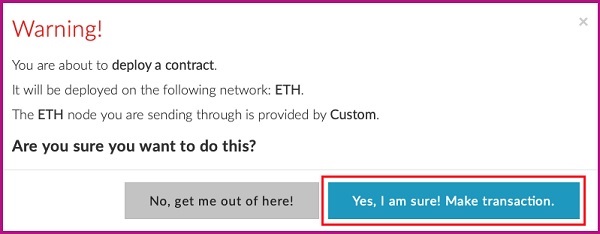
Signing the transaction generates and displays both Raw and Signed transactions. Click on the Deploy Contract button to deploy the contract on the Ganache Blockchain. Remember the contract is deployed by account # 1 user of the Ganache Blockchain. Therefore, account # 1 user becomes the contract creator. Before the contract is deployed, you will be asked to confirm the transaction as it may cost you some real money if you were to deploy this contract on a public real Ethereum Blockchain. Do not worry, for the current private Blockchain running on your local machine, there is no real money involved. Click on the Make transaction button as shown in the screenshot below −
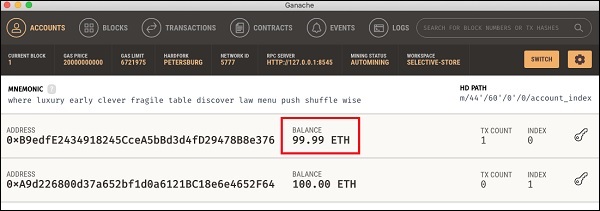
Examine the Ganache console; you will see that the ETH balance in the account # 1 has reduced as seen in the screenshot below −
Now, click on the TRANSACTIONS menu as shown in the screenshot below −

You will see the transaction details.

On this screen, you will find the contracts published address. The address is marked in the above screenshot. You will distribute this address publicly to let others know that your contract is available at this specified address to which they can connect and execute the contract methods, such as sending money to you - the contract creator. Copy this contract address for your own reference as you are going to need it in the next step.
