- CherryPy - Home
- CherryPy - Introduction
- CherryPy - Environment Setup
- CherryPy - Vocabulary
- Bulit-in Http Server
- CherryPy - ToolBox
- CherryPy - A Working Application
- CherryPy - Web Services
- CherryPy - Presentation Layer
- CherryPy - Use Of Ajax
- CherryPy - Demo Application
- CherryPy - Testing
- Deployment Of Application
CherryPy - Quick Guide
CherryPy - Introduction
CherryPy is a web framework of Python which provides a friendly interface to the HTTP protocol for Python developers. It is also called a web application library.
CherryPy uses Pythons strengths as a dynamic language to model and bind HTTP protocol into an API. It is one of the oldest web frameworks for Python, which provides clean interface and reliable platform.
History of CherryPy
Remi Delon released the first version of CherryPy in late June 2002. This was the starting point of a successful Python web library. Remi is a French hacker who has trusted Python for being one of the greatest alternatives for web application development.
The project developed by Remi attracted a number of developers who were interested in the approach. The approach included the following features −
CherryPy was close to the model-view-controller pattern.
A CherryPy class has to be processed and compiled by the CherryPy engine to produce a self-contained Python module embedding the complete application and also its own built-in web server.
CherryPy can map a URL and its query string into a Python method call, for example −
http://somehost.net/echo?message=hello would map to echo(message='hello')
During the two years of development in CherryPy project, it was supported by the community and Remi released several improved versions.
In June 2004, a discussion started about the future of the project and whether it should continue with the same architecture. Brainstorming and discussion by several project regulars then led to the concept of object-publishing engine and filters, which soon became a core part of CherryPy2.Later, in October 2004, the first version of CherryPy 2 alpha was released as a proof of concept of these core ideas. CherryPy 2.0 was a real success; however, it was recognized that its design could still be improved, and needed refactoring.
After discussions based on feedbacks, CherryPy's API was further modified to improve its elegance, leading to the release of CherryPy 2.1.0 in October 2005. After various changes, the team released CherryPy 2.2.0 in April 2006.
Strengths of CherryPy
The following features of CherryPy are considered as its strengths −
Simplicity
Developing a project in CherryPy is a simple task with few lines of code developed as per the conventions and indentations of Python.
CherryPy is also very modular. The primary components are well managed with correct logic concept and parent classes are expandable to child classes.
Power
CherryPy leverages all the power of Python. It also provides tools and plugins, which are powerful extension points needed to develop world-class applications.
Open-source
CherryPy is an open-source Python Web Framework (licensed under the open-source BSD license), which means this framework can be used commercially at ZERO cost.
Community Help
It has a devoted community which provides complete support with various types of questions and answers. The community tries to give complete assistance to the developers starting from the beginner level to the advanced level.
Deployment
There are cost effective ways to deploy the application. CherryPy includes its own production-ready HTTP server to host your application. CherryPy can also be deployed on any WSGI-compliant gateway.
CherryPy - Environment Setup
CherryPy comes in packages like most open-source projects, which can be downloaded and installed in various ways which are mentioned as follows −
- Using a Tarball
- Using easy_install
- Using Subversion
Requirements
The basic requirements for installation of CherryPy framework include −
- Python with version 2.4 or above
- CherryPy 3.0
Installing a Python module is considered an easy process. The installation includes the use of the following commands.
python setup.py build
python setup.py install
The packages of Python are stored in the following default directories −
- On UNIX or Linux,
/usr/local/lib/python2.4/site-packages
or
/usr/lib/python2.4/site-packages
- On Microsoft Windows,
C:\Python or C:\Python2x
- On Mac OS,
Python:Lib:site-package
Installation using Tarball
A Tarball is a compressed archive of files or a directory. The CherryPy framework provides a Tarball for each of its releases (alpha, beta, and stable).
It contains complete source code of the library. The name comes from the utility used in UNIX and other operating systems.
Here are the steps to be followed for the installation of CherryPy using tar ball −
Step 1 − Download the version as per user requirements from http://download.cherrypy.org/
Step 2 − Search for the directory where Tarball has been downloaded and uncompress it. For Linux operating system, type the following command −
tar zxvf cherrypy-x.y.z.tgz
For Microsoft Windows, the user can use a utility such as 7-Zip or Winzip to uncompress the archive via a graphical interface.
Step 3 − Move to the newly created directory and use the following command to build CherryPy −
python setup.py build
For the global installation, the following command should be used −
python setup.py install
Installation using easy_install
Python Enterprise Application Kit (PEAK) provides a python module named Easy Install. This facilitates deployment of the Python packages. This module simplifies the procedure of downloading, building and deploying Python application and products.
Easy Install needs to be installed in the system before installing CherryPy.
Step 1 − Download the ez_setup.py module from http://peak.telecommunity.com and run it using the administrative rights on the computer: python ez_setup.py.
Step 2 − The following command is used to install Easy Install.
easy_install product_name
Step 3 − easy_install will search the Python Package Index (PyPI) to find the given product. PyPI is a centralized repository of information for all Python products.
Use the following command to deploy the latest available version of CherryPy −
easy_install cherrypy
Step 4 − easy_install will then download CherryPy, build, and install it globally to your Python environment.
Installation using Subversion
Installation of CherryPy using Subversion is recommended in the following situations −
A feature exists or a bug has been fixed and is only available in code under development.
When the developer works on CherryPy itself.
When the user needs a branch from the main branch in the versioning control repository.
For bug fixing of the previous release.
The basic principle of subversioning is to register a repository and keep a track of each of the versions, which include a series of changes in them.
Follow these steps to understand the installation of CherryPy using Subversion−
Step 1 − To use the most recent version of the project, it is necessary to check out the trunk folder found on the Subversion repository.
Step 2 − Enter the following command from a shell−
svn co http://svn.cherrypy.org/trunk cherrypy
Step 3 − Now, create a CherryPy directory and download the complete source code into it.
Testing the Installation
It needs to be verified whether the application has properly been installed in the system or not in the same way as we do for applications like Java.
You may choose any one of the three methods mentioned in the previous chapter to install and deploy CherryPy in your environment. CherryPy must be able to import from the Python shell as follows −
import cherrypy

cherrypy.__version__
'3.0.0'
If CherryPy is not installed globally to the local systems Python environment, then you need to set the PYTHONPATH environment variable, else it will display an error in the following way −
import cherrypy

Traceback (most recent call last):
File "<stdin>", line 1, in ?
ImportError: No module named cherrypy
CherryPy - Vocabulary
There are a few important keywords which need to be defined in order to understand the working of CherryPy. The keywords and the definitions are as follows −
| S.No | Keyword & Definition |
|---|---|
| 1. | Web Server It is an interface dealing with the HTTP protocol. Its goal is to transform the HTTP requests to the application server so that they get the responses. |
| 2. | Application It is a piece of software which gathers information. |
| 3. | Application server It is the component holding one or more applications |
| 4. | Web application server It is the combination of web server and application server. |
Example
The following example shows a sample code of CherryPy −
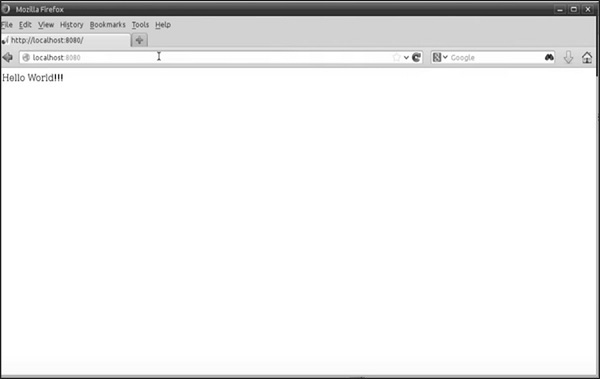
import cherrypy

class demoExample:
   def index(self):
   return "Hello World!!!"
   index.exposed = True
cherrypy.quickstart(demoExample())
Let us now understand how the code works −
The package named CherryPy is always imported in the specified class to ensure proper functioning.
In the above example, the function named index returns the parameter Hello World!!!.
The last line starts the web server and calls the specified class (here, demoExample) and returns the value mentioned in default function index.
The example code returns the following output −
Built-in Http Server & Internal Engine
CherryPy comes with its own web (HTTP) server. That is why CherryPy is self-contained and allows users to run a CherryPy application within minutes of getting the library.
The web server acts as the gateway to the application with the help of which all the requests and responses are kept in track.
To start the web server, a user must make the following call −
cherryPy.server.quickstart()
The internal engine of CherryPy is responsible for the following activities −
- Creation and management of request and response objects.
- Controlling and managing the CherryPy process.
CherryPy Configuration
The framework comes with its own configuration system allowing you to parameterize the HTTP server. The settings for the configuration can be stored either in a text file with syntax close to the INI format or as a complete Python dictionary.
To configure the CherryPy server instance, the developer needs to use the global section of the settings.
global_conf = {
   'global': {
      'server.socket_host': 'localhost',
      'server.socket_port': 8080,
   },
}

application_conf = {
   '/style.css': {
      'tools.staticfile.on': True,
      'tools.staticfile.filename': os.path.join(_curdir, 'style.css'),
   }
}

This could be represented in a file like this:
[global]
server.socket_host = "localhost"
server.socket_port = 8080
[/style.css]
tools.staticfile.on = True
tools.staticfile.filename = "/full/path/to.style.css"
HTTP Compliance
CherryPy has been evolving slowly but it includes the compilation of HTTP specifications with the support of HTTP/1.0 later transferring with the support of HTTP/1.1.
CherryPy is said to be conditionally compliant with HTTP/1.1 as it implements all the must and required levels but not all the should levels of the specification. Therefore, CherryPy supports the following features of HTTP/1.1 −
If a client claims to support HTTP/1.1, it must send a header field in any request made with the specified protocol version. If it is not done, CherryPy will immediately stop the processing of the request.
CherryPy generates a Date header field which is used in all configurations.
CherryPy can handle response status code (100) with the support of clients.
CherryPy's built-in HTTP server supports persistent connections that are the default in HTTP/1.1, through the use of the Connection: Keep-Alive header.
CherryPy handles correctly chunked requests and responses.
CherryPy supports requests in two distinct ways − If-Modified-Since and If-Unmodified-Since headers and sends responses as per the requests accordingly.
CherryPy allows any HTTP method.
CherryPy handles the combinations of HTTP versions between the client and the setting set for the server.
Multithreaded Application Server
CherryPy is designed based on the multithreading concept. Every time a developer gets or sets a value into the CherryPy namespace, it is done in the multi-threaded environment.
Both cherrypy.request and cherrypy.response are thread-data containers, which imply that your application calls them independently by knowing which request is proxied through them at runtime.
Application servers using the threaded pattern are not highly regarded because the use of threads is seen as increasing the likelihood of problems due to synchronization requirements.
The other alternatives include −
Multi-process Pattern
Each request is handled by its own Python process. Here, performance and stability of the server can be considered as better.
Asynchronous Pattern
Here, accepting new connections and sending the data back to the client is done asynchronously from the request process. This technique is known for its efficiency.
URL Dispatching
The CherryPy community wants to be more flexible and that other solutions for dispatchers would be appreciated. CherryPy 3 provides other built-in dispatchers and offers a simple way to write and use your own dispatchers.
- Applications used to develop HTTP methods. (GET, POST, PUT, etc.)
- The one which defines the routes in the URL Routes Dispatcher
HTTP Method Dispatcher
In some applications, URIs are independent of the action, which is to be performed by the server on the resource.
For example,http://xyz.com/album/delete/10
The URI contains the operation the client wishes to carry out.
By default, CherryPy dispatcher would map in the following way −
album.delete(12)
The above mentioned dispatcher is mentioned correctly, but can be made independent in the following way −
http://xyz.com/album/10
The user may wonder how the server dispatches the exact page. This information is carried by the HTTP request itself. When there is request from client to server, CherryPy looks the best suiting handler, the handler is representation of the resource targeted by the URI.
DELETE /album/12 HTTP/1.1
Routes Dispatcher
Here is a list of the parameters for the method required in dispatching −
The name parameter is the unique name for the route to connect.
The route is the pattern to match URIs.
The controller is the instance containing page handlers.
Using the Routes dispatcher connects a pattern that matches URIs and associates a specific page handler.
Example
Let us take an example to understand how it works −
import random
import string
import cherrypy
class StringMaker(object):
@cherrypy.expose
def index(self):
return "Hello! How are you?"
@cherrypy.expose
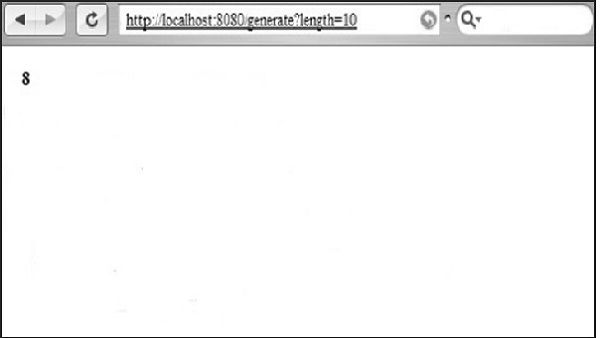
def generate(self, length=9):
return ''.join(random.sample(string.hexdigits, int(length)))
if __name__ == '__main__':
cherrypy.quickstart(StringMaker ())
Follow the steps given below to get the output of the above code −
Step 1 − Save the above mentioned file as tutRoutes.py.
Step 2 − Visit the following URL −
http://localhost:8080/generate?length=10
Step 3 − You will receive the following output −
CherryPy - ToolBox
Within CherryPy, built-in tools offer a single interface to call the CherryPy library. The tools defined in CherryPy can be implemented in the following ways −
- From the configuration settings
- As a Python decorator or via the special _cp_config attribute of a page handler
- As a Python callable that can be applied from within any function
Basic Authentication Tool
The purpose of this tool is to provide basic authentication to the application designed in the application.
Arguments
This tool uses the following arguments −
| Name | Default | Description |
|---|---|---|
| realm | N/A | String defining the realm value. |
| users | N/A | Dictionary of the form − username:password or a Python callable function returning such a dictionary. |
| encrypt | None | Python callable used to encrypt the password returned by the client and compare it with the encrypted password provided in the users dictionary. |
Example
Let us take an example to understand how it works −
import sha
import cherrypy

class Root:
@cherrypy.expose
def index(self):

return """
<html>
   <head></head>
   <body>
      <a href = "admin">Admin </a>
   </body>
</html>
"""

class Admin:

@cherrypy.expose
def index(self):
return "This is a private area"

if __name__ == '__main__':
def get_users():
# 'test': 'test'
return {'test': 'b110ba61c4c0873d3101e10871082fbbfd3'}
def encrypt_pwd(token):

return sha.new(token).hexdigest()
   conf = {'/admin': {'tools.basic_auth.on': True,
      tools.basic_auth.realm': 'Website name',
      'tools.basic_auth.users': get_users,
      'tools.basic_auth.encrypt': encrypt_pwd}}
   root = Root()
root.admin = Admin()
cherrypy.quickstart(root, '/', config=conf)
The get_users function returns a hard-coded dictionary but also fetches the values from a database or anywhere else. The class admin includes this function which makes use of an authentication built-in tool of CherryPy. The authentication encrypts the password and the user Id.
The basic authentication tool is not really secure, as the password can be encoded and decoded by an intruder.
Caching Tool
The purpose of this tool is to provide memory caching of CherryPy generated content.
Arguments
This tool uses the following arguments −
| Name | Default | Description |
|---|---|---|
| invalid_methods | ("POST", "PUT", "DELETE") | Tuples of strings of HTTP methods not to be cached. These methods will also invalidate (delete) any cached copy of the resource. |
| cache_Class | MemoryCache | Class object to be used for caching |
Decoding Tool
The purpose of this tool is to decode the incoming request parameters.
Arguments
This tool uses the following arguments −
| Name | Default | Description |
|---|---|---|
| encoding | None | It looks for the content-type header |
| Default_encoding | "UTF-8" | Default encoding to be used when none is provided or found. |
Example
Let us take an example to understand how it works −
import cherrypy
from cherrypy import tools

class Root:
@cherrypy.expose
def index(self):

return """
<html>
   <head></head>
   <body>
      <form action = "hello.html" method = "post">
         <input type = "text" name = "name" value = "" />
         <input type = submit name = "submit"/>
      </form>
   </body>
</html>
"""

@cherrypy.expose
@tools.decode(encoding='ISO-88510-1')
def hello(self, name):
return "Hello %s" % (name, )
if __name__ == '__main__':
cherrypy.quickstart(Root(), '/')
The above code takes a string from the user and it will redirect the user to "hello.html" page where it will be displayed as Hello with the given name.
The output of the above code is as follows −
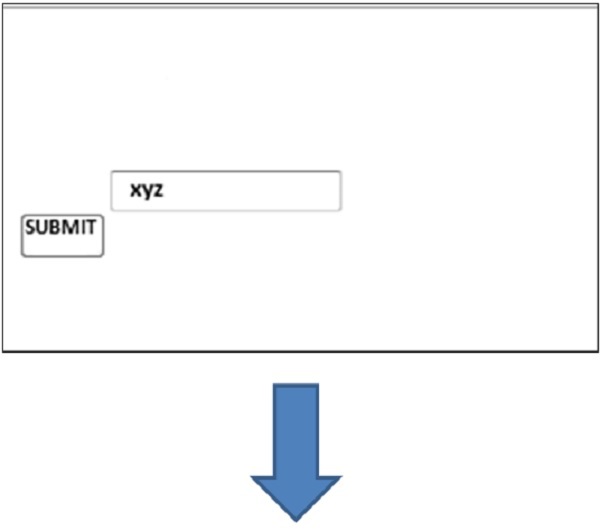
hello.html

CherryPy - A Working Application
Full stack applications provide a facility to create a new application via some command or execution of the file.
Consider the Python applications like web2py framework; the entire project/application is created in terms of MVC framework. Likewise, CherryPy allows the user to set up and configure the layout of the code as per their requirements.
In this chapter, we will learn in detail how to create CherryPy application and execute it.
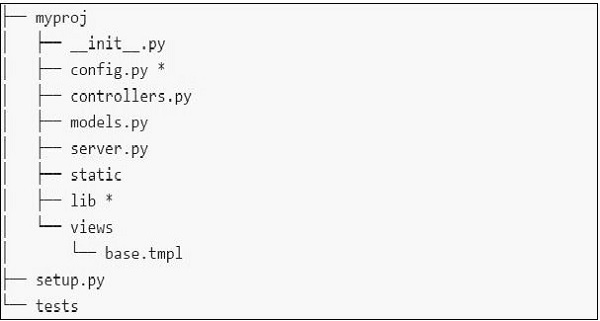
File System
The file system of the application is shown in the following screenshot −
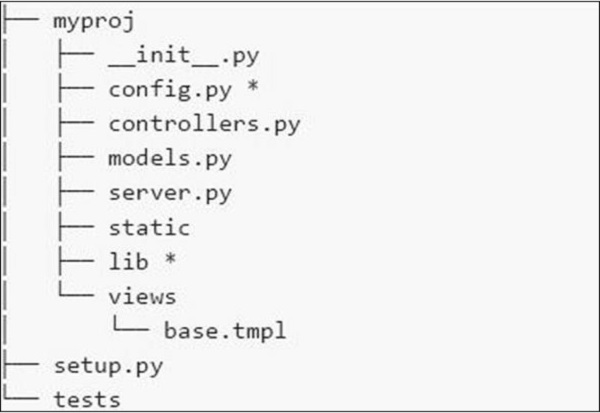
Here is a brief description of the various files that we have in the file system −
config.py − Every application needs a configuration file and a way to load it. This functionality can be defined in config.py.
controllers.py − MVC is a popular design pattern followed by the users. The controllers.py is where all the objects are implemented that will be mounted on the cherrypy.tree.
models.py − This file interacts with the database directly for some services or for storing persistent data.
server.py − This file interacts with production ready web server that works properly with load balancing proxy.
Static − It includes all the CSS and image files.
Views − It includes all the template files for a given application.
Example
Let us learn in detail the steps to create a CherryPy application.
Step 1 − Create an application that should contain the application.
Step 2 − Inside the directory, create a python package corresponding to the project. Create gedit directory and include _init_.py file within the same.
Step 3 − Inside the package, include controllers.py file with the following content −
#!/usr/bin/env python

import cherrypy

class Root(object):

   def __init__(self, data):
      self.data = data

   @cherrypy.expose
   def index(self):
      return 'Hi! Welcome to your application'

def main(filename):
   data = {} # will be replaced with proper functionality later

   # configuration file
   cherrypy.config.update({
      'tools.encode.on': True, 'tools.encode.encoding': 'utf-8',
      'tools.decode.on': True,
      'tools.trailing_slash.on': True,
      'tools.staticdir.root': os.path.abspath(os.path.dirname(__file__)),
   })

   cherrypy.quickstart(Root(data), '/', {
      '/media': {
         'tools.staticdir.on': True,
         'tools.staticdir.dir': 'static'
      }
   })

if __name__ == '__main__':
main(sys.argv[1])
Step 4 − Consider an application where the user inputs the value through a form. Lets include two forms index.html and submit.html in the application.
Step 5 − In the above code for controllers, we have index(), which is a default function and loads first if a particular controller is called.
Step 6 − The implementation of the index() method can be changed in the following way −
@cherrypy.expose
   def index(self):
      tmpl = loader.load('index.html')

      return tmpl.generate(title='Sample').render('html', doctype='html')
Step 7 − This will load index.html on starting the given application and direct it to the given output stream. The index.html file is as follows −
index.html
<!DOCTYPE html >
<html>
   <head>
      <title>Sample</title>
   </head>

   <body class = "index">
      <div id = "header">
         <h1>Sample Application</h1>
      </div>

      <p>Welcome!</p>

      <div id = "footer">
         <hr>
      </div>

   </body>

</html>
Step 8 − It is important to add a method to the Root class in controller.py if you want to create a form which accepts values such as names and titles.
@cherrypy.expose
   def submit(self, cancel = False, **value):

      if cherrypy.request.method == 'POST':
         if cancel:
            raise cherrypy.HTTPRedirect('/') # to cancel the action
         link = Link(**value)
         self.data[link.id] = link
         raise cherrypy.HTTPRedirect('/')
      tmp = loader.load('submit.html')
      streamValue = tmp.generate()

      return streamValue.render('html', doctype='html')
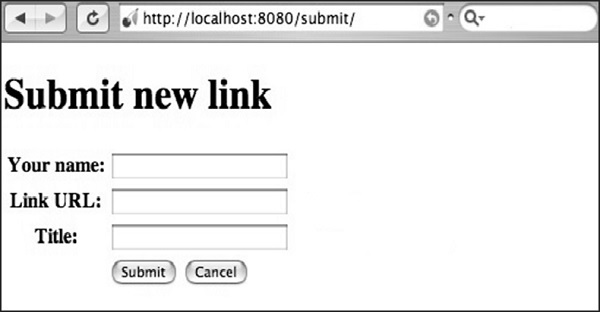
Step 9 − The code to be included in submit.html is as follows −
<!DOCTYPE html>
   <head>
      <title>Input the new link</title>
   </head>

   <body class = "submit">
      <div id = " header">
         <h1>Submit new link</h1>
      </div>

      <form action = "" method = "post">
         <table summary = "">
            <tr>
               <th><label for = " username">Your name:</label></th>
               <td><input type = " text" id = " username" name = " username" /></td>
            </tr>

            <tr>
               <th><label for = " url">Link URL:</label></th>
               <td><input type = " text" id=" url" name= " url" /></td>
            </tr>

            <tr>
               <th><label for = " title">Title:</label></th>
               <td><input type = " text" name = " title" /></td>
            </tr>

            <tr>
               <td></td>
               <td>
                  <input type = " submit" value = " Submit" />
                  <input type = " submit" name = " cancel" value = "Cancel" />
               </td>
            </tr>

         </table>

      </form>
      <div id = "footer">
      </div>

   </body>

</html>
Step 10 − You will receive the following output −
Here, the method name is defined as POST. It is always important to cross verify the method specified in the file. If the method includes POST method, the values should be rechecked in the database in appropriate fields.
If the method includes GET method, the values to be saved will be visible in the URL.
CherryPy - Web Services
A web service is a set of web-based components that helps in the exchange of data between the application or systems which also includes open protocols and standards. It can be published, used and found on the web.
Web services are of various types like RWS (RESTfUL Web Service), WSDL, SOAP and many more.
REST Representational State Transfer
A type of remote access protocol, which, transfers state from client to server which can be used to manipulate state instead of calling remote procedures.
Does not define any specific encoding or structure and ways of returning useful error messages.
Uses HTTP "verbs" to perform state transfer operations.
The resources are uniquely identified using URL.
It is not an API but instead an API transport layer.
REST maintains the nomenclature of resources on a network and provides unified mechanism to perform operations on these resources. Each resource is identified by at least one identifier. If the REST infrastructure is implemented with the base of HTTP, then these identifiers are termed as Uniform Resource Identifiers (URIs).
The following are the two common subsets of the URI set −
| Subset | Full form | Example |
|---|---|---|
| URL | Uniform Resource Locator | http://www.gmail.com/ |
| URN | Uniform Resource Name | urn:isbn:0-201-71088-9 urn:uuid:13e8cf26-2a25-11db-8693-000ae4ea7d46 |
Before understanding the implementation of CherryPy architecture, lets focus on the architecture of CherryPy.
CherryPy includes the following three components −
cherrypy.engine − It controls process startup/teardown and event handling.
cherrypy.server − It configures and controls the WSGI or HTTP server.
cherrypy.tools − A toolbox of utilities that are orthogonal to processing an HTTP request.
REST Interface through CherryPy
RESTful web service implements each section of CherryPy architecture with the help of the following −
- Authentication
- Authorization
- Structure
- Encapsulation
- Error Handling
Authentication
Authentication helps in validating the users with whom we are interacting. CherryPy includes tools to handle each authentication method.
def authenticate():
   if not hasattr(cherrypy.request, 'user') or cherrypy.request.user is None:
      # < Do stuff to look up your users >

      cherrypy.request.authorized = False # This only authenticates.
         Authz must be handled separately.

      cherrypy.request.unauthorized_reasons = []
      cherrypy.request.authorization_queries = []

cherrypy.tools.authenticate = \
   cherrypy.Tool('before_handler', authenticate, priority=10)
The above function authenticate() will help to validate the existence of the clients or users. The built-in tools help to complete the process in a systematic way.
Authorization
Authorization helps in maintaining the sanity of the process via URI. The process also helps in morphing objects by user token leads.
def authorize_all():
   cherrypy.request.authorized = 'authorize_all'

cherrypy.tools.authorize_all = cherrypy.Tool('before_handler', authorize_all, priority=11)

def is_authorized():
   if not cherrypy.request.authorized:
      raise cherrypy.HTTPError("403 Forbidden",
         ','.join(cherrypy.request.unauthorized_reasons))

cherrypy.tools.is_authorized = cherrypy.Tool('before_handler', is_authorized,
priority = 49)

cherrypy.config.update({
   'tools.is_authorized.on': True,
   'tools.authorize_all.on': True
})
The built-in tools of authorization help in handling the routines in a systematic way, as mentioned in the previous example.
Structure
Maintaining a structure of API helps in reducing the work load of mapping the URI of application. It is always necessary to keep API discoverable and clean. The basic structure of API for CherryPy framework should have the following −
- Accounts and User
- Autoresponder
- Contact
- File
- Folder
- List and field
- Message and Batch
Encapsulation
Encapsulation helps in creating API which is lightweight, human readable and accessible to various clients. The list of items along with Creation, Retrieval, Update and Deletion requires encapsulation of API.
Error Handling
This process manages errors, if any, if API fails to execute at the particular instinct. For example, 400 is for Bad Request and 403 is for unauthorized request.
Example
Consider the following as an example for database, validation, or application errors.
import cherrypy
import json

def error_page_default(status, message, traceback, version):
   ret = {
      'status': status,
      'version': version,
      'message': [message],
      'traceback': traceback
   }

   return json.dumps(ret)

class Root:
   _cp_config = {'error_page.default': error_page_default}

@cherrypy.expose
   def index(self):
      raise cherrypy.HTTPError(500, "Internal Sever Error")
cherrypy.quickstart(Root())
The above code will produce the following output −
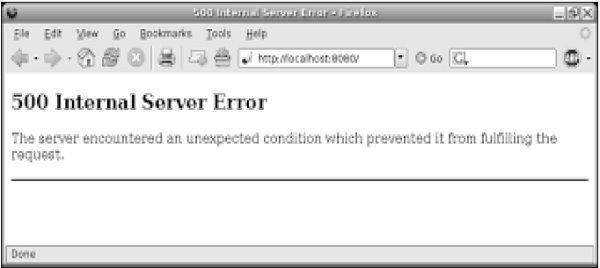
Management of API (Application Programming Interface) is easy through CherryPy because of the built-in access tools.
HTTP Methods
The list of HTTP methods which operate on the resources are as follows −
| S.No | HTTP Method & Operation |
|---|---|
| 1. | HEAD Retrieves the resource metadata. |
| 2. | GET Retrieves the resource metadata and content. |
| 3. | POST Requests the server to create a new resource using the data enclosed in the request body. |
| 4. | PUT Requests the server to replace an existing resource with the one enclosed in the request body. |
| 5. | DELETE Requests the server to remove the resource identified by that URI. |
| 6. | OPTIONS Requests the server to return details about capabilities either globally or specifically towards a resource. |
Atom Publishing Protocol (APP)
APP has arisen from the Atom community as an application-level protocol on top of HTTP to allow the publishing and editing of web resources. The unit of messages between an APP server and a client is based on the Atom XML-document format.
The Atom Publishing Protocol defines a set of operations between an APP service and a user-agent using HTTP and its mechanisms and the Atom XML-document format as the unit of messages.
APP first defines a service document, which provides the user agent with the URI of the different collections served by the APP service.
Example
Let us take an example to demonstrate how APP works −
<?xml version = "1.0" encoding = "UTF-8"?>
<service xmlns = "http://purl.org/atom/app#" xmlns:atom = "http://www.w3.org/2005/Atom">

   <workspace>
      <collection href = "http://host/service/atompub/album/">
         <atom:title> Albums</atom:title>
         <categories fixed = "yes">
            <atom:category term = "friends" />
         </categories>
      </collection>

      <collection href = "http://host/service/atompub/film/">
         <atom:title>Films</atom:title>
         <accept>image/png,image/jpeg</accept>
      </collection>
   </workspace>

</service>
APP specifies how to perform the basic CRUD operations against a member of a collection or the collection itself by using HTTP methods as described in the following table −
| Operation | HTTP Method | Status Code | Content |
|---|---|---|---|
| Retrieve | GET | 200 | An Atom entry representing the resource |
| Create | POST | 201 | The URI of the newly created resource via the Location and Content-Location headers |
| Update | PUT | 200 | An Atom entry representing the resource |
| Delete | DELETE | 200 | None |
CherryPy - Presentation Layer
The Presentation Layer ensures that the communication passing through it targets the intended recipients. CherryPy maintains the working of presentation layer by various template engines.
A template engine takes the input of the page with the help of business logic and then processes it to the final page which targets only the intended audience.
Kid The Template Engine
Kid is a simple template engine which includes the name of the template to be processed (which is mandatory) and input of the data to be passed when the template is rendered.
On creation of the template for the first time, Kid creates a Python module which can be served as a cached version of the template.
The kid.Template function returns an instance of the template class which can be used to render the output content.
The template class provides the following set of commands −
| S.No | Command & Description |
|---|---|
| 1. | serialize It returns the output content as a string. |
| 2. | generate It returns the output content as an iterator. |
| 3. | write It dumps the output content into a file object. |
The parameters used by these commands are as follows −
| S.No | Command & Description |
|---|---|
| 1. | encoding It informs how to encode the output content |
| 2. | fragment It is a Boolean value which tells to XML prolog or Doctype |
| 3. | output This type of serialization is used to render the content |
Example
Let us take an example to understand how kid works −
<!DOCTYPE html PUBLIC "-//W3C//DTD HTML 4.01//EN" "http://www.w3.org/TR/html4/strict.dtd">
<html xmlns:py = "http://purl.org/kid/ns#">
   <head>
      <title>${title}</title>
      <link rel = "stylesheet" href = "style.css" />
   </head>

   <body>
      <p>${message}</p>
   </body>
</html>

The next step after saving the file is to process the template via the Kid engine.

import kid

params = {'title': 'Hello world!!', 'message': 'CherryPy.'}
t = kid.Template('helloworld.kid', **params)
print t.serialize(output='html')
Kid's Attributes
The following are the attributes of Kid −
XML-Based Templating Language
It is an XML-based language. A Kid template must be a well-formed XML document with proper naming conventions.
Kid implements attributes within the XML elements to update the underlying engine on the action to be followed for reaching the element. To avoid overlapping with other existing attributes within the XML document, Kid has introduced its own namespace.
<p py:if = "...">...</p>
Variable Substitution
Kid comes with a variable substitution scheme and a simple approach ${variable-name}.
The variables can either be used in attributes of elements or as the text content of an element. Kid will evaluate the variable each and every time the execution takes place.
If the user needs the output of a literal string as ${something}, it can be escaped using the variable substitution by doubling the dollar sign.
Conditional Statement
For toggling different cases in the template, the following syntax is used −
<tag py:if = "expression">...</tag>
Here, tag is the name of the element, for instance DIV or SPAN.
The expression is a Python expression. If as a Boolean it evaluates to True, the element will be included in the output content or else it will not be a part of the output content.
Looping Mechanism
For looping an element in Kid, the following syntax is used −
<tag py:for = "expression">...</tag>
Here, tag is the name of the element. The expression is a Python expression, for example for value in [...].
Example
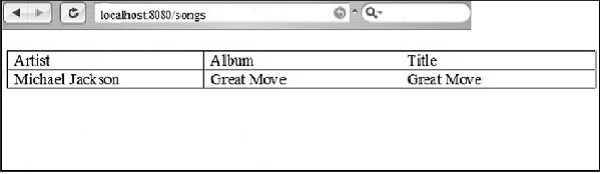
The following code shows how the looping mechanism works −
<!DOCTYPE html PUBLIC "-//W3C//DTD HTML 4.01//EN" "http://www.w3.org/TR/html4/strict.dtd">
<html>
   <head>
      <title>${title}</title>
      <link rel = "stylesheet" href = "style.css" />
   </head>

   <body>
      <table>
         <caption>A few songs</caption>
         <tr>
            <th>Artist</th>
            <th>Album</th>
            <th>Title</th>
         </tr>

         <tr py:for = "info in infos">
            <td>${info['artist']}</td>
            <td>${info['album']}</td>
            <td>${info['song']}</td>
         </tr>
      </table>
   </body>
</html>

import kid

params = discography.retrieve_songs()
t = kid.Template('songs.kid', **params)
print t.serialize(output='html')
The output for the above code with the looping mechanism is as follows −
CherryPy - Use Of Ajax
Till the year 2005, the pattern followed in all web applications was to manage one HTTP request per page. The navigation of one page to another page required loading the complete page. This would reduce the performance at a greater level.
Thus, there was a rise in rich client applications which used to embed AJAX, XML, and JSON with them.
AJAX
Asynchronous JavaScript and XML (AJAX) is a technique to create fast and dynamic web pages. AJAX allows web pages to be updated asynchronously by exchanging small amounts of data behind the scenes with the server. This means that it is possible to update parts of a web page, without reloading the whole page.
Google Maps, Gmail, YouTube, and Facebook are a few examples of AJAX applications.
Ajax is based on the idea of sending HTTP requests using JavaScript; more specifically AJAX relies on the XMLHttpRequest object and its API to perform those operations.
JSON
JSON is a way to carry serialized JavaScript objects in such a way that JavaScript application can evaluate them and transform them into JavaScript objects which can be manipulated later.
For instance, when the user requests the server for an album object formatted with the JSON format, the server would return the output as following −
{'description': 'This is a simple demo album for you to test', 'author': xyz}
Now the data is a JavaScript associative array and the description field can be accessed via −
data ['description'];
Applying AJAX to the Application
Consider the application which includes a folder named media with index.html and Jquery plugin, and a file with AJAX implementation. Let us consider the name of the file as ajax_app.py
ajax_app.py
import cherrypy
import webbrowser
import os
import simplejson
import sys

MEDIA_DIR = os.path.join(os.path.abspath("."), u"media")

class AjaxApp(object):
   @cherrypy.expose
   def index(self):
      return open(os.path.join(MEDIA_DIR, u'index.html'))

   @cherrypy.expose
   def submit(self, name):
      cherrypy.response.headers['Content-Type'] = 'application/json'
      return simplejson.dumps(dict(title="Hello, %s" % name))

config = {'/media':
   {'tools.staticdir.on': True,
   'tools.staticdir.dir': MEDIA_DIR,}
}

def open_page():
webbrowser.open("http://127.0.0.1:8080/")
cherrypy.engine.subscribe('start', open_page)
cherrypy.tree.mount(AjaxApp(), '/', config=config)
cherrypy.engine.start()
The class AjaxApp redirects to the web page of index.html, which is included in the media folder.
<!DOCTYPE html PUBLIC "-//W3C//DTD XHTML 1.0 Strict//EN"
   " http://www.w3.org/TR/xhtml1/DTD/xhtml1-strict.dtd">

<html xmlns = "http://www.w3.org/1999/xhtml" lang = "en" xml:lang = "en">
   <head>
      <title>AJAX with jQuery and cherrypy</title>
      <meta http-equiv = " Content-Type" content = " text/html; charset=utf-8" />
      <script type = " text/javascript" src = " /media/jquery-1.4.2.min.js"></script>

      <script type = " text/javascript">
         $(function() {

            // When the testform is submitted...
            $("#formtest").submit(function() {

               // post the form values via AJAX...
               $.post('/submit', {name: $("#name").val()}, function(data) {

                  // and set the title with the result
                  $("#title").html(data['title']) ;
               });
               return false ;
            });
         });
      </script>

   </head>

   <body>
      <h1 id = "title">What's your name?</h1>
      <form id = " formtest" action = " #" method = " post">
         <p>
            <label for = " name">Name:</label>
            <input type = " text" id = "name" /> <br />
            <input type = " submit" value = " Set" />
         </p>
      </form>
   </body>

</html>
The function for AJAX is included within <script> tags.
Output
The above code will produce the following output −
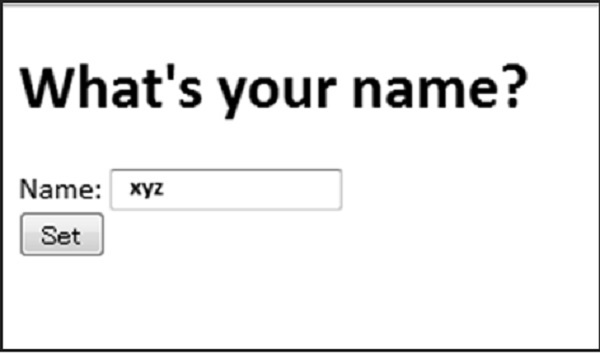
Once the value is submitted by the user, AJAX functionality is implemented and the screen is redirected to the form as shown below −

CherryPy - Demo Application
In this chapter, we will focus on how an application is created in CherryPy framework.
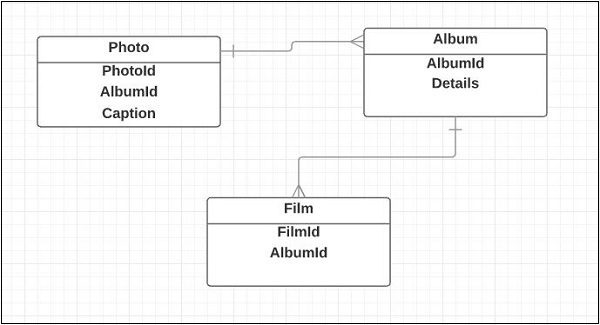
Consider Photoblog application for the demo application of CherryPy. A Photoblog application is a normal blog but the principal text will be photos in place of text. The main catch of Photoblog application is that the developer can focus more on design and implementation.
Basic Structure Design of Entities
The entities design the basic structure of an application. The following are the entities for the Photoblog application −
- Film
- Photo
- Album
The following is a basic class diagram for the entity relationship −
Design Structure
As discussed in the previous chapter, the design structure of the project would be as shown in the following screenshot −
Consider the given application, which has sub-directories for Photoblog application. The sub-directories are Photo, Album, and Film which would include controllers.py, models.py and server.py.
Functionally, the Photoblog application will provide APIs to manipulate those entities via the traditional CRUD interface Create, Retrieve, Update, and Delete.
Connection to the Database
A storage module includes a set of operations; connection with the database being one of the operations.
As it is a complete application, the connection with database is mandatory for API and to maintain the functionality of Create, Retrieve, Update and Delete.
import dejavu

arena = dejavu.Arena()
from model import Album, Film, Photo
def connect():

conf = {'Connect': "host=localhost dbname=Photoblog user=test password=test"}
arena.add_store("main", "postgres", conf)
arena.register_all(globals())
The arena in the above code will be our interface between the underlying storage manager and the business logic layer.
The connect function adds a storage manager to the arena object for a PostgreSQL RDBMS.
Once, the connection is obtained, we can create forms as per business requirements and complete the working of application.
The most important thing before creation of any application is entity mapping and designing the structure of the application.
CherryPy - Testing
Testing is a process during which the application is conducted from different perspectives in order to −
- Find the list of issues
- Find differences between the expected and actual result, output, states, etc.
- Understand the implementation phase.
- Find the application useful for realistic purposes.
The goal of testing is not to put the developer at fault but to provide tools and improve the quality to estimate the health of the application at a given time.
Testing needs to be planned in advance. This calls for defining the purpose of testing, understanding the scope of test cases, making the list of business requirements and being aware of the risks involved in the different phases of the project.
Testing is defined as a range of aspects to be validated on a system or application. Following is a list of the common test approaches −
Unit testing − This is usually carried out by the developers themselves. This aims at checking whether a unit of code works as expected or not.
Usability testing − Developers may usually forget that they are writing an application for the end users who do not have knowledge of the system. Usability testing verifies the pros and cons of the product.
Functional/Acceptance testing − While usability testing checks whether an application or system is usable, functional testing ensures that every specified functionality is implemented.
Load and performance testing − This is carried out to understand whether the system can adjust to the load and performance tests to be conducted. This can lead to changes in hardware, optimizing SQL queries, etc.
Regression testing − It verifies that successive releases of a product do not break any of the previous functionalities.
Reliability and resilience testing − Reliability testing helps in validating the system application with the breakdown of one or several components.
Unit Testing
Photoblog applications constantly use unit tests to check the following −
- New functionalities work correctly and as expected.
- Existing functionalities are not broken by new code release.
- Defects are fixed and remain fixed.
Python comes in with a standard unittest module offering a different approach to unit testing.
Unittest
unittest is rooted in JUnit, a Java unit test package developed by Kent Beck and Erich Gamma. Unit tests simply return defined data. Mock objects can be defined. These objects allows testing against an interface of our design without having to rely on the overall application. They also provide a way to run tests in isolation mode with other tests included.
Lets define a dummy class in the following way −
import unittest

class DummyTest(unittest.TestCase):
def test_01_forward(self):
dummy = Dummy(right_boundary=3)
   self.assertEqual(dummy.forward(), 1)
   self.assertEqual(dummy.forward(), 2)
   self.assertEqual(dummy.forward(), 3)
   self.assertRaises(ValueError, dummy.forward)

def test_02_backward(self):
dummy = Dummy(left_boundary=-3, allow_negative=True)
   self.assertEqual(dummy.backward(), -1)
   self.assertEqual(dummy.backward(), -2)
   self.assertEqual(dummy.backward(), -3)
   self.assertRaises(ValueError, dummy.backward)

def test_03_boundaries(self):
dummy = Dummy(right_boundary=3, left_boundary=-3,allow_negative=True)
   self.assertEqual(dummy.backward(), -1)
   self.assertEqual(dummy.backward(), -2)
   self.assertEqual(dummy.forward(), -1)
   self.assertEqual(dummy.backward(), -2)
   self.assertEqual(dummy.backward(), -3)
The explanation for the code is as follows −
unittest module should be imported to provide unit test capabilities for the given class.
A class should be created by subclassing unittest.
Every method in the above code starts with a word test. All these methods are called by unittest handler.
The assert/fail methods are called by the test case to manage the exceptions.
Consider this as an example for running a test case −
if __name__ == '__main__':
unittest.main()
The result (output) for running the test case will be as follows −
----------------------------------------------------------------------
Ran 3 tests in 0.000s
OK
Functional Testing
Once the application functionalities start taking shape as per the requirements, a set of functional testing can validate the application's correctness regarding the specification. However, the test should be automated for better performance which would require the use of third-party products such as Selenium.
CherryPy provides helper class like built-in functions to ease the writing of functional tests.
Load Testing
Depending on the application you are writing and your expectations in terms of volume, you may need to run load and performance testing in order to detect potential bottlenecks in the application that are preventing it from reaching a certain level of performance.
This section will not detail how to conduct a performance or load test as it is out of its the FunkLoad package.
The very basic example of FunkLoad is as follows −
from funkload.FunkLoadTestCase
import FunkLoadTestCase

class LoadHomePage(FunkLoadTestCase):
def test_homepage(self):

server_url = self.conf_get('main', 'url')
nb_time = self.conf_getInt('test_homepage', 'nb_time')
home_page = "%s/" % server_url

for i in range(nb_time):
self.logd('Try %i' % i)
self.get(home_page, description='Get gome page')
if __name__ in ('main', '__main__'):

import unittest

unittest.main()
Here is a detailed explanation of the above code −
The test case must inherit from the FunkLoadTestCase class so that the FunkLoad can do its internal job of tracking what happens during the test.
The class name is important as FunkLoad will look for a file based on the class name.
The test cases designed have direct access to the configuration files. Get() and post() methods are simply called against the server to get the response.
CherryPy - Deployment Of Application
This chapter will focus more on CherryPy-based application SSL enabled through the built-in CherryPy HTTP server.
Configuration
There are different levels of configuration settings required in a web application −
Web server − Settings linked to the HTTP server
Engine − Settings associated with the hosting of engine
Application − Application which is used by the user
Deployment
Deployment of CherryPy application is considered to be quite an easy method where all the required packages are available from the Python system path. In shared web-hosted environment, web server will reside in the front end which allows the host provider to perform the filtering actions. The front-end server can be Apache or lighttpd.
This section will present a few solutions to run a CherryPy application behind the Apache and lighttpd web servers.
cherrypy
def setup_app():

class Root:
@cherrypy.expose
def index(self):
   # Return the hostname used by CherryPy and the remote
   # caller IP address

return "Hello there %s from IP: %s " %
(cherrypy.request.base, cherrypy.request.remote.ip)
cherrypy.config.update({'server.socket_port': 9091,
   'environment': 'production',
   'log.screen': False,
   'show_tracebacks': False})

cherrypy.tree.mount(Root())
if __name__ == '__main__':

setup_app()
cherrypy.server.quickstart()
cherrypy.engine.start()
SSL
SSL (Secure Sockets Layer) can be supported in CherryPy-based applications. To enable SSL support, the following requirements must be met −
- Have the PyOpenSSL package installed in users environment
- Have an SSL certificate and private key on the server
Creating a Certificate and a Private Key
Let's deal with the requirements of certificate and the private key −
- First the user needs a private key −
openssl genrsa -out server.key 2048
- This key is not protected by a password and therefore has a weak protection.
- The following command will be issued −
openssl genrsa -des3 -out server.key 2048
The program will require a passphrase. If your version of OpenSSL allows you to provide an empty string, do so. Otherwise, enter a default passphrase and then remove it from the generated key as follows −
openssl rsa -in server.key -out server.key
- Creation of the certificate is as follows −
openssl req -new -key server.key -out server.csr
This process will request you to input some details. To do so, the following command must be issued −
openssl x509 -req -days 60 -in server.csr -signkey
server.key -out server.crt
The newly signed certificate will be valid for 60 days.
The following code shows its implementation −
import cherrypy
import os, os.path

localDir = os.path.abspath(os.path.dirname(__file__))
CA = os.path.join(localDir, 'server.crt')
KEY = os.path.join(localDir, 'server.key')
def setup_server():

class Root:
@cherrypy.expose
def index(self):
   return "Hello there!"

cherrypy.tree.mount(Root())
if __name__ == '__main__':

setup_server()
cherrypy.config.update({'server.socket_port': 8443,
   'environment': 'production',
   'log.screen': True,
   'server.ssl_certificate': CA,
   'server.ssl_private_key': KEY})

cherrypy.server.quickstart()
cherrypy.engine.start()
The next step is to start the server; if you are successful, you would see the following message on your screen −
HTTP Serving HTTPS on https://localhost:8443/
