- Caffe2 - Home
- Caffe2 - Introduction
- Caffe2 - Overview
- Caffe2 - Installation
- Verifying Access to Pre-Trained Models
- Image Classification Using Pre-Trained Model
- Caffe2 - Creating Your Own Network
- Caffe2 - Defining Complex Networks
- Caffe2 Useful Resources
- Caffe2 - Quick Guide
- Caffe2 - Useful Resources
- Caffe2 - Discussion
Caffe2 - Installation
Now, that you have got enough insights on the capabilities of Caffe2, it is time to experiment Caffe2 on your own. To use the pre-trained models or to develop your models in your own Python code, you must first install Caffe2 on your machine.
On the installation page of Caffe2 site which is available at the link https://caffe2.ai/docs/getting-started.html you would see the following to select your platform and install type.

As you can see in the above screenshot, Caffe2 supports several popular platforms including the mobile ones.
Now, we shall understand the steps for MacOS installation on which all the projects in this tutorial are tested.
MacOS Installation
The installation can be of four types as given below −
- Pre-Built Binaries
- Build From Source
- Docker Images
- Cloud
Depending upon your preference, select any of the above as your installation type. The instructions given here are as per the Caffe2 installation site for pre-built binaries. It uses Anaconda for Jupyter environment. Execute the following command on your console prompt
pip install torch_nightly -f
https://download.pytorch.org/whl/nightly/cpu/torch_nightly.html
In addition to the above, you will need a few third-party libraries, which are installed using the following commands −
conda install -c anaconda setuptools
conda install -c conda-forge graphviz
conda install -c conda-forge hypothesis
conda install -c conda-forge ipython
conda install -c conda-forge jupyter
conda install -c conda-forge matplotlib
conda install -c anaconda notebook
conda install -c anaconda pydot
conda install -c conda-forge python-nvd3
conda install -c anaconda pyyaml
conda install -c anaconda requests
conda install -c anaconda scikit-image
conda install -c anaconda scipy
Some of the tutorials in the Caffe2 website also require the installation of zeromq, which is installed using the following command −
conda install -c anaconda zeromq
Windows/Linux Installation
Execute the following command on your console prompt −
conda install -c pytorch pytorch-nightly-cpu
As you must have noticed, you would need Anaconda to use the above installation. You will need to install the additional packages as specified in the MacOS installation.
Testing Installation
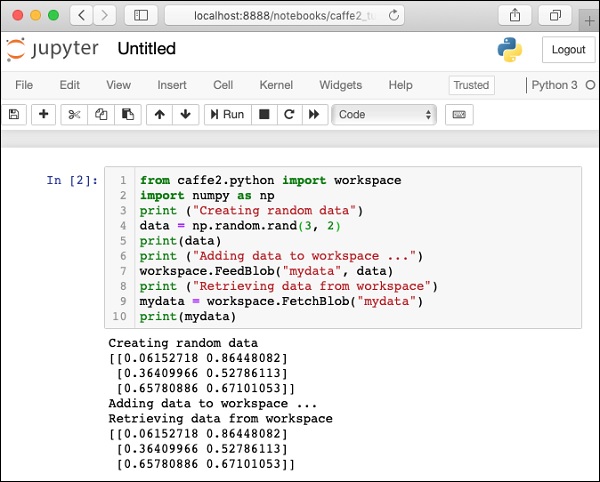
To test your installation, a small Python script is given below, which you can cut and paste in your Juypter project and execute.
from caffe2.python import workspace
import numpy as np
print ("Creating random data")
data = np.random.rand(3, 2)
print(data)
print ("Adding data to workspace ...")
workspace.FeedBlob("mydata", data)
print ("Retrieving data from workspace")
mydata = workspace.FetchBlob("mydata")
print(mydata)
When you execute the above code, you should see the following output −
Creating random data
[[0.06152718 0.86448082]
[0.36409966 0.52786113]
[0.65780886 0.67101053]]
Adding data to workspace ...
Retrieving data from workspace
[[0.06152718 0.86448082]
[0.36409966 0.52786113]
[0.65780886 0.67101053]]
The screenshot of the installation test page is shown here for your quick reference −
Now, that you have installed Caffe2 on your machine, proceed to install the tutorial applications.
Tutorial Installation
Download the tutorials source using the following command on your console −
git clone --recursive https://github.com/caffe2/tutorials caffe2_tutorials
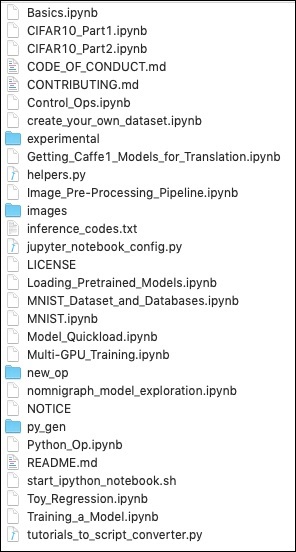
After the download is completed, you will find several Python projects in the caffe2_tutorials folder in your installation directory. The screenshot of this folder is given for your quick perusal.
/Users/yourusername/caffe2_tutorials
You can open some of these tutorials to see what the Caffe2 code looks like. The next two projects described in this tutorial are largely based on the samples shown above.
It is now time to do some Python coding of our own. Let us understand, how to use a pre-trained model from Caffe2. Later, you will learn to create your own trivial neural network for training on your own dataset.
