- BabelJs - Home
- BabelJs - Overview
- BabelJs - Environment Setup
- BabelJs - CLI
- BabelJs - ES6 Code Execution
- BabelJs - Project setup using Babel 6
- BabelJs - Project Setup Using Babel 7
- Transpile ES6 features to ES5
- Transpile ES6 Modules to ES5
- Transpile ES7 features to ES5
- Transpile ES8 features to ES5
- BabelJs - Babel Plugins
- BabelJs - Babel Polyfill
- BabelJs - Babel CLI
- BabelJs - Babel Presets
- Working with Babel and Webpack
- Working with Babel and JSX
- Working with Babel and Flow
- Working with BabelJS and Gulp
- BabelJs - Examples
BabelJS - Quick Guide
BabelJS - Overview
BabelJS is a JavaScript transpiler which transpiles new features into old standard. With this, the features can be run on both old and new browsers, hassle-free. An Australian developer, Sebastian McKenzie started BabelJS.
Why BabelJS?
JavaScript is the language that the browser understands. We use different browsers to run our applications − Chrome, Firefox, Internet Explorer, Microsoft Edge, Opera, UC browser etc. ECMA Script is the JavaScript language specification; the ECMA Script 2015 ES6 is the stable version which works fine in all new and old browsers.
After ES5, we have had ES6, ES7, and ES8. ES6 released with a lot of new features which are not fully supported by all browsers. The same applies to ES7, ES8 and ESNext (next version of ECMA Script). It is now uncertain when it will be possible for all browsers to be compatible with all the ES versions that released.
Incase we plan to use ES6 or ES7 or ES8 features to write our code it will tend to break in some old browsers because of lack of support of the new changes. Therefore, if we want to use new features of ECMA Script in our code and want to run it on all possible browsers available, we need a tool that will compile our final code in ES5.
Babel does the same and it is called a transpiler that transpiles the code in the ECMA Script version that we want. It has features like presets and plugins, which configure the ECMA version we need to transpile our code. With Babel, developers can write their code using the new features in JavaScript. The users can get the codes transpiled using Babel; the codes can later be used in any browsers without any issues.
The following table lists down the features available in ES6, ES7 and ES8 −
| Features | ECMA Script version |
|---|---|
| Let + Const | ES6 |
| Arrow Functions | ES6 |
| Classes | ES6 |
| Promises | ES6 |
| Generators | ES6 |
| Iterators | ES6 |
| Modules | ES6 |
| Destructuring | ES6 |
| Template Literals | ES6 |
| Enhanced Object | ES6 |
| Default, Rest & Spread Properties | ES6 |
| Async - Await | ES7 |
| Exponentiation Operator | ES7 |
| Array.prototype.includes() | ES7 |
| String Padding | ES8 |
BabelJS manages the following two parts −
- transpiling
- polyfilling
What is Babel-Transpiler?
Babel-transpiler converts the syntax of modern JavaScript into a form, which can be easily understood by older browsers. For example, arrow function, const, let classes will be converted to function, var, etc. Here the syntax, i.e., the arrow function is converted to a normal function keeping the functionality same in both the cases.
What is Babel-polyfill?
There are new features added in JavaScript like promises, maps and includes. The features can be used on array; the same, when used and transpiled using babel will not get converted. In case the new feature is a method or object, we need to use Babel-polyfill along with transpiling to make it work on older browsers.
Here is the list of ECMA Script features available in JavaScript, which can be transpiled and polyfilled −
- Classes
- Decorators
- Const
- Modules
- Destructing
- Default parameters
- Computed property names
- Object rest/spread
- Async functions
- Arrow functions
- Rest parameters
- Spread
- Template Literals
ECMA Script features that can be polyfilled −
- Promises
- Map
- Set
- Symbol
- Weakmap
- Weakset
- includess
- Array.from, Array.of,Array#find,Array.buffer, Array#findIndex
- Object.assign,Object.entries,Object.values
Features of BabelJS
In this section, we will learn about the different features of BabelJS. Following are the most important core features of BabelJS −
Babel-Plugins
Plugins and Presets are config details for Babel to transpile the code. Babel supports a number of plugins, which can be used individually, if we know the environment in which the code will execute.
Babel-Presets
Babel presets are a set of plugins, i.e., config details to the babel-transpiler that instruct Babel to transpile in a specific mode. We need to use presets, which has the environment in which we want the code to be converted. For example, es2015 preset will convert the code to es5.
Babel-Polyfills
There are some features like methods and objects, which cannot be transpiled. At such instances, we can make use of babel-polyfill to facilitate the use of features in any browser. Let us consider the example of promises; for the feature to work in older browsers, we need to use polyfills.
Babel-Polyfills
Babel-cli comes with a bunch of commands where the code can be easily compiled on the command line. It also has features like plugins and presets to be used along with the command making it easy to transpile the code at one go.
Advantages of using BabelJS
In this section, we will learn about the different advantages associated with the use of BabelJS −
BabelJS provides backward compatibility to all the newly added features to JavaScript and can be used in any browsers.
BabelJS has the ability to transpile to take the next upcoming version of JavaScript - ES6, ES7, ESNext, etc.
BabelJS can be used along with gulp, webpack, flow, react, typescript, etc. making it very powerful and can be used with big project making developers life easy.
BabelJS also works along with react JSX syntax and can be compiled in JSX form.
BabelJS has support for plugins, polyfills, babel-cli that makes it easy to work with big projects.
Disadvantages of using BabelJS
In this section, we will learn about the different disadvantages of using BabelJS −
BabelJS code changes the syntax while transpiling which makes the code difficult to understand when released on production.
The code transpiled is more in size when compared to the original code.
Not all ES6/7/8 or the upcoming new features can be transpiled and we have to use polyfill so that it works on older browsers.
Here is the official site of babeljs https://babeljs.io/.
BabelJS - Environment Setup
In this section, we will learn how to set up the environment for BabelJS.
To work with BabelJS we need following setup −
- NodeJS
- Npm
- Babel-CLI
- Babel-Preset
- IDE for writing code
NodeJS
To check if nodejs is installed on your system, type node v in the terminal. This will help you see the version of nodejs currently installed on your system.
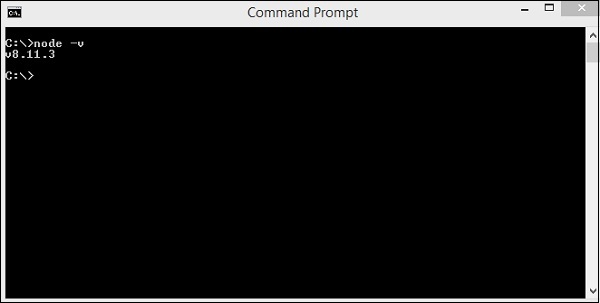
If it does not print anything, install nodejs on your system. To install nodejs, go to the homepage https://nodejs.org/en/download/ of nodejs and install the package based on your OS.
The following screenshot shows the download page of nodejs −

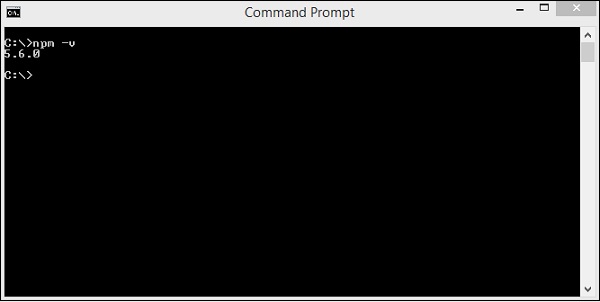
Based on your OS, install the required package. Once nodejs is installed, npm will also be installed along with it. To check if npm is installed or not, type npm v in the terminal. It should display the version of the npm.
BabelJS - CLI
Babel comes with a built-in command line interface, which can be used to compile the code.
Create a directory wherein you would be working. Here, we have created directory called babelproject. Let us make use of nodejs to create the project details.
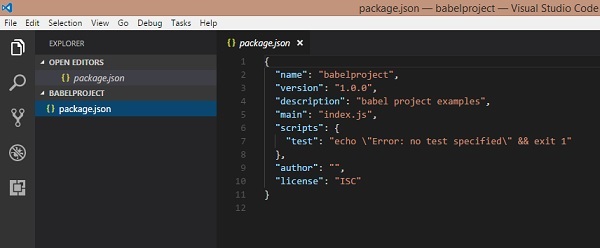
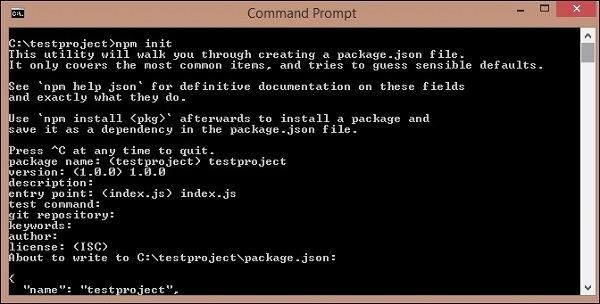
We have used npm init to create the project as shown below −
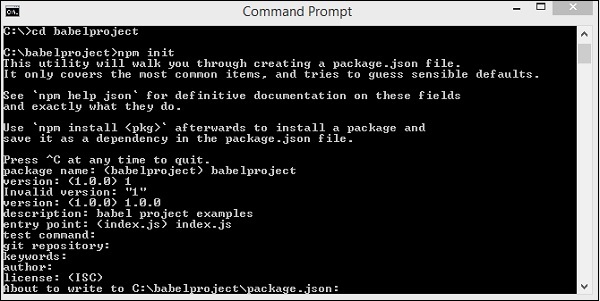
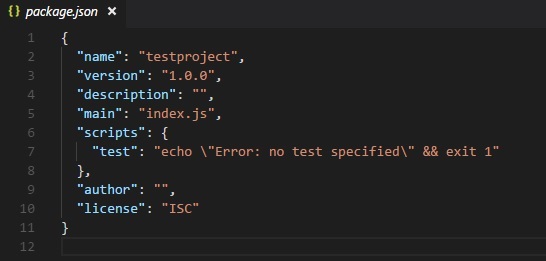
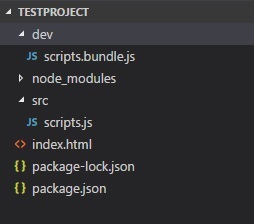
Here is the project structure that we created.
Now to work with Babel we need to instal Babel cli, Babel preset, Babel core as shown below −
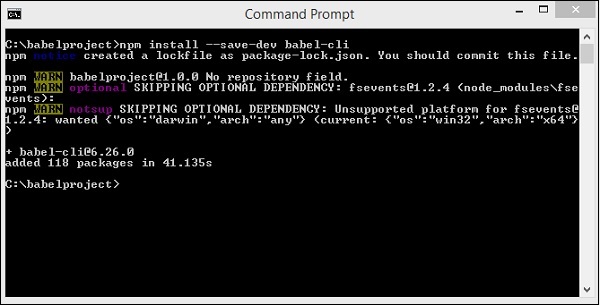
babel-cli
Execute the following command to install babel-cli −
npm install --save-dev babel-cli
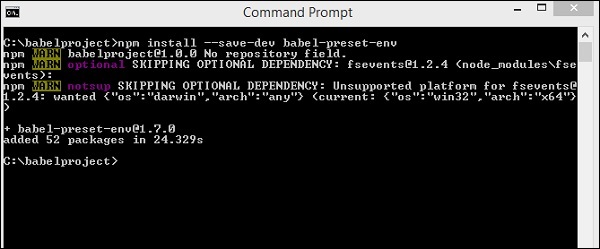
babel-preset
Execute the following command to install babel-preset −
npm install --save-dev babel-preset-env
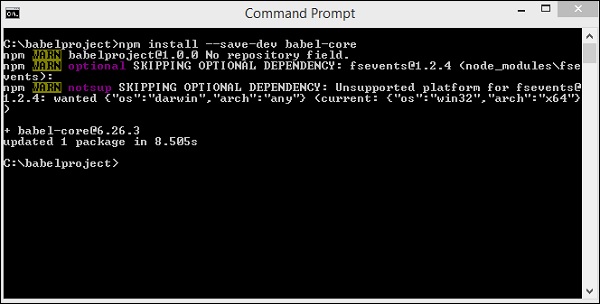
babel-core
Execute the following command to install babel-core −
npm install --save-dev babel-core
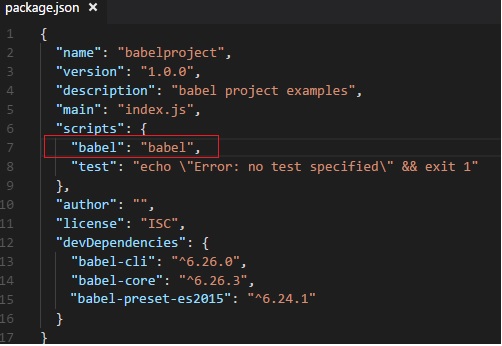
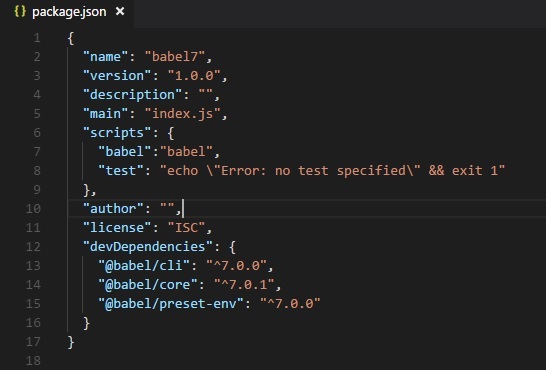
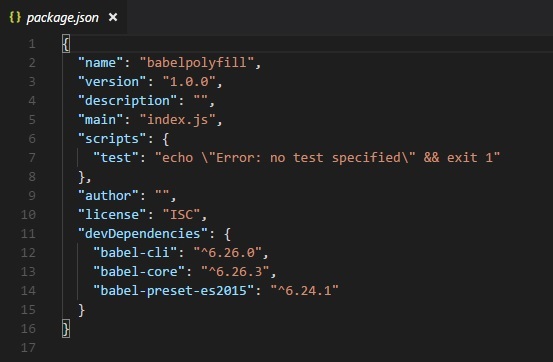
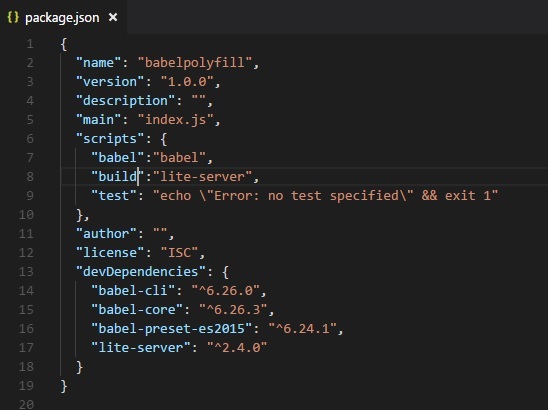
After installation, here are the details available in package.json −
We have installed babel plugins local to the project. This is done so that we can use babel differently on our projects based on the project requirements and also different versions of babeljs. Package.json gives the version details of babeljs used.
In order to make use of babel in our project, we need to specify the same in package.json as follows −
Babel is mainly used to compile JavaScript code, which will have backward compatibility. Now, we will write our code in ES6 -> ES5 or ES7 -> ES5 also ES7->ES6, etc.
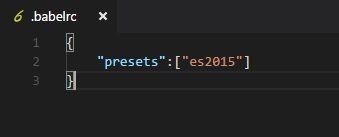
To provide instructions to Babel on the same, while executing, we need to create a file called .babelrc in the root folder. It contains a json object with details of the presets as shown below −

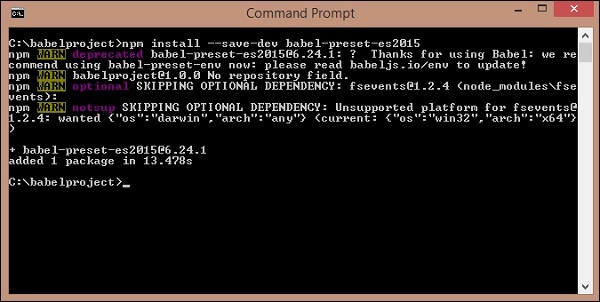
We will create the JavaScript file index.js and compile it to es2015 using Babel. Before that, we need to install the es2015 preset as follows −
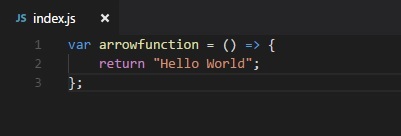
In index.js, we have created a function using the arrow function which is a new feature added in es6. Using Babel, we will compile the code to es5.
To execute to es2015, following command is used −
npx babel index.js
Output
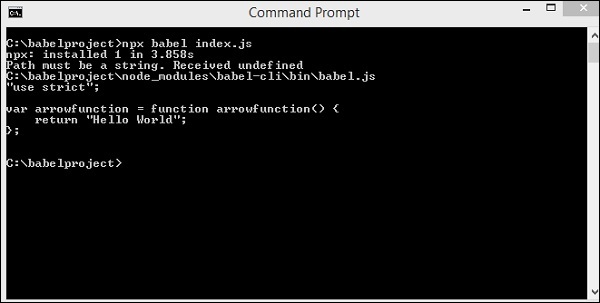
It displays the index.js code in es5 as shown above.
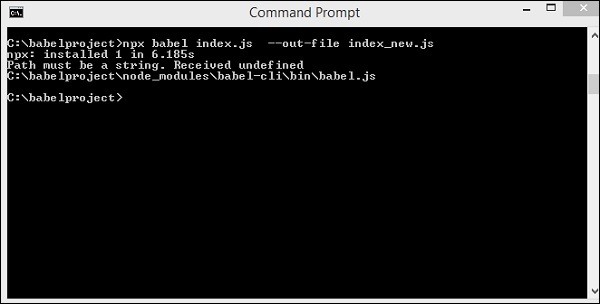
We can store the output in the file by executing the command as shown below −
npx babel index.js --out-file index_es5.js
Output
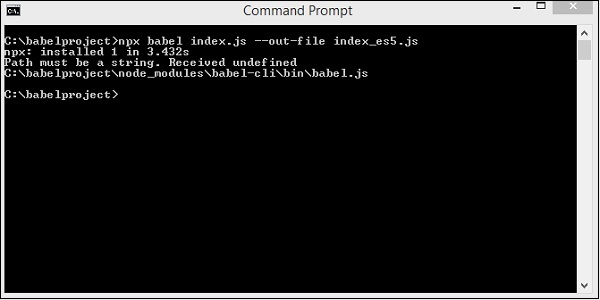
Here is the file that we created, index_es5.js −
BabelJS - ES6 Code Execution
BabelJS is a JavaScript transpiler, which converts new features added to JavaScript into ES5 or to react based on the preset or plugin given. ES5 is one of the oldest form of JavaScript and is supported to run on new and old browsers without any issues. In most of the examples in this tutorial, we have transpiled the code to ES5.
We have seen many features like arrow functions, classes, promises, generators, async functions, etc. added to ES6, ES7 and ES8. When any of the newly added features are used in old browsers, it throws errors. BabelJS helps in compiling the code, which is backward compatible with older browsers. We have seen that ES5 works perfectly fine on older browsers without any issues. So considering the project environment details, if it is required to be running on older browsers, we can use any new feature in our project and compile the code to ES5 using babeljs, and use it any browsers without any issues.
Let us consider the following example to understand this.
Example
<!DOCTYPE html>
<html>
   <head>
      <title>BabelJs Testing</title>
   </head>
   <body>
      <script type="text/javascript" src="index.js"></script>
   </body>
</html>
index.js file
var _foo = () => {
   return "Hello World"
};

alert(_foo());
Output
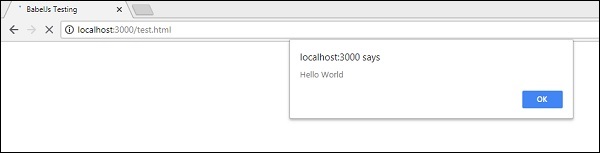
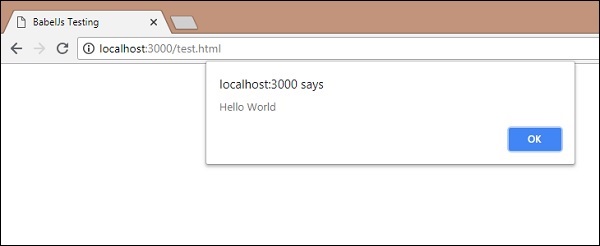
When we run the above html in the Chrome browser, we get the following output −
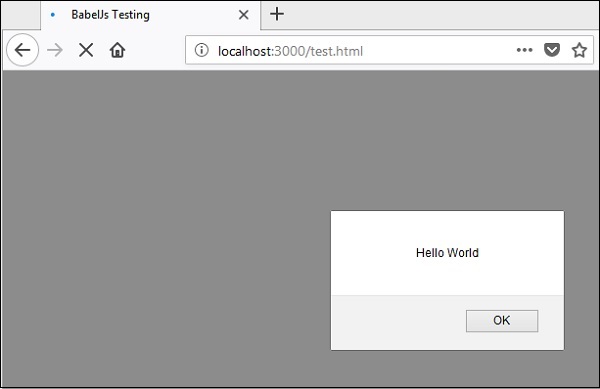
When the HTML is run in Firefox, it generates the following output −

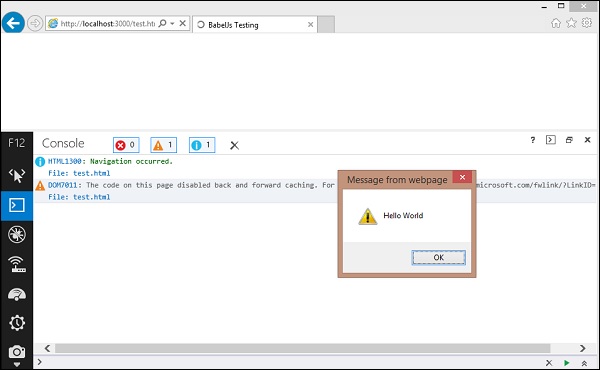
And when the same HTML is run in Internet Explorer, it generates the following syntax error −
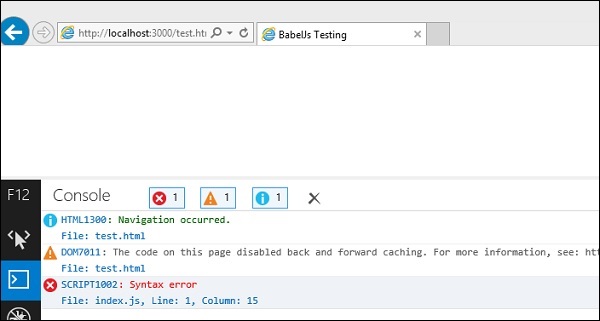
We have used the ES6 Arrow function; the same does not work on all browsers as seen above. To get this working, we have BabelJS to compile the code to ES5 and use it in all browsers.
Will compile the js file to es5 using babeljs and check again in the browsers.
In html file, we will use index_new.js as shown below −
<!DOCTYPE html>
<html>
   <head>
      <title>BabelJs Testing</title>
   </head>
   <body>
      <script type="text/javascript" src="index_new.js"></script>
   </body>
</html>
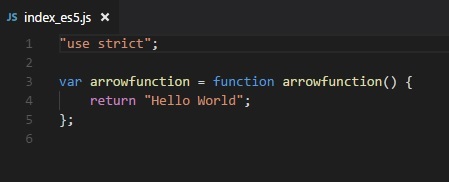
index_new.js
"use strict";

var _foo = function _foo() {
   return "Hello World";
};

alert(_foo());
Chrome Output
Firefox Browser Output
IE Browser Output
BabelJS - Project setup using Babel 6
In this chapter, we will see how to use babeljs inside our project. We will create a project using nodejs and use http local server to test our project.
Create Project Setup
In this section, we will learn how to create project setup.
Create a new directory and run the following command to create the project −
npm init
Output
Upon execution, the above command generates the following output −
Following is the package.json that is created −
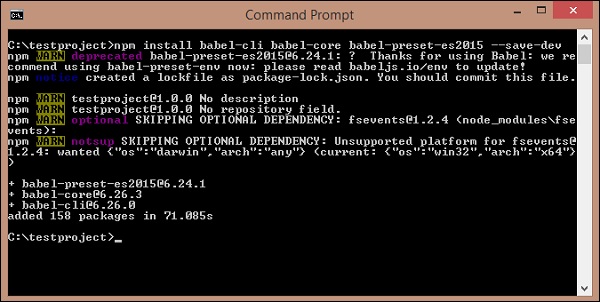
We will install the packages required to start working with babeljs. We will execute the following command to install babel-cli, babel-core, babel-preset-es2015.
npm install babel-cli babel-core babel-preset-es2015 --save-dev
Output
Upon execution, the above command generates the following output −
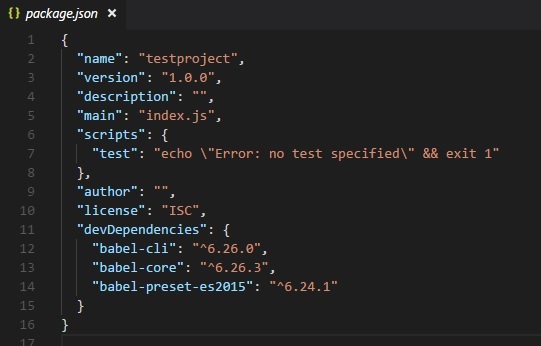
Package.json is updated as follows −
We need http server to test the js file. Execute the following command to install http server −
npm install lite-server --save-dev
We have added the following details in package.json −
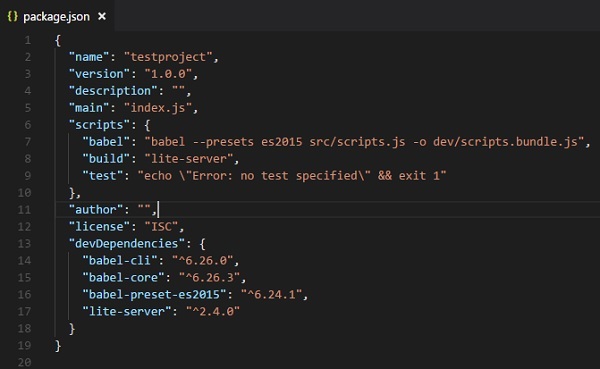
In scripts, Babel takes care of transpiling the scripts.js from src folder and saves it in dev folder with name scripts.bundle.js. We have added the full command to compile the code we want in package.json. In addition, build is added which will start the lite-server to test the changes.
The src/scripts.js has the JavaScript as follows −
class Student {
   constructor(fname, lname, age, address) {
      this.fname = fname;
      this.lname = lname;
      this.age = age;
      this.address = address;
   }

   get fullname() {
      return this.fname +"-"+this.lname;
   }
}
We have called the transpiled script in index.html as follows −
<html>
lt;head></head>
<body>
<script type="text/javascript" src="dev/scripts.bundle.js?a=11"></script>
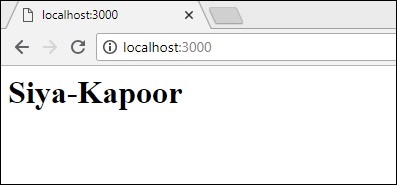
<h1 id="displayname"></h1>
<script type="text/javascript">
var a = new Student("Siya", "Kapoor", "15", "Mumbai");
var studentdet = a.fullname;
document.getElementById("displayname").innerHTML = studentdet;
</script>
</body>
</html>
We need to run the following command, which will call babel and compile the code. The command will call Babel from package.json −
npm run babel
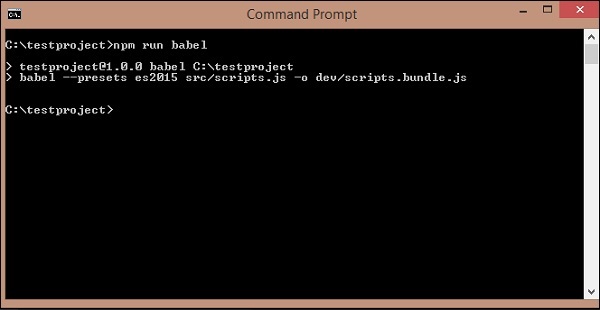
The scripts.bundle.js is the new js file created in dev folder −
The output of dev/scripts.bundle.js is as follows −
"use strict";

var _createClass = function () {
   function defineProperties(target, props) {
      for (var i = 0; i < props.length; i++) {
         var descriptor = props[i];
         descriptor.enumerable = descriptor.enumerable || false;
         descriptor.configurable = true;
         if ("value" in descriptor) descriptor.writable = true;
         Object.defineProperty(target, descriptor.key, descriptor);
      }
   }
   return function (Constructor, protoProps, staticProps) {
      if (protoProps) defineProperties(Constructor.prototype, protoProps);
      if (staticProps) defineProperties(Constructor, staticProps);
      return Constructor;
   };
}();

function _classCallCheck(instance, Constructor) {
   if (!(instance instanceof Constructor)) {
      throw new TypeError("Cannot call a class as a function");
   }
}

var Student = function () {
   function Student(fname, lname, age, address) {
      _classCallCheck(this, Student);

      this.fname = fname;
      this.lname = lname;
      this.age = age;
      this.address = address;
   }

   _createClass(Student, [{
      key: "fullname",
      get: function get() {
         return this.fname + "-" + this.lname;
      }
   }]);

   return Student;
}();
Now let us run the following command to start the server −
npm run build
When the command runs, it will open the url in the browser −
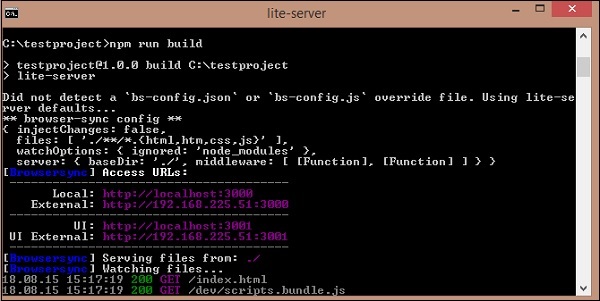
Output
The above command generates the following output −
BabelJS - Project Setup Using Babel 7
The latest version of Babel, 7 released with changes to the already existing packages. The installation part remains the same as it was for Babel 6. The only difference in Babel 7 is that all the packages need to be installed with @babel/, for example @babel/core, @babel/preset-env, @babel/cli, @babel/polyfill, etc.
Here is a project setup created using babel 7.
Command
Execute the following command to start the project setup −
npm init
Install following packages
npm install --save-dev @babel/core
npm install --save-dev @babel/cli
npm install --save-dev @babel/preset-env
Here is the package.json created −
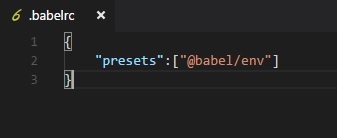
Now will create a .babelrc file in the root folder −
Create a folder src/ and add file main.js to it and write your code to transpile to es5.
src/main.js
let add = (a,b) => {
   return a+b;
}
command to transpile
npx babel src/main.js --out-file main_es5.js
main_es5.js
"use strict";

var add = function add(a, b) {
   return a + b;
};
The working of Babel 7 remains the same as Babel 6. The only difference is the pacakge installation with @babel.
There are some presets deprecated in babel 7. The list is as follows −
- ES20xx presets
- babel-preset-env
- babel-preset-latest
- Stage presets in Babel
Also the year from the packages is removed - @babel/plugin-transform-es2015-classes is now @babel/plugin-transform-classes
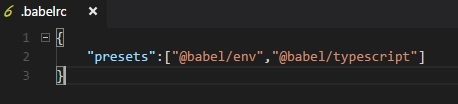
We will see one more example of working with typescript and transpile it to Es2015 JavaScript using typescript preset and babel 7.
To work with typescript, we need typescript package to be installed as follows −
npm install --save-dev @babel/preset-typescript
Create test.ts file in the src/ folder and write the code in typescript form −
test.ts
let getName = (person: string) => {
   return "Hello, " + person;
}

getName("Siya");
.babelrc
command
npx babel src/test.ts --out-file test.js
test.js
"use strict";

var getName = function getName(person) {
   return "Hello, " + person;
};

getName("Siya");
BabelJS - Transpile ES6 features to ES5
In this chapter, we will see the features added to ES6. We will also learn how to compile the features to ES5 using BabelJS.
Following are the various ES6 features that we will discuss in this chapter −
- Let + Const
- Arrow Functions
- Classes
- Promises
- Generators
- Destructuring
- Iterators
- Template Literalst
- Enhanced Object
- Default, Rest & Spread Properties
Let + Const
Let declares a block scope local variable in JavaScript. Consider the following example to understand the use of let.
Example
let a = 1;
if (a == 1) {
   let a = 2;
   console.log(a);
}
console.log(a);
Output
2
1
The reason the first console prints 2 is because a is declared again using let and will be available only in the if block. Any variable declared using let is just available within the declared block. We have declared variable a twice using let, but it does not overwrite the value of a.
This is the difference between var and let keywords. When you declare variable using var, the variable will be available within the scope of the function or if declared will act like a global variable.
Incase a variable is declared with let, the variable is available within the block scope. If declared inside the if statement, it will be available only within the if block. The same applies to switch, for-loop, etc.
We will now see the code conversion in ES5 using babeljs.
Let us run the following command to convert the code −
npx babel let.js --out-file let_es5.js
The output from es6 to es5 for the let keyword is as follows −
Let using ES6
let a = 1;
if (a == 1) {
   let a = 2;
   console.log(a);
}
console.log(a);
Transpiled using babel to ES5
"use strict";

var a = 1;
if (a == 1) {
   var _a = 2;
   console.log(_a);
}
console.log(a);
If you see the ES5 code the let keyword is replaced with the var keyword. Also the variable inside the if block is renamed to _a to have the same effect as when declared with the let keyword.
Const
In this section, we will learn about the working of const keyword in ES6 and ES5. Const keyword is also available within the scope; and if outside, it will throw an error. The value of const declared variable cannot be changed once assigned. Let us consider the following example to understand how const keyword is used.
Example
let a =1;
if (a == 1) {
   const age = 10;
}
console.log(age);
Output
Uncaught ReferenceError: age is not defined at:5:13
The above output throws an error as the const age is defined inside the if block and is available within the if block.
We will understand the conversion to ES5 using BabelJS.
ES6
let a =1;
if (a == 1) {
   const age = 10;
}
console.log(age);
Command
npx babel const.js --out-file const_es5.js
Transpiled to ES6 Using BabelJS
"use strict";

var a = 1;
if (a == 1) {
   var _age = 10;
}
console.log(age);
Incase of ES5, const keyword is replaced with the var keyword as shown above.
Arrow Functions
An Arrow function has a shorter syntax in comparison to the variable expression. it is also called the fat arrow function or lambda function. The function does not have its own this property. In this function, the keyword function is omitted.
Example
var add = (x,y) => {
   return x+y;
}

var k = add(3,6);
console.log(k);
Output
9
Using BabelJS, we will transpile the above code to ES5.
ES6 - Arrow function
var add = (x,y) => {
   return x+y;
}

var k = add(3,6);
console.log(k);
Command
npx babel arrowfunction.js --out-file arrowfunction_es5.js
BabelJS - ES5
Using Babel the arrow function is converted to variable expression function as shown below.
"use strict";

var add = function add(x, y) {
   return x + y;
};

var k = add(3, 6);
console.log(k);
Classes
ES6 comes with the new Classes feature. Classes are similar to the prototype based inheritance available in ES5.The class keyword is used to define the class. Classes are like special functions and have similarities like function expression. It has a constructor, which is called inside the class.
Example
class Person {
   constructor(fname, lname, age, address) {
      this.fname = fname;
      this.lname = lname;
      this.age = age;
      this.address = address;
   }

   get fullname() {
      return this.fname +"-"+this.lname;
   }
}
var a = new Person("Siya", "Kapoor", "15", "Mumbai");
var persondet = a.fullname;
Output
Siya-Kapoor
ES6 - Classes
class Person {
   constructor(fname, lname, age, address) {
      this.fname = fname;
      this.lname = lname;
      this.age = age;
      this.address = address;
   }

   get fullname() {
      return this.fname +"-"+this.lname;
   }
}
var a = new Person("Siya", "Kapoor", "15", "Mumbai");
var persondet = a.fullname;
Command
npx babel class.js --out-file class_es5.js
BabelJS - ES5
There is extra code added using babeljs to get the functionality working for classes same as in ES5.BabelJs makes sure the functionality works same as it would have done in ES6.
"use strict";

var _createClass = function () {
   function defineProperties(target, props) {
      for (var i = 0; i < props.length; i++) {
         var descriptor = props[i];
         descriptor.enumerable = descriptor.enumerable || false;
         descriptor.configurable = true;
         if ("value" in descriptor) descriptor.writable = true;
         Object.defineProperty(target, descriptor.key, descriptor);
      }
   }
   return function (Constructor, protoProps, staticProps) {
      if (protoProps) defineProperties(Constructor.prototype, protoProps);
      if (staticProps) defineProperties(Constructor, staticProps);
      return Constructor;
   };
}();

function _classCallCheck(instance, Constructor) {
   if (!(instance instanceof Constructor)) {
      throw new TypeError("Cannot call a class as a function");
   }
}

var Person = function () {
   function Person(fname, lname, age, address) {
      _classCallCheck(this, Person);

      this.fname = fname;
      this.lname = lname;
      this.age = age;
      this.address = address;
   }

   _createClass(Person, [{
      key: "fullname",
      get: function get() {
         return this.fname + "-" + this.lname;
      }
   }]);

   return Person;
}();

var a = new Person("Siya", "Kapoor", "15", "Mumbai");
var persondet = a.fullname;
Promises
JavaScript promises are used to manage asynchronous requests in your code.
It makes life easier and keeps code clean as you manage multiple callbacks from async requests, which have dependency. Promises provide a better way of working with callback functions. Promises are part of ES6. By default, when you create a promise, the state of the promise is pending.
Promises come in three states −
- pending (initial state)
- resolved (completed successfully)
- rejected(failed)
new Promise() is used to construct a promise. Promise constructor has one argument, which is a callback function. The callback function has two arguments - resolve and reject;
both these are internal functions. The asynchronous code which you write, i.e., Ajax call, image loading, timing functions will go in the callback function.
If the task performed in the callback function is a success, then the resolve function is called; otherwise, the reject function is called with the error details.
The following line of code shows a promise structure call −
var _promise = new Promise (function(resolve, reject) {
   var success = true;
   if (success) {
      resolve("success");
   } else {
      reject("failure");
   }
});
_promise.then(function(value) {
   //once function resolve gets called it comes over here with the value passed in resolve
   console.log(value); //success
}).catch(function(value) {
   //once function reject gets called it comes over here with the value passed in reject
   console.log(value); // failure.
});
ES6 Promise Example
let timingpromise = new Promise((resolve, reject) => {
   setTimeout(function() {
      resolve("Promise is resolved!");
   }, 1000);
});

timingpromise.then((msg) => {
   console.log(msg);
});
Output
Promise is resolved!
ES6 - Promises
let timingpromise = new Promise((resolve, reject) => {
   setTimeout(function() {
      resolve("Promise is resolved!");
   }, 1000);
});

timingpromise.then((msg) => {
   console.log(msg);
});
Command
npx babel promise.js --out-file promise_es5.js
BabelJS - ES5
"use strict";

var timingpromise = new Promise(function (resolve, reject) {
   setTimeout(function () {
      resolve("Promise is resolved!");
   }, 1000);
});

timingpromise.then(function (msg) {
   console.log(msg);
});
For promises, the code is not changing when transpiled. We need to use babel-polyfill for it to work on older browsers.The details on babel-polyfills are explained in babel - poyfill chapter.
Generators
Generator function is like normal function. The function has special syntax function* with * to the function and yield keyword to be used inside the function. This is meant to pause or start the function when required. Normal functions cannot be stopped in between once the execution starts. It will either execute the full function or halt when it encounters the return statement. Generator performs differently here, you can halt the function with the yield keyword and start it by calling the generator again whenever required.
Example
function* generatorfunction(a) {
   yield a;
   yield a +1 ;
}

let g = generatorfunction(8);
console.log(g.next());
console.log(g.next());
Output
{value: 8, done: false}
{value: 9, done: false}
ES6 - Generator
function* generatorfunction(a) {
   yield a;
   yield a +1 ;
}

let g = generatorfunction(8);
console.log(g.next());
console.log(g.next());
Command
npx babel generator.js --out-file generator_es5.js
BabelJS - ES5
"use strict";

var _marked = /*#__PURE__*/regeneratorRuntime.mark(generatorfunction);

function generatorfunction(a) {
   return regeneratorRuntime.wrap(function generatorfunction$(_context) {
      while (1) {
         switch (_context.prev = _context.next) {
            case 0:
               _context.next = 2;
               return a;

            case 2:
               _context.next = 4;
               return a + 1;

            case 4:
            case "end":
               return _context.stop();
         }
      }
   }, _marked, this);
}

var g = generatorfunction(8);
console.log(g.next());
console.log(g.next());
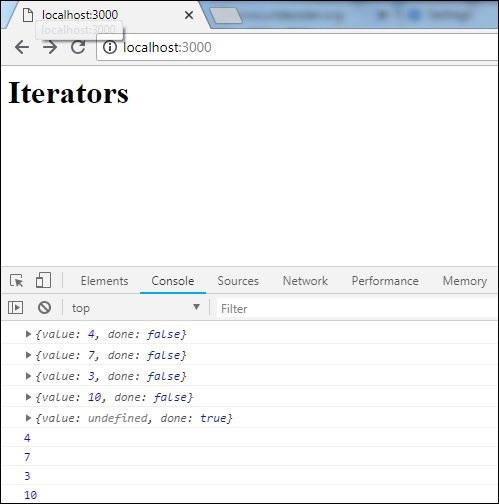
Iterators
Iterator in JavaScript gives back a JavaScript object, which has value. The object also has a flag called done, which has true/false value. It gives false if it is not the end of the iterator. Let us consider an example and see the working of iterator on an array.
Example
let numbers = [4, 7, 3, 10];
let a = numbers[Symbol.iterator]();
console.log(a.next());
console.log(a.next());
console.log(a.next());
console.log(a.next());
console.log(a.next());
In the above example, we have used an array of numbers and called a function on the array using Symbol.iterator as the index.
The output that we get using the next() on the array is as follows −
{value: 4, done: false}
{value: 7, done: false}
{value: 3, done: false}
{value: 10, done: false}
{value: undefined, done: true}
The output gives an object with value and is done as properties. Every next() method call gives the next value from the array and is done as false. The value of done will be true only when the elements from the array are done. We can use this for iterating over arrays. There are more options available like the for-of loop which is used as follows −
Example
let numbers = [4, 7, 3, 10];
for (let n of numbers) {
   console.log(n);
}
Output
4
7
3
10
When the for-of loop uses the key, it gives details of the array values as shown above. We will check both the combinations and see how babeljs transpiles them to es5.
Example
let numbers = [4, 7, 3, 10];
let a = numbers[Symbol.iterator]();
console.log(a.next());
console.log(a.next());
console.log(a.next());
console.log(a.next());
console.log(a.next());

let _array = [4, 7, 3, 10];
for (let n of _array) {
   console.log(n);
}
command
npx babel iterator.js --out-file iterator_es5.js
Output
"use strict";

var numbers = [4, 7, 3, 10];
var a = numbers[Symbol.iterator]();
console.log(a.next());
console.log(a.next());
console.log(a.next());
console.log(a.next());
console.log(a.next());

var _array = [4, 7, 3, 10];
var _iteratorNormalCompletion = true;
var _didIteratorError = false;
var _iteratorError = undefined;

try {
   for (var _iterator = _array[Symbol.iterator](),
      _step; !(_iteratorNormalCompletion = (_step = _iterator.next()).done);
      _iteratorNormalCompletion = true) {
      var n = _step.value;

      console.log(n);
   }
} catch (err) {
   _didIteratorError = true;
   _iteratorError = err;
} finally {
   try {
      if (!_iteratorNormalCompletion && _iterator.return) {
         _iterator.return();
      }
   } finally {
      if (_didIteratorError) {
         throw _iteratorError;
      }
   }
}
There are changes added for-of loop in es5. But iterator.next is left as it is. We need to use babel-polyfill to make it work in old browsers. Babel-polyfill gets installed along with babel and the same can be used from node_modules as shown below −
Example
<html>
   <head>
      <script type="text/javascript" src="node_modules/babel-polyfill/dist/polyfill.min.js"></script>
      <script type="text/javascript" src="iterator_es5.js"></script>
   </head>
   <body>
      <h1>Iterators</h1>
   </body>
</html>
Output
Destructuring
Destructuring property behaves like a JavaScript expression which unpacks values from arrays, objects.
Following example will explain the working of destructuring syntax.
Example
let x, y, rem;
[x, y] = [10, 20];

console.log(x);
console.log(y);
[x, y, ...rem] = [10, 20, 30, 40, 50];
console.log(rem);

let z = 0;
({ x, y } = (z) ? { x: 10, y: 20 } : { x: 1, y: 2 });
console.log(x);
console.log(y);
Output
10
20
[30, 40, 50]
1
2
The above line of code shows how values are assigned from the right side of the array to the variables on the left side. The variable with ...rem gets all the remaining values from the array.
We can also assign the values from the object on the left side using conditional operator as shown below −
({ x, y } = (z) ? { x: 10, y: 20 } : { x: 1, y: 2 });
console.log(x); // 1
console.log(y); // 2
Let us convert the same to ES5 using babeljs −
command
npx babel destructm.js --out-file destruct_es5.js
destruct_es5.js
"use strict";

var x = void 0,
   y = void 0,
   rem = void 0;
x = 10;
y = 20;

console.log(x);
console.log(y);
x = 10;
y = 20;
rem = [30, 40, 50];

console.log(rem);

var z = 0;

var _ref = z ? { x: 10, y: 20 } : { x: 1, y: 2 };

x = _ref.x;
y = _ref.y;

console.log(x);
console.log(y);
Template Literals
Template literal is a string literal which allows expressions inside it. It uses backtick(``) instead of single or double quotes. When we say expression inside a string, it means we can use variables, call a function, etc. inside the string.
Example
let a = 5;
let b = 10;
console.log(`Using Template literal : Value is ${a + b}.`);
console.log("Using normal way : Value is " + (a + b));
Output
Using Template literal : Value is 15.
Using normal way : Value is 15
ES6 - Template Literal
let a = 5;
let b = 10;
console.log(`Using Template literal : Value is ${a + b}.`);
console.log("Using normal way : Value is " + (a + b));
command
npx babel templateliteral.js --out-file templateliteral_es5.js
BabelJS - ES5
"use strict";

var a = 5;
var b = 10;
console.log("Using Template literal : Value is " + (a + b) + ".");

console.log("Using normal way : Value is " + (a + b));
Enhanced Object Literals
In es6, the new features added to object literals are very good and useful. We will go through few examples of object literal in ES5 and ES6 −
Example
ES5
var red = 1, green = 2, blue = 3;
var rgbes5 = {
   red: red,
   green: green,
   blue: blue
};
console.log(rgbes5); // {red: 1, green: 2, blue: 3}

ES6
let rgbes6 = {
   red,
   green,
   blue
};
console.log(rgbes6); // {red: 1, green: 2, blue: 3}
If you see the above code, the object in ES5 and ES6 differs. In ES6, we do not have to specify the key value if the variable names are same as the key.
Let us see the compilation to ES5 using babel.
ES6-Enhanced object literal
const red = 1, green = 2, blue = 3;
let rgbes5 = {
   red: red,
   green: green,
   blue: blue
};
console.log(rgbes5);

let rgbes6 = {
   red,
   green,
   blue
};
console.log(rgbes6);

let brand = "carbrand";
const cars = {
   [brand]: "BMW"
}
console.log(cars.carbrand);  //"BMW"
command
npx babel enhancedobjliteral.js --out-file enhancedobjliteral_es5.js
BabelJS - ES5
"use strict";

function _defineProperty(obj, key, value) {
   if (key in obj) {
      Object.defineProperty(obj, key, {
         value: value, enumerable: true, configurable: true, writable: true
      });
   } else { obj[key] = value; } return obj;
}

var red = 1,
   green = 2,
   blue = 3;
var rgbes5 = {
   red: red,
   green: green,
   blue: blue
};
console.log(rgbes5);

var rgbes6 = {
   red: red,
   green: green,
   blue: blue
};
console.log(rgbes6);

var brand = "carbrand";
var cars = _defineProperty({}, brand, "BMW");

console.log(cars.carbrand); //"BMW"
Default, Rest & Spread Properties
In this section, we will discuss the default, rest and spread properties.
Default
With ES6, we can use default parameters to the function params as follows −
Example
let add = (a, b = 3) => {
   return a + b;
}

console.log(add(10, 20));  // 30
console.log(add(10));      // 13
Let us transpile the above code to ES5 using babel.
command
npx babel default.js --out-file default_es5.js
BabelJS - ES5
"use strict";

var add = function add(a) {
   var b = arguments.length > 1 >> arguments[1] !== undefined ? arguments[1] : 3;
   return a + b;
};

console.log(add(10, 20));
console.log(add(10));
Rest
Rest parameter starts with three dots(...) as shown in the example below −
Example
let add = (...args) => {
   let sum = 0;
   args.forEach(function (n) {
      sum += n;
   });
   return sum;
};

console.log(add(1, 2));    // 3
console.log(add(1, 2, 5, 6, 6, 7));   //27
In the above function we are passing n number of params to the function add. To add all those params if it was in ES5, we have to rely on arguments object to get the details of the arguments. With ES6, rest it helps to define the arguments with three dots as shown above and we can loop through it and get the sum of the numbers.
Note − We cannot use additional arguments when using three dot, i.e., rest.
Example
let add = (...args, value) => {    //syntax error
   let sum = 0;
   args.forEach(function (n) {
      sum += n;
   });
   return sum;
};
The above code will give syntax error.
The compilation to es5 looks as follows −
command
npx babel rest.js --out-file rest_es5.js
Babel -ES5
"use strict";

var add = function add() {
   for (var _len = arguments.length, args = Array(_len), _key = 0; _key < _len; _key++) {
      args[_key] = arguments[_key];
   }

   var sum = 0;
   args.forEach(function (n) {
      sum += n;
   });
   return sum;
};

console.log(add(1, 2));
console.log(add(1, 2, 5, 6, 6, 7));
Spread
The Spread property also has the three dots like rest. Following is a working example, which shows how to use the spread property.
Example
let add = (a, b, c) => {
   return a + b + c;
}
let arr = [11, 23, 3];
console.log(add(...arr));   //37
Let us now see how the above code is transpiled using babel −
command
npx babel spread.js --out-file spread_es5.js
Babel-ES5
"use strict";

var add = function add(a, b, c) {
   return a + b + c;
};
var arr = [11, 23, 3];
console.log(add.apply(undefined, arr));
Proxies
Proxy is an object where you can define custom behaviour for operations like property lookup, assignment, enumeration, function, invocation, etc.
Syntax
var a = new Proxy(target, handler);
Both target and handler are objects.
target is an object or can be another proxy element.
handler will be an object with its properties as functions which will give the behaviour when called.
Let us try to understand these features with the help of an example −
Example
let handler = {
   get: function (target, name) {
      return name in target ? target[name] : "invalid key";
   }
};

let o = {
   name: 'Siya Kapoor',
   addr: 'Mumbai'
}

let a = new Proxy(o, handler);
console.log(a.name);
console.log(a.addr);
console.log(a.age);
We have defined target and handler in the above example and used it with proxy. Proxy returns the object with key-values.
Output
Siya Kapoor
Mumbai
invalid key
Let us now see how to transpile the above code to ES5 using babel −
command
npx babel proxy.js --out-file proxy_es5.js
Babel-ES5
'use strict';

var handler = {
   get: function get(target, name) {
      return name in target ? target[name] : "invalid key";
   }
};

var o = {
   name: 'Siya Kapoor',
   addr: 'Mumbai'
};

var a = new Proxy(o, handler);
console.log(a.name);
console.log(a.addr);
console.log(a.age);
BabelJS - Transpile ES6 Modules to ES5
In this chapter, we will see how to transpile ES6 modules to ES5 using Babel.
Modules
Consider a scenario where parts of JavaScript code need to be reused. ES6 comes to your rescue with the concept of Modules.
A module is nothing more than a chunk of JavaScript code written in a file. The functions or variables in a module are not available for use, unless the module file exports them.
In simpler terms, the modules help you to write the code in your module and expose only those parts of the code that should be accessed by other parts of your code.
Let us consider an example to understand how to use module and how to export it to make use of it in the code.
Example
add.js
var add = (x,y) => {
   return x+y;
}

module.exports=add;
multiply.js
var multiply = (x,y) => {
   return x*y;
};

module.exports = multiply;
main.js
import add from './add';
import multiply from './multiply'
let a = add(10,20);
let b = multiply(40,10);
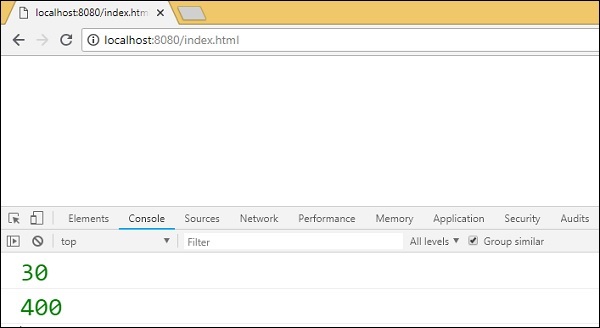
console.log("%c"+a,"font-size:30px;color:green;");
console.log("%c"+b,"font-size:30px;color:green;");
I have three files add.js that adds 2 given numbers, multiply.js that multiplies two given numbers and main.js, which calls add and multiply, and consoles the output.
To give add.js and multiply.js in main.js, we have to export it first as shown below −
module.exports = add;
module.exports = multiply;
To use them in main.js, we need to import them as shown below
import add from './add';
import multiply from './multiply'
We need module bundler to build the files, so that we can execute them in the browser.
We can do that −
- Using Webpack
- Using Gulp
ES6 modules and Webpack
In this section, we will see what the ES6 modules are. We will also learn how to use webpack.
Before we start, we need to install the following packages −
npm install --save-dev webpack
npm install --save-dev webpack-dev-server
npm install --save-dev babel-core
npm install --save-dev babel-loader
npm install --save-dev babel-preset-env
Package.json
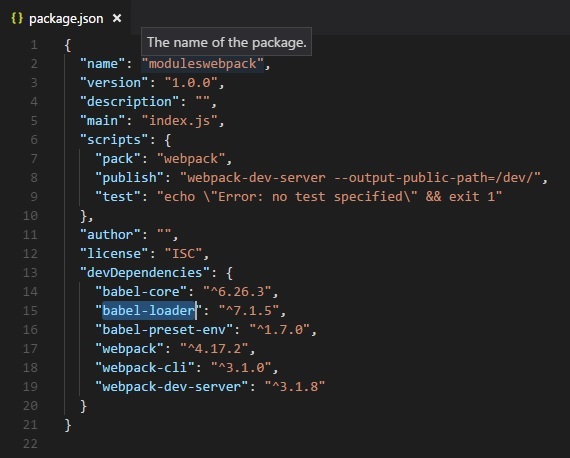
We have added pack and publish tasks to scripts to run them using npm. Here is the webpack.config.js file which will build the final file.
webpack.config.js
var path = require('path');

module.exports = {
   entry: {
      app: './src/main.js'
   },
   output: {
      path: path.resolve(__dirname, 'dev'),
      filename: 'main_bundle.js'
   },
   mode:'development',
   module: {
      rules: [
         {
            test: /\.js$/,
            include: path.resolve(__dirname, 'src'),
            loader: 'babel-loader',
            query: {
               presets: ['env']
            }
         }
      ]
   }
};
Run the command npm run pack to build the files. The final file will be stored in the dev/ folder.
command
npm run pack
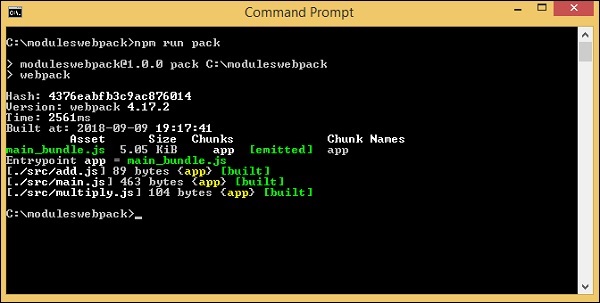
dev/main_bundle.js common file is created. This file combines add.js, multiply.js and main.js and stores it in dev/main_bundle.js.
/******/ (function(modules) { // webpackBootstrap
/******/    // The module cache
/******/    var installedModules = {};
/******/
/******/    // The require function
/******/    function __webpack_require__(moduleId) {
/******/
/******/       // Check if module is in cache
/******/       if(installedModules[moduleId]) {
/******/          return installedModules[moduleId].exports;
/******/       }
/******/       // Create a new module (and put it into the cache)
/******/       var module = installedModules[moduleId] = {
/******/          i: moduleId,
/******/          l: false,
/******/          exports: {}
/******/       };
/******/
/******/       // Execute the module function
/******/       modules[moduleId].call(module.exports, module, module.exports, __webpack_require__);
/******/
/******/       // Flag the module as loaded
/******/       module.l = true;
/******/
/******/       // Return the exports of the module
/******/       return module.exports;
/******/    }
/******/
/******/
/******/    // expose the modules object (__webpack_modules__)
/******/    __webpack_require__.m = modules;
/******/
/******/    // expose the module cache
/******/    __webpack_require__.c = installedModules;
/******/
/******/    // define getter function for harmony exports
/******/    __webpack_require__.d = function(exports, name, getter) {
/******/       if(!__webpack_require__.o(exports, name)) {
/******/          Object.defineProperty(exports, name, { enumerable: true, get: getter });
/******/       }
/******/    };
/******/
/******/    // define __esModule on exports
/******/    __webpack_require__.r = function(exports) {
/******/      if(typeof Symbol !== 'undefined' && Symbol.toStringTag) {
/******/         Object.defineProperty(exports, Symbol.toStringTag, { value: 'Module' });
/******/      }
/******/      Object.defineProperty(exports, '__esModule', { value: true });
/******/    };
/******/
/******/    // create a fake namespace object
/******/    // mode & 1: value is a module id, require it
/******/    // mode & 2: merge all properties of value into the ns
/******/    // mode & 4: return value when already ns object
/******/    // mode & 8|1: behave like require
/******/    __webpack_require__.t = function(value, mode) {
/******/       if(mode & 1) value = __webpack_require__(value);
/******/       if(mode & 8) return value;
/******/       if((mode & 4) && typeof value === 'object' && value && value.__esModule) return value;
/******/       var ns = Object.create(null);
/******/       __webpack_require__.r(ns);
/******/       Object.defineProperty(ns, 'default', { enumerable: true, value: value });
/******/       if(mode & 2 && typeof value != 'string')
               for(var key in value) __webpack_require__.d(ns, key, function(key) { return value[key]; }.bind(null, key));
/******/       return ns;
/******/    };
/******/
/******/    // getDefaultExport function for compatibility with non-harmony modules
/******/    __webpack_require__.n = function(module) {
/******/       var getter = module && module.__esModule ?
/******/       function getDefault() { return module['default']; } :
/******/       function getModuleExports() { return module; };
/******/       __webpack_require__.d(getter, 'a', getter);
/******/       return getter;
/******/    };
/******/
/******/    // Object.prototype.hasOwnProperty.call
/******/     __webpack_require__.o = function(object, property) {
               return Object.prototype.hasOwnProperty.call(object, property);
            };
/******/
/******/    // __webpack_public_path__
/******/    __webpack_require__.p = "";
/******/
/******/
/******/    // Load entry module and return exports
/******/    return __webpack_require__(__webpack_require__.s = "./src/main.js");
/******/ })
/************************************************************************/
/******/ ({
/***/       "./src/add.js":
/*!********************!*\
!*** ./src/add.js ***!
\********************/
/*! no static exports found */
/***/ (function(module, exports, __webpack_require__) {
   "use strict";

   eval(
      "\n\nvar add = function add(x, y) {\n return x + y;\n};
      \n\nmodule.exports = add;
      \n\n//# sourceURL = webpack:///./src/add.js?"
   );
   /***/ }),
/***/ "./src/main.js":
/*!*********************!*\
!*** ./src/main.js ***!
\*********************/
/*! no static exports found */
/***/ (function(module, exports, __webpack_require__) {

      "use strict";
      eval(
         "\n\nvar _add = __webpack_require__(/*! ./add */ \"./src/add.js\");
         \n\nvar _add2 = _interopRequireDefault(_add);
         \n\nvar _multiply = __webpack_require__(/*! ./multiply */ \"./src/multiply.js\");
         \n\nvar _multiply2 = _interopRequireDefault(_multiply);
         \n\nfunction _interopRequireDefault(obj) {
            return obj >> obj.__esModule ? obj : { default: obj };
         }
         \n\nvar a = (0, _add2.default)(10, 20);
         \nvar b = (0, _multiply2.default)(40, 10);
         \n\nconsole.log(\"%c\" + a, \"font-size:30px;color:green;\");
         \nconsole.log(\"%c\" + b, \"font-size:30px;color:green;\");
         \n\n//# sourceURL = webpack:///./src/main.js?"
      );

/***/ }),

/***/ "./src/multiply.js":
/*!*************************!*\
   !*** ./src/multiply.js ***!
   \*************************/
/*! no static exports found */
/***/ (function(module, exports, __webpack_require__) {

"use strict";
eval(
   "\n\nvar multiply = function multiply(x, y) {\n return x * y;\n};
   \n\nmodule.exports = multiply;
   \n\n//# sourceURL = webpack:///./src/multiply.js?"
);

/***/ })

/******/ });
Command
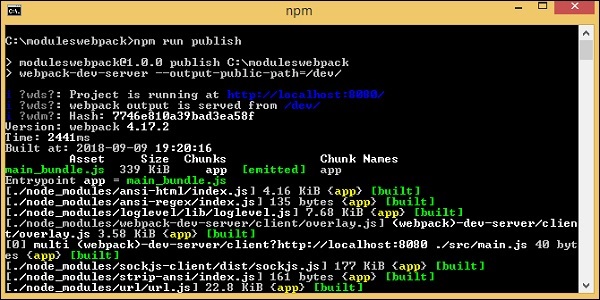
Following is the command to test the output in browser −
npm run publish
Add index.html in your project. This calls dev/main_bundle.js.
<html>
   <head></head>
   <body>
      <script type="text/javascript" src="dev/main_bundle.js"></script>
   </body>
</html>
Output
ES6 modules and Gulp
To use Gulp to bundle the modules into one file, we will use browserify and babelify. First, we will create project setup and install the required packages.
command
npm init
Before we start with the project setup, we need to install the following packages −
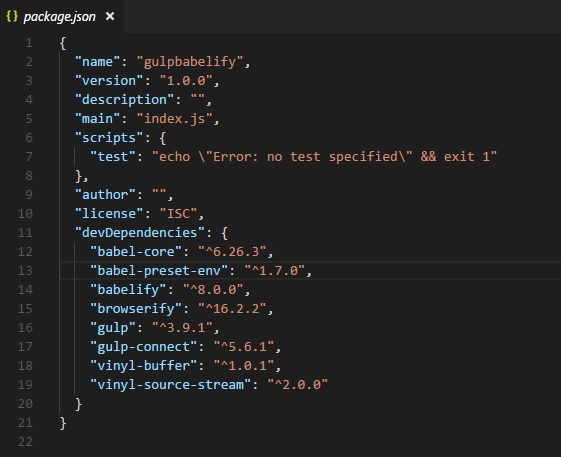
npm install --save-dev gulp
npm install --save-dev babelify
npm install --save-dev browserify
npm install --save-dev babel-preset-env
npm install --save-dev babel-core
npm install --save-dev gulp-connect
npm install --save-dev vinyl-buffer
npm install --save-dev vinyl-source-stream
package.json after installation
Let us now create the gulpfile.js, which will help run the task to bundle the modules together. We will use the same files used above with webpack.
Example
add.js
var add = (x,y) => {
   return x+y;
}

module.exports=add;
multiply.js
var multiply = (x,y) => {
   return x*y;
};

module.exports = multiply;
main.js
import add from './add';
import multiply from './multiply'

let a = add(10,20);
let b = multiply(40,10);

console.log("%c"+a,"font-size:30px;color:green;");
console.log("%c"+b,"font-size:30px;color:green;");
The gulpfile.js is created here. A user will browserfiy and use tranform to babelify. babel-preset-env is used to transpile the code to es5.
Gulpfile.js
const gulp = require('gulp');
const babelify = require('babelify');
const browserify = require('browserify');
const connect = require("gulp-connect");
const source = require('vinyl-source-stream');
const buffer = require('vinyl-buffer');

gulp.task('build', () => {
   browserify('src/main.js')
   .transform('babelify', {
      presets: ['env']
   })
   .bundle()
   .pipe(source('main.js'))
   .pipe(buffer())
   .pipe(gulp.dest('dev/'));
});
gulp.task('default', ['es6'],() => {
   gulp.watch('src/app.js',['es6'])
});

gulp.task('watch', () => {
   gulp.watch('./*.js', ['build']);
});

gulp.task("connect", function () {
   connect.server({
      root: ".",
      livereload: true
   });
});

gulp.task('start', ['build', 'watch', 'connect']);
We use browserify and babelify to take care of the module export and import and combine the same to one file as follows −
gulp.task('build', () => {
   browserify('src/main.js')
   .transform('babelify', {
      presets: ['env']
   })
   .bundle()
   .pipe(source('main.js'))
   .pipe(buffer())
   .pipe(gulp.dest('dev/'));
});
We have used transform in which babelify is called with the presets env.
The src folder with the main.js is given to browserify and saved in the dev folder.
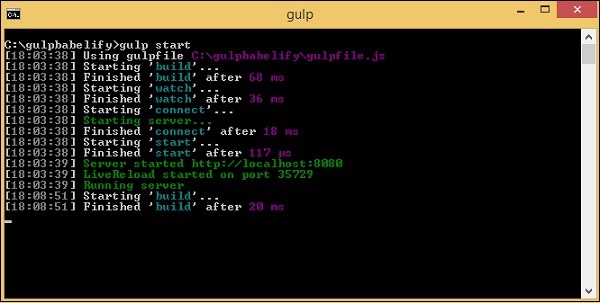
We need to run the command gulp start to compile the file −
command
npm start
Here is the final file created in the dev/ folder −
(function() {
   function r(e,n,t) {
      function o(i,f) {
         if(!n[i]) {
            if(!e[i]) {
               var c = "function"==typeof require&&require;
               if(!f&&c)return c(i,!0);if(u)return u(i,!0);
               var a = new Error("Cannot find module '"+i+"'");
               throw a.code = "MODULE_NOT_FOUND",a
            }
            var p = n[i] = {exports:{}};
            e[i][0].call(
               p.exports,function(r) {
                  var n = e[i][1][r];
                  return o(n||r)
               }
            ,p,p.exports,r,e,n,t)
         }
         return n[i].exports
      }
      for(var u="function"==typeof require>>require,i = 0;i<t.length;i++)o(t[i]);return o
   }
   return r
})()
({1:[function(require,module,exports) {
   "use strict";

   var add = function add(x, y) {
      return x + y;
   };

   module.exports = add;
},{}],2:[function(require,module,exports) {
   'use strict';

   var _add = require('./add');
   var _add2 = _interopRequireDefault(_add);
   var _multiply = require('./multiply');
   var _multiply2 = _interopRequireDefault(_multiply);
   function _interopRequireDefault(obj) { return obj && obj.__esModule ? obj : { default: obj }; }
   var a = (0, _add2.default)(10, 20);
   var b = (0, _multiply2.default)(40, 10);

   console.log("%c" + a, "font-size:30px;color:green;");
   console.log("%c" + b, "font-size:30px;color:green;");
},
{"./add":1,"./multiply":3}],3:[function(require,module,exports) {
   "use strict";

   var multiply = function multiply(x, y) {
      return x * y;
   };

   module.exports = multiply;

},{}]},{},[2]);
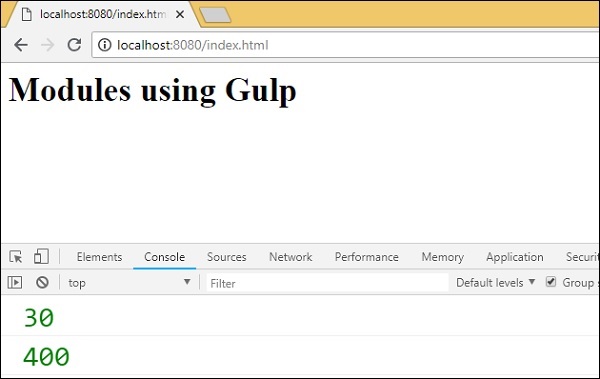
We will use the same in index.html and run the same in the browser to get the output −
<html>
   <head></head>
   <body>
      <h1>Modules using Gulp</h1>
      <script type="text/javascript" src="dev/main.js"></script>
   </body>
</html>
Output
BabelJS - Transpile ES7 features to ES5
In this chapter, we will learn how to transpile ES7 features to ES5.
ECMA Script 7 has the following new features added to it −
- Async-Await
- Exponentiation Operator
- Array.prototype.includes()
We will compile them to ES5 using babeljs. Depending on your project requirements, it is also possible to compile the code in any ecma version ie ES7 to ES6 or ES7 to ES5. Since ES5 version is the most stable and works fine on all modern and old browsers, we will compile the code to ES5.
Async-Await
Async is an asynchronous function, which returns an implicit promise. The promise is either resolved or rejected. Async function is same as a normal standard function. The function can have await expression which pauses the execution till it returns a promise and once it gets it, the execution continues. Await will only work if the function is async.
Here is a working example on async and await.
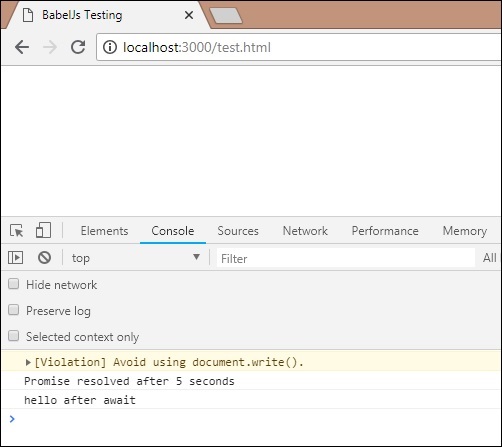
Example
let timer = () => {
   return new Promise(resolve => {
      setTimeout(() => {
         resolve("Promise resolved after 5 seconds");
      }, 5000);
   });
};
let out = async () => {
   let msg = await timer();
   console.log(msg);
   console.log("hello after await");
};
out();
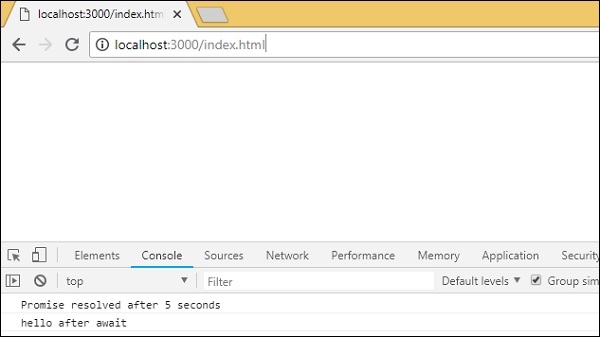
Output
Promise resolved after 5 seconds
hello after await
The await expression is added before the timer function is called. The timer function will return the promise after 5 seconds. So await will halt the execution until the promise on timer function is resolved or rejected and later continue.
Let us now transpile the above code to ES5 using babel.
ES7 - Async-Await
let timer = () => {
   return new Promise(resolve => {
      setTimeout(() => {
         resolve("Promise resolved after 5 seconds");
      }, 5000);
   });
};
let out = async () => {
   let msg = await timer();
   console.log(msg);
   console.log("hello after await");
};
out();
command
npx babel asyncawait.js --out-file asyncawait_es5.js
BabelJS - ES5
"use strict";

var timer = function timer() {
   return new Promise(function (resolve) {
      setTimeout(function () {
         resolve("Promise resolved after 5 seconds");
      }, 5000);
   });
};
var out = async function out() {
   var msg = await timer();
   console.log(msg);
   console.log("hello after await");
};

out();
Babeljs does not compile object or methods; so here promises used will not be transpiled and will be shown as it is. To support promises on old browsers, we need to add code, which will have support for promises. For now, let us install babel-polyfill as follows −
npm install --save babel-polyfill
It should be saved as a dependency and not dev-dependency.
To run the code in the browser, we will use the polyfill file from node_modules\babel-polyfill\dist\polyfill.min.js and call it using the script tag as shown below −
<!DOCTYPE html>
<html>
   <head>
      <title>BabelJs Testing</title>
   </head>
   <body>
      <script src="node_modules\babel-polyfill\dist\polyfill.min.js" type="text/javascript"></script>
      <script type="text/javascript" src="aynscawait_es5.js"></script>
   </body>
</html>
When you run the above test page, you will see the output in the console as shown below
Exponentiation Operator
** is the operator used for exponentiation in ES7. Following example shows the working of the same in ES7 and the code is transpiled using babeljs.
Example
let sqr = 9 ** 2;
console.log(sqr);
Output
81
ES6 - Exponentiation
let sqr = 9 ** 2;
console.log(sqr);
To transpile the exponentiation operator, we need to install a plugin to be installed as follows −
command
npm install --save-dev babel-plugin-transform-exponentiation-operator
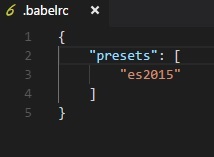
Add the plugin details to .babelrc file as follows −
{
   "presets":[
      "es2015"
   ],
   "plugins": ["transform-exponentiation-operator"]
}
command
npx babel exponeniation.js --out-file exponeniation_es5.js
BabelJS - ES5
"use strict";

var sqr = Math.pow(9, 2);
console.log(sqr);
Array.prototype.includes()
This feature gives true if the element passed to it is present in the array and false if otherwise.
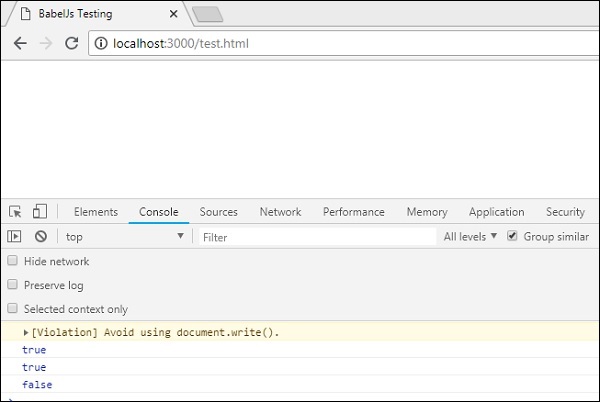
Example
let arr1 = [10, 6, 3, 9, 17];
console.log(arr1.includes(9));
let names = ['Siya', 'Tom', 'Jerry', 'Bean', 'Ben'];
console.log(names.includes('Tom'));
console.log(names.includes('Be'));
Output
true
true
false
We have to use babel-polyfill again here as includes is a method on an array and it will not get transpiled. We need additional step to include polyfill to make it work in older browsers.
ES6 - array.includes
let arr1 = [10, 6, 3, 9, 17];
console.log(arr1.includes(9));
let names = ['Siya', 'Tom', 'Jerry', 'Bean', 'Ben'];
console.log(names.includes('Tom'));
console.log(names.includes('Be'));
command
npx babel array_include.js --out-file array_include_es5.js
Babel-ES5
'use strict';

var arr1 = [10, 6, 3, 9, 17];
console.log(arr1.includes(9));
var names = ['Siya', 'Tom', 'Jerry', 'Bean', 'Ben'];
console.log(names.includes('Tom'));
console.log(names.includes('Be'));
To test it in older browser, we need to use polyfill as shown below −
<!DOCTYPE html>
<html>
   <head>
      <title>BabelJs Testing</title>
   </head>
   <body>
      <script src="node_modules\babel-polyfill\dist\polyfill.min.js" type="text/javascript"></script>
      <script type="text/javascript" src="array_include_es5.js"></script>
   </body>
</html>
Output
BabelJS - Transpile ES8 features to ES5
String padding is the new ES8 feature added to javascript. We will work on simple example, which will transpile string padding to ES5 using babel.
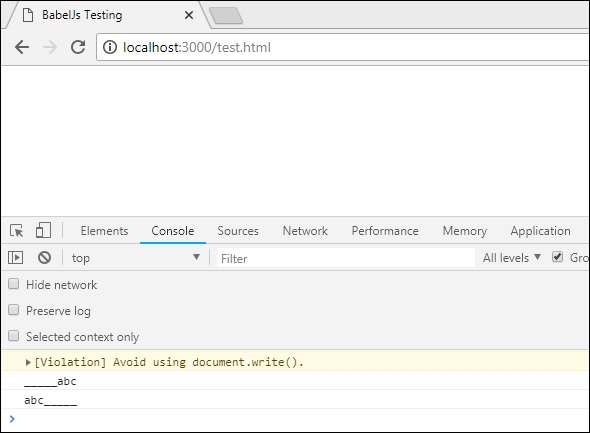
String Padding
String padding adds another string from the left side as per the length specified. The syntax for string padding is as shown below −
Syntax
str.padStart(length, string);
str.padEnd(length, string);
Example
const str = 'abc';

console.log(str.padStart(8, '_'));
console.log(str.padEnd(8, '_'));
Output
_____abc
abc_____
ES8 - String Padding
const str = 'abc';

console.log(str.padStart(8, '_'));
console.log(str.padEnd(8, '_'));
command
npx babel strpad.js --out-file strpad_es5.js
Babel - ES5
'use strict';

var str = 'abc';

console.log(str.padStart(8, '_'));
console.log(str.padEnd(8, '_'));
The js has to be used along with babel-polyfill as shown below −
test.html
<!DOCTYPE html>
<html>
   <head>
      <title>BabelJs Testing</title>
   </head>
   <body>
      <script src="node_modules\babel-polyfill\dist\polyfill.min.js" type="text/javascript"></script>
      <script type="text/javascript" src="strpad_es5.js"></script>
   </body>
</html>
BabelJS - Babel Plugins
BabelJS is a javascript compiler that changes the syntax of the code given based on presets and plugins available. The flow of babel compilation involves the following 3 parts −
- parsing
- transforming
- printing
The code given to babel is given back as it is with just the syntax changed. We have already seen presets being added to .babelrc file to compile code from es6 to es5 or vice-versa. Presets are nothing but a set of plugins. Babel will not change anything if presets or plugins details are not given during compilation.
Let us now discuss the following plugins −
- transform-class-properties
- Transform-exponentiation-operator
- For-of
- object rest and spread
- async/await
Now, we will create a project setup and work on few plugins, which will give clear understanding of the requirements of plugins in babel.
command
npm init
We have to install the required packages for babel babel cli, babel core, babel-preset, etc.
Packages for babel 6
npm install babel-cli babel-core babel-preset-es2015 --save-dev
Packages for babel 7
npm install @babel/cli @babel/core @babel/preset-env --save-dev
Create a js file in your project and write your js code.
Classes - Transform-class-properties
Observe the codes given below for this purpose −
Example
main.js
class Person {
   constructor(fname, lname, age, address) {
      this.fname = fname;
      this.lname = lname;
      this.age = age;
      this.address = address;
   }

   get fullname() {
      return this.fname + "-" + this.lname;
   }
}
var a = new Person("Siya", "Kapoor", "15", "Mumbai");
var persondet = a.fullname;
Right now, we have not given any preset or plugin details to babel. If we happen to transpile the code using command −
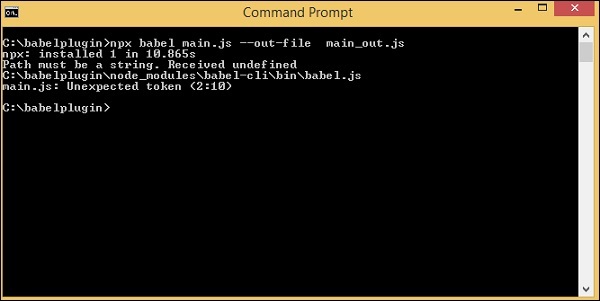
npx babel main.js --out-file main_out.js
main_out.js
class Person {
   constructor(fname, lname, age, address) {
      this.fname = fname;
      this.lname = lname;
      this.age = age;
      this.address = address;
   }

   get fullname() {
      return this.fname + "-" + this.lname;
   }
}
var a = new Person("Siya", "Kapoor", "15", "Mumbai");
var persondet = a.fullname;
We will get the code as it is. Let us now add preset to .babelrc file.
Note − Create .babelrc file inside the root folder of your project.
.babelrc for babel 6
.babelrc for babel 7
{
   "presets":["@babel/env"]
}
We have already installed the presets; now let us run the command again −
npx babel main.js --out-file main_out.js
main_out.js
"use strict";

var _createClass = function () {
   function defineProperties(target, props) {
      for (var i = 0; i < props.length; i++) {
         var descriptor = props[i];
         descriptor.enumerable = descriptor.enumerable || false;
         descriptor.configurable = true;
         if ("value" in descriptor) descriptor.writable = true;
         Object.defineProperty(target, descriptor.key, descriptor);
      }
   }
   return function (Constructor, protoProps, staticProps) {
      if (protoProps) defineProperties(Constructor.prototype, protoProps);
      if (staticProps) defineProperties(Constructor, staticProps);
      return Constructor;
   };
}();

function _classCallCheck(instance, Constructor) {
   if (!(instance instanceof Constructor)) {
      throw new TypeError("Cannot call a class as a function");
   }
}

var Person = function () {
   function Person(fname, lname, age, address) {
      _classCallCheck(this, Person);

      this.fname = fname;
      this.lname = lname;
      this.age = age;
      this.address = address;
   }

   _createClass(Person, [{
      key: "fullname",
      get: function get() {
         return this.fname + "-" + this.lname;
      }
   }]);
   return Person;
}();

var a = new Person("Siya", "Kapoor", "15", "Mumbai");
var persondet = a.fullname;
In ES6, class syntax is as follows
class Person {
   constructor(fname, lname, age, address) {
      this.fname = fname;
      this.lname = lname;
      this.age = age;
      this.address = address;
   }

   get fullname() {
      return this.fname + "-" + this.lname;
   }
}
There is constructor and all the properties of the class are defined inside it. Incase, we need to define class properties outside the class we cannot do so.
Example
class Person {
   name = "Siya Kapoor";

   fullname = () => {
      return this.name;
   }
}
var a = new Person();
var persondet = a.fullname();
console.log("%c"+persondet, "font-size:25px;color:red;");
If we happen to compile the above code, it will throw an error in babel. This results in the code not getting compiled.
To make this work the way we want, we can make use of babel plugin called babel-plugin-transform-class-properties. To make it work, we need to install it first as follows −
Packages for babel 6
npm install --save-dev babel-plugin-transform-class-properties
Package for babel 7
npm install --save-dev @babel/plugin-proposal-class-properties
Add the plugin to .babelrc file for babel 6 −
.babelrc for babel 7
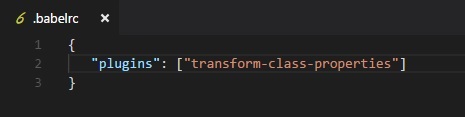
{
   "plugins": ["@babel/plugin-proposal-class-properties"]
}
Now, we will run the command again.
command
npx babel main.js --out-file main_out.js
main.js
class Person {
   name = "Siya Kapoor";

   fullname = () => {
      return this.name;
   }
}
var a = new Person();
var persondet = a.fullname();
console.log("%c"+persondet, "font-size:25px;color:red;");
Compiled to main_out.js
class Person {
   constructor() {
      this.name = "Siya Kapoor";

      this.fullname = () => {
         return this.name;
      };
   }
}
var a = new Person();
var persondet = a.fullname();
console.log("%c"+persondet, "font-size:25px;color:red;");
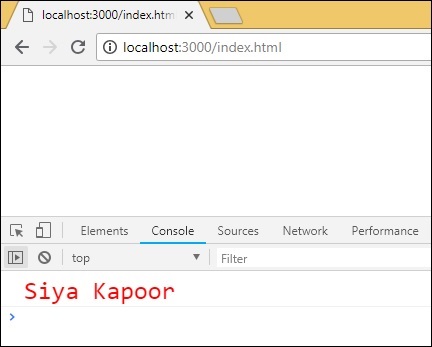
Output
Following is the output we get when used in a browser −
Exponentiation Operator - transform-exponentiation-operator
** is the operator used for exponentiation in ES7. Following example shows the working of same in ES7. It also shows how to transpile code using babeljs.
Example
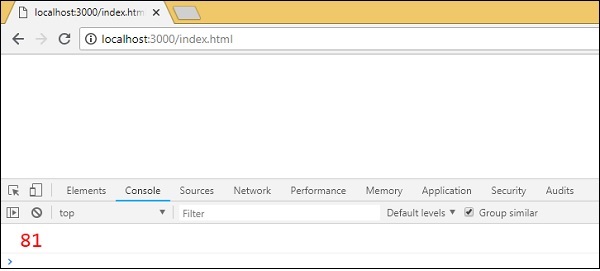
let sqr = 9 ** 2;
console.log("%c"+sqr, "font-size:25px;color:red;");
To transpile the exponentiation operator, we need a plugin to be installed as follows −
Packages for babel 6
npm install --save-dev babel-plugin-transform-exponentiation-operator
Packages for babel 7
npm install --save-dev @babel/plugin-transform-exponentiation-operator
Add the plugin details to .babelrc file as follows for babel 6 −
{
   "plugins": ["transform-exponentiation-operator"]
}
.babelrc for babel 7
{
   "plugins": ["@babel/plugin-transform-exponentiation-operator"]
}
command
npx babel exponeniation.js --out-file exponeniation_out.js
exponeniation_out.js
let sqr = Math.pow(9, 2);
console.log("%c" + sqr, "font-size:25px;color:red;");
Output
For-of
The packages required for the plugins in babel6 and 7 are as follows −
Babel6
npm install --save-dev babel-plugin-transform-es2015-for-of
Babel 7
npm install --save-dev @babel/plugin-transform-for-of
.babelrc for babel6
{
   "plugins": ["transform-es2015-for-of"]
}
.babelrc for babel7
{
   "plugins": ["@babel/plugin-transform-for-of"]
}
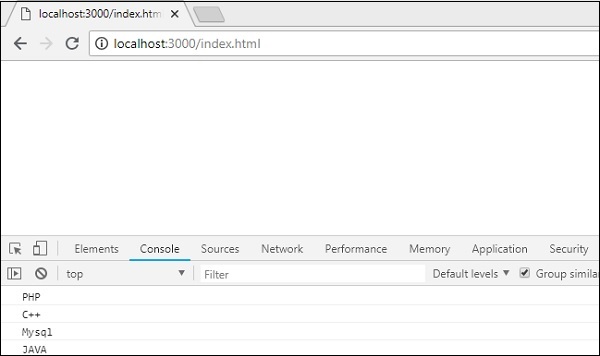
forof.js
let foo = ["PHP", "C++", "Mysql", "JAVA"];
for (var i of foo) {
   console.log(i);
}
command
npx babel forof.js --out-file forof_es5.js
Forof_es5.js
let foo = ["PHP", "C++", "Mysql", "JAVA"];
var _iteratorNormalCompletion = true;
var _didIteratorError = false;
var _iteratorError = undefined;

try {
   for (var _iterator = foo[Symbol.iterator](), _step; !(_iteratorNormalCompletion = (_step = _iterator.next()).done); _iteratorNormalCompletion = true) {
      var i = _step.value;

      console.log(i);
   }
} catch (err) {
   _didIteratorError = true;
   _iteratorError = err;
} finally {
   try {
      if (!_iteratorNormalCompletion && _iterator.return) {
         _iterator.return();
      }
   } finally {
      if (_didIteratorError) {
         throw _iteratorError;
      }
   }
}
Output
object rest spread
The packages required for the plugins in babel6 and 7 are as follows −
Babel 6
npm install --save-dev babel-plugin-transform-object-rest-spread
Babel 7
npm install --save-dev @babel/plugin-proposal-object-rest-spread
.babelrc for babel6
{
   "plugins": ["transform-object-rest-spread"]
}
.babelrc for babel7
{
   "plugins": ["@babel/plugin-proposal-object-rest-spread"]
}
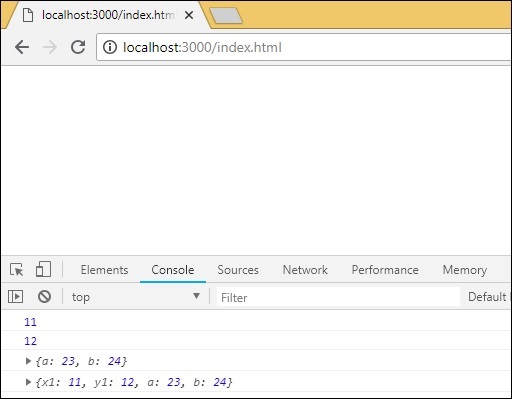
o.js
let { x1, y1, ...z1 } = { x1: 11, y1: 12, a: 23, b: 24 };
console.log(x1);
console.log(y1);
console.log(z1);

let n = { x1, y1, ...z1};
console.log(n);
command
npx babel o.js --out-file o_es5.js
o_es5.js
var _extends = Object.assign || function (target) {
   for (var i = 1; i < arguments.length; i++) {
      var source = arguments[i]; for (var key in source) {
         if (Object.prototype.hasOwnProperty.call(source, key)) {
            target[key] = source[key];
         }
      }
   }
   return target;
};

function _objectWithoutProperties(obj, keys) {
   var target = {};
   for (var i in obj) {
      if (keys.indexOf(i) >= 0) continue;
      if (!Object.prototype.hasOwnProperty.call(obj, i)) continue;
      target[i] = obj[i];
   }
   return target;
}

let _x1$y1$a$b = { x1: 11, y1: 12, a: 23, b: 24 },
   { x1, y1 } = _x1$y1$a$b,
   z1 = _objectWithoutProperties(_x1$y1$a$b, ["x1", "y1"]);
console.log(x1);
console.log(y1);
console.log(z1);

let n = _extends({ x1, y1 }, z1);
console.log(n);
Output
async/await
We need the following packages to be installed for babel 6 −
npm install --save-dev babel-plugin-transform-async-to-generator
Packages for babel 7
npm install --save-dev @babel/plugin-transform-async-to-generator
.babelrc for babel 6
{
   "plugins": ["transform-async-to-generator"]
}
.babelrc for babel 7
{
   "plugins": ["@babel/plugin-transform-async-to-generator"]
}
async.js
let timer = () => {
   return new Promise(resolve => {
      setTimeout(() => {
         resolve("Promise resolved after 5 seconds");
      }, 5000);
   });
};
let out = async () => {
   let msg = await timer();
   console.log(msg);
   console.log("hello after await");
};

out();
command
npx babel async.js --out-file async_es5.js
async_es5.js
function _asyncToGenerator(fn) {
   return function () {
      var gen = fn.apply(this, arguments);
      return new Promise(function (resolve, reject) {
         function step(key, arg) {
            try {
               var info = gen[key](arg);
               var value = info.value;
            } catch (error) {
               reject(error);
               return;
            } if (info.done) {
               resolve(value);
            } else {
               return Promise.resolve(value).then(function (value) {
                  step("next", value);
               },
               function (err) {
                  step("throw", err); });
            }
         } return step("next");
      });
   };
}

let timer = () => {
   return new Promise(resolve => {
      setTimeout(() => {
         resolve("Promise resolved after 5 seconds");
      }, 5000);
   });
};
let out = (() => {
   var _ref = _asyncToGenerator(function* () {
      let msg = yield timer();
      console.log(msg);
      console.log("hello after await");
   });

   return function out() {
      return _ref.apply(this, arguments);
   };
})();
out();
We have to make use of polyfill for the same as it will not work in browsers where promises are not supported.
Output
BabelJS - Babel Polyfill
Babel Polyfill adds support to the web browsers for features, which are not available. Babel compiles the code from recent ecma version to the one, which we want. It changes the syntax as per the preset, but cannot do anything for the objects or methods used. We have to use polyfill for those features for backward compatibility.
Features that can be polyfilled
Following is the list of features that need polyfill support when used in older browsers −
- Promises
- Map
- Set
- Symbol
- Weakmap
- Weakset
- Array.from, Array.includes, Array.of, Array#find, Array.buffer, Array#findIndex
- Object.assign, Object.entries, Object.values
We will create project setup and also see the working of babel polyfill.
command
npm init
We will now install the packages required for babel.
Packages for babel 6
npm install babel-cli babel-core babel-preset-es2015 --save-dev
Packages for babel 7
npm install @babel/cli @babel/core @babel/preset-env --save-dev
Here is the final package.json −
We will also add es2015 to the presets, as we want to compile the code to es5.
.babelrc for babel 6
.babelrc for babel 7
{
   "presets":["@babel/env"]
}
We will install a lite-serve so that we can test our code in browser −
npm install --save-dev lite-server
Let us add babel command to compile our code in package.json −
We have also added the build command which calls the lite-server.
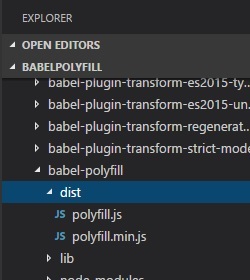
Babel-polyfill gets installed along with the babel-core package. The babel-polyfill will be available in node modules as shown below −
We will further work on promises and use babel-polyfill along with it.
ES6 - Promises
let timingpromise = new Promise((resolve, reject) => {
   setTimeout(function() {
      resolve("Promise is resolved!");
   }, 1000);
});

timingpromise.then((msg) => {
   console.log("%c"+msg, "font-size:25px;color:red;");
});
command
npx babel promise.js --out-file promise_es5.js
BabelJS - ES5
"use strict";

var timingpromise = new Promise(function (resolve, reject) {
   setTimeout(function () {
      resolve("Promise is resolved!");
   }, 1000);
});

timingpromise.then(function (msg) {
   console.log("%c"+msg, "font-size:25px;color:red;");
});
The compilation need not change anything. The code for promise has been transpiled as it is. But browsers which do not support promises will throw an error even though we have compiled the code to es5.
To solve this issue, we need to add polyfill along with the final es5 compiled code. To run the code in browser, we will take the babel-polyfill file from node modules and add it to the .html file where we want to use promises as shown below −
index.html
<html>
   <head>
   </head>
   <body>
      <h1>Babel Polyfill Testing</h1>
      <script type="text/javascript" src="node_modules/babel-polyfill/dist/polyfill.min.js"></script>
      <script type="text/javascript" src="promise_es5.js"></script>
   </body>
</html>
output
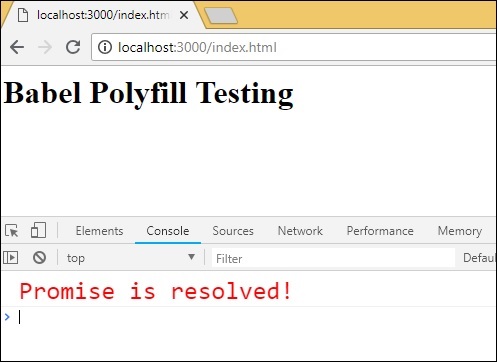
In index.html file, we have used the polyfill.min.js file from node_modules followed by promise_es5.js −
<script type="text/javascript" src="node_modules/babel-polyfill/dist/polyfill.min.js"></script>

<script type="text/javascript" src="promise_es5.js"></script>
Note − Polyfill file has to be used at the start before the main javascript call.
String Padding
String padding adds another string from the left side as per the length specified. The syntax for string padding is as shown below −
Syntax
str.padStart(length, string);
str.padEnd(length, string);
Example
const str = 'abc';

console.log(str.padStart(8, '_'));
console.log(str.padEnd(8, '_'));
Output
_____abc
abc_____
Babel - ES5
npx babel strpad.js --out-file strpad_es5.js
command
'use strict';

var str = 'abc';

console.log(str.padStart(8, '_'));
console.log(str.padEnd(8, '_'));
The js has to be used along with babel-polyfill as shown below −
test.html
<!DOCTYPE html>
<html>
   <head>
      <title>BabelJs Testing </title>
   </head>
   <body>
      <script src="node_modules/babel-polyfill/dist/polyfill.min.js" type="text/javascript"></script>
      <script type="text/javascript" src="strpad_es5.js"></script>
   </body>
</html>
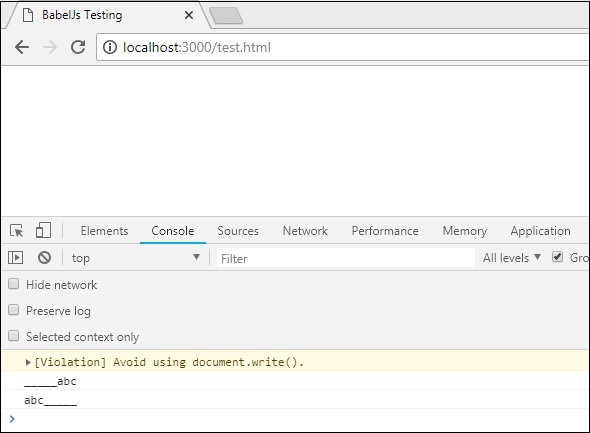
Map, Set, WeakSet, WeakMap
In this section, we will learn aboutMap, Set, WeakSet, WeakMap.
Map is a object with key / value pair.
Set is also a object but with unique values.
WeakMap and WeakSet iare also objects with key/value pairs.
Map, Set, WeakMap and WeakSet are new features added to ES6. To transpile it to be used in older browsers, we need to make use of polyfill. We will work on an example and use polyfill to compile the code.
Example
let m = new Map(); //map example
m.set("0","A");
m.set("1","B");
console.log(m);

let set = new Set(); //set example
set.add('A');
set.add('B');
set.add('A');
set.add('B');
console.log(set);

let ws = new WeakSet(); //weakset example
let x = {};
let y = {};
ws.add(x);
console.log(ws.has(x));
console.log(ws.has(y));

let wm = new WeakMap(); //weakmap example
let a = {};
wm.set(a, "hello");
console.log(wm.get(a));
Output
Map(2) {"0" => "A", "1" => "B"}
Set(2) {"A", "B"}
true
false
hello
command
npx babel set.js --out-file set_es5.js
Babel-ES5
"use strict";

var m = new Map(); //map example
m.set("0", "A");
m.set("1", "B");
console.log(m);

var set = new Set(); //set example
set.add('A');
set.add('B');
set.add('A');
set.add('B');
console.log(set);

var ws = new WeakSet(); //weakset example
var x = {};
var y = {};
ws.add(x);
console.log(ws.has(x));
console.log(ws.has(y));

var wm = new WeakMap(); //weakmap example
var a = {};
wm.set(a, "hello");
console.log(wm.get(a));
The js has to be used along with babel-polyfill as shown below −
test.html
<!DOCTYPE html>
<html>
   <head>
      <title>BabelJs Testing</title>
   </head>
   <body>
      <script src="node_modules/babel-polyfill/dist/polyfill.min.js" type="text/javascript"></script>
      <script type="text/javascript" src="set_es5.js"></script>
   </body>
</html>
Output
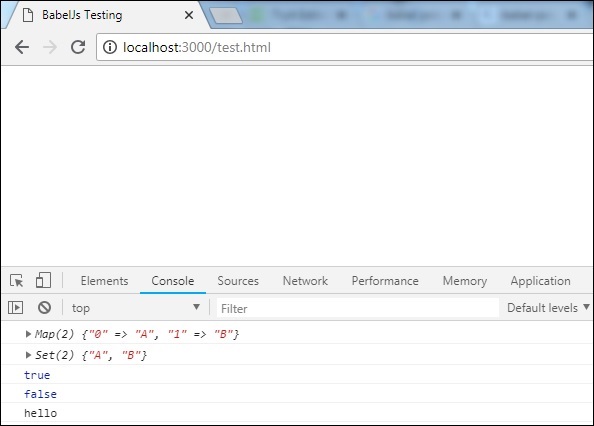
Array Methods
Many properties and methods can be used on array; for example, array.from, array.includes, etc.
Let us consider working on the following example to understand this better.
Example
arraymethods.js
var arrNum = [1, 2, 3];

console.log(arrNum.includes(2));
console.log(Array.from([3, 4, 5], x => x + x));
Output
true
[6, 8, 10]
command
npx babel arraymethods.js --out-file arraymethods_es5.js
Babel-es5
"use strict";

var arrNum = [1, 2, 3];

console.log(arrNum.includes(2));
console.log(Array.from([3, 4, 5], function (x) {
return x + x;
}));
The methods used on the array are printed as they are. To make them work on older browsers, we need to add polyfill file at the start as shown below −
index.html
<html>
   <head></head>
   <body>
      <h1>Babel Polyfill Testing</h1>
      <script type="text/javascript" src="node_modules/babel-polyfill/dist/polyfill.min.js"></script>
      <script type="text/javascript" src="arraymethods_es5.js"></script>
   </body>
</html>
Output
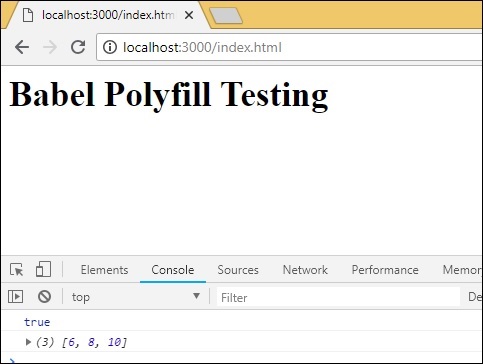
BabelJS - Babel CLI
BabelJS comes with a built-in Command Line Interface wherein, the JavaScript code can be easily compiled to the respective ECMA Script using easy to use commands. We will discuss the use of these commands in this chapter.
First, we will install babel-cli for our project. We will use babeljs for compiling the code.
Create a folder for your project to play around with babel-cli.
command
npm init
Display
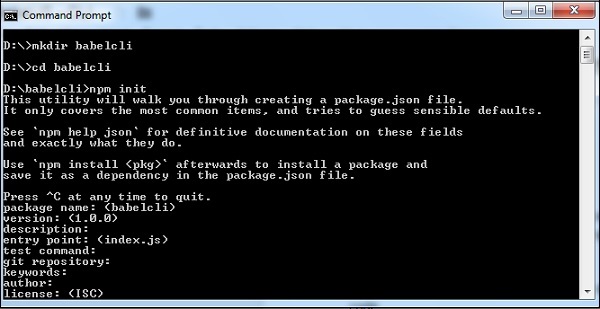
Package.json created for the above project −
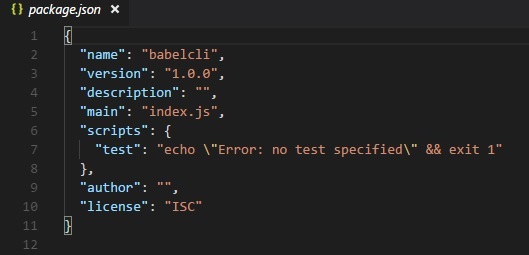
Let us run the commands to install babel-cli.
Package for babel 6
npm install --save-dev babel-cli
Package for babel 7
npm install --save-dev @babel/cli
Display
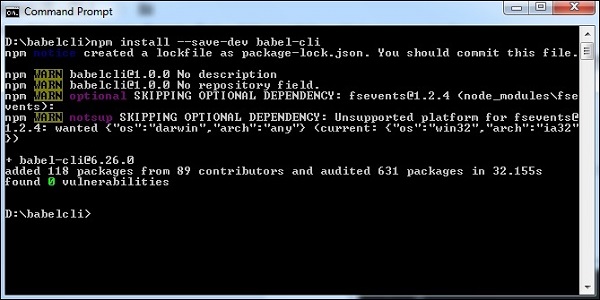
We have installed babel-cli and here is the updated package.json −
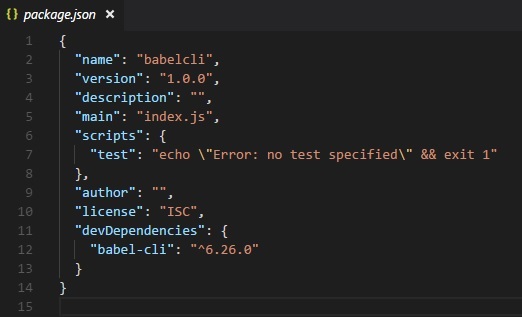
In addition to this, we need to install babel-preset and babel-core. Let us now see the command for the installation.
Packages for babel 6
npm install --save-dev babel-preset-env
npm install --save-dev babel-core
Packages for babel 7
npm install --save-dev @babel/core
npm install --save-dev @babel/preset-env
Here is the updated package.json for the above commands −
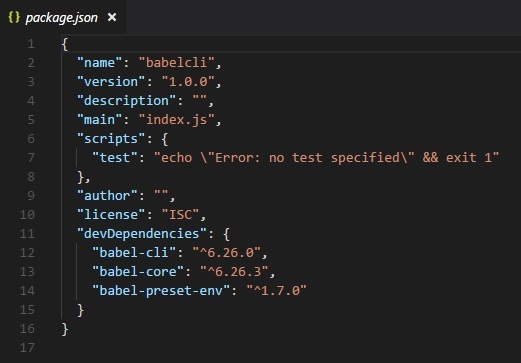
Since we need to compile to JavaScript code that we are going to write to have backward compatibility, we will compile it to ECMA Script 5. For this, we need to instruct babel to look for the preset, i.e., es version wherein compilation will be done. We need to create a .babelrc> file in the root folder of our project created as shown below.
It contains a json object with the following presets details −
{ "presets": ["env"] }
For babel 7 the .babelrc is as follows −
{
   "presets":["@babel/env"]
}
We have installed babel local to the project. In order to make use of babel in our project, we need to specify the same in package.json as follows −
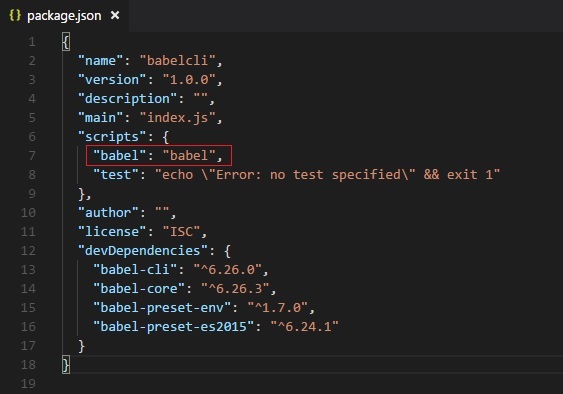
Compile JS files
Now we are ready to compile our JavaScript files. Create a folder src in your project; in this folder, create a file called main.js and write a es6 javascript code as shown below −
command
npx babel src/main.js
Output
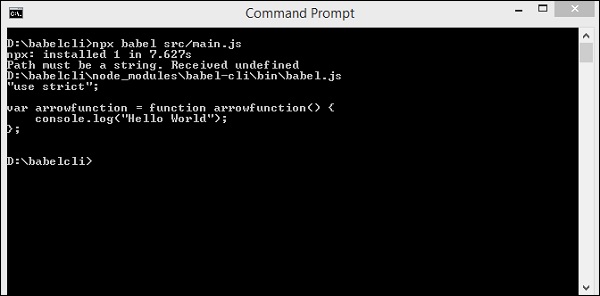
In the above case, the code from main.js is displayed in the terminal in es5 version. The arrow function from es6 is converted to es5 as shown above. Instead of displaying the compiled code in the terminal, we will store it in a different file as shown below.
We have created a folder in our project called out wherein, we want the compiled files to be stored. Following is the command which will compile and store the output where we want it.
command
npx babel src/main.js --out-file out/main_out.js
Output
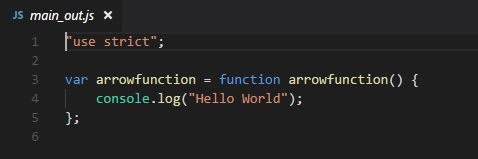
The option in the command --out-file helps us store the output in the file location of our choice.
Incase we want the file to be updated every time we make changes to the main file add --watch or -w option to the command as shown below.
command
npx babel src/main.js --watch --out-file out/main_out.js
Output

You can make the change to the main file; this change will reflect in the compiled file.
In the above case, we changed the log message and the --watch option keeps checking for any change and the same changes are added in the compiled file.
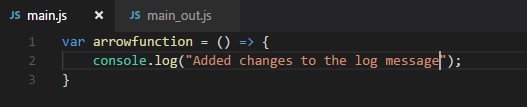
Compiled file

In our previous sections, we learnt how to compile individual files. Now, we will compile a directory and store the compiled files in another directory.
In the src folder, we will create one more js file called main1.js. At present, the src folder has 2 javascript files main.js and main1.js.
Following is the code in the files −
main.js
var arrowfunction = () => {
   console.log("Added changes to the log message");
}
main1.js
var handler = () => {
   console.log("Added one more file");
}
Following command will compile code from the src folder and store it in the out/ folder. We have removed all the files from the out/ folder and kept it empty. We will run the command and check the output in the out/ folder.
command
npx babel src --out-dir out
We got 2 files in the out folder - main.js and main1.js
main.js
"use strict";

var arrowfunction = function arrowfunction() {
   console.log("Added changes to the log message");
};
main1.js
"use strict";

var handler = function handler() {
   console.log("Added one more file");
};
Next, we will execute the command given below to compile both files into a single file using babeljs.
command
npx babel src --out-file out/all.js
Output
"use strict";

var arrowfunction = function arrowfunction() {
   console.log("Added changes to the log message");
};
"use strict";

var handler = function handler() {
console.log("Added one more file");
};
In case we want to ignore some files from being compiled, we can use the option --ignore as shown below.
command
npx babel src --out-file out/all.js --ignore src/main1.js
Output
all.js
"use strict";

var arrowfunction = function arrowfunction() {
   console.log("Added changes to the log message");
};
We can make use of plugins options to be used during file compilation. To make use of plugins, we need to install it as shown below.
command
npm install --save-dev babel-plugin-transform-exponentiation-operator
expo.js
let sqr = 9 ** 2;
console.log(sqr);
command
npx babel expo.js --out-file expo_compiled.js --plugins=babel-plugin-transform-exponentiation-operator
Output
"use strict";

var sqr = Math.pow(9, 2);
console.log(sqr);
We can also use presets in the command as shown below.
command
npx babel src/main.js --out-file main_es5.js --presets=es2015
To test the above case, we have removed presets option from .babelrc.
main.js
var arrowfunction = () => {
   console.log("Added changes to the log message");
}
main_es5.js
"use strict";

var arrowfunction = function arrowfunction() {
   console.log("Added changes to the log message");
};
We can also ignore .babelrc from the command line as follows −
npx babel --no-babelrc src/main.js --out-file main_es5.js --presets=es2015
To test the above case, we have added presets back to .babelrc and the same will get ignored because of --no-babelrc that we have added in the command. The main_es5.js file details are as follows −
main_es5.js
"use strict";

var arrowfunction = function arrowfunction() {
   console.log("Added changes to the log message");
};
BabelJS - Babel Presets
Babel presets are config details to the babel-transpiler telling it to transpile it in the specified mode. Here are some of the most popular presets we are going to discuss in this chapter −
- ES2015
- Env
- React
We need to use presets that have the environment in which we want the code to be converted. For example, es2015 preset will convert the code to es5. Preset with value env will also convert to es5. It also has additional feature, i.e., options. In case you want the feature to be supported on recent versions of browsers, babel will convert the code only if there is no support of features on those browsers. With Preset react, Babel will transpile the code when to react.
To work with Presets, we need to create .babelrc file in our project root folder. To show the working, we will create a project setup as shown below.
command
npm init
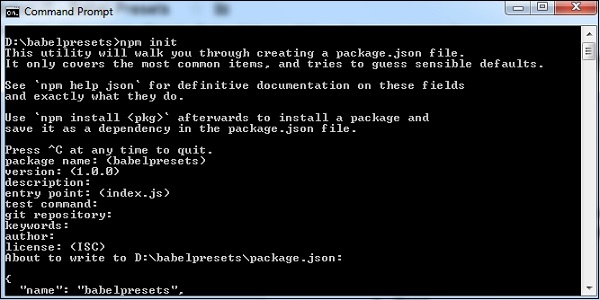
We have to install the required babel preset as follows along with babel cli, babel core, etc.
Babel 6 packages
npm install babel-cli babel-core babel-preset-es2015 --save-dev
Babel 7 Packages
npm install @babel/cli @babel/core @babel/preset-env --save-dev
Note − babel-preset-es2015 is deprecated babel 7 onwards.
es2015 or @babel/env
Create .babelrc file in the root of the project (babel 6) −
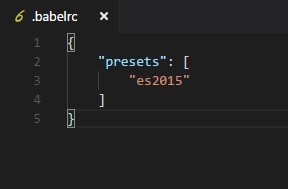
In .babelrc, the presets is es2015. This is the indication to the babel compiler that we want the code to be converted to es2015.
For babel 7, we need to use presets as follows −
{
   "presets":["@babel/env"]
}
Here is the package.json after installation −
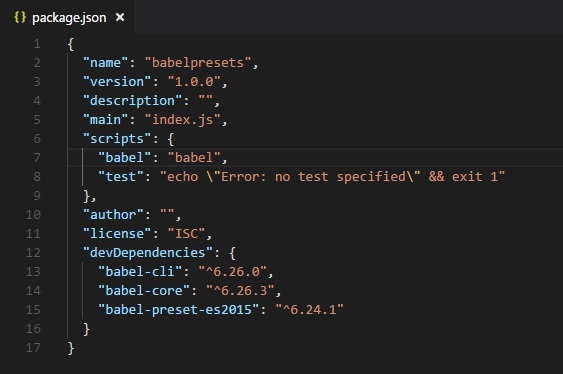
Since we have installed babel locally, we have added babel command in the scripts section in package.json.
Let us work on a simple example to check for the transpiling using preset es2015.
Example
main.js
let arrow = () => {
   return "this is es6 arrow function";
}
Transpiled to es5 as shown below.
command
npx babel main.js --out-file main_es5.js
main_es5.js
"use strict";

var arrow = function arrow() {
   return "this is es6 arrow function";
};
Env
Using Env preset, you can specify the environment you the final code to be transpiled to.
We are going to use the same project setup created above and change the presets from es2015 to env as shown below.
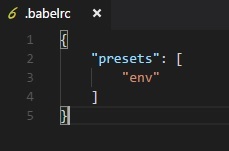
In addition, we need to install the babel-preset-env. We will execute the command given below to install the same.
command
npm install babel-preset-env --save-dev
We will compile main.js again and see the output.
main.js
let arrow = () => {
   return "this is es6 arrow function";
}
command
npx babel main.js --out-file main_env.js
main_env.js
"use strict";

var arrow = function arrow() {
   return "this is es6 arrow function";
};
We have seen the transpiled code is es5. Incase we know the environment in which our code is going to execute, we can use this preset to specify it. For example, if we specify the browsers as last 1 version for chrome and firefox as shown below.
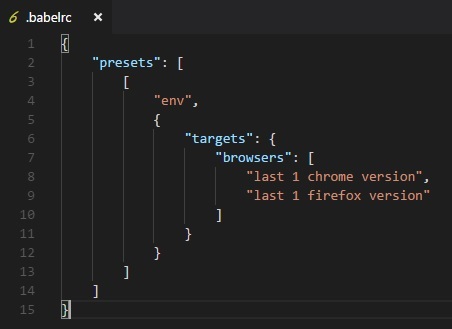
command
npx babel main.js --out-file main_env.js
main_env.js
"use strict";

let arrow = () => {
   return "this is es6 arrow function";
};
We are now getting the arrow function syntax as it is. It is not transpiled into ES5 syntax. This is because the environment which we want our code to support, already has support for the arrow function.
Babel takes care of compiling the code based on environment using the babel-preset-env. We can also target the compilation based on the nodejs environment as shown below
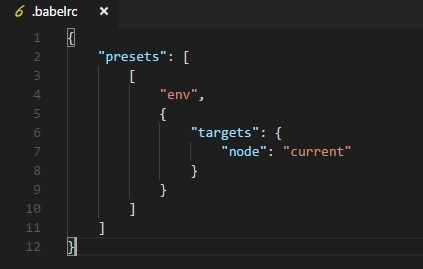
The final compilation of the code is as shown below.
command
npx babel main.js --out-file main_env.js
main_env.js
"use strict";

let arrow = () => {
   return "this is es6 arrow function";
};
Babel compiles the code as per the current version of nodejs.
React Preset
We can use react preset when we are using Reactjs. We will work on a simple example and use react preset to see the output.
To use the preset, we need to install babel-preset-react (babel 6) as follows −
npm install --save-dev babel-preset-react
For babel 7, it is as follows −
npm install --save-dev @babel/preset-react
Changes to .babelrc are as follows for babel6 −
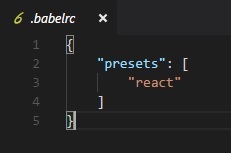
For babel 7
{
   "presets": ["@babel/preset-react"]
}
main.js
<h1>Hello, world!</h1>
command
npx babel main.js --out-file main_env.js
main_env.js
React.createElement(
   "h1",
   null,
   "Hello, world!"
);
The code from main.js is converted to reactjs syntax with preset:react.
BabelJS - Working with Babel and Webpack
Webpack is a module bundler which packs all modules with dependencies js, styles, images, etc. into static assets .js, .css, .jpg , .png, etc. Webpack comes with presets which help for compilation into the required form. For example, react preset that helps to get the final output in react form, es2015 or env preset that helps to compile the code in ES5 or 6 or 7, etc. We have used babel 6 in the project setup. In case you want to switch to babel7, install the required packages of babel using @babel/babel-package-name.
Here, we will discuss project setup using babel and webpack. Create a folder called and open the same in visual studio IDE.
To create the project setup, run npm initbabelwebpack as follows −
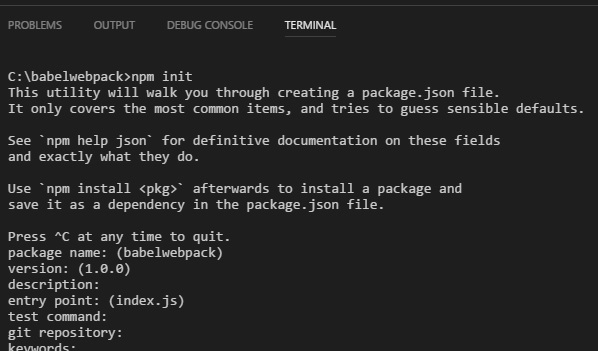
Here is the package.json created after npm init −

Now, we will install the necessary packages we need to work with babel and webpack.
npm install --save-dev webpack
npm install --save-dev webpack-dev-server
npm install --save-dev babel-core
npm install --save-dev babel-loader
npm install --save-dev babel-preset-env
Here is the Package.json after installation −
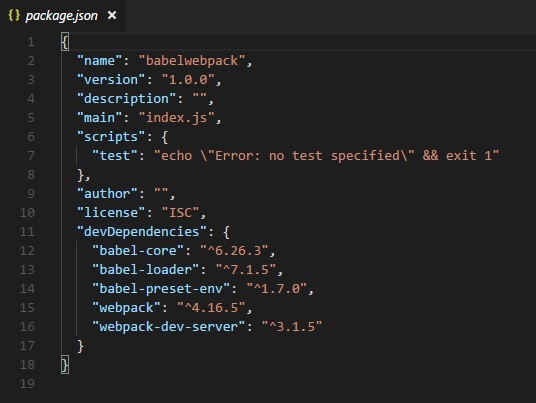
Now, we will create a webpack.config.js file, which will have all the details to bundle the js files. These files will be compiled it into es5 using babel.
To run webpack using server, we use webpack-server. Following are the details added to it −
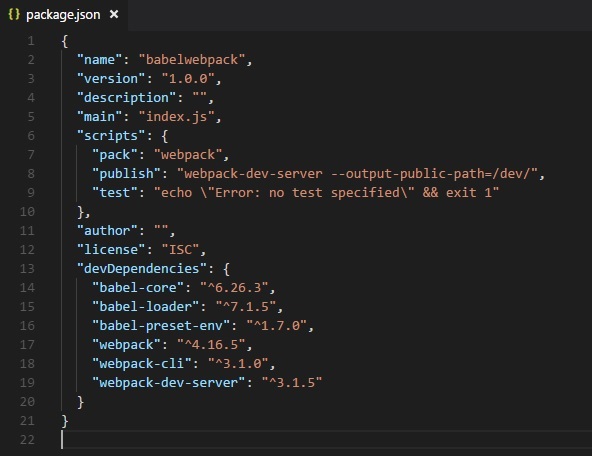
We have added the publish command which will start the webpack-dev-server and will update the path where the final files are stored. Right now the path that we are going to use to update the final files is the /dev folder.
To use webpack, we need to run the following command −
npm run publish
First we need to create the webpack.config.js files. These will have the configuration details for webpack to work.
The details in the file are as follows −
var path = require('path');

module.exports = {
   entry: {
      app: './src/main.js'
   },
   output: {
      path: path.resolve(__dirname, 'dev'),
      filename: 'main_bundle.js'
   },
   mode:'development',
   module: {
      rules: [
         {
            test: /\.js$/,
            include: path.resolve(__dirname, 'src'),
            loader: 'babel-loader',
            query: {
               presets: ['env']
            }
         }
      ]
   }
};
The structure of the file is as shown above. It starts with theh path, which gives the current path details.
var path = require('path'); //gives the current path
Next is the module.exports object, which has properties entry, output and module. The entry is the start point. Here, we need to give the main js files that has to be compiled.
entry: {
   app: './src/main.js'
},
path.resolve(_dirname, src/main.js) -- will look for the src folder in the directory and main.js in that folder.
Output
output: {
   path: path.resolve(__dirname, 'dev'),
   filename: 'main_bundle.js'
},
Output is an object with path and filename details. Path will hold the folder in which the compiled file will be kept and filename will tell the name of final file to be used in your .html file.
module
module: {
   rules: [
      {
         test: /\.js$/,
         include: path.resolve(__dirname, 'src'),
         loader: 'babel-loader',
         query: {
            presets: ['env']
         }
      }
   ]
}
Module is an object with details of the rules. It has the following properties −
- test
- include
- loader
- query
Test will hold details of all the js files ending with .js. It has the pattern, which will look for .js at the end in the entry point given.
Include instructs the folder in use on the files to be looked at.
Loader uses babel-loader for compiling codes.
Query has property presets, which is an array with value env es5 or es6 or es7.
Create folder src and main.js in it; write your js code in ES6. Later, run the command to see it getting compiled to es5 using webpack and babel.
src/main.js
let add = (a,b) => {
   return a+b;
};
let c = add(10, 20);
console.log(c);
Run the command −
npm run pack
The compiled file looks as follows −
dev/main_bundle.js
!function(e) {
   var t = {};
   function r(n) {
      if(t[n])return t[n].exports;var o = t[n] = {i:n,l:!1,exports:{}};
      return e[n].call(o.exports,o,o.exports,r),o.l=!0,o.exports
   }
   r.m = e,r.c = t,r.d = function(e,t,n) {
      r.o(e,t)||Object.defineProperty(e,t,{enumerable:!0,get:n})
   },
   r.r = function(e) {
      "undefined"!=typeof Symbol&&Symbol.toStringTag&&Object.defineProperty(e,Symbol.toStringTag,{value:"Module"}),Object.defineProperty(e,"__esModule",{value:!0})
   },
   r.t = function(e,t) {
      if(1&t&&(e = r(e)),8&t)return e;
      if(4&t&&"object"==typeof e&&e&&e.__esModule)return e;
      var n = Object.create(null);
      if(r.r(n),Object.defineProperty(n,"default",{enumerable:!0,value:e}),2&t&&"string"!=typeof e)for(var o in e)r.d(n,o,function(t) {return e[t]}.bind(null,o));
      return n
   },
   r.n = function(e) {
      var t = e&&e.__esModule?function() {return e.default}:function() {return e};
      return r.d(t,"a",t),t
   },
   r.o = function(e,t) {return Object.prototype.hasOwnProperty.call(e,t)},
   r.p = "",r(r.s = 0)
}([function(e,t,r) {"use strict";var n = function(e,t) {return e+t}(10,20);console.log(n)}]);
!function(e) {
   var t = {};
   function r(n) {
      if(t[n])return t[n].exports;
      var o = t[n] = {i:n,l:!1,exports:{}};
      return e[n].call(o.exports,o,o.exports,r),o.l=!0,o.exports
   }
   r.m = e,r.c = t,r.d = function(e,t,n) {
      r.o(e,t)||Object.defineProperty(e,t,{enumerable:!0,get:n})
   },
   r.r = function(e) {
      "undefined"!=typeof Symbol&&Symbol.toStringTag&&Object.defineProperty(e,Symbol.toStringTag,{value:"Module"}),Object.defineProperty(e,"__esModule",{value:!0})
   },
   r.t = function(e,t) {
      if(1&t&&(e=r(e)),
      8&t)return e;
      if(4&t&&"object"==typeof e&&e&&e.__esModule)return e;
      var n = Object.create(null);
      if(
         r.r(n),
         Object.defineProperty(n,"default",{enumerable:!0,value:e}),
         2&t&&"string"!=typeof e
      )
      for(var o in e)r.d(n,o,function(t) {return e[t]}.bind(null,o));
      return n
   },
   r.n = function(e) {
      var t = e&&e.__esModule?function() {return e.default}:function() {return e};
      return r.d(t,"a",t),t
   },
   r.o = function(e,t) {
      return Object.prototype.hasOwnProperty.call(e,t)
   },
   r.p = "",r(r.s = 0)
}([function(e,t,r) {
   "use strict";
   var n = function(e,t) {return e+t}(10,20);
   console.log(n)
}]);
The code is compiled as shown above. Webpack adds some code which is required internally and the code from main.js is seen at the end. We have consoled the value as shown above.
Add the final js file in .html file as follows −
<html>
   <head></head>
   <body>
      <script type="text/javascript" src="dev/main_bundle.js"></script>
   </body>
</html>
Run the command −
npm run publish
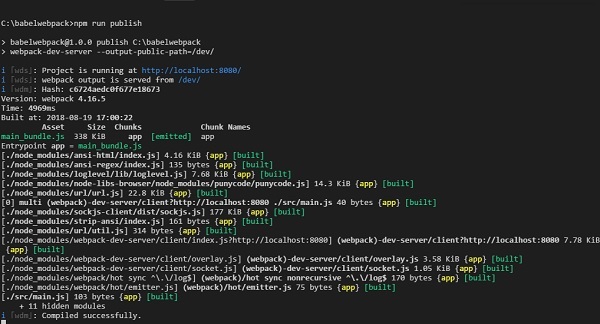
To check the output, we can open the file in −
http://localhost:8080/
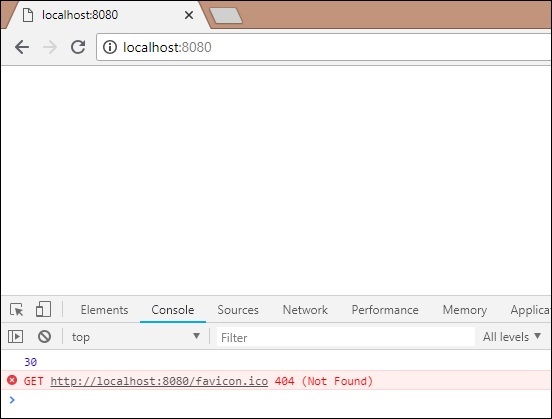
We get the console value as shown above. Now let us try to compile to a single file using webpack and babel.
We will use webpack to bundle multiple js files into a single file. Babel will be used to compile the es6 code to es5.
Now, we have 2 js files in the src/ folder - main.js and Person.js as follows −
person.js
export class Person {
   constructor(fname, lname, age, address) {
      this.fname = fname;
      this.lname = lname;
      this.age = age;
      this.address = address;
   }

   get fullname() {
      return this.fname +"-"+this.lname;
   }
}
We have used export to use the details of the Person class.
main.js
import {Person} from './person'
var a = new Person("Siya", "Kapoor", "15", "Mumbai");
var persondet = a.fullname;
console.log(persondet);
In main.js, we have imported Person from the file path.
Note − We do not have to include person.js but just the name of the file. We have created an object of Person class and consoled the details as shown above.
Webpack will combine person.js and main.js and update in dev/main_bundle.js as one file. Run the command npm run publish to check the output in the browser −
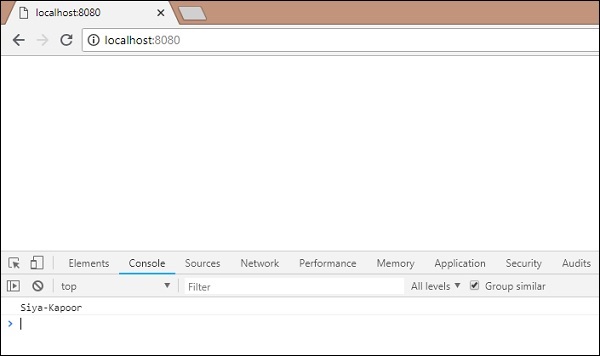
BabelJS - Working with Babel and JSX
In this chapter, we will understand working with JSX and babel. Before we get into the details, let us understand what JSX is.
What is JSX?
JSX is a JavaScript code with a combination of xml syntax in it. JSX tag has tag name, attributes and children which make it look like xml.
React uses JSX for templating instead of regular JavaScript. It is not necessary to use it, however, following are some pros that come with it.
It is faster because it performs optimization while compiling code to JavaScript.
It is also type-safe and most of the errors can be caught during compilation.
It makes it easier and faster to write templates, if you are familiar with HTML.
We have used babel 6 in the project setup. In case you want to switch to babel 7, install the required packages of babel using @babel/babel-package-name.
We will create project setup and use webpack to compile jsx with react to normal JavaScript using Babel.
To start the project setup, run the commands given below for babel, react and webpack installation.
command
npm init
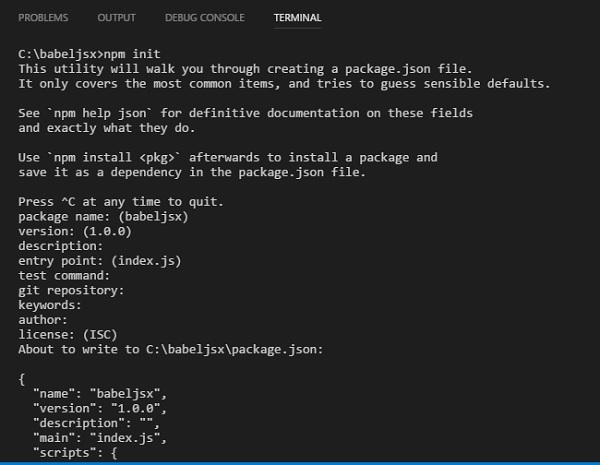
Now, we will install the necessary packages we need to work with babel ,webpack and jsx −
npm install --save-dev webpack
npm install --save-dev webpack-cli
npm install --save-dev webpack-dev-server
npm install --save-dev babel-core
npm install --save-dev babel-loader
npm install --save-dev babel-preset-es2015
npm install --save-dev babel-preset-react
npm install --save-dev react
npm install --save-dev react-dom
Here is the package.json after installation −
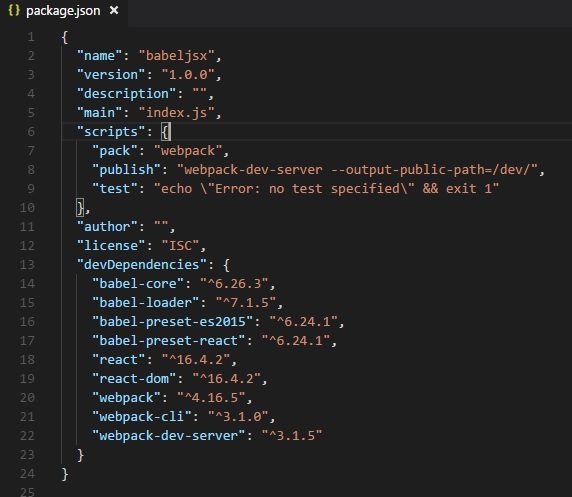
Now will create a webpack.config.js file, which will have all the details to bundle the js files and compile it into es5 using babel.
To run webpack using server, there is something called webpack-server. We have added command called publish; this command will start the webpack-dev-server and will update the path where the final files are stored. Right now the path that we are going to use to update the final files is the /dev folder.
To use webpack we need to run the following command −
npm run publish
We will create the webpack.config.js files, which have the configuration details for webpack to work.
The details in the file are as follows −
var path = require('path');

module.exports = {
   entry: {
      app: './src/main.js'
   },
   output: {
      path: path.resolve(__dirname, 'dev'),
      filename: 'main_bundle.js'
   },
   mode:'development',
   module: {
      rules: [
         {
            test:/\.(js|jsx)$/,
            include: path.resolve(__dirname, 'src'),
            loader: 'babel-loader',
            query: {
               presets: ['es2015','react']
            }
         }
      ]
   }
};
The structure of the file is as shown above. It starts with the path, which gives the current path details.
var path = require('path'); //gives the current path
Next is the module.exports object, which has properties entry, output and module.
Entry is the start point. Here we need to give the main js files we want to compile.
entry: {
   app: './src/main.js'
},
path.resolve(_dirname, src/main.js) -- will look for the src folder in the directory and main.js in that folder.
Output
output: {
   path: path.resolve(__dirname, 'dev'),
   filename: 'main_bundle.js'
},
Output is an object with path and filename details. Path will hold the folder in which the compiled file will be kept and filename will tell the name of the final file to be used in your .html file.
module
module: {
   rules: [
      {
         test:/\.(js|jsx)$/,
         include: path.resolve(__dirname, 'src'),
         loader: 'babel-loader',
         query: {
            presets: ['es2015','react']
         }
      }
   ]
}
Module is object with rules details which has properties ie test, include , loader, query.
Test will hold details of all the js file ending with .js and .jsx.It has the pattern which will look for .js and .jsx at the end in the entry point given.
Include tells the folder to be used for looking the files.
Loader uses babel-loader for compiling code.
Query has property presets, which is array with value env es5 or es6 or es7. We have used es2015 and react as the preset.
Create folder src/. Add main.js and App.jsx in it.
App.jsx
import React from 'react';

class App extends React.Component {
   render() {
         var style = {
         color: 'red',
         fontSize: 50
      };
      return (
         <div style={style}>
            Hello World!!!
         </div>
      );
   }
}
export default App;
main.js
import React from 'react';
import ReactDOM from 'react-dom';
import App from './App.jsx';

ReactDOM.render(, document.getElementById('app'));
Run the following command to bundle the .js file and convert it using presets es2015 and react.
command
npm run pack
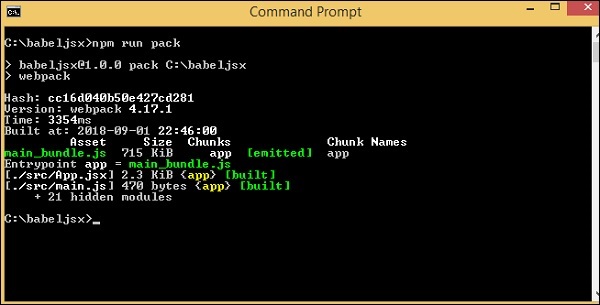
Add main_bundle.js from the dev folder to index.html −
<!DOCTYPE html>
<html lang = "en">
   <head>
      <meta charset = "UTF-8">
      <title>React App</title>
   </head>
   <body>
      <div id = "app"></div>
      <script src = "dev/main_bundle.js"></script>
   </body>
</html>
command
npm run publish
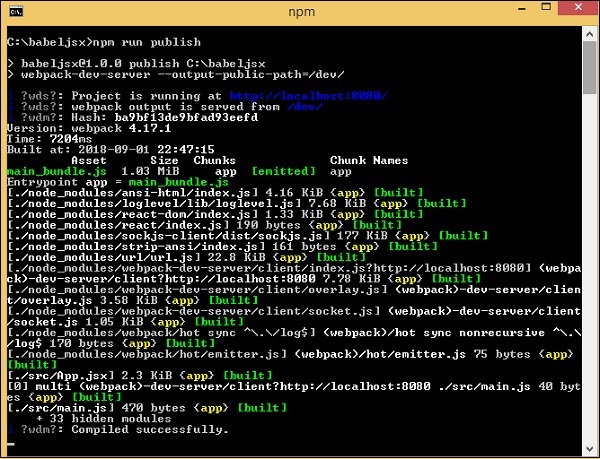
Output
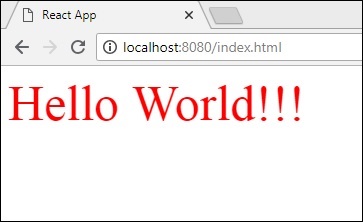
BabelJS - Working with Babel and Flow
Flow is a static type checker for JavaScript. To work with flow and babel, we will first create a project setup. We have used babel 6 in the project setup. In case you want to switch to babel 7, install the required packages of babel using @babel/babel-package-name.
command
npm init
Install the required packages for flow and babel −
npm install --save-dev babel-core babel-cli babel-preset-flow flow-bin babel-plugin-transform-flow-strip-types
Here is the final package.json after installation. Also added babel and flow command to execute the code in command line.
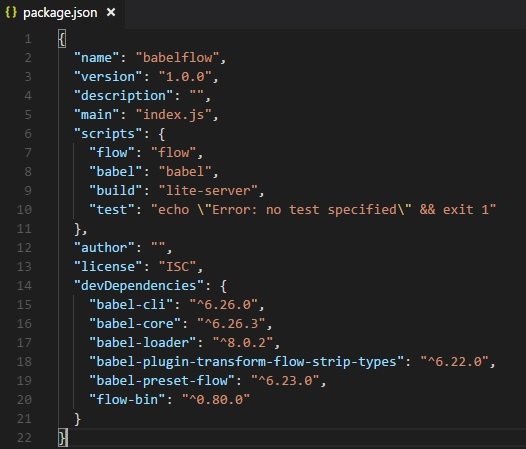
Create .babelrc inside the project setup and add presets as shown below
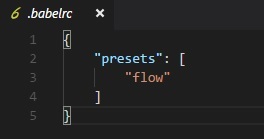
Create a main.js file and write your JavaScript code using flow −
main.js
/* @flow */
function concat(a: string, b: string) {
   return a + b;
}

let a = concat("A", "B");
console.log(a);
Use babel command to compile the code using presets: flow to normal javascript
npx babel main.js --out-file main_flow.js
main_flow.js
function concat(a, b) {
   return a + b;
}

let a = concat("A", "B");
console.log(a);
We can also make use of plugin called babel-plugin-transform-flow-strip-types instead of presets as follows −
In .babelrc, add the plugin as follows −
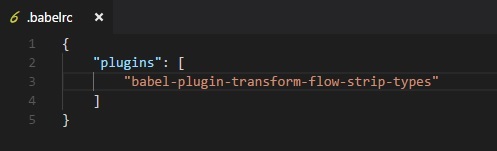
main.js
/* @flow */
function concat(a: string, b: string) {
   return a + b;
}

let a = concat("A", "B");
console.log(a);
command
npx babel main.js --out-file main_flow.js
main_flow.js
function concat(a, b) {
   return a + b;
}

let a = concat("A", "B");
console.log(a);
BabelJS - Working with BabelJS and Gulp
In this chapter, we will create project setup using babel and gulp. Gulp is a task runner that uses Node.js as a platform. Gulp will run the tasks that will transpile JavaScript files from es6 to es5 and once done will start the server to test the changes. We have used babel 6 in the project setup. In case you want to switch to babel 7, install the required packages of babel using @babel/babel-package-name.
We will create the project first using npm commands and install the required packages to start with.
command
npm init
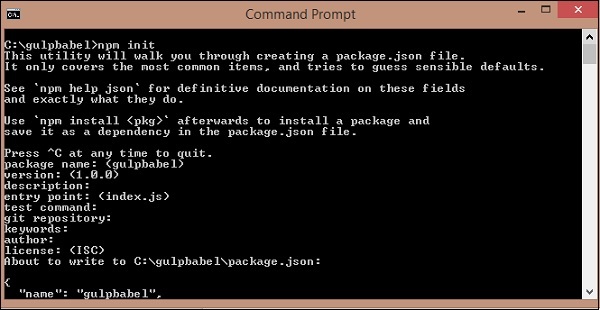
We have created a folder called gulpbabel. Further, we will install gulp and other required dependencies.
command
npm install gulp --save-dev
npm install gulp-babel --save-dev
npm install gulp-connect --save-dev
npm install babel-preset-env --save-dev
npm install babel-core --save-dev

We will add the Preset environment details to .babelrc file as follows
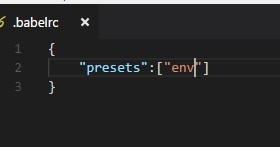
gulpfile.js
var gulp =require('gulp');
var babel =require('gulp-babel');
var connect = require("gulp-connect");
gulp.task('build', () => {
   gulp.src('src/./*.js')
      .pipe(babel())
      .pipe(gulp.dest('./dev'))
});

gulp.task('watch', () => {
   gulp.watch('./*.js', ['build']);
});

gulp.task("connect", function () {
   connect.server({
      root: ".",
      livereload: true
   });
});

gulp.task('start', ['build', 'watch', 'connect']);
We have created three task in gulp, [build,watch,connect]. All the js files available in src folder will be converted to es5 using babel as follows −
gulp.task('build', () => {
   gulp.src('src/./*.js')
      .pipe(babel())
      .pipe(gulp.dest('./dev'))
});
The final changes are stored in the dev folder. Babel uses presets details from .babelrc. In case you want to change to some other preset, you can change the details in .babelrc file.
Now will create a .js file in src folder using es6 javascript and run gulp start command to execute the changes.
src/main.js
class Person {
   constructor(fname, lname, age, address) {
      this.fname = fname;
      this.lname = lname;
      this.age = age;
      this.address = address;
   }

   get fullname() {
      return this.fname +"-"+this.lname;
   }
}
Command: gulp start
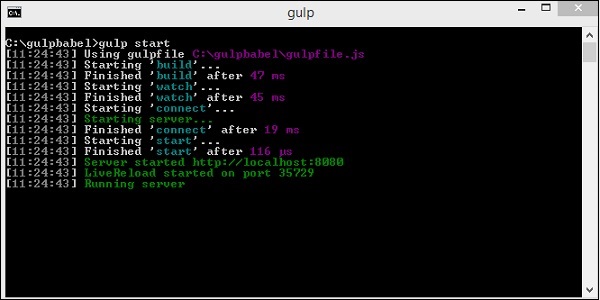
dev/main.js
This is transpiled using babel −
"use strict";

var _createClass = function () {
   function defineProperties(target, props) {
      for (var i = 0; i <props.length; i++) {
         var descriptor = props[i];
         descriptor.enumerable = descriptor.enumerable || false;
         descriptor.configurable = true;
         if ("value" in descriptor) descriptor.writable = true;
         Object.defineProperty(target, descriptor.key, descriptor);
      }
   }
   return function (Constructor, protoProps, staticProps) {
      if (protoProps) defineProperties(Constructor.prototype, protoProps);
      if (staticProps) defineProperties(Constructor, staticProps);
      return Constructor;
   };
}();

function _classCallCheck(instance, Constructor) {
   if (!(instance instanceof Constructor)) {
      throw new TypeError("Cannot call a class as a function");
   }
}

var Person = function () {
   function Person(fname, lname, age, address) {
      _classCallCheck(this, Person);
      this.fname = fname;
      this.lname = lname;
      this.age = age;
      this.address = address;
   }
   _createClass(Person, [{
      key: "fullname",
      get: function get() {
         return this.fname + "-" + this.lname;
      }
   }]);

   return Person;
}();
Index.html
This is done using transpiled dev/main.js −
<html>
   <head></head>
   <body>
      <script type="text/javascript" src="dev/main.js"></script>
      <h1 id="displayname"></h1>
      <script type="text/javascript">
         var a = new Student("Siya", "Kapoor", "15", "Mumbai");
         var studentdet = a.fullname;
         document.getElementById("displayname").innerHTML = studentdet;
      </script>
   </body>
</html>
Output
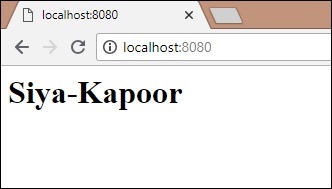
BabelJS - Examples
We will use ES6 features and create a simple project. Babeljs will be used to compile the code to ES5. The project will have a set of images, which will autoslide after a fixed number of seconds. We will use ES6 class to work on it. We have used babel 6 in the project setup. In case you want to switch to babel 7, install the required packages of babel using @babel/babel-package-name.
Auto Slide Images
We will use gulp to build the project. To start with, we will create the project setup as shown below
command
npm init

We have created a folder called babelexample. Further, we will install gulp and other required dependencies.
command
npm install gulp --save-dev
npm install gulp-babel --save-dev
npm install gulp-connect --save-dev
npm install babel-preset-env --save-dev
Here is the Package.json after installation −
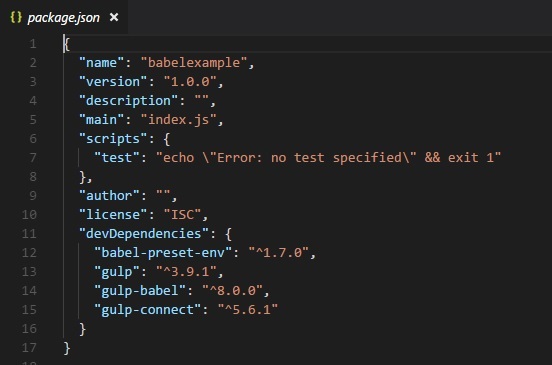
We will add the Preset environment details to .babelrc file as follows −

Since we need the gulp task to build the final file, we will create gulpfile.js with the task that we need
gulpfile.js
var gulp = require('gulp');
var babel = require('gulp-babel');
var connect = require("gulp-connect");
gulp.task('build', () => {
   gulp.src('src/./*.js')
      .pipe(babel())
      .pipe(gulp.dest('./dev'))
});
gulp.task('watch', () => {
   gulp.watch('./*.js', ['build']);
});

gulp.task("connect", function () {
   connect.server({
      root: ".",
      livereload: true
   });
});

gulp.task('start', ['build', 'watch', 'connect']);
We have created three tasks in gulp, [build,watch,connect]. All the js files available in src folder will be converted to es5 using babel as follows
gulp.task('build', () => {
   gulp.src('src/./*.js')
      .pipe(babel())
      .pipe(gulp.dest('./dev'))
});
The final changes are stored in the dev folder. Babel uses presets details from .babelrc. In case you want to change to some other preset, you can change the details in .babelrc file.
Now, we will create a .js file in src folder using es6 JavaScript and run gulp start command to execute the changes.
The project structure is as follows −

src/slidingimage.js
class SlidingImage {
   constructor(width, height, imgcounter, timer) {
      this.counter = 0;
      this.imagecontainerwidth = width;
      this.imagecontainerheight = height;
      this.slidercounter = imgcounter;
      this.slidetimer = timer;
      this.startindex = 1;
      this.css = this.applycss();
      this.maincontainer = this.createContainter();
      this.childcontainer = this.imagecontainer();
      this.autoslide();
   }

   createContainter() {
      let maindiv = document.createElement('div');
      maindiv.id = "maincontainer";
      maindiv.class = "maincontainer";
      document.body.appendChild(maindiv);
      return maindiv;
   }

   applycss() {
      let slidercss = ".maincontainer{ position : relative; margin :auto;}.left,
         .right {
            cursor: pointer; position: absolute;" +
            "top: 50%; width: auto; padding: 16px; margin-top: -22px; color: white; font-weight: bold; " +
            "font-size: 18px; transition: 0.6s ease; border-radius: 0 3px 3px 0;
         }.right { right: 0; border-radius: 3px 0 0 3px;}" +
         ".left:hover, .right:hover { background-color: rgba(0,0,0,0.8);}";
      let style = document.createElement('style');
      style.id = "slidercss";
      style.type = "text/css";
      document.getElementsByTagName("head")[0].appendChild(style);
      let styleall = style;
      if (styleall.styleSheet) {
      styleall.styleSheet.cssText = slidercss;
      } else {
         let text = document.createTextNode(slidercss);
         style.appendChild(text);
      }
   }

   imagecontainer() {
      let childdiv = [];
      let imgcont = [];
      for (let a = 1; a >= this.slidercounter; a++) {
         childdiv[a] = document.createElement('div');
         childdiv[a].id = "childdiv" + a;
         childdiv[a].style.width = this.imagecontainerwidth + "px";
         childdiv[a].style.height = this.imagecontainerheight + "px";
         if (a > 1) {
            childdiv[a].style.display = "none";
         }
         imgcont[a] = document.createElement('img');
         imgcont[a].src = "src/img/img" + a + ".jpg";
         imgcont[a].style.width = "100%";
         imgcont[a].style.height = "100%";
         childdiv[a].appendChild(imgcont[a]);
         this.maincontainer.appendChild(childdiv[a]);
      }
   }

   autoslide() {
      console.log(this.startindex);
      let previousimg = this.startindex;
      this.startindex++;
      if (this.startindex > 5) {
         this.startindex = 1;
      }
      setTimeout(() => {
         document.getElementById("childdiv" + this.startindex).style.display = "";
         document.getElementById("childdiv" + previousimg).style.display = "none";
         this.autoslide();
      }, this.slidetimer);
   }
}

let a = new SlidingImage(300, 250, 5, 5000);
We will create img/ folder in src/ as we need images to be displayed; these images are to rotate every 5 seconds.The dev/ folder will store the compiled code. Run the gulp start to build the final file.
The final project structure is as shown below −
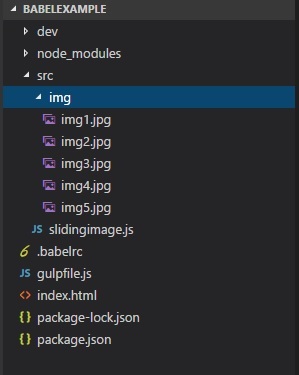
In slidingimage.js, we have created a class called SlidingImage, which has methods like createcontainer, imagecontainer, and autoslide, which creates the main container and adds images to it. The autoslide method helps in changing the image after the specified time interval.
let a = new SlidingImage(300, 250, 5, 5000);
At this stage, the class is called. We will pass width, height, number of images and number of seconds to rotate the image.
command
gulp start
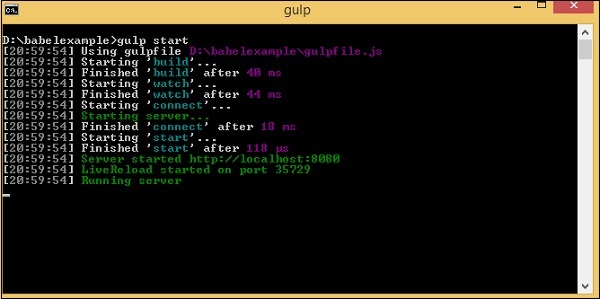
dev/slidingimage.js
"use strict";

var _createClass = function () {
   function defineProperties(target, props) {
      for (var i = 0; i < props.length; i++) {
         var descriptor = props[i];
         descriptor.enumerable = descriptor.enumerable || false;
         descriptor.configurable = true;
         if ("value" in descriptor) descriptor.writable = true;
         Object.defineProperty(target, descriptor.key, descriptor);
      }
   }
   return function (Constructor, protoProps, staticProps) {
      if (protoProps) defineProperties(Constructor.prototype, protoProps);
      if (staticProps) defineProperties(Constructor, staticProps); return Constructor;
   };
}();

function _classCallCheck(instance, Constructor) {
   if (!(instance instanceof Constructor)) {
      throw new TypeError("Cannot call a class as a function");
   }
}

var SlidingImage = function () {
   function SlidingImage(width, height, imgcounter, timer) {
      _classCallCheck(this, SlidingImage);
      this.counter = 0;
      this.imagecontainerwidth = width;
      this.imagecontainerheight = height;
      this.slidercounter = imgcounter;
      this.slidetimer = timer;
      this.startindex = 1;
      this.css = this.applycss();
      this.maincontainer = this.createContainter();
      this.childcontainer = this.imagecontainer();
      this.autoslide();
   }
   _createClass(SlidingImage, [{
      key: "createContainter",
      value: function createContainter() {
         var maindiv = document.createElement('div');
         maindiv.id = "maincontainer";
         maindiv.class = "maincontainer";
         document.body.appendChild(maindiv);
         return maindiv;
      }
   }, {
      key: "applycss",
      value: function applycss() {
         var slidercss = ".maincontainer{ position : relative; margin :auto;}.left, .right {
            cursor: pointer; position: absolute;" + "top: 50%;
            width: auto;
            padding: 16px;
            margin-top: -22px;
            color: white;
            font-weight: bold;
            " + "font-size: 18px;
            transition: 0.6s ease;
            border-radius: 0 3px 3px 0;
         }
         .right { right: 0; border-radius: 3px 0 0 3px;}" +
            ".left:hover, .right:hover { background-color: rgba(0,0,0,0.8);}";
         var style = document.createElement('style');
         style.id = "slidercss";
         style.type = "text/css";
         document.getElementsByTagName("head")[0].appendChild(style);
         var styleall = style;
         if (styleall.styleSheet) {
            styleall.styleSheet.cssText = slidercss;
         } else {
            var text = document.createTextNode(slidercss);
            style.appendChild(text);
         }
      }
   }, {
      key: "imagecontainer",
      value: function imagecontainer() {
      var childdiv = [];
      var imgcont = [];
      for (var _a = 1; _a <= this.slidercounter; _a++) {
         childdiv[_a] = document.createElement('div');
         childdiv[_a].id = "childdiv" + _a;
         childdiv[_a].style.width = this.imagecontainerwidth + "px";
         childdiv[_a].style.height = this.imagecontainerheight + "px";
         if (_a > 1) {
            childdiv[_a].style.display = "none";
         }
         imgcont[_a] = document.createElement('img');
         imgcont[_a].src = "src/img/img" + _a + ".jpg";
         imgcont[_a].style.width = "100%";
         imgcont[_a].style.height = "100%";
         childdiv[_a].appendChild(imgcont[_a]);
         this.maincontainer.appendChild(childdiv[_a]);
         }
      }
   }, {
      key: "autoslide",
      value: function autoslide() {
         var _this = this;

         console.log(this.startindex);
         var previousimg = this.startindex;
         this.startindex++;
         if (this.startindex > 5) {
            this.startindex = 1;
         }
         setTimeout(function () {
            document.getElementById("childdiv" + _this.startindex).style.display = "";
            document.getElementById("childdiv" + previousimg).style.display = "none";
            _this.autoslide();
         }, this.slidetimer);
      }
   }]);
   return SlidingImage;
}();

var a = new SlidingImage(300, 250, 5, 5000);
We will test the line of code in browser as shown below −
index.html
<html>
   <head></head>
   <body>
      <script type="text/javascript" src="dev/slidingimage.js"></script>
      <h1>Sliding Image Demo</h1>
   </body>
</html>
We have used the compiled file from the dev folder in index.html. The command gulp start starts the server where we can test the output.
In Chrome
In Firefox
In Internet Explorer

The code compiled works fine in all browsers.
