
Article Categories
- All Categories
-
 Data Structure
-
 Networking
-
 RDBMS
RDBMS
-
 Operating System
-
 Java
Java
-
 MS Excel
-
 iOS
iOS
-
 HTML
HTML
-
 CSS
CSS
-
 Android
-
 Python
-
 C Programming
-
 C++
C++
-
 C#
C#
-
 MongoDB
-
 MySQL
MySQL
-
 Javascript
-
 PHP
PHP
-
 Economics & Finance
Azure DSC node configuration using PowerShell
What is Azure State DSC?
Azure State DSC is nothing but the DSC (Desired State Configuration) for the Azure VMs and can be configured from the Azure Automation Account. For the DSC there are two methods Push and Pull configuration but Azure is by default using the Pull server which constantly polls the target nodes and sends the configuration to the nodes.
Azure DSC is itself a vast topic, in this article we will try the below configuration using PowerShell.
Compose / Upload Node Configuration file.
Compile node configuration.
Attach compiled node configuration to the nodes.
Prerequisite
Azure Subscription
Azure Automation Account
Configuration file (That we will create in this article).
PowerShell AZ module.
Azure DSC location
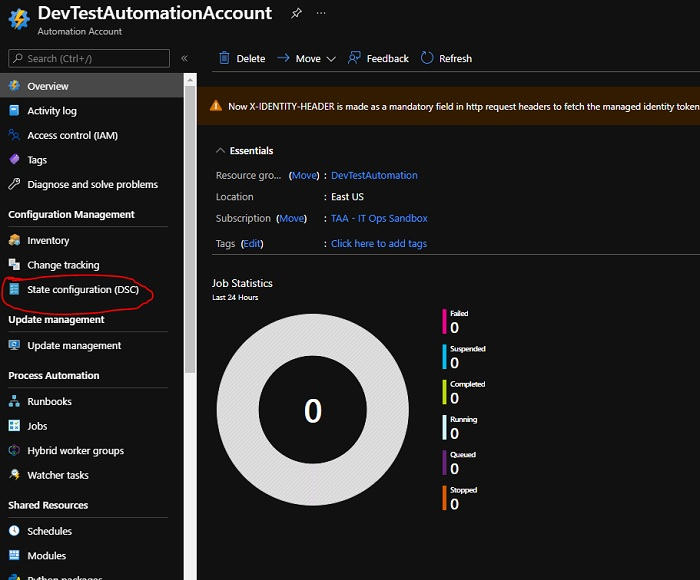
You can find the Azure DSC from the Azure Automation Account. In the search bar of Azure, search for the Automation accounts, and if not created then create a new Automation account first because it is a pre-requisite for the Azure DSC.
Once you are in the Azure Automation account, check for the State Configuration (DSC) and this article is all about this.
Node Configuration to Apply
We have to apply the below configuration to the nodes.
FileName − StartWinRMService.ps1 (Make sure this file name should be the same as configuration name).
Configuration StartWinRMService{
   Node Localhost{
      Service WinrmStart{
         Name = 'winrm'
         State = 'Running'
         StartupType = 'Automatic'
      }
   }
}
Applying node configuration steps
Upload the Node Configuration
To upload the Node configuration that we do manually from the Azure Automation Account, we will use the below command for it.
Example
$AutomationAccount = 'DevTestAutomation'
$AutomationAccount = 'DevTestAutomationAccount'
$AutomationRG = 'DevTestAutomation'
$SourceFile = "C:\Temp\StartWinRMService.ps1"

Import-AzAutomationDscConfiguration `
   -SourcePath $SourceFile `
   -AutomationAccountName $AutomationAccount `
   -ResourceGroupName $AutomationRG `
   -Published -Force -Verbose
Output
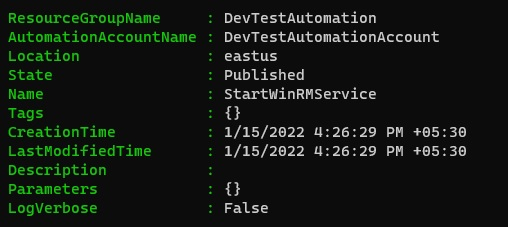
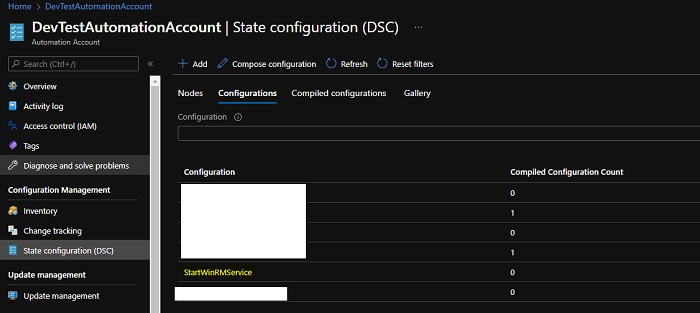
From the Azure portal (DSC -> Configurations),
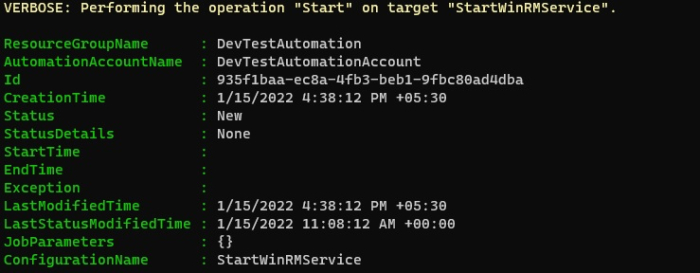
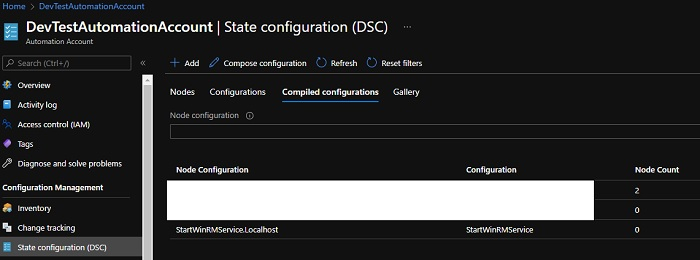
Compile Configuration
To run the configuration on the Azure Nodes, we need to compile the configuration which generates the MOF file “ConfigurationName.LocalHost” in this case it is “StartWinRMService.LocalHost”. To compile the configuration using PowerShell, we can use the Start-AzAutomationDscCompilationJob command.
Example
Start-AzAutomationDscCompilationJob `
   -ConfigurationName StartWinRMService `
   -AutomationAccountName $AutomationAccount `
   -ResourceGroupName $AutomationRG -Verbose
Output
From the Azure Portal (DSC -> Complied Configurations),
Apply Configuration
Once the Node configuration is uploaded and complied we can start applying single or multiple nodes by registering them. From the Azure Portal, you can apply on the single node but using PowerShell, you can use a loop and apply the configuration on the multiple nodes.
From the Azure Portal (DSC -> Nodes -> Add),
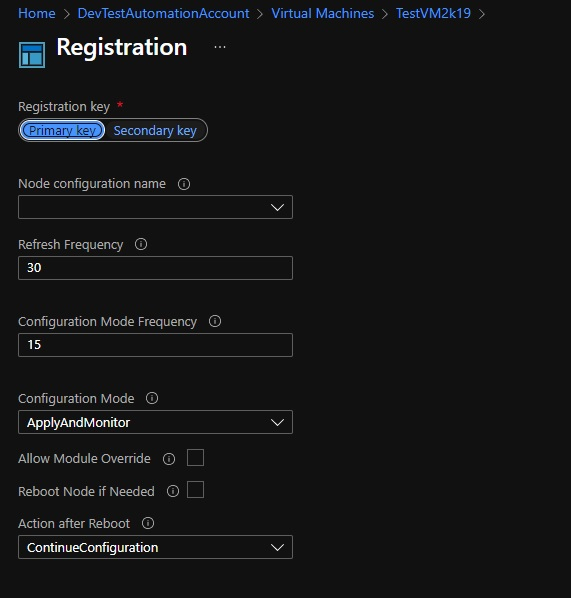
To register nodes using PowerShell,
$vm = Get-AzVM -Name TestVM2k19
Register-AzAutomationDscNode `
   -AzureVMName $vm.Name `
   -AzureVMLocation $vm.Location `
   -NodeConfigurationName "StartWinRMService.LocalHost" `
   -ConfigurationMode ApplyAndAutocorrect `
   -AutomationAccountName $AutomationAccount `
   -ResourceGroupName $AutomationRG -Verbose
PS − In the above command, we are using the Complied node configuration name and we have applied here ApplyAndAutoCorrect. There are other two configurations (ApplyOnly and ApplyAndMonitor) modes you can apply and you can find details below.
https://docs.microsoft.com/en-us/powershell/dsc/managing-nodes/metaConfig?view=dsc-1.1
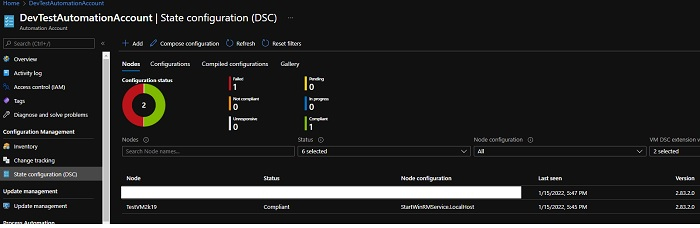
If your configuration is correct and when you check your Node configuration from the portal, the node should show the compliant.

772 Views
