- Spring - Home
- Spring - Overview
- Spring - Architecture
- Spring - Environment Setup
- Spring - Hello World Example
- Spring - IoC Containers
- Spring - Bean Definition
- Spring - Bean Scopes
- Spring - Bean Life Cycle
- Spring - Bean Post Processors
- Spring - Bean Definition Inheritance
- Spring - Dependency Injection
- Spring - Injecting Inner Beans
- Spring - Injecting Collection
- Spring - Beans Auto-Wiring
- Annotation Based Configuration
- Spring - Java Based Configuration
- Spring - Event Handling in Spring
- Spring - Custom Events in Spring
- Spring - AOP with Spring Framework
- Spring - JDBC Framework
- Spring - Transaction Management
- Spring - Web MVC Framework
- Spring - Logging with Log4J
Spring Useful Resources
Spring - MVC Hello World Example
The following example shows how to write a simple web-based Hello World application using Spring MVC framework. To start with it, let us have a working Eclipse IDE in place and take the following steps to develop a Maven based Web Application using Spring Web Framework −
Example - WEB MVC Application
| Steps | Description |
|---|---|
| 1 | Create a Maven project with archetype as maven-archetype-webapp with a name web, groupid com.tutorialspoint, artifactid web and create a package com.tutorialspoint under the src folder in the created project. |
| 2 | Update the pom.xml as explained in the Spring - Environment Setup chapter. |
| 3 | Create a Java class HelloController under the com.tutorialspoint package. |
| 4 | Create Spring configuration files web.xml and web-servlet.xml under the WEB-INF folder. |
| 5 | Create a sub-folder with a name jsp under the WEB-INF folder. Create a view file hello.jsp under this sub-folder. |
| 6 | The final step is to create the content of all the source and configuration files and export the application as explained below. |
pom.xml
<?xml version="1.0" encoding="UTF-8"?>
<project xmlns="http://maven.apache.org/POM/4.0.0" xmlns:xsi="http://www.w3.org/2001/XMLSchema-instance"
   xsi:schemaLocation="http://maven.apache.org/POM/4.0.0 http://maven.apache.org/xsd/maven-4.0.0.xsd">
   <modelVersion>4.0.0</modelVersion>

   <groupId>com.tutorialspoint</groupId>
   <artifactId>web</artifactId>
   <version>0.0.1-SNAPSHOT</version>
   <packaging>war</packaging>

   <name>web Maven Webapp</name>
   <!-- FIXME change it to the project's website -->
   <url>http://www.example.com</url>

   <properties>
      <project.build.sourceEncoding>UTF-8</project.build.sourceEncoding>
      <maven.compiler.source>24</maven.compiler.source>
      <maven.compiler.target>24</maven.compiler.target>
      <spring.version>7.0.0-M9</spring.version>
   </properties>

   <dependencies>
      <dependency>
         <groupId>junit</groupId>
         <artifactId>junit</artifactId>
         <version>4.13.1</version>
         <scope>test</scope>
      </dependency>
      <dependency>
         <groupId>org.springframework</groupId>
         <artifactId>spring-core</artifactId>
         <version>${spring.version}</version>
      </dependency>
      <dependency>
         <groupId>org.springframework</groupId>
         <artifactId>spring-context</artifactId>
         <version>${spring.version}</version>
      </dependency>
      <dependency>
         <groupId>org.springframework</groupId>
         <artifactId>spring-aspects</artifactId>
         <version>${spring.version}</version>
      </dependency>
      <dependency>
         <groupId>org.springframework</groupId>
         <artifactId>spring-jdbc</artifactId>
         <version>${spring.version}</version>
      </dependency>
      <dependency>
         <groupId>org.springframework</groupId>
         <artifactId>spring-web</artifactId>
         <version>${spring.version}</version>
      </dependency>
      <dependency>
         <groupId>org.springframework</groupId>
         <artifactId>spring-webmvc</artifactId>
         <version>${spring.version}</version>
      </dependency>
      <dependency>
         <groupId>com.mysql</groupId>
         <artifactId>mysql-connector-j</artifactId>
         <version>9.4.0</version>
      </dependency>
      <dependency>
         <groupId>jakarta.annotation</groupId>
         <artifactId>jakarta.annotation-api</artifactId>
         <version>2.1.1</version> <!-- Or the appropriate version -->
      </dependency>
      <dependency>
         <groupId>jakarta.servlet</groupId>
         <artifactId>jakarta.servlet-api</artifactId>
         <version>6.1.0</version>
         <scope>provided</scope>
      </dependency>
   </dependencies>
   <build>
      <finalName>web</finalName>
      <pluginManagement>
         <plugins>
            <plugin>
               <artifactId>maven-clean-plugin</artifactId>
               <version>3.4.0</version>
            </plugin>
            <plugin>
               <artifactId>maven-resources-plugin</artifactId>
               <version>3.3.1</version>
            </plugin>
            <plugin>
               <artifactId>maven-compiler-plugin</artifactId>
               <version>3.13.0</version>
            </plugin>
            <plugin>
               <artifactId>maven-surefire-plugin</artifactId>
               <version>3.3.0</version>
            </plugin>
            <plugin>
               <artifactId>maven-war-plugin</artifactId>
               <version>3.4.0</version>
            </plugin>
            <plugin>
               <artifactId>maven-install-plugin</artifactId>
               <version>3.1.2</version>
            </plugin>
            <plugin>
               <artifactId>maven-deploy-plugin</artifactId>
               <version>3.1.2</version>
            </plugin>
         </plugins>
      </pluginManagement>
   </build>
</project>
HelloController.java
package com.tutorialspoint;

import org.springframework.stereotype.Controller;
import org.springframework.web.bind.annotation.RequestMapping;
import org.springframework.web.bind.annotation.RequestMethod;
import org.springframework.ui.ModelMap;

@Controller
@RequestMapping("/hello")
public class HelloController {
   @RequestMapping(method = RequestMethod.GET)public String printHello(ModelMap model) {
      model.addAttribute("message", "Hello Spring MVC Framework!");
      return "hello";
   }
}
web.xml
Following is the content of Spring Web configuration file web.xml
<?xml version="1.0" encoding="UTF-8"?>
<web-app
   version="4.0"
   xmlns="http://xmlns.jcp.org/xml/ns/javaee"
   xmlns:javaee="http://xmlns.jcp.org/xml/ns/javaee"
   xmlns:xml="http://www.w3.org/XML/1998/namespace"
   xmlns:xsi="http://www.w3.org/2001/XMLSchema-instance"
      xsi:schemaLocation="http://xmlns.jcp.org/xml/ns/javaee http://xmlns.jcp.org/xml/ns/javaee/web-app_4_0.xsd">
   <display-name>Spring MVC Application</display-name>

   <servlet>
      <servlet-name>web</servlet-name>
      <servlet-class>
         org.springframework.web.servlet.DispatcherServlet
      </servlet-class>
      <load-on-startup>1</load-on-startup>
   </servlet>

   <servlet-mapping>
      <servlet-name>web</servlet-name>
      <url-pattern>/</url-pattern>
   </servlet-mapping>
</web-app>
web-servlet.xml
Following is the content of another Spring Web configuration file web-servlet.xml
<beans xmlns = "http://www.springframework.org/schema/beans"
   xmlns:context = "http://www.springframework.org/schema/context"
   xmlns:xsi = "http://www.w3.org/2001/XMLSchema-instance"
   xsi:schemaLocation = "http://www.springframework.org/schema/beans
      http://www.springframework.org/schema/beans/spring-beans-3.0.xsd
      http://www.springframework.org/schema/context
      http://www.springframework.org/schema/context/spring-context-3.0.xsd">

   <context:component-scan base-package = "com.tutorialspoint" />

   <bean class = "org.springframework.web.servlet.view.InternalResourceViewResolver">
      <property name = "prefix" value = "/WEB-INF/jsp/" />
      <property name = "suffix" value = ".jsp" />
   </bean>

</beans>
hello.jsp
Following is the content of Spring view file hello.jsp
<%@ page contentType = "text/html; charset = UTF-8" %>
<html>
   <head>
      <title>Hello World</title>
   </head>

   <body>
      <h2>${message}</h2>
   </body>
</html>
Output
Once you are done creating the source and configuration files, export your application. Right-click on your application and use run as > maven install > option and save your web.war file in Tomcat's webapps folder.
Now start your Tomcat server and make sure you are able to access other web pages from webapps folder using a standard browser. Try to access the URL http://localhost:8080/web/hello and if everything is fine with your Spring Web Application, you should see the following result −
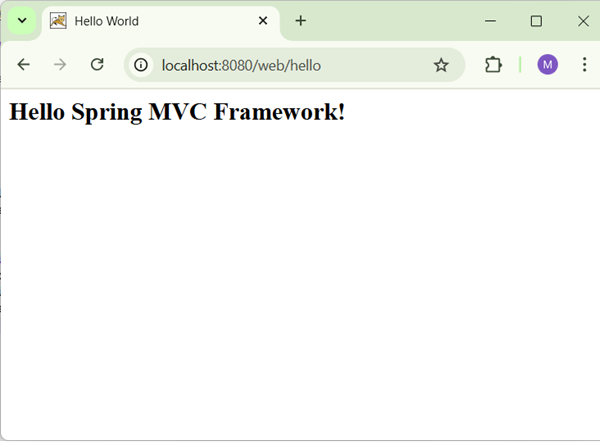
You should note that in the given URL, web is the application name and hello is the virtual subfolder which we have mentioned in our controller using @RequestMapping("/hello"). You can use direct root while mapping your URL using @RequestMapping("/"). In this case you can access the same page using short URL http://localhost:8080/web/ but it is advised to have different functionalities under different folders.
