- MYBATIS - Home
- MYBATIS - Overview
- MYBATIS - Environment
- MYBATIS - Configuration XML
- MYBATIS - Mapper XML
- MYBATIS - Create Operation
- MYBATIS - Read Operation
- MYBATIS - Update Operation
- MYBATIS - Delete Operation
- MYBATIS - Annotations
- MYBATIS - Stored Procedures
- MYBATIS - Dynamic SQL
- MYBATIS - Hibernate
MYBATIS - Quick Guide
MYBATIS - Overview
MyBatis is an open source, lightweight, persistence framework. It is an alternative to JDBC and Hibernate. It automates the mapping between SQL databases and objects in Java, .NET, and Ruby on Rails. The mappings are decoupled from the application logic by packaging the SQL statements in XML configuration files.
It abstracts almost all of the JDBC code, and reduces the burden of setting of parameters manually and retrieving the results. It provides a simple API to interact with the database. It also provides support for custom SQL, stored procedures and advanced mappings.
It was formerly known as IBATIS, which was started by Clinton Begin in 2002. MyBatis 3 is the latest version. It is a total makeover of IBATIS.
A significant difference between MyBatis and other persistence frameworks is that MyBatis emphasizes the use of SQL, while other frameworks such as Hibernate typically uses a custom query language i.e. the Hibernate Query Language (HQL) or Enterprise JavaBeans Query Language (EJB QL).
MYBATIS Design Features
MyBatis comes with the following design philosophies −
Simplicity − MyBatis is widely regarded as one of the simplest persistence frameworks available today.
Fast Development − MyBatis does all it can to facilitate hyper-fast development.
Portability − MyBatis can be implemented for nearly any language or platform such as Java, Ruby, and C# for Microsoft .NET.
Independent Interfaces − MyBatis provides database-independent interfaces and APIs that help the rest of the application remain independent of any persistence-related resources.
Open source− MyBatis is free and an open source software.
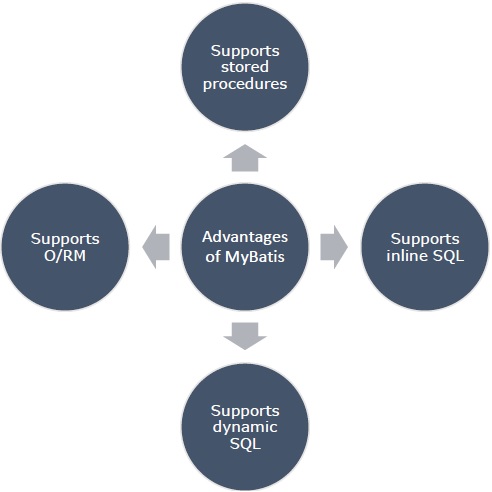
Advantages of MYBATIS
MYBATIS offers the following advantages −
Supports stored procedures − MyBatis encapsulates SQL in the form of stored procedures so that business logic can be kept out of the database, and the application is more portable and easier to deploy and test.
Supports inline SQL − No pre-compiler is needed, and you can have the full access to all of the features of SQL.
Supports dynamic SQL − MyBatis provides features for dynamic building SQL queries based on parameters.
Supports O/RM − MyBatis supports many of the same features as an O/RM tool, such as lazy loading, join fetching, caching, runtime code generation, and inheritance.
MyBatis uses JAVA programming language while developing database oriented application. Before proceeding further, make sure that you understand the basics of procedural and object-oriented programming control structures, data structures and variables, classes, objects, etc.
To understand JAVA in detail you can go through our JAVA Tutorial.
MYBATIS - Environment
You would have to set up a proper environment for MyBatis before starting off with the actual development work. This chapter explains how to set up a working environment for MyBatis.
MyBatis Installation
Carry out the following simple steps to install MyBatis on your machine −
Download the latest version of MyBatis from Download MYBATIS.
Download the latest version of mysqlconnector from Download MySQL Connector.
Unzip the downloaded files to extract .jar files and keep them in appropriate folders/directory.
Set CLASSPATH variable for the extracted .jar files appropriately.
Database Setup
Create an EMPLOYEE table in any MySQL database using the following syntax −
mysql> DROP TABLE IF EXISTS details.student;
CREATE TABLE  details.student(
   ID int(10) NOT NULL AUTO_INCREMENT,
   NAME varchar(100) NOT NULL,
   BRANCH varchar(255) NOT NULL,
   PERCENTAGE int(3) NOT NULL,
   PHONE int(10) NOT NULL,
   EMAIL varchar(255) NOT NULL,
   PRIMARY KEY ( ID )
);
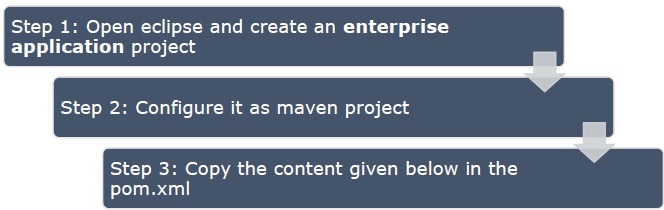
MyBatis Eclipse Setup
If you want to develop MyBatis Application using eclipse, carry out the following steps −
<project xmlns = "http://maven.apache.org/POM/4.0.0" xmlns:xsi = "http://www.w3.org/2001/XMLSchema-instance"
   xsi:schemaLocation = "http://maven.apache.org/POM/4.0.0 http://maven.apache.org/xsd/maven-4.0.0.xsd">

   <modelVersion>4.0.0</modelVersion>
   <groupId>mybatisfinalexamples</groupId>
   <artifactId>mybatisfinalexamples</artifactId>
   <version>0.0.1-SNAPSHOT</version>

   <build>
      <sourceDirectory>src</sourceDirectory>

      <plugins>
         <plugin>
            <artifactId>maven-compiler-plugin</artifactId>
            <version>3.1</version>
            <configuration>
               <source>1.8</source>
               <target>1.8</target>
            </configuration>
         </plugin>
      </plugins>

   </build>

   <dependencies>

      <dependency>
         <groupId>org.mybatis</groupId>
         <artifactId>mybatis</artifactId>
         <version>3.3.0</version>
      </dependency>

      <dependency>
         <groupId>mysql</groupId>
         <artifactId>mysql-connector-java</artifactId>
         <version>5.1.6</version>
      </dependency>

   </dependencies>

</project>
MYBATIS - Configuration XML
In the previous chapter, we have seen how to install MyBatis. This chapter discusses how to configure MyBatis using XML file.
Since we are communicating with the database, we have to configure the details of the database. Configuration XML is the file used for the XML-based configuration. By using this file, you can configure various elements.
The following programing is a typical structure of MyBatis configuration file.
<configuration>

   <typeAliases>
      <typeAlias alias = "class_alias_Name" type = "absolute_clas_Name"/>
   </typeAliases>

   <environments default = "default_environment _name">
      <environment id = "environment_id">
         <transactionManager type = "JDBC/MANAGED"/>

            <dataSource type = "UNPOOLED/POOLED/JNDI">
               <property name = "driver" value = "database_driver_class_name"/>
               <property name = "url" value = "database_url"/>
               <property name = "username" value = "database_user_name"/>
               <property name = "password" value = "database_password"/>
            </dataSource>

      </environment>
   </environments>

   <mappers>
      <mapper resource = "path of the configuration XML file"/>
   </mappers>

</configuration>
Let us discuss the important elements (tags) of the configuration XML file one by one.
environments tag
Within the environments element, we configure the environment of the database that we use in our application. In MyBatis, you can connect to multiple databases by configuring multiple environment elements. To configure the environment, we are provided with two sub tags namely transactionManager and dataSource.
transactionManager tag
MyBatis supports two transaction managers namely JDBC and MANAGED
If we use the transaction manager of type JDBC, the application is responsible for the transaction management operations, such as, commit, roll-back, etc...
If we use the transaction manager of type MANAGED, the application server is responsible to manage the connection life cycle. It is generally used with the Web Applications.
dataSource tag
It is used to configure the connection properties of the database, such as driver-name, url, user-name, and password of the database that we want to connect. It is of three types namely −
UNPOOLED − For the dataSource type UNPOOLED, MyBatis simply opens and closes a connection for every database operation. It is a bit slower and generally used for the simple applications.
POOLED − For the dataSource type POOLED, MyBatis will maintain a database connection pool. And, for every database operation, MyBatis uses one of these connections, and returns them to the pool after the completion of the operation. It reduces the initial connection and authentication time that required to create a new connection.
JNDI − For the dataSource type JNDI, MyBatis will get the connection from the JNDI dataSource.
Here is how you can use an environment tag in practice −
<environments default = "development">
   <environment id = "development">
      <transactionManager type = "JDBC"/>
      <dataSource type = "POOLED">
         <property name = "driver" value = "com.mysql.jdbc.Driver"/>
         <property name = "url" value = "jdbc:mysql://localhost:3306/details"/>
         <property name = "username" value = "root"/>
         <property name = "password" value = "password"/>
      </dataSource>
   </environment>
</environments>
typeAliases tag
Instead of specifying the absolute class name everywhere, we can use typeAliases, a shorter name for a Java type. Suppose, we have a class Student in Student.java file within the package named tutorials_point.com.mybatis_examples, then the absolute class name will be tutorials_point.com.mybatis_examples.Student. Instead of using this name to address the class every time, you can declare an alias to that class as shown below −
<typeAliases>
   <typeAlias alias = "Student" type = "mybatis.Student"/>
</typeAliases>
mappers tag
Mapper XML file is the important file, which contains the mapped SQL statements. Mappers element is used to configure the location of these mappers xml files in the configuration file of MyBatis (this element contains four attributes namely resources, url, class, and name).
For example, the name of the mapper xml file is Student.xml and it resides in the package named as mybatis,, then you can configure the mapper tag as shown below.
<mappers>
   <mapper resource = "mybatis/Student.xml"/>
</mappers>
The attribute resource points to the classpath of the XML file.
The attribute url points to the fully qualified path of the xml file.
We can use mapper interfaces instead of xml file, the attribute class points to the class-path of the mapper interface.
The attribute name points to the package name of the mapper interface. In the example provided in this chapter, we have specified the class path of the mapper XML using the resource attribute.
In addition to these, there are other elements that can be used in the configuration file of MyBatis documentation. Refer MyBatis documentation for the complete details.
MyBatis with MySQL database
MySQL is one of the most popular open-source database systems available today. Let us create a SqlMapConfig.xml configuration file to connect to mysql database. The example given below are the dataSource properties (driver-name, url, user-name, and password) for MySQL database −
| Sr.No. | Property Name | value |
|---|---|---|
| 1 | driver | com.mysql.jdbc.Driver |
| 2 | url | jdbc:mysql://localhost:3306/details (assume database is "details" ) |
| 3 | username | root |
| 4 | password | password |
We use the transaction manager of type JDBC, means we have to perform the operations, such as commit and roll-back manually, within the application.
We use the dataSource of type UNPOOLED, which means new connection is created for each database operation. Therefore, it is recommended to close the connection manually after the completion of database operations.
SqlMapConfig.xml
Below given is the XML configuration for the examples used in this tutorial. Copy the content given below in a text file and save it as SqlMapConfig.xml. We are going to use this file in all the examples given in this tutorial.
<?xml version = "1.0" encoding = "UTF-8"?>

<!DOCTYPE configuration PUBLIC "-//mybatis.org//DTD Config 3.0//EN" "http://mybatis.org/dtd/mybatis-3-config.dtd">
<configuration>

   <environments default = "development">
      <environment id = "development">
         <transactionManager type = "JDBC"/>

         <dataSource type = "POOLED">
            <property name = "driver" value = "com.mysql.jdbc.Driver"/>
            <property name = "url" value = "jdbc:mysql://localhost:3306/details"/>
            <property name = "username" value = "root"/>
            <property name = "password" value = "password"/>
         </dataSource>

      </environment>
   </environments>

   <mappers>
      <mapper resource = "mybatis/Student.xml"/>
   </mappers>

</configuration>
MYBATIS - Mapper XML
In the previous chapter, we have seen how to configure MyBatis using an XML file. This chapter discusses the Mapper XML file and various mapped SQL statements provided by it.
Before proceeding to mapped statements, assume that the following table named Student exists in the MYSQL database −
+----+-------+--------+------------+-----------+---------------+
| ID |  NAME | BRANCH | PERCENTAGE |   PHONE   |     EMAIL     |
+----+-------+--------+------------+-----------+---------------+
|  1 | Shyam |   it   |     80     | 954788457 | mail@mail.com |
+----+-------+--------+------------+-----------+---------------+
Also assume that POJO class also exists named Student with respect to the above table as shown below −
public class Student {
   private int id;
   private String name;
   private String branch;
   private int percentage;
   private int phone;
   private String email;

   //Setters and getters
}
Mapped Statements
Mapper XML is an important file in MyBatis, which contains a set of statements to configure various SQL statements such as select, insert, update, and delete. These statements are known as Mapped Statements or Mapped SQL Statements.
All the statements have unique id. To execute any of these statements you just need to pass the appropriate id to the methods in Java Application.(This is discussed clearly in later chapters).
mapper XML file prevents the burden of writing SQL statements repeatedly in the application. In comparison to JDBC, almost 95% of the code is reduced using Mapper XML file in MyBatis.
All these Mapped SQL statements are resided within the element named<mapper>. This element contains an attribute called namespace.
<mapper namespace = "Student">
   //mapped statements and result maps
<mapper>
All the Mapped SQL statements are discussed below with examples.
Insert
In MyBatis, to insert values into the table, we have to configure the insert mapped query. MyBatis provides various attributes for insert mapper, but largely we use id and parameter type.
id is unique identifier used to identify the insert statement. On the other hand, parametertype is the class name or the alias of the parameter that will be passed into the statement. Below given is an example of insert mapped query −
<insert id = "insert" parameterType = "Student">
   INSERT INTO STUDENT1 (NAME, BRANCH, PERCENTAGE, PHONE, EMAIL )
   VALUES (#{name}, #{branch}, #{percentage}, #{phone}, #{email});
</insert>
In the given example, we use the parameter of type Student (class). The class student is a POJO class, which represents the Student record with name, branch, percentage, phone, and email as parameters.
You can invoke the insert mapped query using Java API as shown below −
//Assume session is an SqlSession object.
session.insert("Student.insert", student);
Update
To update values of an existing record using MyBatis, the mapped query update is configured. The attributes of update mapped query are same as the insert mapped query. Following is the example of the update mapped query −
<update id = "update" parameterType = "Student">
   UPDATE STUDENT SET EMAIL = #{email}, NAME = #{name}, BRANCH = #{branch}, PERCENTAGE = #{percentage}, PHONE = #{phone} WHERE ID = #{id};
</update>
To invoke the update query, instantiate Student class, set the values for the variables representing columns which need to be updated, and pass this object as parameter to update() method. You can invoke the update mapped query using Java API as shown below −
//Assume session is an SqlSession object.
session.update("Student.update",student);
Delete
To delete the values of an existing record using MyBatis, the mapped query delete is configured. The attributes of delete mapped query are same as the insert and update mapped queries. Following is the example of the delete mapped query −
<delete id = "deleteById" parameterType = "int">
   DELETE from STUDENT WHERE ID = #{id};
</delete>
You can invoke the delete mapped query using the delete method of SqlSession interface provided by MyBatis Java API as shown below −
//Assume session is an SqlSession object.
session.delete("Student.deleteById", 18);
Select
To retrieve data, select mapper statement is used. Following is the example of select mapped query to retrieve all the records in a table −
<select id = "getAll" resultMap = "result">
   SELECT * FROM STUDENT;
</select>
You can retrieve the data returned by the select query using the method selectList(). This method returns the data of the selected record in the form of List as shown below −
List<Student> list = session.selectList("Student.getAll");
resultMaps
It is the most important and powerful elements in MyBatis. The results of SQL SELECT statements are mapped to Java objects (beans/POJO). Once the result map is defined, we can refer these from several SELECT statements. Following is the example of result Map query; it maps the results of the select queries to the Student class −
<resultMap id = "result" type = "Student">
   <result property = "id" column = "ID"/>
   <result property = "name" column = "NAME"/>
   <result property = "branch" column = "BRANCH"/>
   <result property = "percentage" column = "PERCENTAGE"/>
   <result property = "phone" column = "PHONE"/>
   <result property = "email" column = "EMAIL"/>
</resultMap>

<select id = "getAll" resultMap = "result">
   SELECT * FROM STUDENT;
</select>

<select id = "getById" parameterType = "int" resultMap = "result">
   SELECT * FROM STUDENT WHERE ID = #{id};
</select>
Note − It is not mandatory to write the column attribute of the resultMap if both the property and the column name of the table are same.
MYBATIS - Create Operation
To perform any Create, Read, Update, and Delete (CRUD) operation using MyBATIS, you would need to create a Plain Old Java Objects (POJO) class corresponding to the table. This class describes the objects that will "model" database table rows.
The POJO class would have implementation for all the methods required to perform desired operations.
Create the STUDENT table in MySQL database as shown below −
mysql> CREATE TABLE details.student(
   ->   ID int(10) NOT NULL AUTO_INCREMENT,
   ->   NAME varchar(100) NOT NULL,
   ->   BRANCH varchar(255) NOT NULL,
   ->   PERCENTAGE int(3) NOT NULL,
   ->   PHONE int(11) NOT NULL,
   ->   EMAIL varchar(255) NOT NULL,
   ->   PRIMARY KEY (`ID`)
   ->
);
Query OK, 0 rows affected (0.37 sec)
Student POJO Class
Create a STUDENT class in STUDENT.java file as
public class Student {
   private int id;
   private String name;
   private String branch;
   private int percentage;
   private int phone;
   private String email;

   public Student(String name, String branch, int percentage, int phone, String email) {
      super();
      this.name = name;
      this.branch = branch;
      this.percentage = percentage;
      this.phone = phone;
      this.email = email;
   }

}
You can define methods to set individual fields in the table. The next chapter explains how to get the values of individual fields.
Student.xml File
To define SQL mapping statement using MyBatis, we would use <insert> tag. Inside this tag definition, we would define an "id." Further, the id will be used in the mybatisInsert.java file for executing SQL INSERT query on database. Create student.xml file as shown below −
<?xml version = "1.0" encoding = "UTF-8"?>

<!DOCTYPE mapper PUBLIC "-//mybatis.org//DTD Mapper 3.0//EN"  "http://mybatis.org/dtd/mybatis-3-mapper.dtd">

<mapper namespace = "Student">

   <insert id = "insert" parameterType = "Student">
      INSERT INTO STUDENT (NAME, BRANCH, PERCENTAGE, PHONE, EMAIL ) VALUES (#{name}, #{branch}, #{percentage}, #{phone}, #{email});

      <selectKey keyProperty = "id" resultType = "int" order = "AFTER">
         select last_insert_id() as id
      </selectKey>

   </insert>

</mapper>
Here, parameteType − could take a value as string, int, float, double, or any class object based on requirement. In this example, we would pass Student object as a parameter, while calling insert method of SqlSession class.
If your database table uses an IDENTITY, AUTO_INCREMENT, or SERIAL column, or you have defined a SEQUENCE/GENERATOR, you can use the <selectKey> element in an <insert> statement to use or return that database-generated value.
mybatisInsert.java File
This file would have application level logic to insert records in the Student table. Create and save mybatisInsert.java file as shown below −
import java.io.IOException;
import java.io.Reader;

import org.apache.ibatis.io.Resources;
import org.apache.ibatis.session.SqlSession;
import org.apache.ibatis.session.SqlSessionFactory;
import org.apache.ibatis.session.SqlSessionFactoryBuilder;

public class mybatisInsert {

   public static void main(String args[]) throws IOException{

      Reader reader = Resources.getResourceAsReader("SqlMapConfig.xml");
      SqlSessionFactory sqlSessionFactory = new SqlSessionFactoryBuilder().build(reader);
      SqlSession session = sqlSessionFactory.openSession();

      //Create a new student object
      Student student = new Student("Mohammad","It", 80, 984803322, "Mohammad@gmail.com" );

      //Insert student data
      session.insert("Student.insert", student);
      System.out.println("record inserted successfully");
      session.commit();
      session.close();

   }

}
Compilation and Execution
Here are the steps to compile and run the mybatisInsert.java file. Make sure, you have set PATH and CLASSPATH appropriately before proceeding for compilation and execution.
Create Student.xml as shown above.
Create SqlMapConfig.xml as shown in the MYBATIS - Configuration XML chapter of this tutorial.
Create Student.java as shown above and compile it.
Create mybatisInsert.java as shown above and compile it.
Execute mybatisInsert binary to run the program.
You would get the following result, and a record would be created in the STUDENT table.
$java mybatisInsert
Record Inserted Successfully
If you check the STUDENT table, it should display the following result −
mysql> select * from student;
+----+----------+--------+------------+-----------+--------------------+
| ID |   NAME   | BRANCH | PERCENTAGE |   PHONE   |       EMAIL        |
+----+----------+--------+------------+-----------+--------------------+
|  1 | Mohammad |   It   |     80     | 984803322 | Mohammad@gmail.com |
+----+----------+--------+------------+-----------+--------------------+
1 row in set (0.00 sec)
MYBATIS - Read Operation
We discussed in the last chapter, how to insert values into the STUDENT table using MyBatis by performing CREATE operation. This chapter explains how to read the data in a table using MyBatis.
We have the following STUDENT table in MySQL −
CREATE TABLE details.student(
   ID int(10) NOT NULL AUTO_INCREMENT,
   NAME varchar(100) NOT NULL,
   BRANCH varchar(255) NOT NULL,
   PERCENTAGE int(3) NOT NULL,
   PHONE int(11) NOT NULL,
   EMAIL varchar(255) NOT NULL,
   PRIMARY KEY (`ID`)
);
Assume, this table has two record as −
+----+----------+--------+------------+-----------+--------------------+
| ID |  NAME    | BRANCH | PERCENTAGE |   PHONE   |      EMAIL         |
+----+----------+--------+------------+-----------+--------------------+
| 1  | Mohammad |   It   |     80     | 984803322 | Mohammad@gmail.com |
| 2  | shyam    |   It   |     75     | 984800000 | shyam@gmail.com    |
+----+----------+--------+------------+-----------+--------------------+
Student POJO Class
To perform read operation, we would modify the Student class in Student.java as −
public class Student {
   private int id;
   private String name;
   private String branch;
   private int percentage;
   private int phone;
   private String email;

   public Student(int id, String name, String branch, int percentage, int phone, String email) {
      super();
      this.id = id;
      this.name = name;
      this.branch = branch;
      this.percentage = percentage;
      this.phone = phone;
      this.email = email;
   }

   public Student() {}

   public int getId() {
      return id;
   }

   public String getName() {
      return name;
   }

   public int getPhone() {
      return phone;
   }

   public String getEmail() {
      return email;
   }

   public String getBranch() {
      return branch;
   }

   public int getPercentage() {
      return percentage;
   }

}
Student.xml File
To define SQL mapping statement using MyBatis, we would add <select> tag in Student.xml file and inside this tag definition, we would define an "id" which will be used in mybatisRead.java file for executing SQL SELECT query on database. While reading the records, we can get all the records at once or we can get a particular record using the where clause. In the XML given below, you can observe both the queries.
To retrieve a particular record, we need a unique key to represent that record. Therefore, we have also defined the resultmap "id" (unique key) of type Student to map the result of the select query with the variable of Student class.
<?xml version = "1.0" encoding = "UTF-8"?>

<!DOCTYPE mapper PUBLIC "-//mybatis.org//DTD Mapper 3.0//EN" "http://mybatis.org/dtd/mybatis-3-mapper.dtd">

<mapper namespace = "Student">

   <resultMap id = "result" type = "Student">
      <result property = "id" column = "ID"/>
   </resultMap>

   <select id = "getAll" resultMap = "result">
      SELECT * FROM STUDENT;
   </select>

   <select id = "getById" parameterType = "int" resultMap = "result">
      SELECT * FROM STUDENT WHERE ID = #{id};
   </select>

</mapper>
mybatisRead_ALL.java File
This file has application level logic to read all the records from the Student table. Create and save mybatisRead_ALL.java file as shown below −
import java.io.IOException;
import java.io.Reader;
import java.util.List;

import org.apache.ibatis.io.Resources;
import org.apache.ibatis.session.SqlSession;
import org.apache.ibatis.session.SqlSessionFactory;
import org.apache.ibatis.session.SqlSessionFactoryBuilder;

public class mybatisRead_ALL {

   public static void main(String args[]) throws IOException{

      Reader reader = Resources.getResourceAsReader("SqlMapConfig.xml");
      SqlSessionFactory sqlSessionFactory = new SqlSessionFactoryBuilder().build(reader);
      SqlSession session = sqlSessionFactory.openSession();

      //select contact all contacts
      List<Student> student = session.selectList("Student.getAll");

      for(Student st : student ){
         System.out.println(st.getId());
         System.out.println(st.getName());
         System.out.println(st.getBranch());
         System.out.println(st.getPercentage());
         System.out.println(st.getEmail());
         System.out.println(st.getPhone());
      }

      System.out.println("Records Read Successfully ");
      session.commit();
      session.close();
   }
}
Compilation and Execution
Here are the steps to compile and run the mybatisRead_ALL file. Make sure, you have set PATH and CLASSPATH appropriately before proceeding for compilation and execution.
- Create Student.xml as shown above.
- Create Student.java as shown above and compile it.
- Create mybatisRead_ALL.java as shown above and compile it.
- Execute mybatisRead_ALL binary to run the program.
You would get all the record of the student table as −
++++++++++++++ details of the student who's id is  :1 +++++++++++++++++++
1
Mohammad
It
80
Mohammad@gmail.com
984803322
++++++++++++++ details of the student who's id is  :2
+++++++++++++++++++
2
shyam
It
75
shyam@gmail.com
984800000
Records Read Successfully
Reading a Particular Record
Copy and save the following program with the name mybatisRead_byID −
import java.io.IOException;
import java.io.Reader;

import org.apache.ibatis.io.Resources;
import org.apache.ibatis.session.SqlSession;
import org.apache.ibatis.session.SqlSessionFactory;
import org.apache.ibatis.session.SqlSessionFactoryBuilder;

public class mybatisRead_byID {

   public static void main(String args[]) throws IOException{

      int i = 1;
      Reader reader = Resources.getResourceAsReader("SqlMapConfig.xml");
      SqlSessionFactory sqlSessionFactory = new SqlSessionFactoryBuilder().build(reader);
      SqlSession session = sqlSessionFactory.openSession();

      //select a particular student  by  id
      Student student = (Student) session.selectOne("Student.getById", 2);

      //Print the student details
      System.out.println(student.getId());
      System.out.println(student.getName());
      System.out.println(student.getBranch());
      System.out.println(student.getPercentage());
      System.out.println(student.getEmail());
      System.out.println(student.getPhone());

      session.commit();
      session.close();

   }

}
Compilation and Execution
Here are the steps to compile and run the mybatisRead_byID file. Make sure, you have set PATH and CLASSPATH appropriately before proceeding for compilation and execution.
Create Student.xml as shown above.
Create SqlMapConfig.xml as shown in the MYBATIS - Configuration XML chapter of this tutorial.
Create Student.java as shown above and compile it.
Create mybatisRead_byID.java as shown above and compile it.
Execute mybatisRead_byID binary to run the program.
You would get the following result, and a record would be read from the Student table as −
2
shyam
It
75
shyam@gmail.com
984800000
MYBATIS - Update Operation
We discussed, in the last chapter, how to perform READ operation on a table using MyBatis. This chapter explains how you can update records in a table using it.
We have the following STUDENT table in MySQL −
CREATE TABLE details.student(
   ID int(10) NOT NULL AUTO_INCREMENT,
   NAME varchar(100) NOT NULL,
   BRANCH varchar(255) NOT NULL,
   PERCENTAGE int(3) NOT NULL,
   PHONE int(11) NOT NULL,
   EMAIL varchar(255) NOT NULL,
   PRIMARY KEY (`ID`)
);
Assume this table has two record as follows −
mysql> select * from STUDENT;
+----+----------+--------+------------+-----------+--------------------+
| ID |   NAME   | BRANCH | PERCENTAGE |   PHONE   |      EMAIL         |
+----+----------+--------+------------+-----------+--------------------+
| 1  | Mohammad |   It   |     80     | 984803322 | Mohammad@gmail.com |
| 2  | shyam    |   It   |     75     | 984800000 | shyam@gmail.com    |
+----+----------+--------+------------+-----------+--------------------+
Student POJO Class
To perform update operation, you would need to modify Student.java file as −
public class Student {

   private int id;
   private String name;
   private String branch;
   private int percentage;
   private int phone;
   private String email;

   public Student(int id, String name,  String branch, int percentage, int phone, String email) {
      super();
      this.id = id;
      this.name = name;
      this.setBranch(branch);
      this.setPercentage(percentage);
      this.phone = phone;
      this.email = email;
   }

   public Student() {}

   public int getId() {
      return id;
   }

   public void setId(int id) {
      this.id = id;
   }

   public String getName() {
      return name;
   }

   public void setName(String name) {
      this.name = name;
   }

   public int getPhone() {
      return phone;
   }

   public void setPhone(int phone) {
      this.phone = phone;
   }

   public String getEmail() {
      return email;
   }

   public void setEmail(String email) {
      this.email = email;
   }

   public String getBranch() {
      return branch;
   }

   public void setBranch(String branch) {
      this.branch = branch;
   }

   public int getPercentage() {
      return percentage;
   }

   public void setPercentage(int percentage) {
      this.percentage = percentage;
   }

   public String toString(){
      StringBuilder sb = new StringBuilder();

      sb.append("Id = ").append(id).append(" - ");
      sb.append("Name = ").append(name).append(" - ");
      sb.append("Branch = ").append(branch).append(" - ");
      sb.append("Percentage = ").append(percentage).append(" - ");
      sb.append("Phone = ").append(phone).append(" - ");
      sb.append("Email = ").append(email);

      return sb.toString();
   }

}
Student.xml File
To define SQL mapping statement using MyBatis, we would add <update> tag in Student.xml and inside this tag definition, we would define an "id" which will be used in mybatisUpdate.java file for executing SQL UPDATE query on database.
<?xml version = "1.0" encoding = "UTF-8"?>

<!DOCTYPE mapper PUBLIC "-//mybatis.org//DTD Mapper 3.0//EN" "http://mybatis.org/dtd/mybatis-3-mapper.dtd">

<mapper namespace = "Student">
   <resultMap id = "result" type = "Student">
      <result property = "id" column = "ID"/>
      <result property = "name" column = "NAME"/>
      <result property = "branch" column = "BRANCH"/>
      <result property = "percentage" column = "PERCENTAGE"/>
      <result property = "phone" column = "PHONE"/>
      <result property = "email" column = "EMAIL"/>
   </resultMap>

   <select id = "getById" parameterType = "int" resultMap = "result">
      SELECT * FROM STUDENT WHERE ID = #{id};
   </select>

   <update id = "update" parameterType = "Student">
      UPDATE STUDENT SET NAME = #{name},
         BRANCH = #{branch},
         PERCENTAGE = #{percentage},
         PHONE = #{phone},
         EMAIL = #{email}
      WHERE ID = #{id};
   </update>

</mapper>
mybatisUpdate.java File
This file has application level logic to update records into the Student table −
import java.io.IOException;
import java.io.Reader;

import org.apache.ibatis.io.Resources;
import org.apache.ibatis.session.SqlSession;
import org.apache.ibatis.session.SqlSessionFactory;
import org.apache.ibatis.session.SqlSessionFactoryBuilder;

public class mybatisUpdate {

   public static void main(String args[]) throws IOException{

      Reader reader = Resources.getResourceAsReader("SqlMapConfig.xml");
      SqlSessionFactory sqlSessionFactory = new SqlSessionFactoryBuilder().build(reader);
      SqlSession session = sqlSessionFactory.openSession();

      //select a particular student using id
      Student student = (Student) session.selectOne("Student.getById", 1);
      System.out.println("Current details of the student are" );
      System.out.println(student.toString());

      //Set new values to the mail and phone number of the student
      student.setEmail("mohamad123@yahoo.com");
      student.setPhone(90000000);

      //Update the student record
      session.update("Student.update",student);
      System.out.println("Record updated successfully");
      session.commit();
      session.close();

      //verifying the record
      Student std = (Student) session.selectOne("Student.getById", 1);
      System.out.println("Details of the student after update operation" );
      System.out.println(std.toString());
      session.commit();
      session.close();

   }
}
Compilation and Run
Here are the steps to compile and run mybatisUpdate.java. Make sure, you have set PATH and CLASSPATH appropriately before proceeding for compilation and execution.
Create Student.xml as shown above.
Create SqlMapConfig.xml as shown in the MYBATIS - Configuration XML chapter of this tutorial.
Create Student.java as shown above and compile it.
Create mybatisUpdate.java as shown above and compile it.
Execute mybatisUpdate binary to run the program.
You would get following result. You can see the details of a particular record initially, and that record would be updated in STUDENT table and later, you can also see the updated record.
Current details of the student are
Id = 1 - Name = Mohammad - Branch = It - Percentage = 80 - Phone = 984802233 - Email = mohammad@gmail.com
Record updated successfully
Details of the student after update operation
Id = 1 - Name = Mohammad - Branch = It - Percentage = 80 - Phone = 90000000 - Email = mohamad123@yahoo.com
If you check the STUDENT table, it should display the following result −
mysql> select * from student;
+----+----------+--------+------------+-----------+----------------------+
| ID |  NAME    | BRANCH | PERCENTAGE |  PHONE    |       EMAIL          |
+----+----------+--------+------------+-----------+----------------------+
| 1  | Mohammad |  It    |     80     |  90000000 | mohamad123@yahoo.com |
| 2  | shyam    |  It    |     75     | 984800000 | shyam@gmail.com      |
+----+----------+--------+------------+-----------+----------------------+
2 rows in set (0.00 sec)
MYBATIS - Delete Operation
This chapter describes how to delete records from a table using MyBatis.
We have the following STUDENT table in MySQL −
CREATE TABLE details.student(
   ID int(10) NOT NULL AUTO_INCREMENT,
   NAME varchar(100) NOT NULL,
   BRANCH varchar(255) NOT NULL,
   PERCENTAGE int(3) NOT NULL,
   PHONE int(11) NOT NULL,
   EMAIL varchar(255) NOT NULL,
   PRIMARY KEY (`ID`)
);
Assume, this table has two records as −
mysql> select * from STUDENT;
+----+----------+--------+------------+-----------+----------------------+
| ID |  NAME    | BRANCH | PERCENTAGE |  PHONE    |       EMAIL          |
+----+----------+--------+------------+-----------+----------------------+
| 1  | Mohammad |   It   |     80     | 900000000 | mohamad123@yahoo.com |
| 2  | shyam    |   It   |     75     | 984800000 | shyam@gmail.com      |
+----+----------+--------+------------+-----------+----------------------+
2 rows in set (0.00 sec)
STUDENT POJO Class
To perform delete operation, you do not need to modify Student.java file. Let us keep it as it was in the last chapter.
public class Student {

   private int id;
   private String name;
   private String branch;
   private int percentage;
   private int phone;
   private String email;

   public Student(int id, String name, String branch, int percentage, int phone, String email) {
      super();
      this.id = id;
      this.name = name;
      this.setBranch(branch);
      this.setPercentage(percentage);
      this.phone = phone;
      this.email = email;
   }

   public Student() {}

   public int getId() {
      return id;
   }

   public void setId(int id) {
      this.id = id;
   }

   public String getName() {
      return name;
   }

   public void setName(String name) {
      this.name = name;
   }

   public int getPhone() {
      return phone;
   }

   public void setPhone(int phone) {
      this.phone = phone;
   }

   public String getEmail() {
      return email;
   }

   public void setEmail(String email) {
      this.email = email;
   }

   public String getBranch() {
      return branch;
   }

   public void setBranch(String branch) {
      this.branch = branch;
   }

   public int getPercentage() {
      return percentage;
   }

   public void setPercentage(int percentage) {
      this.percentage = percentage;
   }

   public String toString(){
      StringBuilder sb = new StringBuilder();

      sb.append("Id = ").append(id).append(" - ");
      sb.append("Name = ").append(name).append(" - ");
      sb.append("Branch = ").append(branch).append(" - ");
      sb.append("Percentage = ").append(percentage).append(" - ");
      sb.append("Phone = ").append(phone).append(" - ");
      sb.append("Email = ").append(email);

      return sb.toString();
   }

}
Student.xml File
To define SQL mapping statement using MyBatis, we would use <delete> tag in Student.xml and inside this tag definition, we would define an "id" which will be used in mybatisDelete.java file for executing SQL DELETE query on database.
<?xml version = "1.0" encoding = "UTF-8"?>

<!DOCTYPE mapper PUBLIC "-//mybatis.org//DTD Mapper 3.0//EN" "http://mybatis.org/dtd/mybatis-3-mapper.dtd">

<mapper namespace = "Student">
   <resultMap id = "result" type = "Student">
      <result property = "id" column = "ID"/>
   </resultMap>

   <delete id = "deleteById" parameterType = "int">
      DELETE from STUDENT WHERE ID = #{id};
   </delete>

</mapper>
MyBatisDelete.java File
This file has application level logic to delete records from the Student table −
import java.io.IOException;
import java.io.Reader;

import org.apache.ibatis.io.Resources;
import org.apache.ibatis.session.SqlSession;
import org.apache.ibatis.session.SqlSessionFactory;
import org.apache.ibatis.session.SqlSessionFactoryBuilder;

public class mybatisDelete {

   public static void main(String args[]) throws IOException{

      Reader reader = Resources.getResourceAsReader("SqlMapConfig.xml");
      SqlSessionFactory sqlSessionFactory = new SqlSessionFactoryBuilder().build(reader);
      SqlSession session = sqlSessionFactory.openSession();

      //Delete operation
      session.delete("Student.deleteById", 2);
      session.commit();
      session.close();
      System.out.println("Record deleted successfully");

   }

}
Compilation and Run
Here are the steps to compile and run mybatisDelete.java. Make sure, you have set PATH and CLASSPATH appropriately before proceeding for compilation and execution.
Create Student.xml as shown above.
Create SqlMapConfig.xml as shown in the MYBATIS - Configuration XML chapter of this tutorial.
Create Student.java as shown above and compile it.
Create mybatisDelete.java as shown above and compile it.
Execute mybatisDelete binary to run the program.
You would get the following result, and a record with ID = 1 would be deleted from the STUDENT.
Records Read Successfully
If you check the STUDENT table, it should display the following result −
mysql> select * from student;
+----+----------+--------+------------+----------+----------------------+
| ID |   NAME   | BRANCH | PERCENTAGE |  PHONE   |        EMAIL         |
+----+----------+--------+------------+----------+----------------------+
| 1  | Mohammad |   It   |    80      | 90000000 | mohamad123@yahoo.com |
+----+----------+--------+------------+----------+----------------------+
1 row in set (0.00 sec)
MYBATIS - Annotations
In the previous chapters, we have seen how to perform curd operations using MyBatis. There we used a Mapper XML file to store mapped SQL statements and a configuration XML file to configure MyBatis.
To map SQL statements, MyBatis also provides annotations. So, this chapter discusses how to use MyBatis annotations.
While working with annotations, instead of configuration XML file, we can use a java mapper interface to map and execute SQL queries.
Assume, we have the following employee table in MySQL −
CREATE TABLE details.student(
   ID int(10) NOT NULL AUTO_INCREMENT,
   NAME varchar(100) NOT NULL,
   BRANCH varchar(255) NOT NULL,
   PERCENTAGE int(3) NOT NULL,
   PHONE int(11) NOT NULL,
   EMAIL varchar(255) NOT NULL,
   PRIMARY KEY (`ID`)
);
Query OK, 0 rows affected (0.37 sec)
Assume this table has two records as −
mysql> select * from STUDENT;
+----+----------+--------+------------+-----------+--------------------+
| ID |  NAME    | BRANCH | PERCENTAGE |   PHONE   |      EMAIL         |
+----+----------+--------+------------+-----------+--------------------+
|  1 | Mohammad |   It   |    80      | 984803322 | Mohammad@gmail.com |
|  2 | Shyam    |   It   |    75      | 984800000 | shyam@gmail.com    |
+----+----------+--------+------------+-----------+--------------------+
Student POJO Class
The POJO class would have implementation for all the methods required to perform desired operations.
Create a Student class in Student.java file as −
public class Student {
   private int id;
   private String name;
   private String branch;
   private int percentage;
   private int phone;
   private String email;

   public Student(int id, String name, String branch, int percentage, int phone, String email) {
      super();
      this.id = id;
      this.name = name;
      this.branch = branch;
      this.percentage = percentage;
      this.phone = phone;
      this.email = email;
   }

   public Student() {}

   public int getId() {
      return id;
   }

   public void setId(int id) {
      this.id = id;
   }

   public String getName() {
      return name;
   }

   public void setName(String name) {
      this.name = name;
   }

   public int getPhone() {
      return phone;
   }

   public void setPhone(int phone) {
      this.phone = phone;
   }

   public String getEmail() {
      return email;
   }

   public void setEmail(String email) {
      this.email = email;
   }

   public String getBranch() {
      return branch;
   }

   public void setBranch(String branch) {
      this.branch = branch;
   }

   public int getPercentage() {
      return percentage;
   }

   public void setPercentage(int percentage) {
      this.percentage = percentage;
   }

}
Student_mapper.java
This is the file, which contains the mapper interface where we declare the mapped statements using annotations instead of XML tags. For almost all of the XML-based mapper elements, MyBatis provides annotations. The following file named Student_mapper.java, contains a mapper interface. Within this file, you can see the annotations to perform CURD operations on the STUDENT table.
import java.util.List;

import org.apache.ibatis.annotations.*;

public interface Student_mapper {

   final String getAll = "SELECT * FROM STUDENT";
   final String getById = "SELECT * FROM STUDENT WHERE ID = #{id}";
   final String deleteById = "DELETE from STUDENT WHERE ID = #{id}";
   final String insert = "INSERT INTO STUDENT (NAME, BRANCH, PERCENTAGE, PHONE, EMAIL ) VALUES (#{name}, #{branch}, #{percentage}, #{phone}, #{email})";
   final String update = "UPDATE STUDENT SET EMAIL = #{email}, NAME = #{name}, BRANCH = #{branch}, PERCENTAGE = #{percentage}, PHONE = #{phone} WHERE ID = #{id}";

   @Select(getAll)
   @Results(value = {
      @Result(property = "id", column = "ID"),
      @Result(property = "name", column = "NAME"),
      @Result(property = "branch", column = "BRANCH"),
      @Result(property = "percentage", column = "PERCENTAGE"),
      @Result(property = "phone", column = "PHONE"),
      @Result(property = "email", column = "EMAIL")
   })

   List getAll();

   @Select(getById)
   @Results(value = {
      @Result(property = "id", column = "ID"),
      @Result(property = "name", column = "NAME"),
      @Result(property = "branch", column = "BRANCH"),
      @Result(property = "percentage", column = "PERCENTAGE"),
      @Result(property = "phone", column = "PHONE"),
      @Result(property = "email", column = "EMAIL")
   })

   Student getById(int id);

   @Update(update)
   void update(Student student);

   @Delete(deleteById)
   void delete(int id);

   @Insert(insert)
   @Options(useGeneratedKeys = true, keyProperty = "id")
   void insert(Student student);
}
Annotations_Example.java File
This file would have application level logic to insert records in the Student table. Create and save mybatisInsert.java file as shown below −
import java.io.IOException;
import java.io.Reader;

import org.apache.ibatis.io.Resources;
import org.apache.ibatis.session.SqlSession;
import org.apache.ibatis.session.SqlSessionFactory;
import org.apache.ibatis.session.SqlSessionFactoryBuilder;

public class Annotations_Example {

   public static void main(String args[]) throws IOException{

      Reader reader = Resources.getResourceAsReader("SqlMapConfig.xml");
      SqlSessionFactory sqlSessionFactory = new SqlSessionFactoryBuilder().build(reader);
      SqlSession session = sqlSessionFactory.openSession();
      session.getConfiguration().addMapper(Student_mapper.class);

      Student_mapper mapper = session.getMapper(Student_mapper.class);

      //Create a new student object
      Student student = new Student();

      //Set the values
      student.setName("zara");
      student.setBranch("EEE");
      student.setEmail("zara@gmail.com");
      student.setPercentage(90));
      student.setPhone(123412341);

      //Insert student data
      mapper.insert(student);
      System.out.println("record inserted successfully");
      session.commit();
      session.close();

   }

}
Compilation and Execution
Here are the steps to compile and run the Annotations_Example.java file. Make sure, you have set PATH and CLASSPATH appropriately before proceeding for compilation and execution.
Create Student_mapper.java file as shown above and compile it.
Create SqlMapConfig.xml as shown in the MYBATIS - Configuration XML chapter of this tutorial.
Create Student.java as shown above and compile it.
Create Annotations_Example.java as shown above and compile it.
Execute Annotations_Example binary to run the program.
You would get the following result, and a record would be created in the STUDENT table.
$java Annotations_Example
Record Inserted Successfully
If you check the STUDENT table, it should display the following result −
mysql> select * from student;
+----+----------+--------+------------+-----------+----------------------+
| ID | NAME     | BRANCH | PERCENTAGE |   PHONE   |        EMAIL         |
+----+----------+--------+------------+-----------+----------------------+
|  1 | Mohammad |  It    |     80     | 900000000 | mohamad123@yahoo.com |
|  2 | Shyam    |  It    |     75     | 984800000 | shyam@gmail.com      |
|  3 | Zara     |  EEE   |     90     | 123412341 | zara@gmail.com       |
+----+----------+--------+------------+-----------+----------------------+
3 rows in set (0.08 sec)
In the same way, we can perform update, delete, and read operations using annotations by replacing the content of Annotations_Example.java with the respective snippets mentioned below −
Update
public static void main(String args[]) throws IOException{

   Reader reader = Resources.getResourceAsReader("SqlMapConfig.xml");
   SqlSessionFactory sqlSessionFactory = new SqlSessionFactoryBuilder().build(reader);
   SqlSession session = sqlSessionFactory.openSession();
   session.getConfiguration().addMapper(Student_mapper.class);
   Student_mapper mapper = session.getMapper(Student_mapper.class);

   //select a particular student using id
   Student student = mapper.getById(2);
   System.out.println("Current details of the student are "+student.toString());

   //Set new values to the mail and phone number of the student
   student.setEmail("Shyam123@yahoo.com");
   student.setPhone(984802233);

   //Update the student record
   mapper.update(student);
   System.out.println("Record updated successfully");
   session.commit();
   session.close();

}
Read
public static void main(String args[]) throws IOException{

   Reader reader = Resources.getResourceAsReader("SqlMapConfig.xml");
   SqlSessionFactory sqlSessionFactory = new SqlSessionFactoryBuilder().build(reader);
   SqlSession session = sqlSessionFactory.openSession();
   session.getConfiguration().addMapper(Student_mapper.class);
   Student_mapper mapper = session.getMapper(Student_mapper.class);

   //Get the student details
   Student student = mapper.getById(2);
   System.out.println(student.getBranch());
   System.out.println(student.getEmail());
   System.out.println(student.getId());
   System.out.println(student.getName());
   System.out.println(student.getPercentage());
   System.out.println(student.getPhone());
   session.commit();
   session.close();

}
Delete
public static void main(String args[]) throws IOException{

   Reader reader = Resources.getResourceAsReader("SqlMapConfig.xml");
   SqlSessionFactory sqlSessionFactory = new SqlSessionFactoryBuilder().build(reader);
   SqlSession session = sqlSessionFactory.openSession();
   session.getConfiguration().addMapper(Student_mapper.class);

   Student_mapper mapper = session.getMapper(Student_mapper.class);
   mapper.delete(2);
   System.out.println("record deleted successfully");
   session.commit();
   session.close();

}
MYBATIS - Stored Procedures
You can call a stored procedure using MyBatis. First of all, let us understand how to create a stored procedure in MySQL.
We have the following EMPLOYEE table in MySQL −
CREATE TABLE details.student(
   ID int(10) NOT NULL AUTO_INCREMENT,
   NAME varchar(100) NOT NULL,
   BRANCH varchar(255) NOT NULL,
   PERCENTAGE int(3) NOT NULL,
   PHONE int(11) NOT NULL,
   EMAIL varchar(255) NOT NULL,
   PRIMARY KEY (`ID`)
);
Let us create the following stored procedure in MySQL database −
DELIMITER //
   DROP PROCEDURE IF EXISTS details.read_recordById //
   CREATE PROCEDURE details.read_recordById (IN emp_id INT)

   BEGIN
      SELECT * FROM STUDENT WHERE ID = emp_id;
   END//

DELIMITER ;
Assume the table named STUDENT has two records as −
mysql> select * from STUDENT;
+----+----------+--------+------------+-----------+----------------------+
| ID |   NAME   | BRANCH | PERCENTAGE |  PHONE    |       EMAIL          |
+----+----------+--------+------------+-----------+----------------------+
|  1 | Mohammad |  It    |     80     | 900000000 | mohamad123@yahoo.com |
|  2 | Shyam    |  It    |     75     | 984800000 | shyam@gmail.com      |
+----+----------+--------+------------+-----------+----------------------+
2 rows in set (0.00 sec)
STUDENT POJO Class
To use stored procedure, you do not need to modify the Student.java file. Let us keep it as it was in the last chapter.
public class Student {

   private int id;
   private String name;
   private String branch;
   private int percentage;
   private int phone;
   private String email;

   public Student(int id, String name, String branch, int percentage, int phone, String email) {
      super();
      this.id = id;
      this.name = name;
      this.setBranch(branch);
      this.setPercentage(percentage);
      this.phone = phone;
      this.email = email;
   }

   public Student() {}

   public int getId() {
      return id;
   }

   public void setId(int id) {
      this.id = id;
   }

   public String getName() {
      return name;
   }

   public void setName(String name) {
      this.name = name;
   }

   public int getPhone() {
      return phone;
   }

   public void setPhone(int phone) {
      this.phone = phone;
   }

   public String getEmail() {
      return email;
   }

   public void setEmail(String email) {
      this.email = email;
   }

   public String getBranch() {
      return branch;
   }

   public void setBranch(String branch) {
      this.branch = branch;
   }

   public int getPercentage() {
      return percentage;
   }

   public void setPercentage(int percentage) {
      this.percentage = percentage;
   }

   public String toString(){
      StringBuilder sb = new StringBuilder();

      sb.append("Id = ").append(id).append(" - ");
      sb.append("Name = ").append(name).append(" - ");
      sb.append("Branch = ").append(branch).append(" - ");
      sb.append("Percentage = ").append(percentage).append(" - ");
      sb.append("Phone = ").append(phone).append(" - ");
      sb.append("Email = ").append(email);

      return sb.toString();
   }

}
Student.xml File
Unlike IBATIS, there is no <procedure> tag in MyBatis. To map the results of the procedures, we have created a resultmap named Student and to call the stored procedure named read_recordById. We have defined a select tag with id callById, and we use the same id in the application to call the procedure.
<?xml version = "1.0" encoding = "UTF-8"?>
<!DOCTYPE mapper PUBLIC "-//mybatis.org//DTD Mapper 3.0//EN" "http://mybatis.org/dtd/mybatis-3-mapper.dtd">

<mapper namespace = "Student">

   <resultMap id = "result" type = "Student">
      <result property = "id" column = "ID"/>
      <result property = "name" column = "NAME"/>
      <result property = "branch" column = "BRANCH"/>
      <result property = "percentage" column = "PERCENTAGE"/>
      <result property = "phone" column = "PHONE"/>
      <result property = "email" column = "EMAIL"/>
   </resultMap>

   <select id = "callById" resultMap = "result" parameterType = "Student" statementType = "CALLABLE">
      {call read_record_byid(#{id, jdbcType = INTEGER, mode = IN})}
   </select>

</mapper>
mybatisSP.java File
This file has application level logic to read the names of the employees from the Employee table using ResultMap −
import java.io.IOException;
import java.io.Reader;

import org.apache.ibatis.io.Resources;
import org.apache.ibatis.session.SqlSession;
import org.apache.ibatis.session.SqlSessionFactory;
import org.apache.ibatis.session.SqlSessionFactoryBuilder;

public class getRecords {

   public static void main(String args[]) throws IOException{

      Reader reader = Resources.getResourceAsReader("SqlMapConfig.xml");
      SqlSessionFactory sqlSessionFactory = new SqlSessionFactoryBuilder().build(reader);
      SqlSession session = sqlSessionFactory.openSession();

      //select a particular student  by  id
      Student student = (Student) session.selectOne("Student.callById", 3);

      //Print the student details
      System.out.println("Details of the student are:: ");
      System.out.println("Id :"+student.getId());
      System.out.println("Name :"+student.getName());
      System.out.println("Branch :"+student.getBranch());
      System.out.println("Percentage :"+student.getPercentage());
      System.out.println("Email :"+student.getEmail());
      System.out.println("Phone :"+student.getPhone());
      session.commit();
      session.close();

   }

}
Compilation and Run
Here are the steps to compile and run the getRecords program. Make sure, you have set PATH and CLASSPATH appropriately before proceeding for compilation and execution.
- Create Student.xml as shown above.
- Create Student.java as shown above and compile it.
- Create getRecords.java as shown above and compile it.
- Execute getRecords binary to run the program.
You will get the following result −
Details of the student are::
Id :2
Name :Shyam
Branch :It
Percentage :75
Email :shyam@gmail.com
Phone :984800000
MYBATIS - Dynamic SQL
Dynamic SQL is a very powerful feature of MyBatis. It enables programmers to build queries based on the scenario dynamically. For example, if you want to search the Student data base, based on the name of the student in MyBatis, you have to write the query using the dynamic SQL.
MyBatis uses a powerful Dynamic SQL language that can be used within any mapped SQL statement. Following are the OGNL based Dynamic SQL expressions provided by MyBatis.
- if
- choose (when, otherwise)
- trim (where, set)
- foreach
The if Statement
The most common thing to do in dynamic SQL is conditionally include a part of a where clause. For example −
<select id = "getRecByName" parameterType = "Student" resultType = "Student">

   SELECT * FROM STUDENT
   <if test = "name != null">
      WHERE name LIKE #{name}
   </if>
</select>
This statement provides an optional text search type of functionality. If you pass in no name, then all active records will be returned. But if you do pass in a name, it will look for a name with the given like condition.
You can include multiple if conditions as −
<select id = "getRecByName_Id" parameterType = "Student" resultType = "Student">

   SELECT * FROM STUDENT
   <if test = "name != null">
      WHERE name LIKE #{name}
   </if>

   <if test = "id != null">
      AND id LIKE #{id}
   </if>
</select>
The choose, when, and otherwise Statements
MyBatis offers a choose element, which is similar to Java's switch statement. It helps to choose only one case among many options.
The following example will search only by name if it is provided, and if the name is not given, then only by id −
<select id = "getRecByName_Id_phone" parameterType = "Student" resultType = "Student">
   SELECT * FROM Student WHERE id != 0

   <choose>
      <when test = "name != null">
         AND name LIKE #{name}
      </when>

      <when test = "phone != null">
         AND phone LIKE #{phone}
      </when>
   </choose>

</select>
The where Statement
Take a look at our previous examples to see what happens if none of the conditions are met. You would end up with an SQL that looks like this −
SELECT * FROM Student
WHERE
This would fail, but MyBatis has a simple solution with one simple change, everything works fine −
<select id = "getName_Id_phone" parameterType = "Student" resultType = "Student">
   SELECT * FROM STUDENT

   <where>
      <if test = "id != null">
         id = #{id}
      </if>

      <if test = "name != null">
         AND name LIKE #{name}
      </if>
   </where>

</select>
The where element inserts a WHERE only when the containing tags return any content. Furthermore, if that content begins with AND or OR, it knows to strip it off.
The foreach Statement
The foreach element allows you to specify a collection and declare item and index variables that can be used inside the body of the element.
It also allows you to specify opening and closing strings, and add a separator to place in between iterations. You can build an IN condition as follows −
<select id = "selectPostIn" resultType = "domain.blog.Post">
   SELECT *
   FROM POST P
   WHERE ID in

   <foreach item = "item" index = "index" collection = "list"
      open = "(" separator = "," close = ")">
      #{item}
   </foreach>

</select>
Dynamic SQL Example
This is an example if using dynamic SQL. Consider, we have the following Student table in MySQL −
CREATE TABLE details.student(
   ID int(10) NOT NULL AUTO_INCREMENT,
   NAME varchar(100) NOT NULL,
   BRANCH varchar(255) NOT NULL,
   PERCENTAGE int(3) NOT NULL,
   PHONE int(11) NOT NULL,
   EMAIL varchar(255) NOT NULL,
   PRIMARY KEY (`ID`)
);
Query OK, 0 rows affected (0.37 sec)
Lets assume this table has two records as −
mysql> select * from student;
+----+----------+--------+------------+-----------+----------------------+
| ID |   NAME   | BRANCH | PERCENTAGE |   PHONE   |        EMAIL         |
+----+----------+--------+------------+-----------+----------------------+
|  1 | Mohammad |   It   |     80     | 900000000 | mohamad123@yahoo.com |
|  2 | Shyam    |   It   |     75     | 984800000 | shyam@gmail.com      |
+----+----------+--------+------------+-----------+----------------------+
2 rows in set (0.00 sec)
Student POJO Class
To perform read operation, let us have a Student class in Student.java as −
public class Student {
   private int id;
   private String name;
   private String branch;
   private int percentage;
   private int phone;
   private String email;

   public Student(int id, String name,  String branch, int percentage, int phone, String email) {
      super();
      this.id = id;
      this.name = name;
      this.branch = branch;
      this.percentage = percentage;
      this.phone = phone;
      this.email = email;
   }

   public Student() {}

   public int getId() {
      return id;
   }

   public void setId(int id) {
      this.id = id;
   }

   public String getName() {
      return name;
   }

   public void setName(String name) {
      this.name = name;
   }

   public int getPhone() {
      return phone;
   }

   public void setPhone(int phone) {
      this.phone = phone;
   }

   public String getEmail() {
      return email;
   }

   public void setEmail(String email) {
      this.email = email;
   }

   public String getBranch() {
      return branch;
   }

   public void setBranch(String branch) {
      this.branch = branch;
   }

   public int getPercentage() {
      return percentage;
   }

   public void setPercentage(int percentage) {
      this.percentage = percentage;
   }

}
Student.xml File
This file contains the result map named Student, to map the results of the SELECT Query. We will define an "id" which will be used in mybatisRead.java for executing Dynamic SQL SELECT query on database.
<?xml version = "1.0" encoding = "UTF-8"?>

&l;t!DOCTYPE mapper PUBLIC "-//mybatis.org//DTD Mapper 3.0//EN" "http://mybatis.org/dtd/mybatis-3-mapper.dtd">

<mapper namespace = "Student">

   <resultMap id = "result" type = "Student">
      <result property = "id" column = "ID"/>
      <result property = "name" column = "NAME"/>
      <result property = "branch" column = "BRANCH"/>
      <result property = "percentage" column = "PERCENTAGE"/>
      <result property = "phone" column = "PHONE"/>
      <result property = "email" column = "EMAIL"/>
   </resultMap>

   <select id = "getRecByName" parameterType = "Student" resultType = "Student">
      SELECT * FROM STUDENT

      <if test = "name != null">
         WHERE name LIKE #{name}
      </if>

   </select>

</mapper>
GetRecordByName.java File
This file has application level logic to read conditional records from the Student table −
import java.io.IOException;
import java.io.Reader;
import java.util.List;

import org.apache.ibatis.io.Resources;
import org.apache.ibatis.session.SqlSession;
import org.apache.ibatis.session.SqlSessionFactory;
import org.apache.ibatis.session.SqlSessionFactoryBuilder;

public class GetRecordByName {

   public static void main(String args[]) throws IOException{

      String req_name = "Mohammad";
      Reader reader = Resources.getResourceAsReader("SqlMapConfig.xml");
      SqlSessionFactory sqlSessionFactory = new SqlSessionFactoryBuilder().build(reader);
      SqlSession session = sqlSessionFactory.openSession();
      Student stud = new Student();
      stud.setName(req_name);

      //select contact all contacts
      //List<Student> student = session.selectList("getRecByName",stud);

      stud.setId(1);
      List<Student> student = session.selectList("getRecByName_Id",stud);

      for(Student st : student ){

         System.out.println("++++++++++++++details of the student named Mohammad are "+"+++++++++++++++++++" );

         System.out.println("Id :  "+st.getId());
         System.out.println("Name :  "+st.getName());
         System.out.println("Branch :  "+st.getBranch());
         System.out.println("Percentage :  "+st.getPercentage());
         System.out.println("Email :  "+st.getEmail());
         System.out.println("Phone :  "+st.getPhone());

      }

      System.out.println("Records Read Successfully ");
      session.commit();
      session.close();
   }
}
Compilation and Run
Here are the steps to compile and run the above mentioned software. Make sure, you have set PATH and CLASSPATH appropriately before proceeding for compilation and execution.
- Create Student.xml as shown above.
- Create Student.java as shown above and compile it.
- Create GetRecordByName.java as shown above and compile it.
- Execute GetRecordByName binary to run the program.
You would get the following result, and a record would be read from the Student table.
++++++++++++++details of the student named Mohammad are +++++++++++++++++++
Id :  1
Name :  Mohammad
Branch :  It
Percentage :  80
Email :  mohamad123@yahoo.com
Phone :  90000000
Records Read Successfully
MYBATIS - Hibernate
There are major differences between MyBatis and Hibernate. Both the technologies work well, given their specific domain. MyBatis is suggested in case −
- You want to create your own SQL's and you are willing to maintain them.
- Your environment is driven by relational data model.
- You have to work on existing and complex schemas.
Use Hibernate, if the environment is driven by object model and needs to generate SQL automatically.
Difference between MyBatis and Hibernate
Both Hibernate and MyBatis are open source Object Relational Mapping (ORM) tools available in the industry. Use of each of these tools depends on the context you are using them.
The following table highlights the differences between MyBatis and Hibernate −
| MyBatis | Hibernate |
|---|---|
| It is simpler. It comes in a much smaller package size. | Hibernate generates SQL for you, which means you dont have to spend time on generating SQL. |
| It is flexible, offers faster development time. | It is highly scalable, provides a much more advanced cache. |
| It uses SQL, which could be database dependent. | It uses HQL, which is relatively independent of databases. It is easier to change db into Hibernate. |
| It maps the ResultSet from JDBC API to your POJO Objects, so you dont have to care about table structures. | Hibernate maps your Java POJO objects to the Database tables. |
| It is quite easy to use stored procedure in MyBatis. | Use of stored procedures is a little difficult in Hibernate. |
Hibernate and MyBatis both are compatible with the SPRING framework, so it should not be a problem to choose one of them.
