- MS Access - Home
- MS Access - Overview
- MS Access - RDBMS
- MS Access - Objects
- MS Access - Create Database
- MS Access - Data Types
- MS Access - Create Tables
- MS Access - Adding Data
- MS Access - Query Data
- MS Access - Query Criteria
- MS Access - Action Queries
- MS Access - Create Queries
- MS Access - Parameter Queries
- MS Access - Alternate Criteria
- MS Access - Relating Data
- MS Access - Create Relationships
- One-To-One Relationship
- One-To-Many Relationship
- Many-To-Many Relationship
- MS Access - Wildcards
- MS Access - Calculated Expression
- MS Access - Indexing
- MS Access - Grouping Data
- MS Access - Summarizing Data
- MS Access - Joins
- MS Access - Duplicate Query Wizard
- Unmatched Query Wizard
- MS Access - Create A Form
- MS Access - Modify A Form
- MS Access - Navigation Form
- MS Access - Combo Box
- MS Access - SQL View
- MS Access - Formatting
- MS Access - Controls & Properties
- MS Access - Reports Basics
- MS Access - Formatting Reports
- MS Access - Built-In Functions
- MS Access - Macros
- MS Access - Data Import
- MS Access - Data Export
MS Access - Quick Guide
Ms Access - Overview
Microsoft Access is a Database Management System (DBMS) from Microsoft that combines the relational Microsoft Jet Database Engine with a graphical user interface and softwaredevelopment tools. It is a member of the Microsoft Office suite of applications, included in the professional and higher editions.
Microsoft Access is just one part of Microsofts overall data management product strategy.
It stores data in its own format based on the Access Jet Database Engine.
Like relational databases, Microsoft Access also allows you to link related information easily. For example, customer and order data. However, Access 2013 also complements other database products because it has several powerful connectivity features.
It can also import or link directly to data stored in other applications and databases.
As its name implies, Access can work directly with data from other sources, including many popular PC database programs, with many SQL (Structured Query Language) databases on the desktop, on servers, on minicomputers, or on mainframes, and with data stored on Internet or intranet web servers.
Access can also understand and use a wide variety of other data formats, including many other database file structures.
You can export data to and import data from word processing files, spreadsheets, or database files directly.
Access can work with most popular databases that support the Open Database Connectivity (ODBC) standard, including SQL Server, Oracle, and DB2.
Software developers can use Microsoft Access to develop application software.
Microsoft Access stores information which is called a database. To use MS Access, you will need to follow these four steps −
Database Creation − Create your Microsoft Access database and specify what kind of data you will be storing.
Data Input − After your database is created, the data of every business day can be entered into the Access database.
Query − This is a fancy term to basically describe the process of retrieving information from the database.
Report (optional) − Information from the database is organized in a nice presentation that can be printed in an Access Report.
Architecture
Access calls anything that can have a name an object. Within an Access desktop database, the main objects are tables, queries, forms, reports, macros, data macros, and modules.
If you have worked with other database systems on desktop computers, you might have seen the term database used to refer to only those files in which you store data.
But, in Access, a desktop database (.accdb) also includes all the major objects related to the stored data, including objects you define to automate the use of your data.
Ms Access - RDBMS
Microsoft Access has the look and feel of other Microsoft Office products as far as its layout and navigational aspects are concerned, but MS Access is a database and, more specifically, a relational database.
Before MS Access 2007, the file extension was *.mdb, but in MS Access 2007 the extension has been changed to *.accdb extension.
Early versions of Access cannot read accdb extensions but MS Access 2007 and later versions can read and change earlier versions of Access.
An Access desktop database (.accdb or .mdb) is a fully functional RDBMS.
It provides all the data definition, data manipulation, and data control features that you need to manage large volumes of data.
You can use an Access desktop database (.accdb or .mdb) either as a standalone RDBMS on a single workstation or in a shared client/server mode across a network.
A desktop database can also act as the data source for data displayed on webpages on your company intranet.
When you build an application with an Access desktop database, Access is the RDBMS.
Data Definition
Let us now understand what Data Definition is −
In document or a spreadsheet, you generally have complete freedom to define the contents of the document or each cell in the spreadsheet.
In a document, you can include paragraphs of text, a table, a chart, or multiple columns of data displayed with multiple fonts.
In spreadsheet, you can have text data at the top to define a column header for printing or display, and you might have various numeric formats within the same column, depending on the function of the row.
An RDBMS allows you to define the kind of data you have and how the data should be stored.
You can also usually define rules that the RDBMS can use to ensure the integrity of your data.
For example, a validation rule might ensure that the user cant accidentally store alphabetic characters in a field that should contain a number.
Data Manipulation
Working with data in RDBMS is very different from working with data in a word processing or spreadsheet program.
In a word processing document, you can include tabular data and perform a limited set of functions on the data in the document.
You can also search for text strings in the original document and, with ActiveX controls, include tables, charts, or pictures from other applications.
In a spreadsheet, some cells contain functions that determine the result you want, and in other cells, you enter the data that provides the source information for the functions.
You can search a single table for information or request a complex search across several related tables.
You can update a single field or many records with a single command.
You can write programs that use RDBMS commands to fetch data that you want to display and allow the user to update the data.
An RDBMS provides you many ways to work with your data. For example,
Access uses the powerful SQL database language to process data in your tables. Using SQL, you can define the set of information that you need to solve a particular problem, including data from perhaps many tables.
Data Control
Spreadsheets and word processing documents are great for solving single-user problems, but they are difficult to use when more than one person needs to share the data.
When you need to share your information with others, RDBMS gives you the flexibility to allow multiple users to read or update your data.
An RDBMS that is designed to allow data sharing also provides features to ensure that no two people can change the same data at the same time.
The best systems also allow you to group changes (which is also known as transaction) so that either all the changes or none of the changes appear in your data.
You might also want to be sure that no one else can view any part of the order until you have entered all of it.
Because you can share your Access data with other users, you might need to set some restrictions on what various users are allowed to see or update.
Ms Access - Objects
MS Access uses objects" to help the user list and organize information, as well as prepare specially designed reports. When you create a database, Access offers you Tables, Queries, Forms, Reports, Macros, and Modules. Databases in Access are composed of many objects but the following are the major objects −
- Tables
- Queries
- Forms
- Reports
Together, these objects allow you to enter, store, analyze, and compile your data. Here is a summary of the major objects in an Access database;
Table
Table is an object that is used to define and store data. When you create a new table, Access asks you to define fields which is also known as column headings.
Each field must have a unique name, and data type.
Tables contain fields or columns that store different kinds of data, such as a name or an address, and records or rows that collect all the information about a particular instance of the subject, such as all the information about a customer or employee etc.
You can define a primary key, one or more fields that have a unique value for each record, and one or more indexes on each table to help retrieve your data more quickly.
Query
An object that provides a custom view of data from one or more tables. Queries are a way of searching for and compiling data from one or more tables.
Running a query is like asking a detailed question of your database.
When you build a query in Access, you are defining specific search conditions to find exactly the data you want.
In Access, you can use the graphical query by example facility or you can write Structured Query Language (SQL) statements to create your queries.
You can define queries to Select, Update, Insert, or Delete data.
You can also define queries that create new tables from data in one or more existing tables.
Form
Form is an object in a desktop database designed primarily for data input or display or for control of application execution. You use forms to customize the presentation of data that your application extracts from queries or tables.
Forms are used for entering, modifying, and viewing records.
The reason forms are used so often is that they are an easy way to guide people toward entering data correctly.
When you enter information into a form in Access, the data goes exactly where the database designer wants it to go in one or more related tables.
Report
Report is an object in desktop databases designed for formatting, calculating, printing, and summarizing selected data.
You can view a report on your screen before you print it.
If forms are for input purposes, then reports are for output.
Anything you plan to print deserves a report, whether it is a list of names and addresses, a financial summary for a period, or a set of mailing labels.
Reports are useful because they allow you to present components of your database in an easy-to-read format.
You can even customize a report's appearance to make it visually appealing.
Access offers you the ability to create a report from any table or query.
Other MS Access Objects
Let us now take a look at other MS Access objects.
Macro
This object is a structured definition of one or more actions that you want Access to perform in response to a defined event. An Access Macro is a script for doing some job. For example, to create a button which opens a report, you could use a macro which will fire OpenReport action.
You can include simple conditions in macros to specify when one or more actions in the macro should be performed or skipped.
You can use macros to open and execute queries, to open tables, or to print or view reports.
You can also run other macros or Visual Basic procedures from within a macro.
Data macros can be attached directly to table events such as inserting new records, editing existing records, or deleting records.
Data macros in web apps can also be stand-alone objects that can be called from other data macros or macro objects.
Module
Module is an object in desktop databases containing custom procedures that you code using Visual Basic. Modules provide a more discrete flow of actions and allow you to trap errors.
Everything that can be done in a macro can also be done in a module, but you don't get the macro interface that prompts you what is needed for each action.
Modules are far more powerful, and are essential if you plan to write code for a multi-user environment, because macros cannot include error handling.
Modules can be standalone objects containing functions that can be called from anywhere in your application, or they can be directly associated with a form or a report to respond to events on the associated form or report.
Ms Access - Create Database
In this chapter, we will be covering the basic process of starting Access and creating a database. This chapter will also explain how to create a desktop database by using a template and how to build a database from scratch.
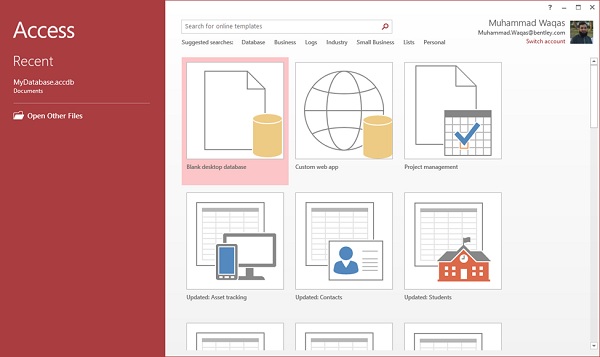
To create a database from a template, we first need to open MS Access and you will see the following screen in which different Access database templates are displayed.
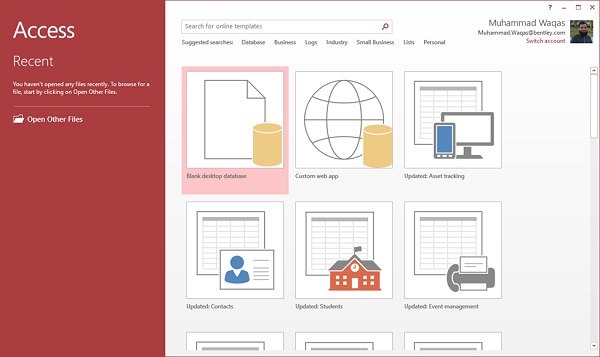
To view the all the possible databases, you can scroll down or you can also use the search box.
Let us enter project in the search box and press Enter. You will see the database templates related to project management.
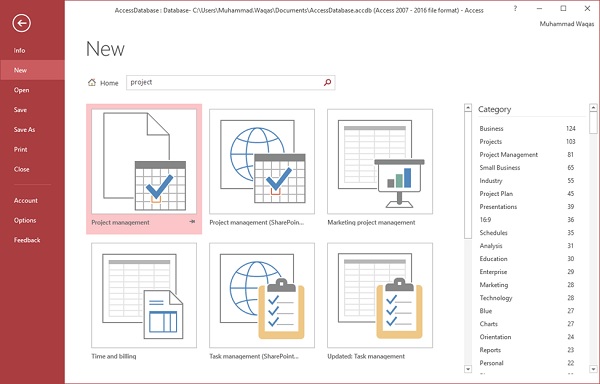
Select the first template. You will see more information related to this template.
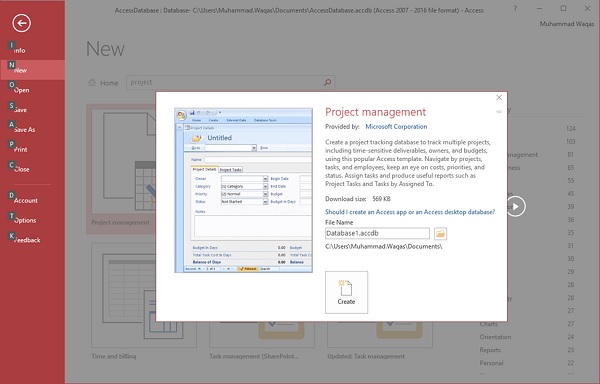
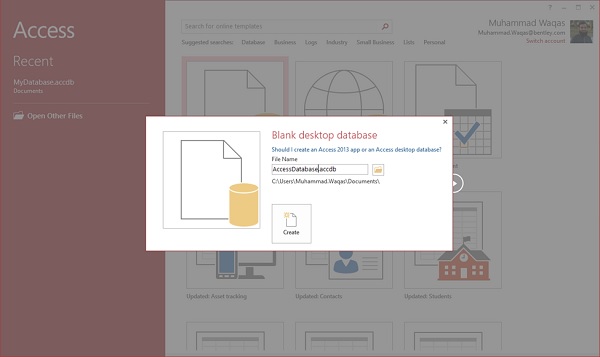
After selecting a template related to your requirements, enter a name in the File name field and you can also specify another location for your file if you want.
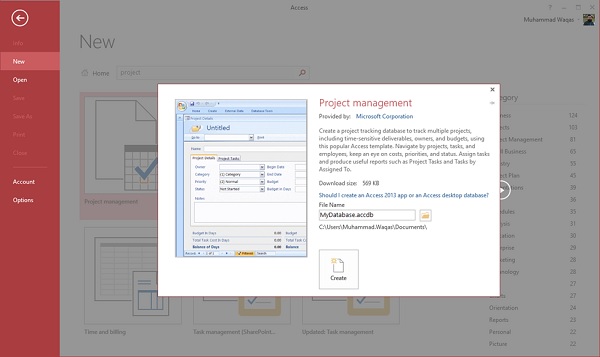
Now, press the Create option. Access will download that database template and open a new blank database as shown in the following screenshot.
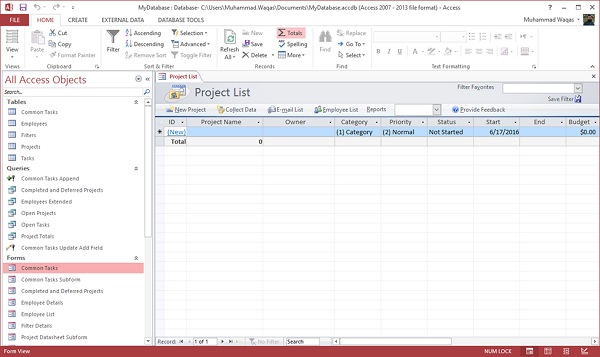
Now, click the Navigation pane on the left side and you will see all the other objects that come with this database.
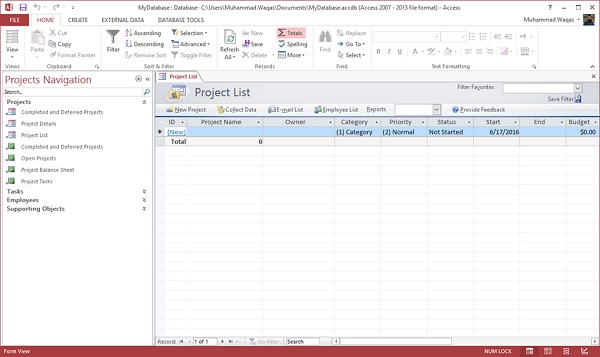
Click the Projects Navigation and select the Object Type in the menu.

You will now see all the objects types tables, queries, etc.
Create Blank Database
Sometimes database requirements can be so specific that using and modifying the existing templates requires more work than just creating a database from scratch. In such case, we make use of blank database.
Step 1 − Let us now start by opening MS Access.
Step 2 − Select Blank desktop database. Enter the name and click the Create button.
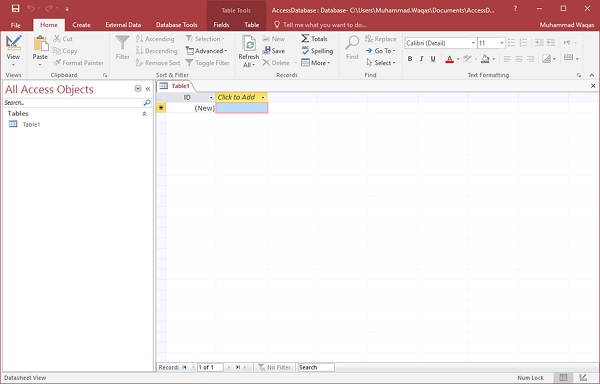
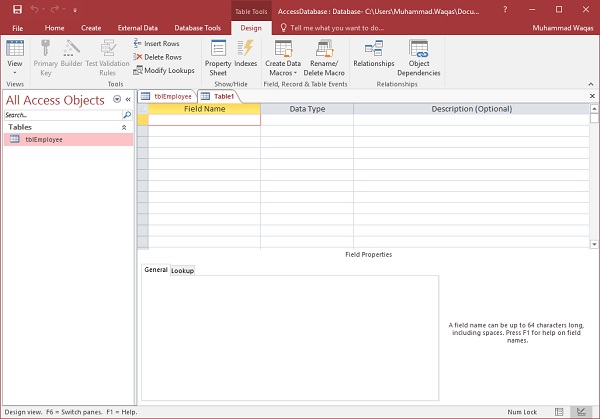
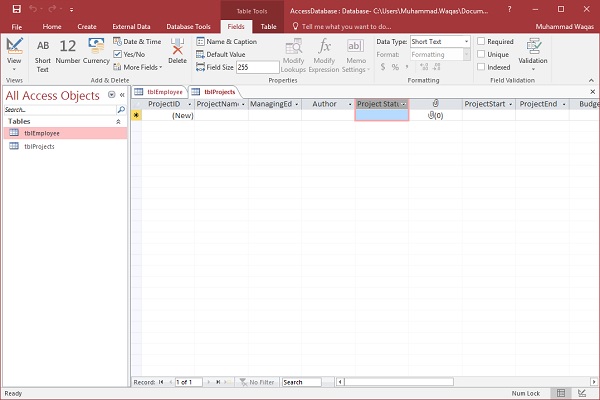
Step 3 − Access will create a new blank database and will open up the table which is also completely blank.
Ms Access - Data Types
Every field in a table has properties and these properties define the field's characteristics and behavior. The most important property for a field is its data type. A field's data type determines what kind of data it can store. MS Access supports different types of data, each with a specific purpose.
- The data type determines the kind of the values that users can store in any given field.
- Each field can store data consisting of only a single data type.
Here are some of the most common data types you will find used in a typical Microsoft Access database.
| Type of Data | Description | Size |
|---|---|---|
| Short Text | Text or combinations of text and numbers, including numbers that do not require calculating (e.g. phone numbers). | Up to 255 characters. |
| Long Text | Lengthy text or combinations of text and numbers. | Up to 63, 999 characters. |
| Number | Numeric data used in mathematical calculations. | 1, 2, 4, or 8 bytes (16 bytes if set to Replication ID). |
| Date/Time | Date and time values for the years 100 through 9999. | 8 bytes |
| Currency | Currency values and numeric data used in mathematical calculations involving data with one to four decimal places. | 8 bytes |
| AutoNumber | A unique sequential (incremented by 1) number or random number assigned by Microsoft Access whenever a new record is added to a table. | 4 bytes (16 bytes if set to Replication ID). |
| Yes/No | Yes and No values and fields that contain only one of two values (Yes/No, True/False, or On/Off). | 1 bit. |
If you use previous versions of Access, you will notice a difference for two of those data types.
In Access 2013, we now have two data types short text and long text. In previous versions of Access these data types were called text and memo.
The text field is referred to as short text and your memo field is now called long text.
Here are some of the other more specialized data types, you can choose from in Access.
| Data Types | Description | Size |
|---|---|---|
Attachment |
Files, such as digital photos. Multiple files can be attached per record. This data type is not available in earlier versions of Access. |
Up to about 2 GB. |
OLE objects |
OLE objects can store pictures, audio, video, or other BLOBs (Binary Large Objects) |
Up to about 2 GB. |
Hyperlink |
Text or combinations of text and numbers stored as text and used as a hyperlink address. |
Up to 8,192 (each part of a Hyperlink data type can contain up to 2048 characters). |
Lookup Wizard |
The Lookup Wizard entry in the Data Type column in the Design view is not actually a data type. When you choose this entry, a wizard starts to help you define either a simple or complex lookup field. A simple lookup field uses the contents of another table or a value list to validate the contents of a single value per row. A complex lookup field allows you to store multiple values of the same data type in each row. |
Dependent on the data type of the lookup field. |
Calculated |
You can create an expression that uses data from one or more fields. You can designate different result data types from the expression. |
You can create an expression that uses data from one or more fields. You can designate different result data types from the expression. |
These are all the different data types that you can choose from when creating fields in a Microsoft Access table.
Ms Access - Create Tables
When you create a database, you store your data in tables. Because other database objects depend so heavily on tables, you should always start your design of a database by creating all of its tables and then creating any other object. Before you create tables, carefully consider your requirements and determine all the tables that you need.
Let us try and create the first table that will store the basic contact information concerning the employees as shown in the following table −
| Field Name | Data Type |
|---|---|
| EmployeelD | AutoNumber |
| FirstName | Short Text |
| LastName | Short Text |
| Address1 | Short Text |
| Address2 | Short Text |
| City | Short Text |
| State | Short Text |
| Zip | Short Text |
| Phone | Short Text |
| Phone Type | Short Text |
Let us now have short text as the data type for all these fields and open a blank database in Access.
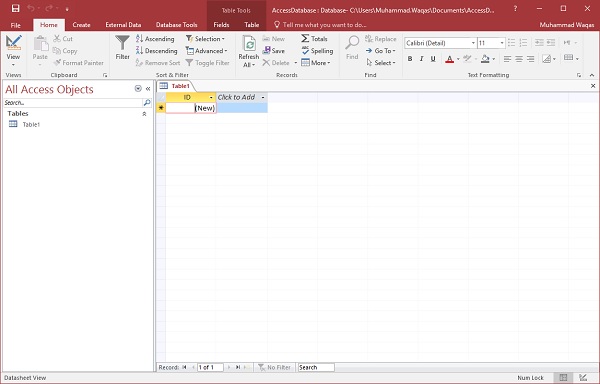
This is where we left things off. We created the database and then Access automatically opened up this table-one-datasheet view for a table.
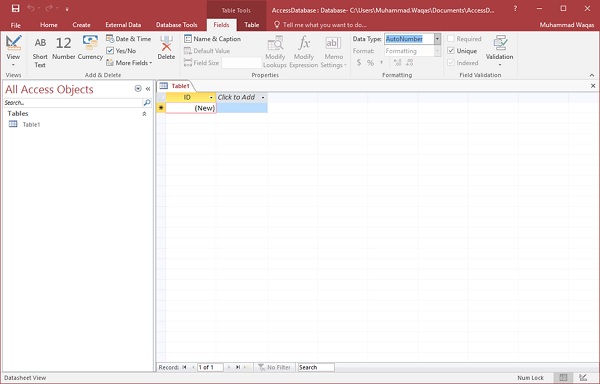
Let us now go to the Field tab and you will see that it is also automatically created. The ID which is an AutoNumber field acts as our unique identifier and is the primary key for this table.
The ID field has already been created and we now want to rename it to suit our conditions. This is an Employee table and this will be the unique identifier for our employees.
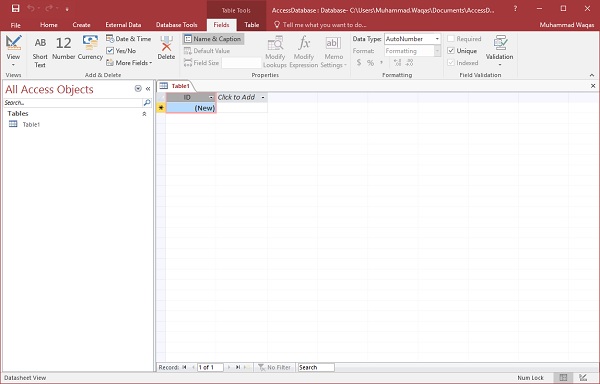
Click on the Name & Caption option in the Ribbon and you will see the following dialog box.
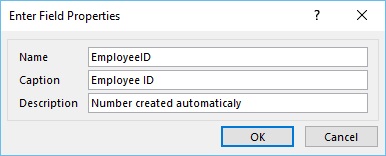
Change the name of this field to EmployeeID to make it more specific to this table. Enter the other optional information if you want and click Ok.

We now have our employee ID field with the caption Employee ID. This is automatically set to auto number so we don't really need to change the data type.
Let us now add some more fields by clicking on click to add.
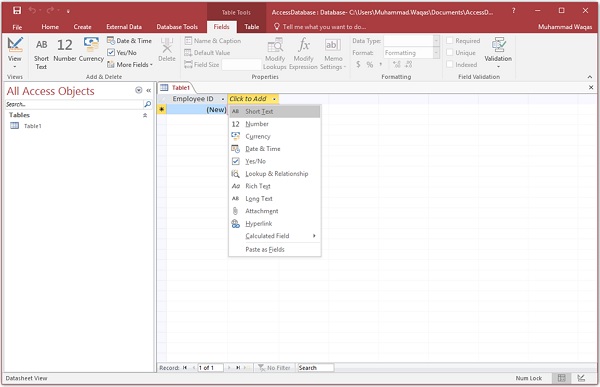
Choose Short Text as the field. When you choose short text, Access will then highlight that field name automatically and all you have to do is type the field name.
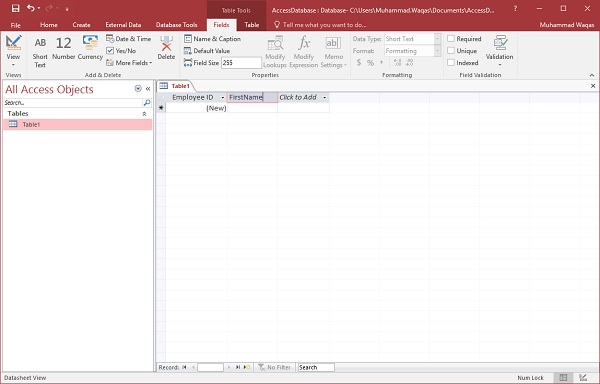
Type FirstName as the field name. Similarly, add all the required fields as shown in the following screenshot.
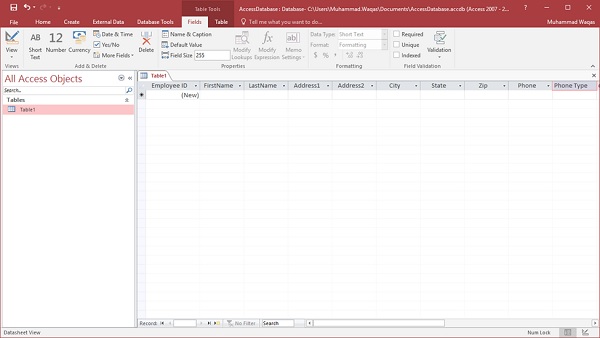
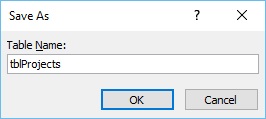
Once all the fields are added, click the Save icon.
You will now see the Save As dialog box, where you can enter a table name for the table.
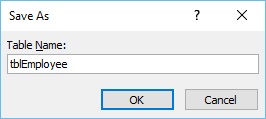
Enter the name of your table in the Table Name field. Here the tbl prefix stands for table. Let us click Ok and you will see your table in the navigation pane.
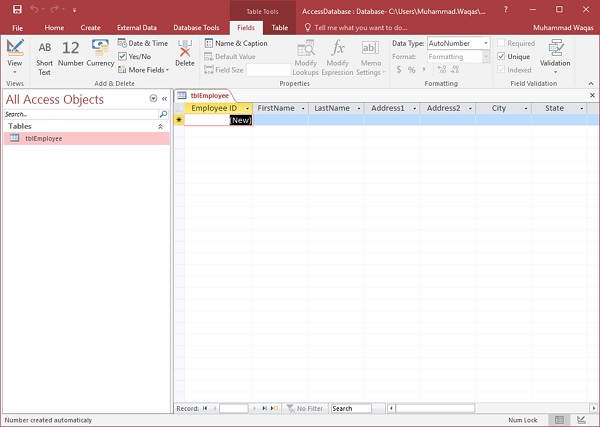
Table Design View
As we have already created one table using Datasheet View. We will now create another table using the Table Design View. We will be creating the following fields in this table. These tables will store some of the information for various book projects.
| Field Name | Data Type |
|---|---|
| Project ID | AutoNumber |
| ProjectName | Short Text |
| ManagingEditor | Short Text |
| Author | Short Text |
| PStatus | Short Text |
| Contracts | Attachment |
| ProjectStart | Date/Time |
| ProjectEnd | Date/Time |
| Budget | Currency |
| ProjectNotes | Long Text |
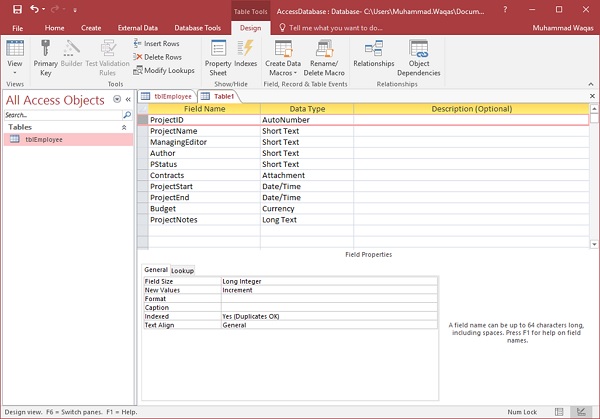
Let us now go to the Create tab.

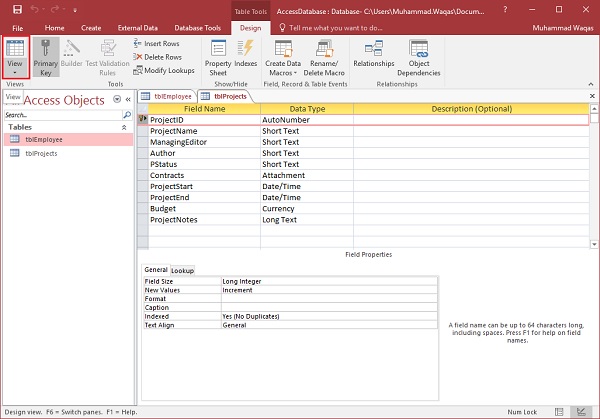
In the tables group, click on Table and you can see this looks completely different from the Datasheet View. In this view, you can see the field name and data type side by side.
We now need to make ProjectID a primary key for this table, so let us select ProjectID and click on Primary Key option in the ribbon.
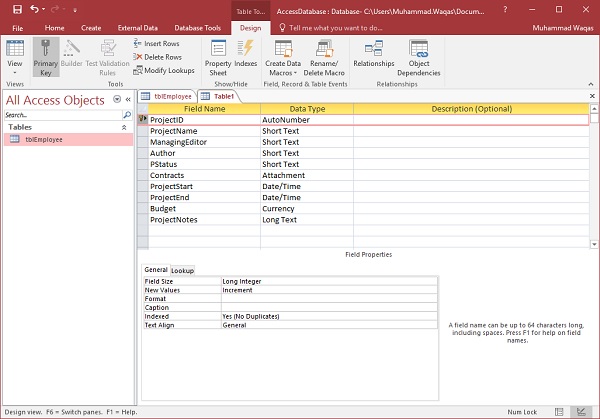
You can now see a little key icon that will show up next to that field. This shows that the field is part of the tables primary key.
Let us save this table and give this table a name.
Click Ok and you can now see what this table looks like in the Datasheet View.
Let us click the datasheet view button on the top left corner of the ribbon.
If you ever want to make changes to this table or any specific field, you don't always have to go back to the Design View to change it. You can also change it from the Datasheet View. Let us update the PStatus field as shown in the following screenshot.

Click Ok and you will see the changes.
Ms Access - Adding Data
An Access database is not a file in the same sense as a Microsoft Office Word document or a Microsoft Office PowerPoint are. Instead, an Access database is a collection of objects like tables, forms, reports, queries etc. that must work together for a database to function properly. We have now created two tables with all of the fields and field properties necessary in our database. To view, change, insert, or delete data in a table within Access, you can use the tables Datasheet View.
A datasheet is a simple way to look at your data in rows and columns without any special formatting.
Whenever you create a new web table, Access automatically creates two views that you can start using immediately for data entry.
A table open in Datasheet View resembles an Excel worksheet, and you can type or paste data into one or more fields.
You do not need to explicitly save your data. Access commits your changes to the table when you move the cursor to a new field in the same row, or when you move the cursor to another row.
By default, the fields in an Access database are set to accept a specific type of data, such as text or numbers. You must enter the type of data that the field is set to accept. If you don't, Access displays an error message −
Let us add some data into your tables by opening the Access database we have created.

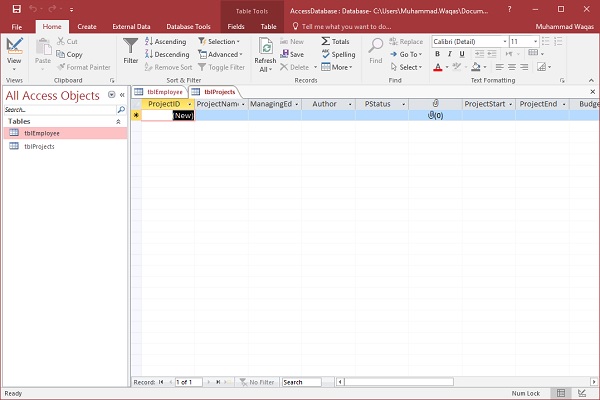
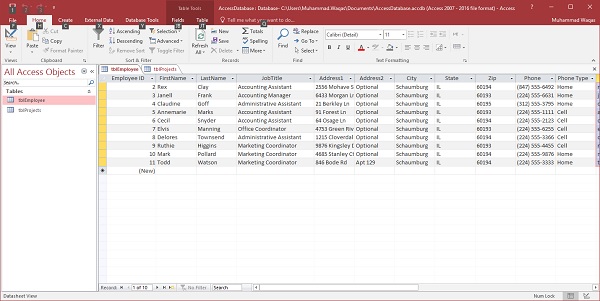
Select the Views → Datasheet View option in the ribbon and add some data as shown in the following screenshot.
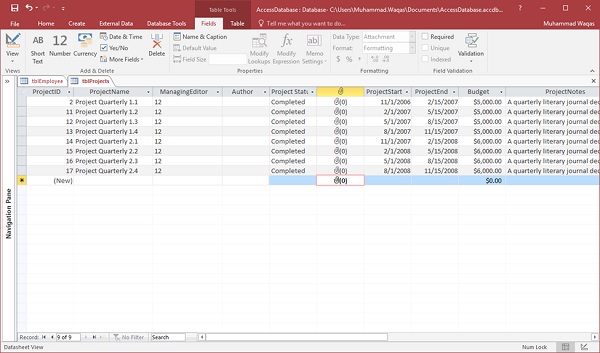
Similarly, add some data in the second table as well as shown in the following screenshot.
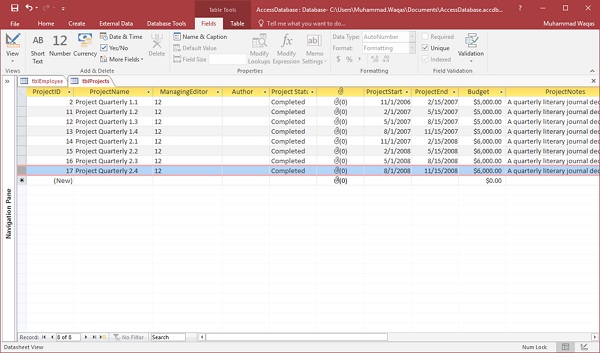
You can now see that inserting a new data and updating the existing data is very simple in Datasheet View as working in spreadsheet. But if you want to delete any data you need to select the entire row first as shown in the following screenshot.
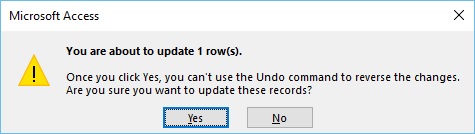
Now press the delete button. This will display the confirmation message.
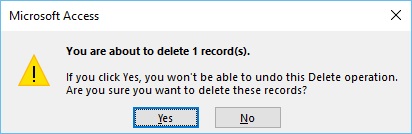
Click Yes and you will see that the selected record is deleted now.
Ms Access - Query Data
A query is a request for data results, and for action on data. You can use a query to answer a simple question, to perform calculations, to combine data from different tables, or even to add, change, or delete table data.
As tables grow in size they can have hundreds of thousands of records, which makes it impossible for the user to pick out specific records from that table.
With a query you can apply a filter to the table's data, so that you only get the information that you want.
Queries that you use to retrieve data from a table or to make calculations are called select queries.
Queries that add, change, or delete data are called action queries.
You can also use a query to supply data for a form or report.
In a well-designed database, the data that you want to present by using a form or report is often located in several different tables.
The tricky part of queries is that you must understand how to construct one before you can actually use them.
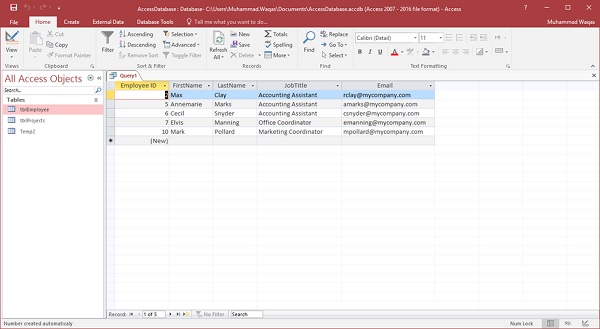
Create Select Query
If you want to review data from only certain fields in a table, or review data from multiple tables simultaneously or maybe just see the databased on certain criteria, you can use the Select query. Let us now look into a simple example in which we will create a simple query which will retrieve information from tblEmployees table. Open the database and click on the Create tab.
Click Query Design.
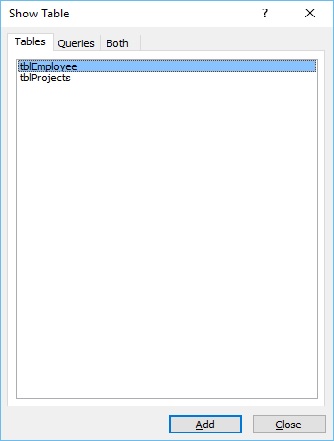
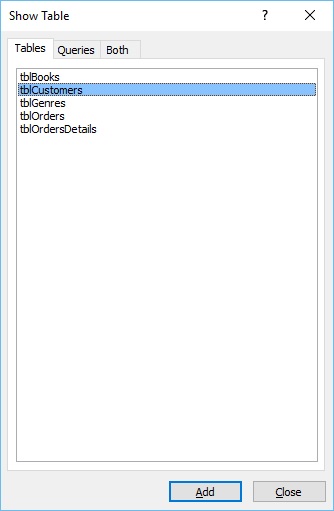
In the Tables tab, on the Show Table dialog, double-click the tblEmployees table and then Close the dialog box.

In the tblEmployees table, double-click all those fields which you want to see as result of the query. Add these fields to the query design grid as shown in the following screenshot.
Now click Run on the Design tab, then click Run.
The query runs, and displays only data in those field which is specified in the query.
Ms Access - Query Criteria
Query criteria helps you to retrieve specific items from an Access database. If an item matches with all the criteria you enter, it appears in the query results. When you want to limit the results of a query based on the values in a field, you use query criteria.
A query criterion is an expression that Access compares to query field values to determine whether to include the record that contains each value.
Some criteria are simple, and use basic operators and constants. Others are complex, and use functions, special operators, and include field references.
To add some criteria to a query, you must open the query in the Design View.
You then identify the fields for which you want to specify criteria.
Example
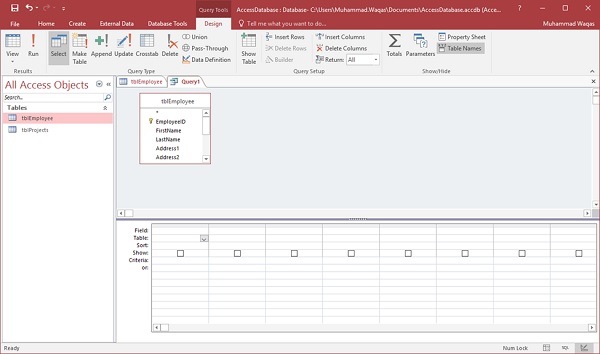
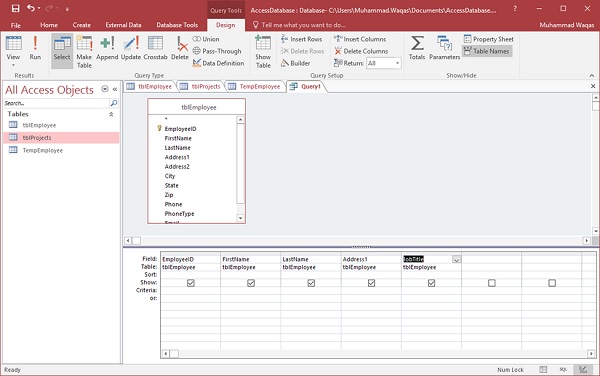
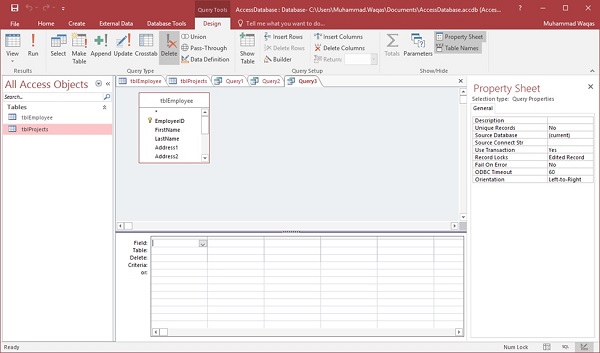
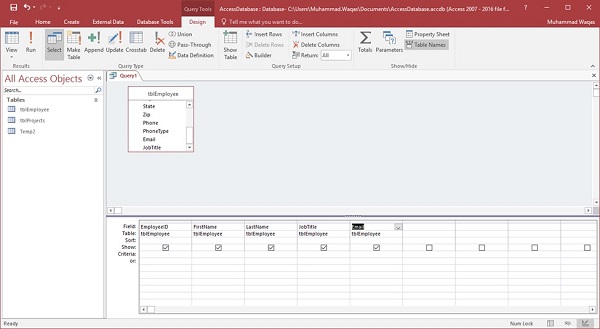
Lets look at a simple example in which we will use criteria in a query. First open your Access database and then go to the Create tab and click on Query Design.
In the Tables tab on Show Table dialog, double-click on the tblEmployees table and then close the dialog box.
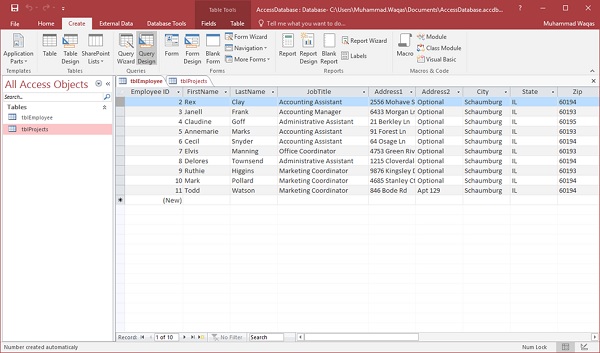
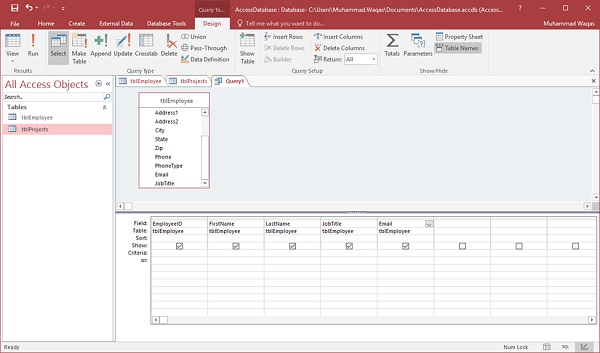
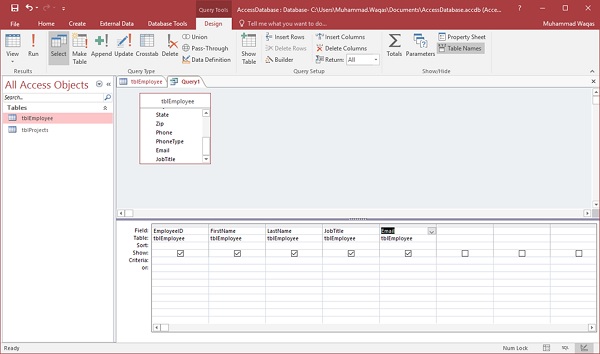
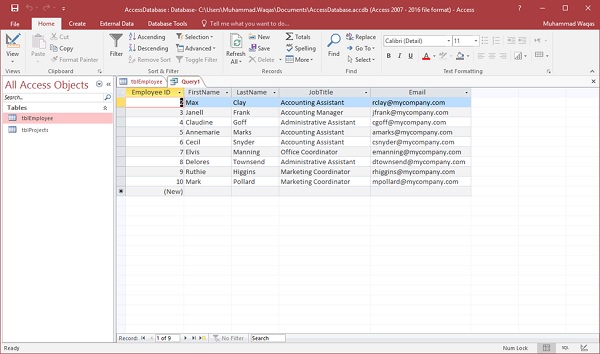
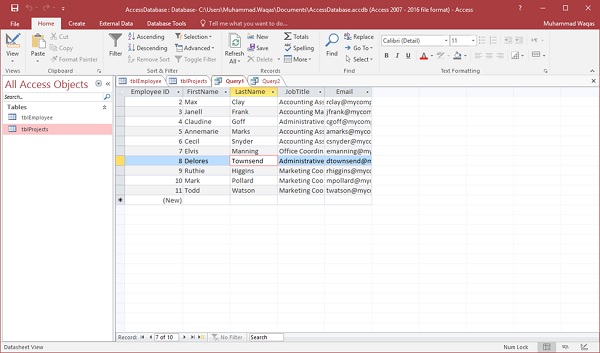
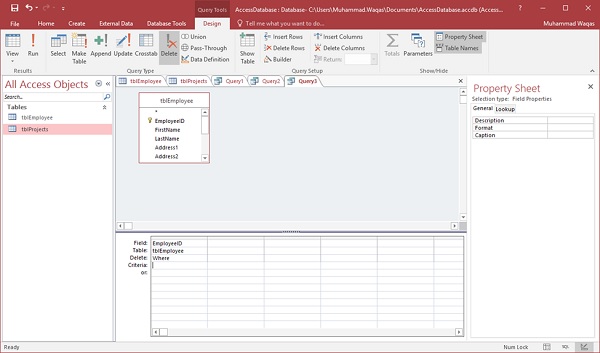
Let us now add some field to the query grid such as EmployeeID, FirstName, LastName, JobTitle and Email as shown in the following screenshot.
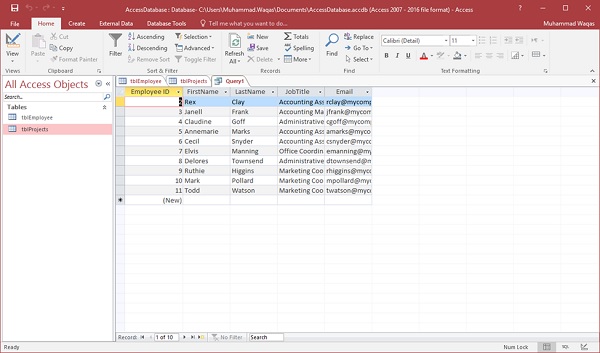
Let us now run your query and you will see only these fields as query result.
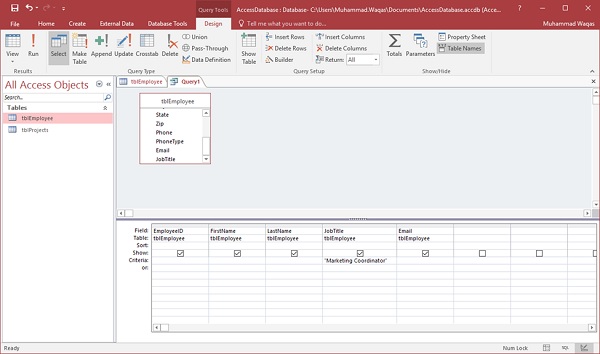
If you want to see only those whose JobTitle are Marketing Coordinator then you will need to add the criteria for that. Lets go to the Query Design again and in Criteria row of JobTitle enter Marketing Coordinator.
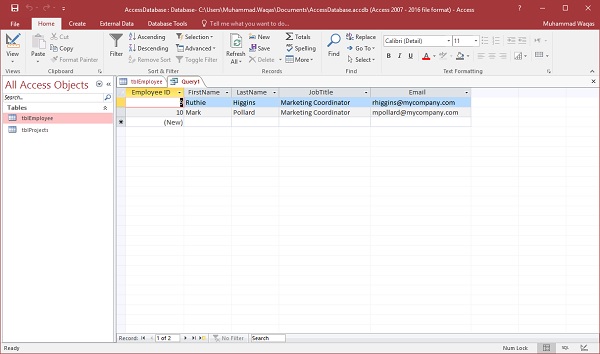
Let us now run your query again and you will see that only Job title of Marketing Coordinators are retrieved.
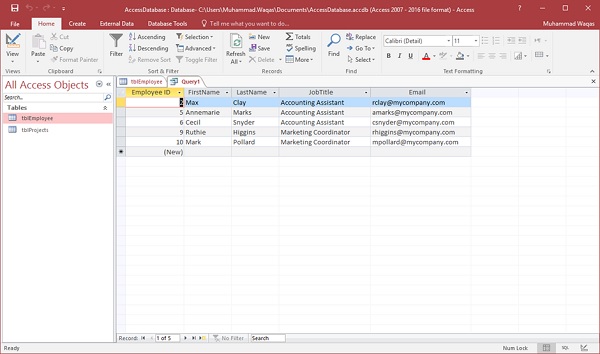
If you want to add criteria for multiple fields, just add the criteria in multiple fields. Let us say we want to retrieve data only for Marketing Coordinator and Accounting Assistant; we can specify the OR row operator as shown in the following screenshot −

Let us now run your query again and you will see the following results.
If you need to use the functionality of the AND operator, then you have to specify the other condition in the Criteria row. Let us say we want to retrieve all Accounting Assistants but only those Marketing Coordinator titles with Pollard as last name.

Let us now run your query again and you will see the following results.
Ms Access - Action Queries
In MS Access and other DBMS systems, queries can do a lot more than just displaying data, but they can actually perform various actions on the data in your database.
Action queries are queries that can add, change, or delete multiple records at one time.
The added benefit is that you can preview the query results in Access before you run it.
Microsoft Access provides 4 different types of Action Queries −
Append
Update
Delete
Make-table
An action query cannot be undone. You should consider making a backup of any tables that you will update by using an update query.
Create an Append Query
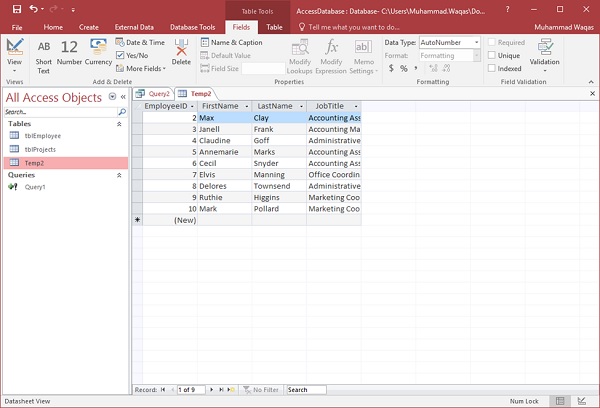
You can use an Append Query to retrieve data from one or more tables and add that data to another table. Let us create a new table in which we will add data from the tblEmployees table. This will be temporary table for demo purpose.
Let us call it TempEmployees and this contains the fields as shown in the following screenshot.
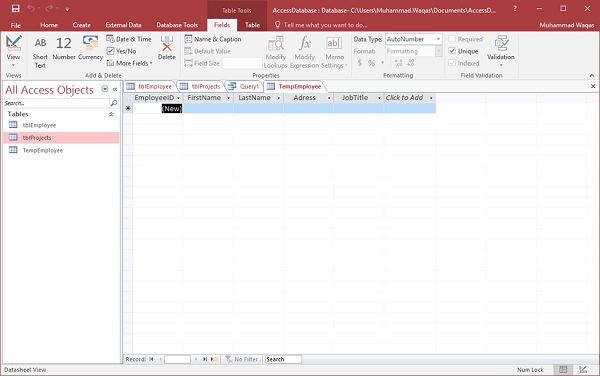

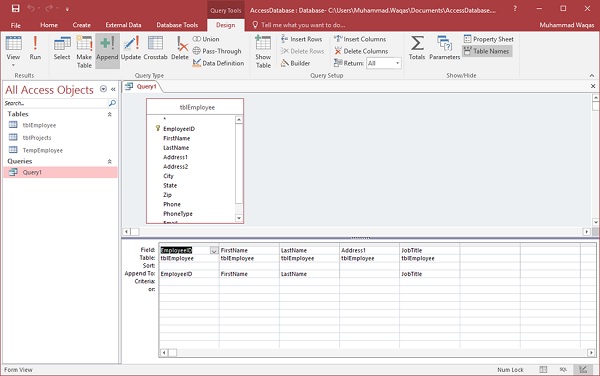
In the Tables tab, on the Show Table dialog box, double-click on the tblEmployees table and then close the dialog box. Double-click on the field you want to be displayed.
Let us run your query to display the data first.
Now let us go back to Query design and select the Append button.
In the Query Type, select the Append option button. This will display the following dialog box.
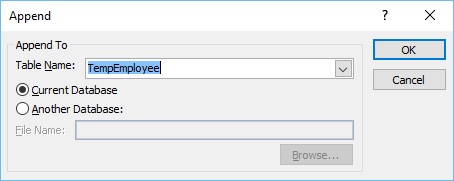
Select the table name from the drop-down list and click Ok.
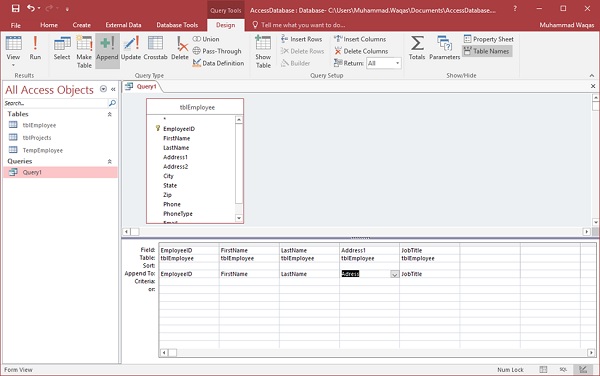
In the Query grid, you can see that in the Append To row all the field are selected by default except Address1. This because that Address1 field is not available in the TempEmployee table. So, we need to select the field from the drop-down list.
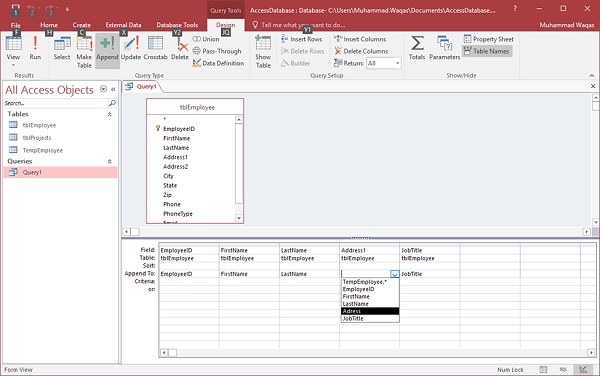
Let us look into the Address field.
Let us now run your query and you will see the following confirmation message.
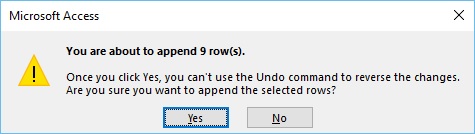
Click Yes to confirm your action.
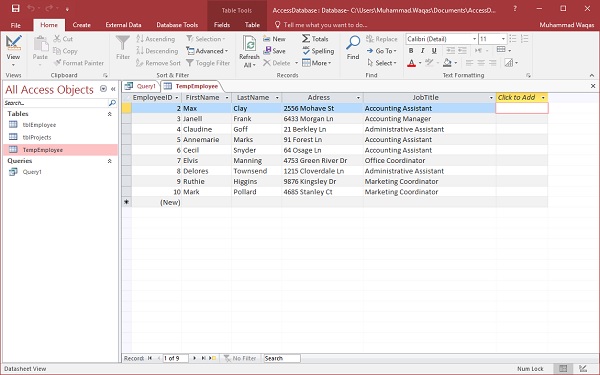
When you open the TempEmployee table, you will see all the data is added from the tblEmployees to the TempEmployee table.
Ms Access - Create Queries
Let us understand how to create queries in this chapter.
Create an Update Query
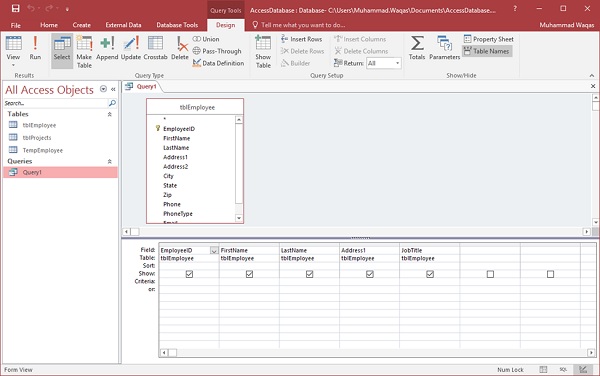
You can use an Update Query to change the data in your tables, and you can use an update query to enter criteria to specify which rows should be updated. An update query provides you an opportunity to review the updated data before you perform the update. Let us go to the Create tab again and click Query Design.
In the Tables tab, on the Show Table dialog box, double-click on the tblEmployees table and then close the dialog box.
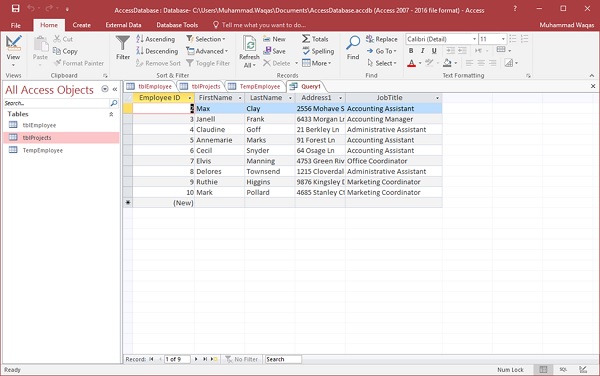
On the Design tab, in the Query Type group, click Update and double-click on the field in which you want to update the value. Let us say we want to update the FirstName of Rex to Max.
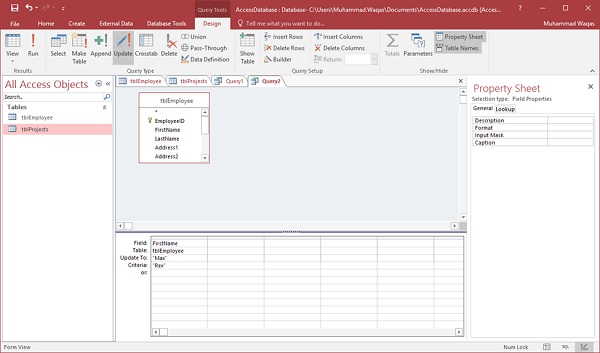
In the Update row of the Design grid, enter the updated value and in Criteria row add the original value which you want to be updated and run the query. This will display the confirmation message.
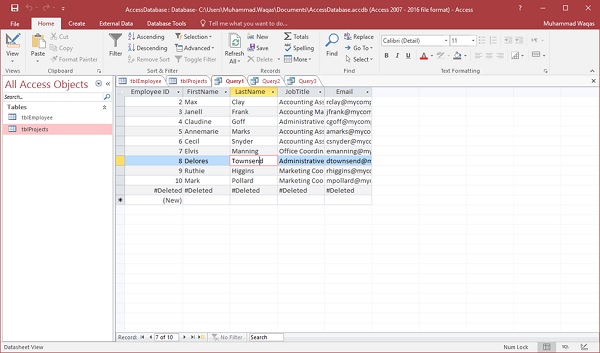
Click Yes and go to Datasheet View and you will see the first record FirstName is updated to Max now.
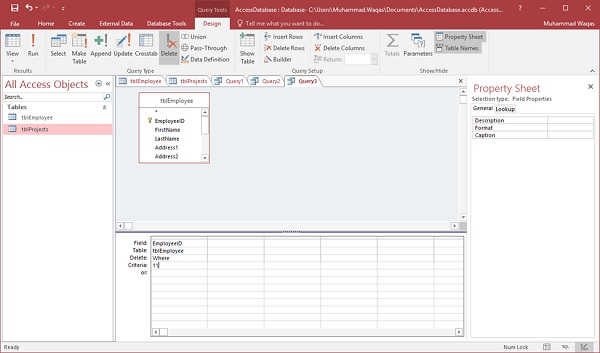
Create a Delete Query
You can use a delete query to delete data from your tables, and you can use a delete query to enter criteria to specify which rows should be deleted. A Delete Query provides you an opportunity to review the rows that will be deleted before you perform the deletion. Let us go to the Create tab again and click Query Design.
In the Tables tab on the Show Table dialog box, double-click the tblEmployees table and then close the dialog box.
On the Design tab, in the Query Type group, click Delete and double-click on the EmployeeID.
In the Criteria row of the Design Grid, type 11. Here we want to delete an employee whose EmployeeID is 11.
Let us now run the query. This query will display the confirmation message.
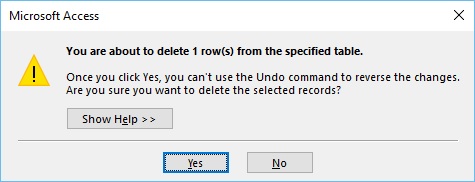
Click Yes and go to your Datasheet View and you will see that the specified employee record is deleted now.
Create a Make Table Query
You can use a make-table query to create a new table from data that is stored in other tables. Let us go to the Create tab again and click Query Design.
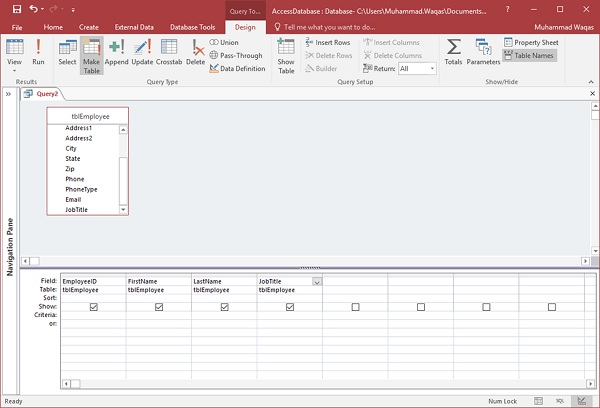
In the Tables tab, on the Show Table dialog box, double-click the tblEmployees table and then close the dialog box.
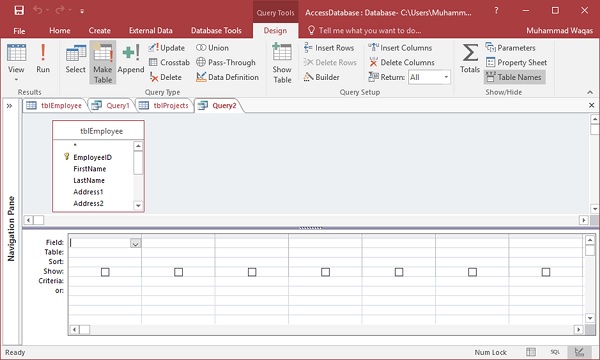
Select all those fields which you want to copy to another table.

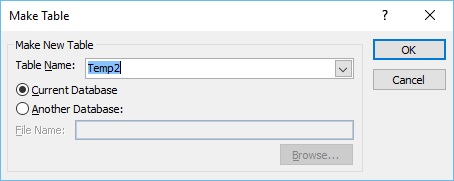
In the Query Type, select the Make Table option button.
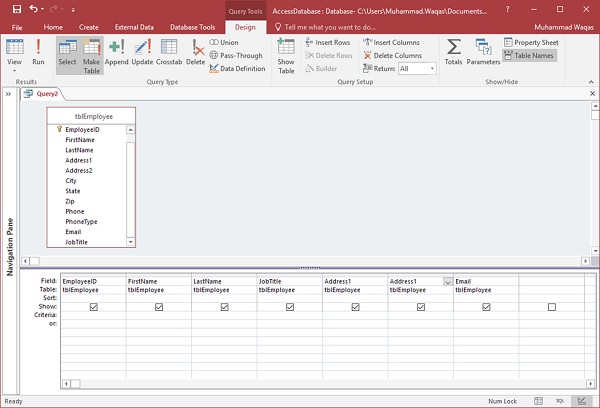
You will see the following dialog box. Enter the name of the new table you want to create and click OK.
Now run your query.
You will now see the following message.
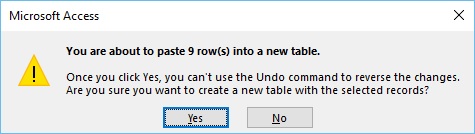
Click Yes and you will see a new table created in the navigation pane.
Ms Access - Parameter Queries
The best part about queries is that you can save and run the same query again and again, but when you run the same query again and again by only changing the criteria then you might consider the query to accept parameters.
If you frequently want to run variations of a particular query, consider using a parameter query
Parameter query retrieves information in an interactive manner prompting the end user to supply criteria before the query is run.
You can also specify what type of data a parameter should accept.
You can set the data type for any parameter, but it is especially important to set the data type for numeric, currency, or date/time data.
When you specify the data type that a parameter should accept, users see a more helpful error message if they enter the wrong type of data, such as entering text when currency is expected.
If a parameter is set to accept text data, any input is interpreted as text, and no error message is displayed.
Example
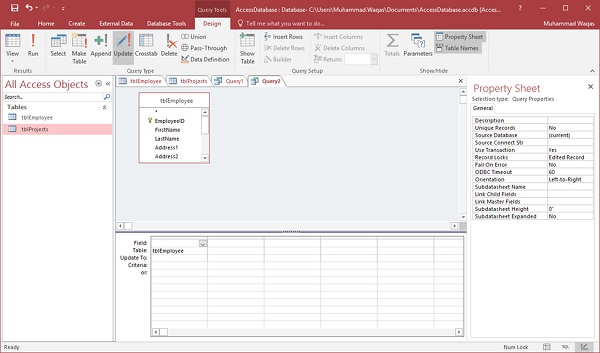
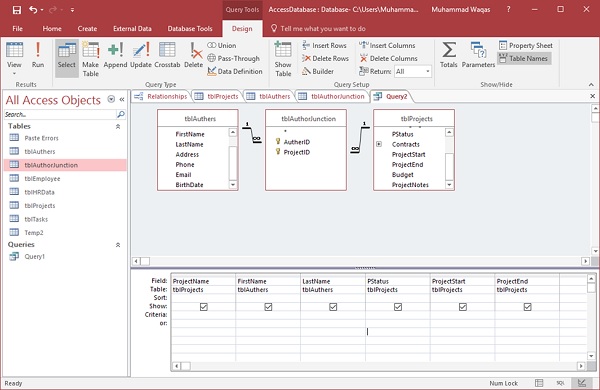
Let us now take a look at a simple example by creating a parameter query. Let us open your database and select Query Design in the Create table tab.

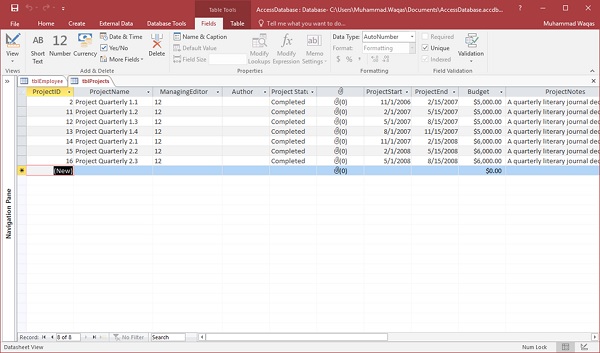
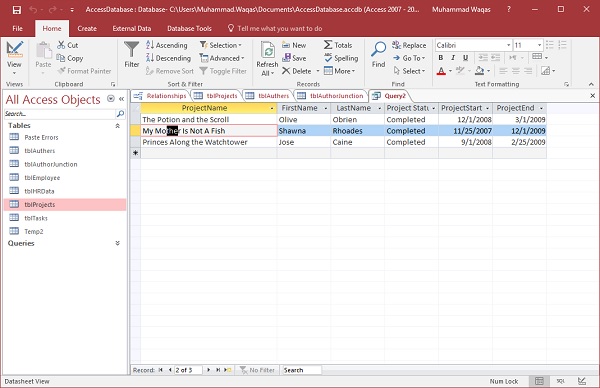
Double-click on the tblProjects and close the Show dialog box.
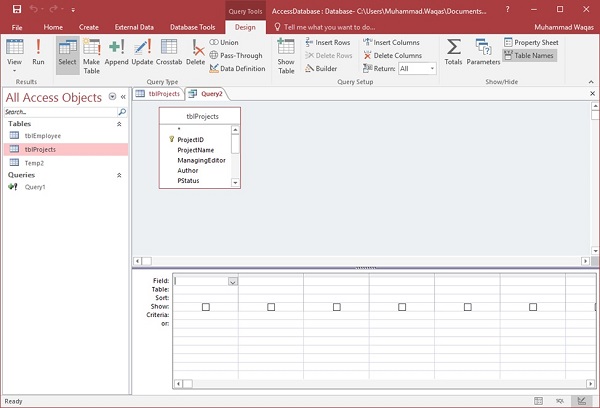
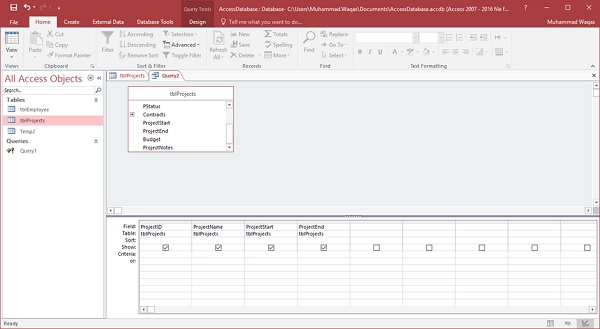
Select the field you want to see as a query result as shown in the following screenshot.
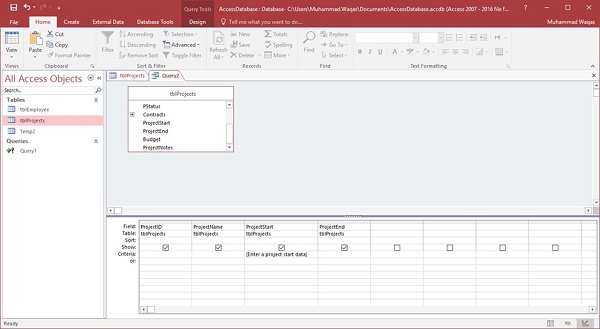
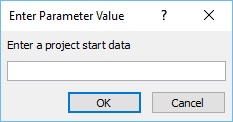
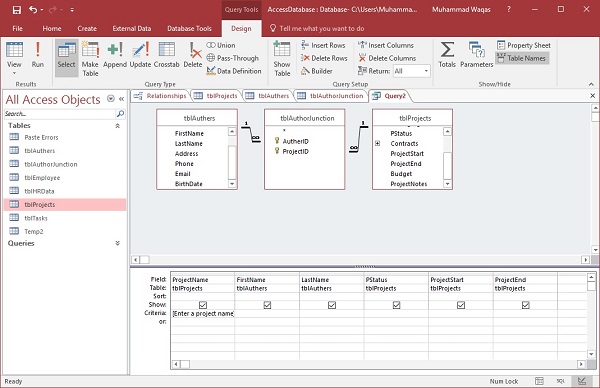
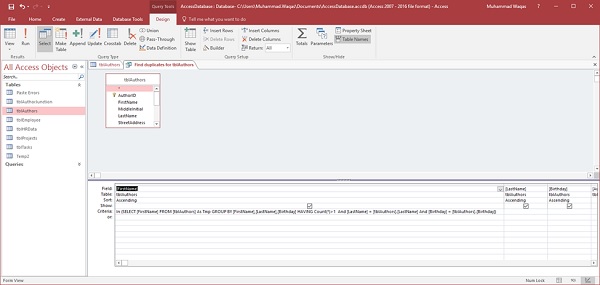
In the query design grid, in the Criteria row of the ProjectStart column, type [Enter a project start data]. The string [Enter a project start data] is your parameter prompt. The square brackets indicate that you want the query to ask for input, and the text is Enter a project start data is the parameter prompt displays.
Let us now run your query and you will see the following prompt.
Let us now enter the following date.
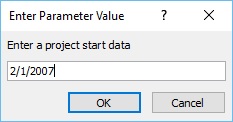
Click OK to confirm.
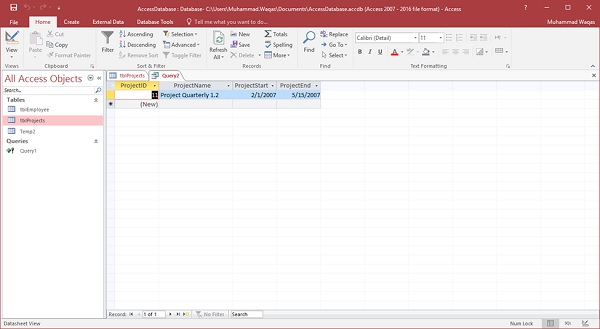
As a result, you will see the details of the project which started on 2/1/2007. Let us go to the Design View and run the query again.
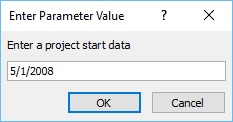
Enter the date as in the above screenshot and click Ok. You will now see the details of the project which started on 5/1/2008.
Ms Access - Alternate Criteria
Queries come in with many advantages. You can save and run the same query again and again, and a lot of times you want to add alternate criteria.
You can add alternate criteria in the following two ways −
- You can use the OR operator to combine two sets of criteria.
- You can also use the query design grid, but instead of specifying criteria on the same line, you will need to separate it in multiple row.
Example
Let us look at a simple example of alternate criteria. Open database and in the Create tab select Query Design.

Double-click on tblEmployee and close the Show Table dialog box.
Double-click on all the field you want to see as query result.
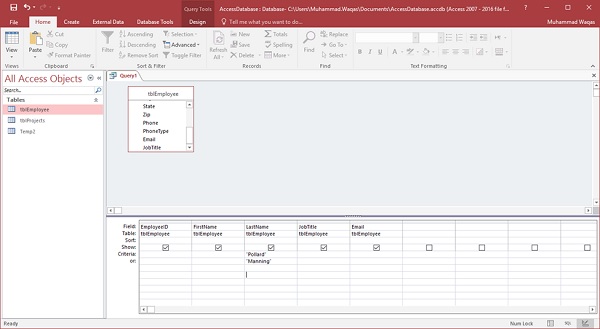
You can now see that alternate criterion is specified in different rows of the LastName field. When you run this query, you will see the employees whose last name is either Pollard or Manning. Let us now run this query.
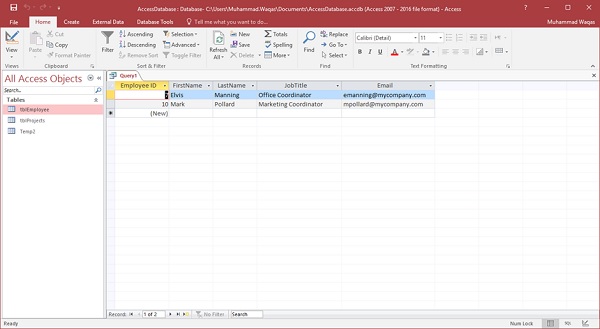
As you can see that only two employees have been retrieved, because of the alternate criteria.
If you want to add alternate criteria in multiple fields then you will have to use different rows for all the fields. Let us now add another alternate criterion where we can retrieve information for employees whose last name is either Pollard or Manning or the job title is Accounting Assistant.
Let us now run this query.
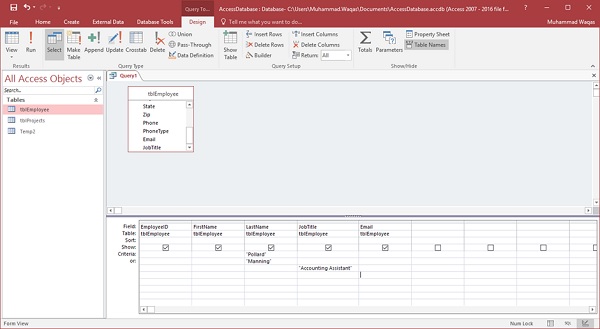
You will now see the following result.
Ms Access - Relating Data
In this chapter, we will understand the basics of relating data. Before talking about and creating relationships between different data, let us review why we need it. It all goes back to normalization.
Normalization
Database normalization, or simply normalization, is the process of organizing columns (attributes) and tables (relations) of a relational database to minimize data redundancy. It is the process of splitting data across multiple tables to improve overall performance, integrity and longevity.
Normalization is the process of organizing data in a database.
This includes creating tables and establishing relationships between those tables according to rules designed both to protect the data and to make the database more flexible by eliminating redundancy and inconsistent dependency.
Let us now look into the following table which contains data, but the problem is that this data is quite redundant which increases the chances of typo and inconsistent phrasing during data entry.
| CustID | Name | Address | Cookie | Quantity | Price | Total |
|---|---|---|---|---|---|---|
| 1 | Ethel Smith | 12 Main St, Arlington, VA 22201 S | Chocolate Chip | 5 | $2.00 | $10.00 |
| 2 | Tom Wilber | 1234 Oak Dr., Pekin, IL 61555 | Choc Chip | 3 | $2.00 | $6.00 |
| 3 | Ethil Smithy | 12 Main St., Arlington, VA 22201 | Chocolate Chip | 5 | $2.00 | $10.00 |
To solve this problem, we need to restructure our data and break it down into multiple tables to eliminate some of those redundancy as shown in the following three tables.

Here, we have one table for Customers, the 2nd one is for Orders and the 3rd one is for Cookies.
The problem here is that just by splitting the data in multiple tables will not help to tell how data from one table relates to data in another table. To connect data in multiple tables, we have to add foreign keys to the Orders table.
Defining Relationships
A relationship works by matching data in key columns usually columns with the same name in both the tables. In most cases, the relationship matches the primary key from one table, which provides a unique identifier for each row, with an entry in the foreign key in the other table. There are three types of relationships between tables. The type of relationship that is created depends on how the related columns are defined.
Let us now look into the three types of relationships −
One-to-Many Relationships
A one-to-many relationship is the most common type of relationship. In this type of relationship, a row in table A can have many matching rows in table B, but a row in table B can have only one matching row in table A.
For example, the Customers and Orders tables have a one-to-many relationship: each customer can place many orders, but each order comes from only one customer.
Many-to-Many Relationships
In a many-to-many relationship, a row in table A can have many matching rows in table B, and vice versa.
You create such a relationship by defining a third table, called a junction table, whose primary key consists of the foreign keys from both table A and table B.
For example, the Customers table and the Cookies table have a many-to-many relationship that is defined by a one-to-many relationship from each of these tables to the Orders table.
One-to-One Relationships
In a one-to-one relationship, a row in table A can have no more than one matching row in table B, and vice versa. A one-to-one relationship is created if both the related columns are primary keys or have unique constraints.
This type of relationship is not common because most information related in this way would be all in one table. You might use a one-to-one relationship to −
- Divide a table into many columns.
- Isolate part of a table for security reasons.
- Store data that is short-lived and could be easily deleted by simply deleting the table.
- Store information that applies only to a subset of the main table.
Ms Access - Create Relationships
In this chapter, we will understand the need to create relationships between related tables. One of the goals of good database design is to remove data redundancy.
To achieve that goal, you divide your data into many subject-based tables so that each fact is represented only once.
To do this, all the common fields which are related to each other are placed in one table.
To do this step correctly, you must first understand the relationship between your tables, and then specify these relationships in your Access database.
Why Create Table Relationships?
MS Access uses table relationships to join tables when you need to use them in a database object. There are several reasons why you should create table relationships before you create other database objects, such as forms, queries, macros, and reports.
To work with records from more than one table, you often must create a query that joins the tables.
The query works by matching the values in the primary key field of the first table with a foreign key field in the second table.
When you design a form or report, MS Access uses the information it gathers from the table relationships you have already defined to present you with informed choices and to prepopulate property settings with appropriate default values.
When you design a database, you divide your information into tables, each of which has a primary key and then add foreign keys to related tables that reference those primary keys.
These foreign key-primary key pairings form the basis for table relationships and multi-table queries.
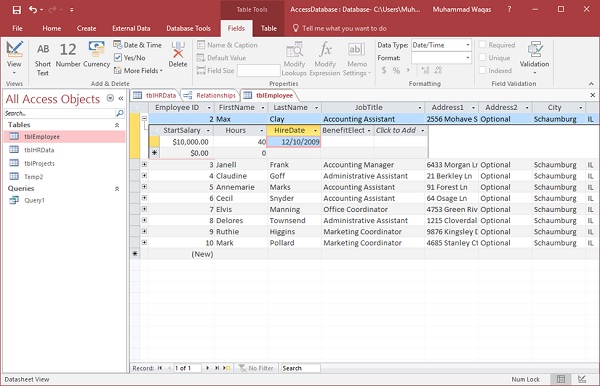
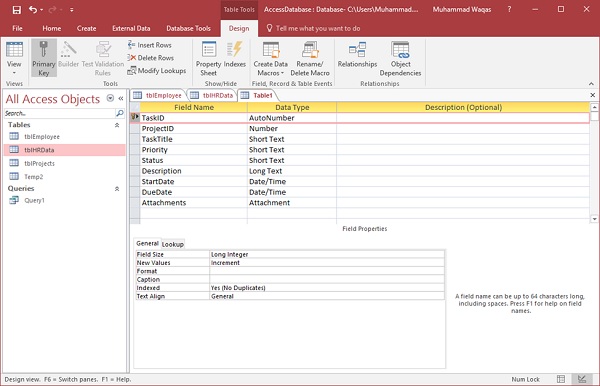
Let us now add another table into your database and name it tblHRData using Table Design as shown in the following screenshot.
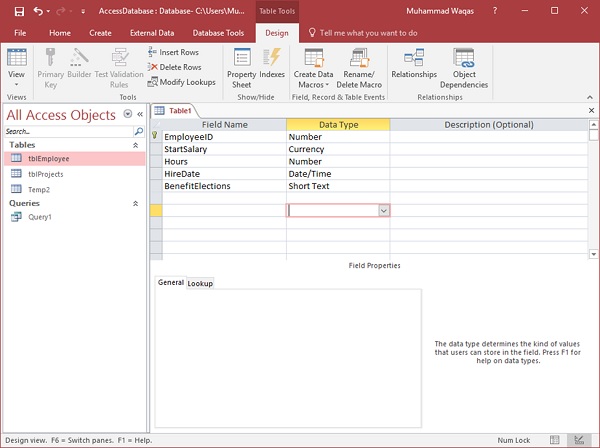
Click on the Save icon as in the above screenshot.
Enter tblHRData as table name and click Ok.

tblHRData is now created with data in it.
Ms Access - One-To-One Relationship
Let us now understand One-to-One Relationship in MS Access. This relationship is used to relate one record from one table to one and only one record in another table.
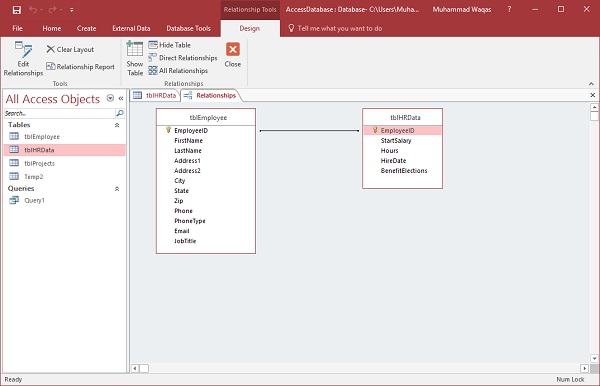
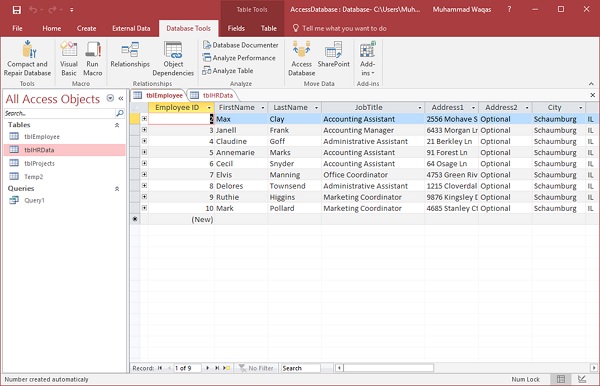
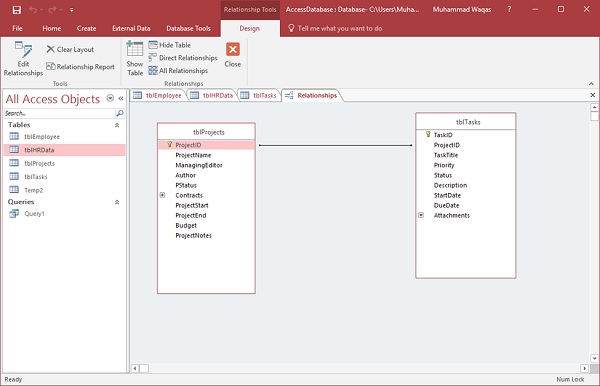
Let us now go to the Database Tools tab.
Click on the Relationships option.
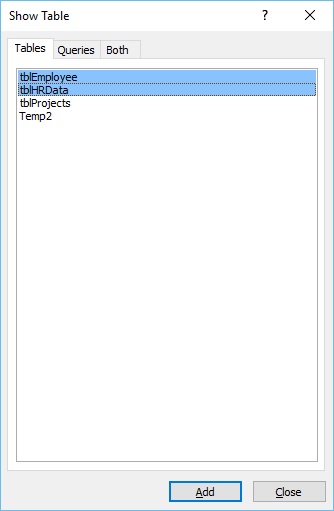
Select tblEmployees and tblHRData and then click on the Add button to add them to our view and then close the Show Table dialog box.
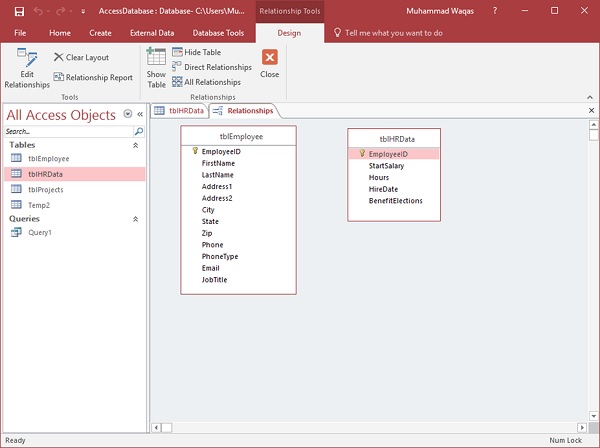
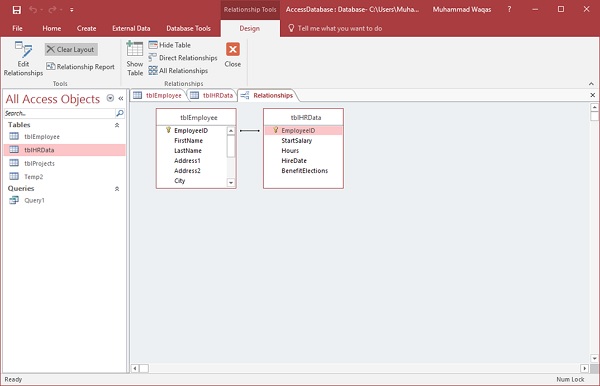
To create a relationship between these two tables, use the mouse, and click and hold the EmployeeID field from tblEmployees and drag and drop that field on the field we want to relate by hovering the mouse right over EmployeeID from tblHRData. When you release your mouse button, Access will then open the following window −
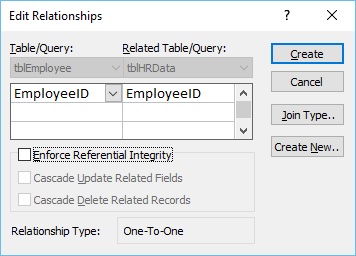
The above window relates EmployeeID of tblEmployees to EmployeeID of tblHRData. Let us now click on the Create button and now these two tables are related.
The relationship is now saved automatically and there's no real need to click on the Save button. Now that we have the most basic of relationships created, let us now go to the table side to see what has happened with this relationship.
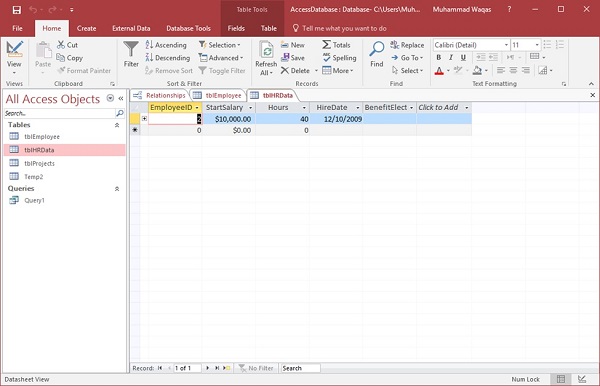
Let us open the tblEmployees table.
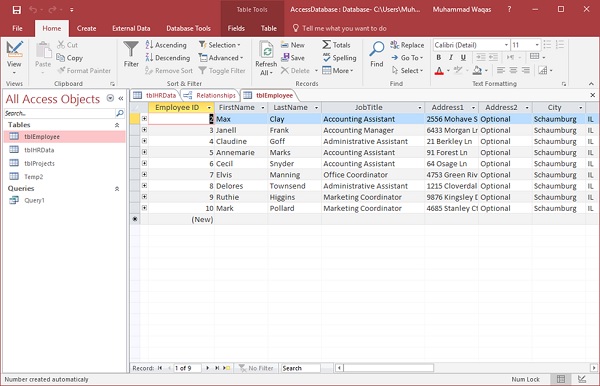
Here, on the left-hand side of each and every record, you will see a little plus sign by default. When you create a relationship, Access will automatically add a sub-datasheet to that table.
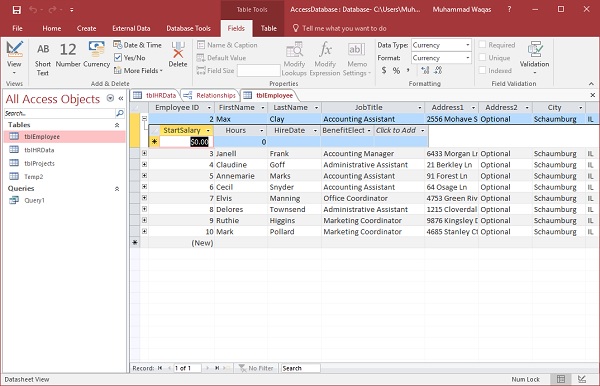
Let us click on the plus sign and you will see the information that is related to this record is on the tblHRData table.
Click on the Save icon and open tblHRData and you will see that the data we have entered is already here.
Ms Access - One-To-Many Relationship
The vast majority of your relationships will more than likely be this one to many relationships where one record from a table has the potential to be related to many records in another table.
The process to create one-to-many relationship is exactly the same as for creating a one-to-one relationship.
Let us first clear the layout by clicking on the Clear Layout option on the Design tab.
We will first add another table tblTasks as shown in the following screenshot.
Click on the Save icon and enter tblTasks as the table name and go to the Relationship view.

Click on the Show Table option.
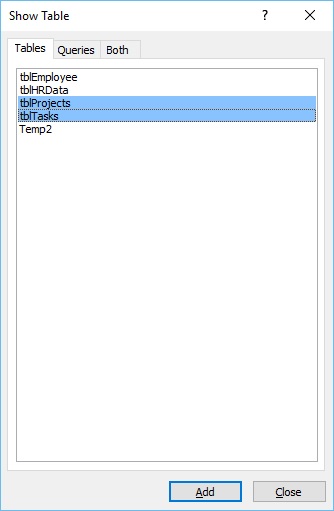
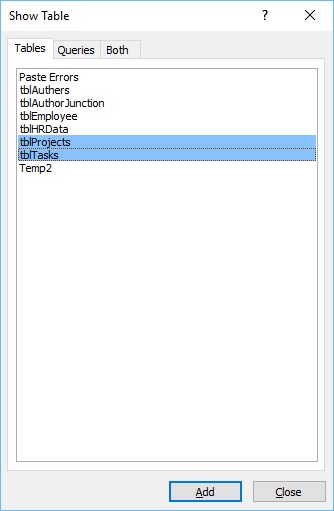
Add tblProjects and tblTasks and close the Show Table dialog box.
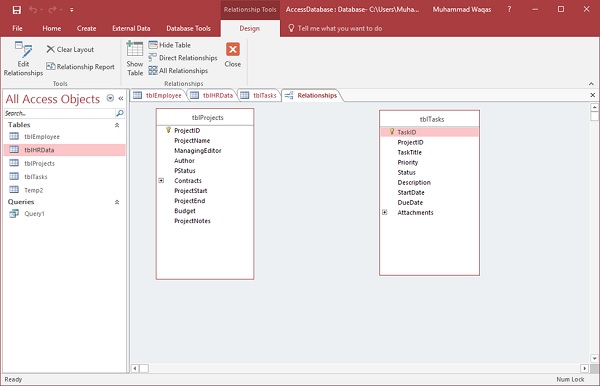
We can run through the same process once again to relate these tables. Click and hold ProjectID from tblProjects and drag that all the way over to the ProjectID from tblTasks. Further, a relationships window pops up when you release the mouse.
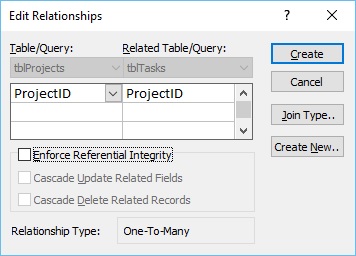
Click the Create button. We now have a very simple relationship created.
Ms Access - Many-To-Many Relationship
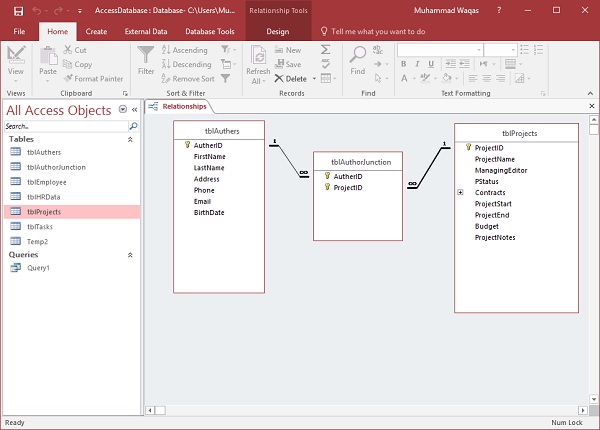
In this chapter, let us understand Many-to-Many Relationship. To represent a many-tomany relationship, you must create a third table, often called a junction table, that breaks down the many-to-many relationship into two one-to-many relationships. To do so, we also need to add a junction table. Let us first add another table tblAuthers.
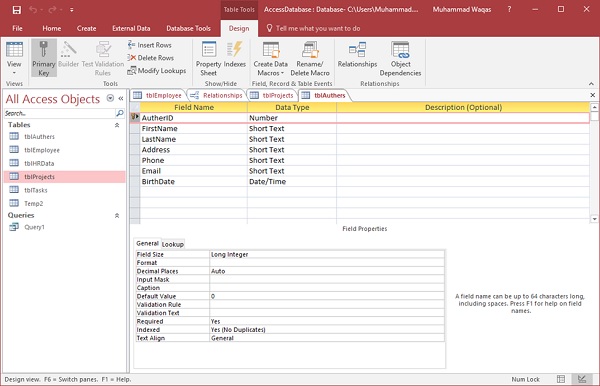
Let us now create a many-to-many relationship. We have more than one author working on more than one project and vice versa. As you know, we have an Author field in tblProjects so, we have created a table for it. We do not need this field any more.
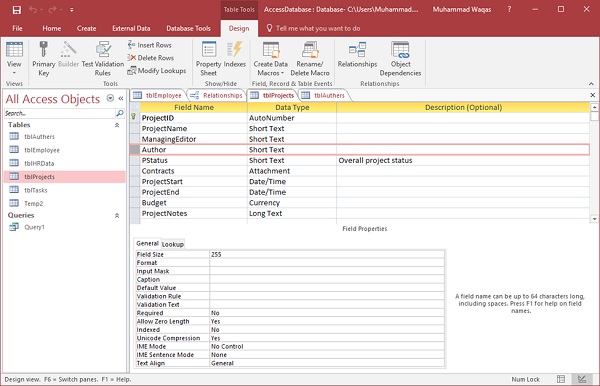
Select the Author field and press the delete button and you will see the following message.

Click Yes. We will now have to create a junction table. This junction table have two foreign keys in it as shown in the following screenshot.
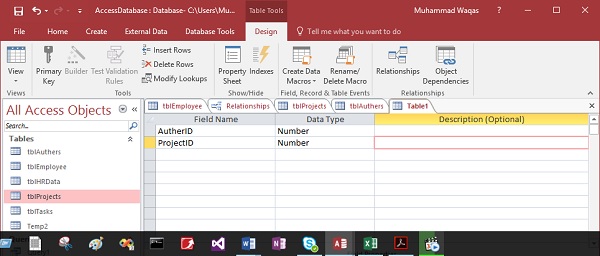
These foreign key fields will be the primary keys from the two tables that were linked together tblAuthers and tblProjects.
To create a composite key in Access, select both these fields and from the table tools design tab, you can click directly on that primary key and that will mark not one but both of these fields.
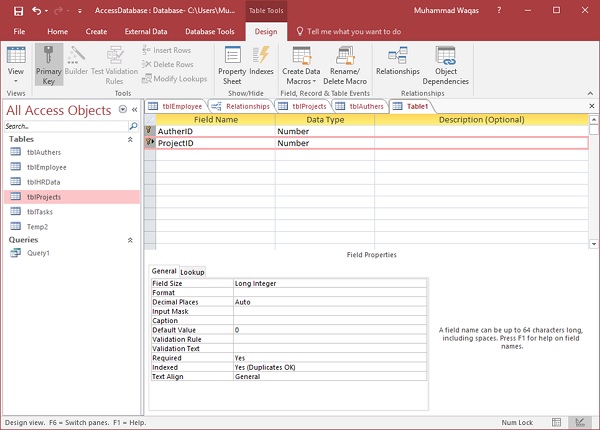
The combination of these two fields is the tables unique identifier. Let us now save this table as tblAuthorJunction.
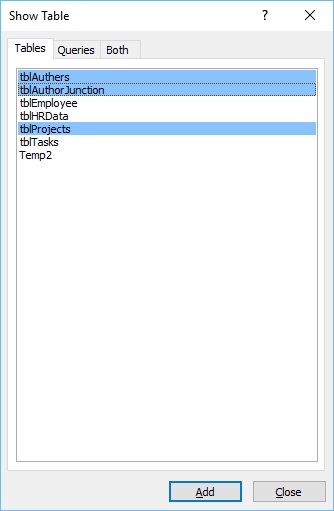
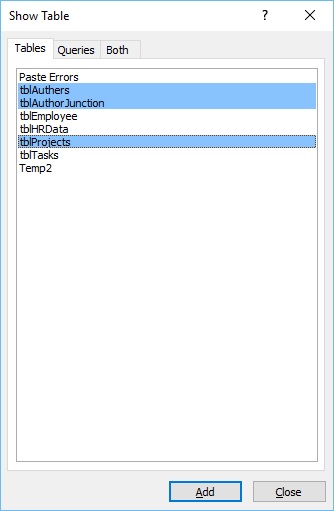
The last step in bringing the many-to-many relationships together is to go back to that relationships view and create those relationships by clicking on Show Table.
Select the above three highlighted tables and click on the Add button and then close this dialog box.
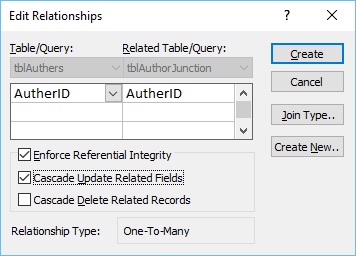
Click and drag the AuthorID field from tblAuthors and place it on top of the tblAuthorJunction table AuthorID.
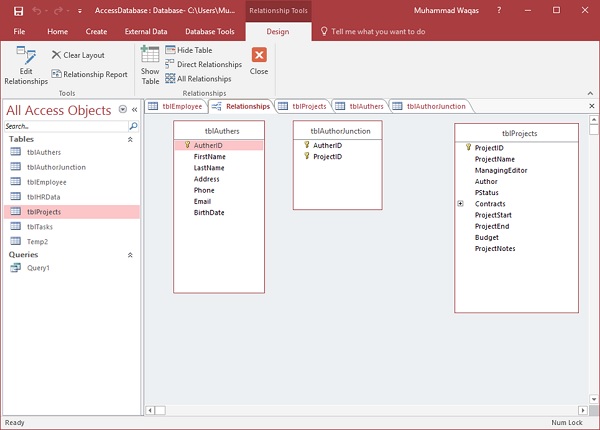
The relationship youre creating is the one that Access will consider as a one-to-many relationship. We will also enforce referential integrity. Let us now turn on Cascade Update and click on the Create button as in the above screenshot.
Let us now hold the ProjectID, drag and drop it right on top of ProjectID from tblAuthorJunction.

We will Enforce Referential Integrity and Cascade Update Related Fields.

The following are the many-to-many relationships.
Ms Access - Wildcards
Wildcards are special characters that can stand in for unknown characters in a text value and are handy for locating multiple items with similar, but not identical data. Wildcards can also help with getting databased on a specified pattern match.
Access supports two sets of wildcard characters because it supports two standards for Structured Query Language.
- ANSI-89
- ANSI-92
As a rule, you use the ANSI-89 wildcards when you run queries and find-and-replace operations against Access databases such as *.mdb and *.accdb files.
You use the ANSI-92 wildcards when you run queries against Access projects Access files connected to Microsoft SQL Server databases. Access projects use the ANSI-92 standard because SQL Server uses that standard.
ANSI-89 Wildcard Characters
The following table lists out characters supported by ANSI-89 −
| Character | Description | Example |
|---|---|---|
| * | Matches any number of characters. You can use the asterisk (*) anywhere in a character string. | wh* finds what, white, and why, but not awhile or watch. |
| ? | Matches any single alphabetic character. | B?ll finds ball, bell, and bill. |
| [ ] | Matches any single character within the brackets. | B[ae]ll finds ball and bell, but not bill. |
| ! | Matches any character not in the brackets. | b[!ae]ll finds bill and bull, but not ball or bell. |
| - | Matches any one of a range of characters. You must specify the range in ascending order (A to Z, not Z to A). | b[a-c]d finds bad, bbd, and bcd. |
| # | Matches any single numeric character. | 1#3S finds 103, 113, and 123. |
ANSI-92 wildcard characters
The following table lists out characters supported by ANSI-92 −
| Character | Description | Example |
|---|---|---|
| % | Matches any number of characters. It can be used as the first or last character in the character string. | wh% finds what, white, and why, but not awhile or watch. |
| _ | Matches any single alphabetic character. | B_ll finds ball, bell, and bill. |
| [ ] | Matches any single character within the brackets. | B[ae]ll finds ball and bell, but not bill. |
| ^ | Matches any character not in the brackets. | b[^ae]ll finds bill and bull, but not ball or bell. |
| - | Matches any one of a range of characters. You must specify the range in ascending order (A to Z, not Z to A). | b[a-c]d finds bad, bbd, and bcd. |
Example
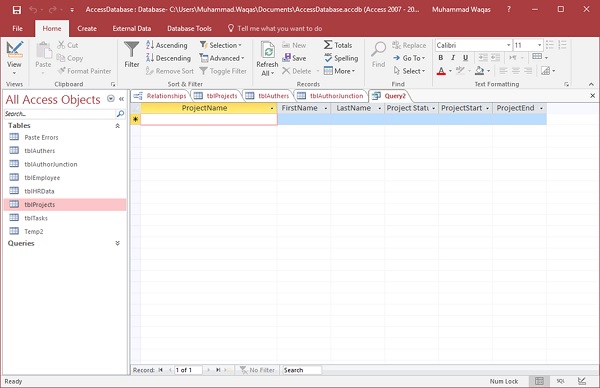
Let us now look at a simple example of using these wildcard characters by opening the query design.
Add the highlighted tables and close the Show Table dialog box.
Add the fields in the query grid which you want to see as a query result.
Run your query.

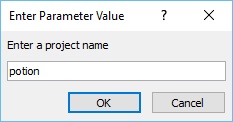
Let us again go to the query design and add prompt for project name.
Now run your query and let us assume that you dont know the exact project name, but you know that the project name contains the words potion. Click Ok.
The above step does not generate any result. That is because Access is looking for an exact match in the project name field. It is looking for that project which has the word potion in its name.
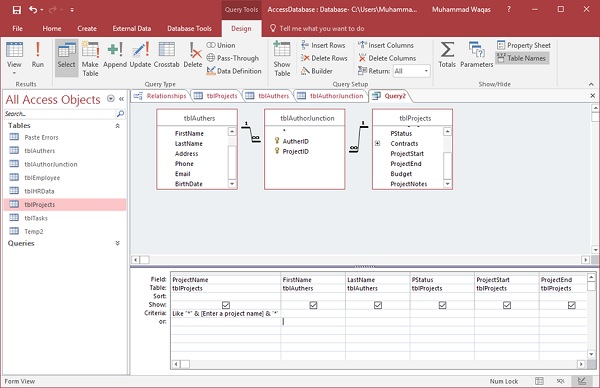
If you want it so that the users can enter wildcards to replace unknown characters, then you need to adjust the criteria and include the operator like.
When you run the query, users can use wildcards to replace any number of characters.

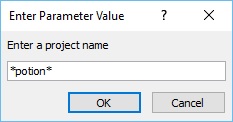
Let us assume that you know that the word potion appears somewhere in the title but you are not exactly sure where.
You can add an * to replace any number of characters before the word potion and then add another * after the. Click Ok.

It is always good for the users to know the wildcards they can enter. But there are users who may not know the wildcards they can and cannot enter. In that case, you can enter the wildcards yourself.
In this situation, in-between the Like operator and our parameter prompt, we can add those wildcards and now there's a very specific way we have to write this. After the word like in quotation marks, enter the wildcard that we are using. In this case, we have used * to replace any number of characters. We will now add this to the parameter. To do so, we need ampersand (&) symbol and a space. We will now repeat this step and add another ampersand (&) because we're joining that wildcard to whatever criteria is entered in for that project name by the user and then * in quotes.
Let us now run our query again. Enter the word potion in the prompt without any wildcards.
The query will now track those wildcards on either side of whatever is entered here. We need to simply type potion and press enter.
We now get the results we were looking for and the results will be the same regardless of what the users enter.
Let us say we want to find every project with the word the in the title. Then, you need to just type the word and Enter or click Ok.
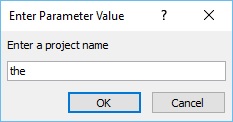
With this query, it becomes easier to search for projects with the word the in their names. The 2nd level of results may also include the project names with the word mother where the is part of the word.
Ms Access - Calculated Expression
In MS Access, an expression is like a formula in Excel. This consists of a number of elements that can be used alone or in a combination to produce a result. Expressions can include operators, constants, functions and identifiers.
Expressions can be used to perform a variety of tasks from retrieving the value of a control or supplying criteria to a query to creating calculated controls and fields or defining a group level for report.
In this chapter, we will be focusing on creating a very specific kind of expression called a calculated expression. We will create several calculated fields that will calculate and display data that is not stored anywhere within the database itself but calculated from separate fields that are stored.
We now have a new Access database that contains more data to calculate.
Example
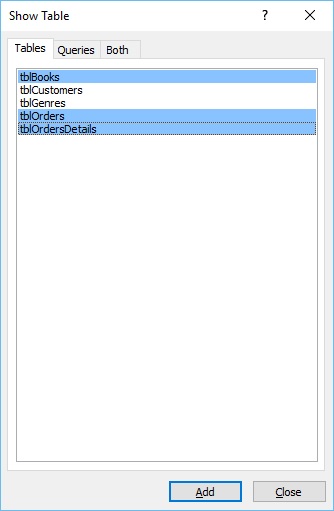
Let us try an example to understand this. We will be retrieving some information from a variety of tables tblCustomers, tblOrders, tblOrdersDetails and tblBooks and reviewing a variety of fields.
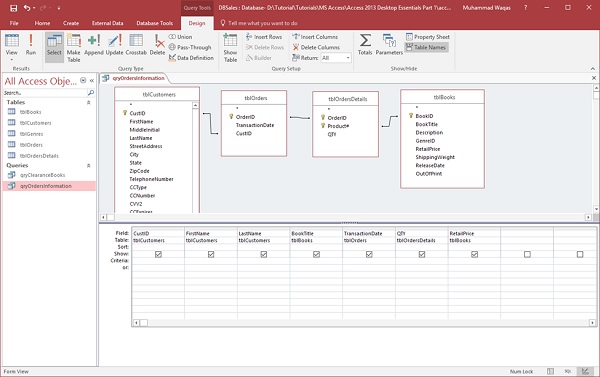
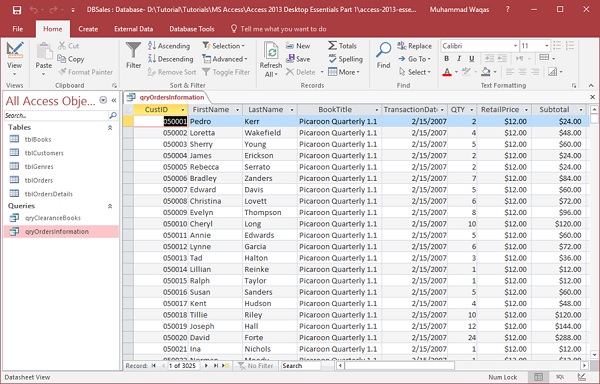
Let us now run the query and you will see the following results.
We want a very simple calculation for a subtotal which will take the quantity of the books ordered and multiply that by the retail price of the book. It is a good idea to begin every expression or any expression with a name to call that field. Let us call this one subtotal.
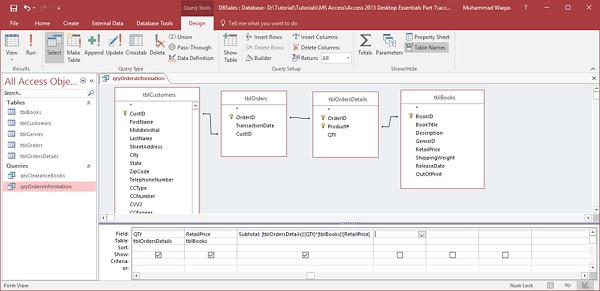
The full expression (Subtotal: [tblOrdersDetails]![QTY]*[tblBooks]![RetailPrice]) includes the table name, first tblOrdersDetails inside square brackets because that is where our quantity field lives. Now an exclamation is telling Access to look inside that table for a field QTY and multiply that by the retail price field in tblBooks.
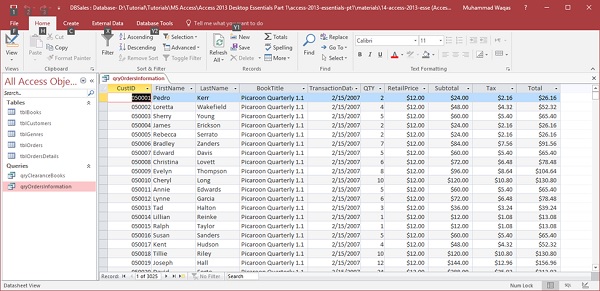
Let us try to run your query and you will see at end the subtotal field.
Let us say we want to calculate our sales tax. In the query grid we will do in the exact same way we did before and this time we will call the field simply Tax and Let us multiply Subtotal by nine percent tax rate.
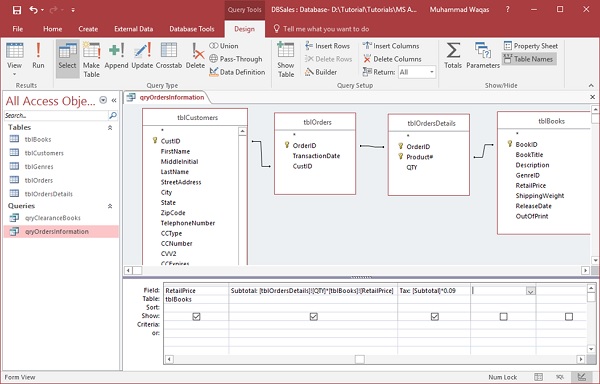
Let us run your query again and you will see the new Tax field in the end.
Ms Access - Indexing
An index is a data structure, a special data structure designed to improve the speed of data retrieval. If you often search a table or sort its records by a particular field, you can speed up these operations by creating an index for the field. Microsoft Access uses indexes in a table as you use an index in a book to find data.
- In some instances, such as for a primary key, Access automatically creates an index for you.
- At other times, you might want to create an index yourself.
- An index stores the location of records based on the field or fields that you choose to index.
- After Access obtains the location from the index, it can then retrieve the data by moving directly to the correct location.
- In this way, using an index can be considerably faster than scanning through all of the records to find the data.
- Indexes can speed up searches in queries, but they can also slow down performance when adding or updating records.
Let us now look into what indexes Microsoft Access creates by default and how to create them ourselves and learn how to delete any unnecessary indexes. Open the tblEmployees table in Access database which we have created.
- We haven't really played with indexes in this database but that doesn't mean we don't have any.
- In fact, any field that is set as a primary key in Access is automatically indexed.
- Access creates additional secondary indexes depending on the names of your fields.
Let us now go to the File menu and select Options.
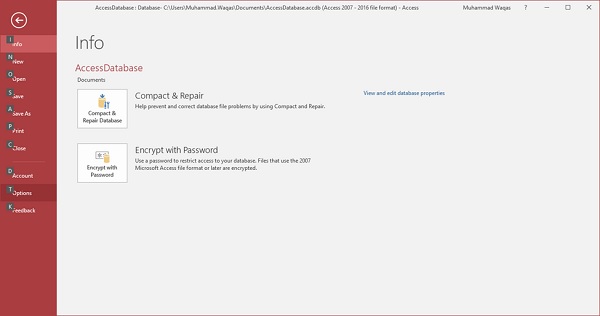
You will see the Access Options window.
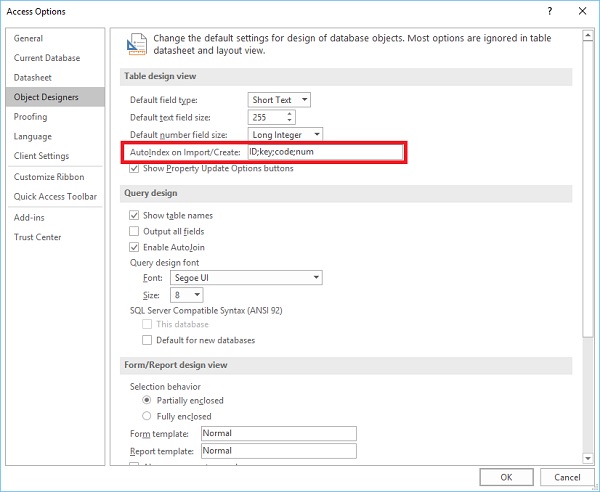
Go to the Object Designers and you will see a section labeled AutoIndex on Import/Create and in the textbox you will see ID;key;code;num. By default, access automatically adds a secondary index to fields that start or end with these names and that goes for fields you have imported as well as ones you have manually created.
If you want to make any field indexed you can go to the Field tab.
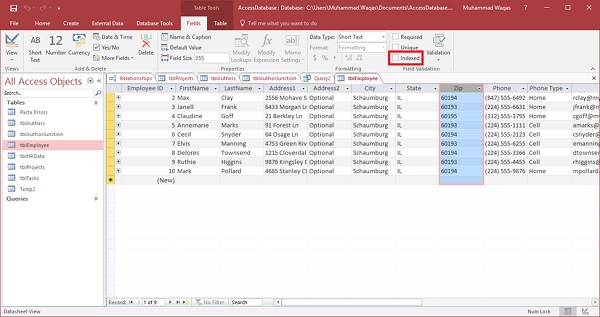
Select any field that you want indexed and check the Indexed checkbox in Field Validation section. You also have alternate options for creating or removing an index. You can go back to the Design View.
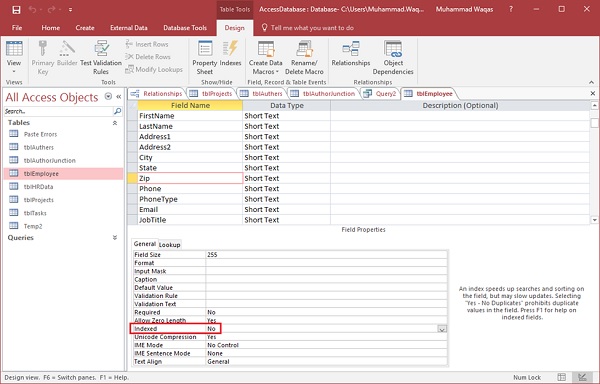
You can adjust indexes by selecting any field. You can also see how they are indexed in the field properties area below. Any field that has No selected next to indexed, means there is no index for that given field. You can change that by clicking on the drop-down menu and choosing the other two options Yes (Duplicate OK) and Yes (No duplicates).
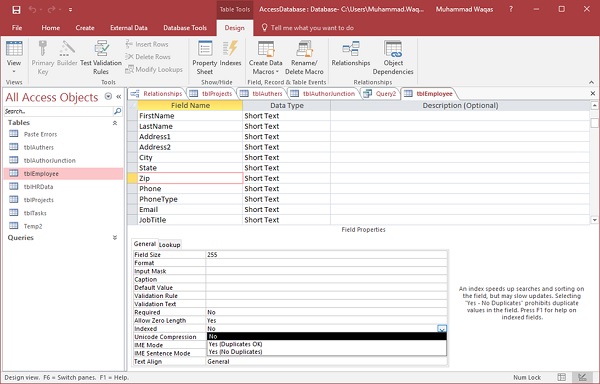
The last option Yes (No Duplicates) means that Access will automatically prohibit duplicate values in that field. Let us now create an index for our last name field.
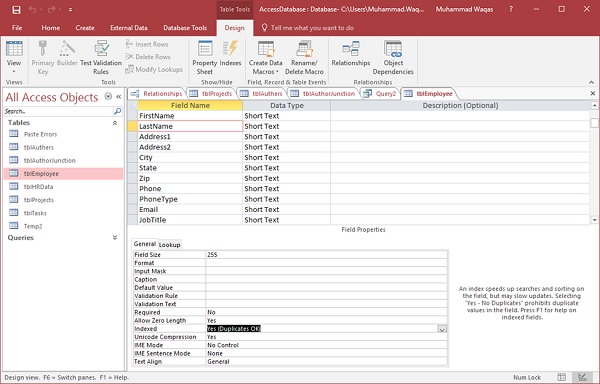
Let us select LastName to index and say Yes (Duplicates OK). As we save, Access will create that index. Another area where you can view and adjust your indexes for a table is the tables design area in the Show/Hide group.

If you click on this Indexes button that will bring up a special view displaying all the indexes created for this table.
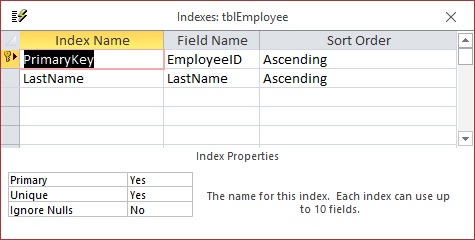
We now have two indexes for tblEmployees one that was created automatically based on the primary key field and one that we just created for the LastName field. These are the different ways to deal with indexes in Microsoft Access tables.
Ms Access - Grouping Data
In this chapter, we will be covering how to calculate on a group of records in Access. We have created a field that calculates row by row or record by record to create a line total or subtotal field, but what if we wanted to calculate down by a group of records rather than by individual ones. We can do this by creating what's known as an Aggregate Query.
Aggregate Query
An aggregate query also known as a totals or summary query is a sum, mass or group particulars. It can be a total or gross amount or a group or subset of records. Aggregate queries can perform a number of operations. Here's a simple table listing some of the ways to total on a group of records.
| S.No | Aggregate Functions & Description |
|---|---|
| 1. | Sum Adds the field values |
| 2. | Avg Average of the field values |
| 3. | Min Lowest (minimum) field value |
| 4. | Max Highest (maximum) field value |
| 5. | Count Count of the values (records) |
| 6. | StDev Standard deviation of the field values including date/time fields |
| 7. | Var Variance of the field values including date/time |
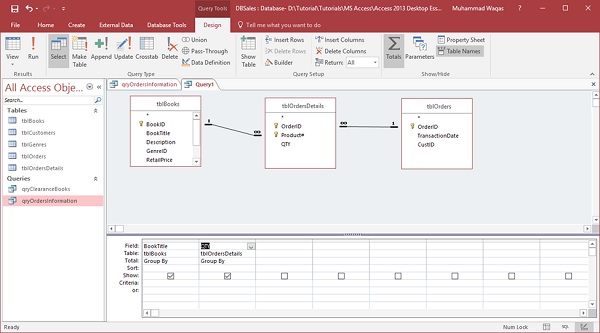
Let us open your database and go to the Query Design and include the following tables −
Close this dialog box and the following two fields will be displayed as shown in the query grid in the following screenshot.
This is a simple query and we are displaying only two fields book title and quantity and when we run it we're seeing every single individual order in our database.
Let us now run this query and you will see the following results.
This is why book titles are repeating. Separate orders have been placed for each of these books here and they were ordered in different quantities. Let us assume we want to see a summary of only that book title that has been listed only once. And then the sum of the quantity listed beside it.
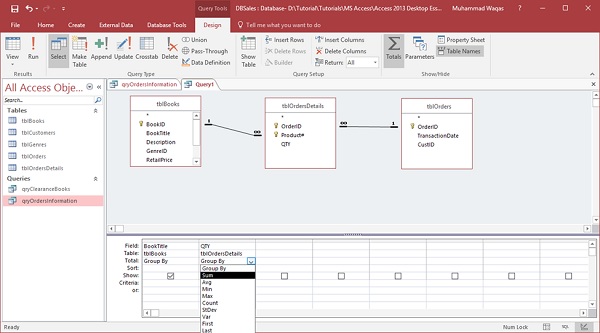
Let us now go to the Design View and in the Design tab, you will see a Sigma symbol. This is your totals button.
Click the sigma symbol which will open another row underneath your field in the table row and from here, you can specify how you are grouping this query.
We will now group by book title and also sum our quantity field.
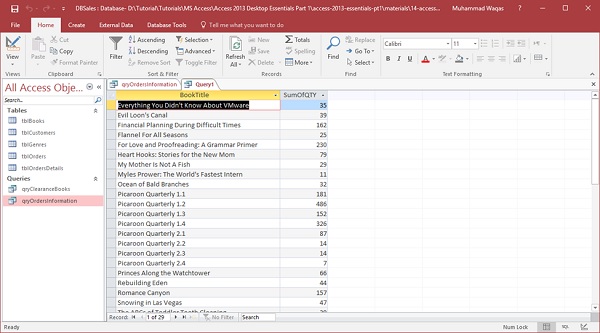
If we click on group by area and further click on the drop-down menu, all the options will be listed down. In this case, we will choose the option Sum and then run your query.
You can now see each individual book and also all the individual orders displayed beside the book name.
Concatenation in Access
We learned the process of normalization, storing information in separate fields. Sometimes you want to see or view data together like combining the first name and last name fields as a single field. You can display that information together by creating a calculated field that concatenates one or more strings. You can also add other characters like a comma or period that you may want.
To concatenate in Access, there are two different operators you can use the ampersand (&) and the plus (+) sign.
The ampersand will combine two strings into one whereas the plus sign will combine two strings and propagate NULL values, for example, if one value is NULL the entire expression evaluates to null.
Example
Let us take a simple example to understand the process of creating a new query using query design. This is going to be a very simple query that is pulling information from our customers table.
Let us now add tblCustomers table close that show table dialog box. We will try some concatenation with some simple named fields.
Let us now add the first name and last name fields and run the query.
As you can see, the first name and the last name are separated into two different fields.

We need to display this information together.

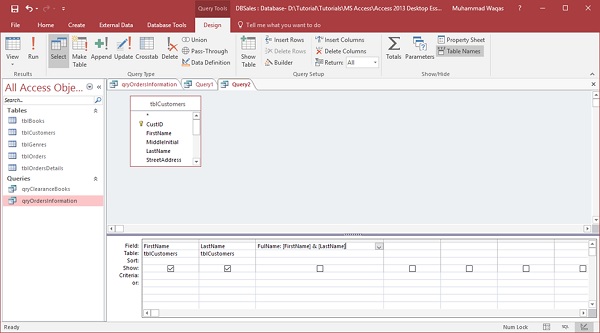
Go back to the Design View and in the third field create a new field called full name. Now, add the full name and type the expression that concatenates those two fields together.
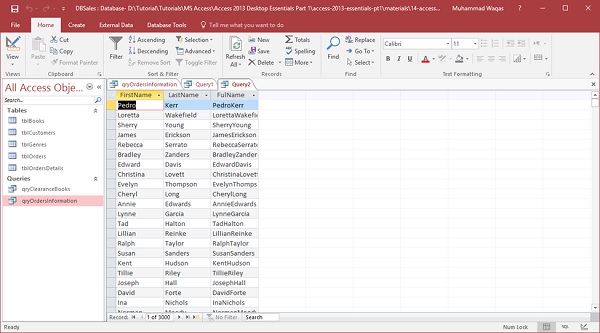
Let us run the query and you will see a new calculated field.
It can concatenate the information from these two fields together, but it doesn't exactly appear the way we want it to. It runs all of that text together because it's performing the way we have asked it to. We will now have to ask Access to add space in between the information from these two fields.
Let us now go back to the Design View and add another section to this expression.
Add a Space inside quotes and another ampersand. This makes Access take the information from that first name field; add it with a space and then add the information from the last name field at the very end. Now, run the query again and you will see the following results.
Ms Access - Summarizing Data
Aggregate queries are great if you are looking just for one specific number, but if you want summarizing information like a spreadsheet-like summary you might want to consider trying a crosstab query. When you want to restructure summary data to make it easier to read and understand, consider using a Crosstab Query.
A crosstab query is a type of Select Query. When you run a crosstab query, the results get displayed in a datasheet. This datasheet has a different structure from the other types of datasheets.
The structure of a crosstab query can make it easier to read than a simple select query that displays the same data, as shown in the following screenshot.
By far, the simplest way to create a crosstab query in Access is to simply use the wizard that comes with Access to create your crosstab query. Let us now go to the Create tab, in the queries groups and click on query wizard.
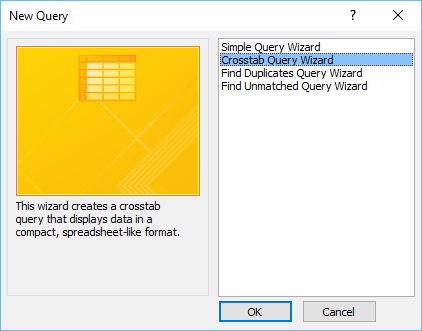
In the above dialog box, you can see all kinds of special queries. You can create a simple query wizard like how we have been doing so far from the Design View. The second one is the one we want the crosstab query that displays data in a compact spreadsheet like format. Now, select the crosstab query and click Ok.
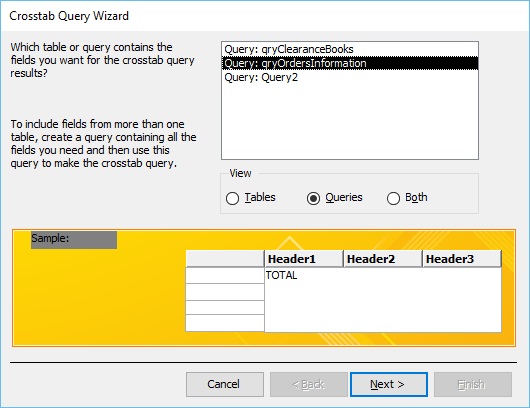
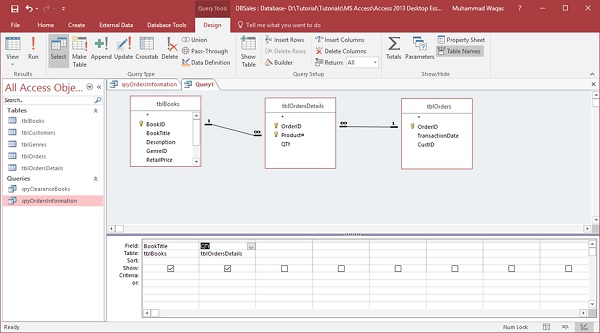
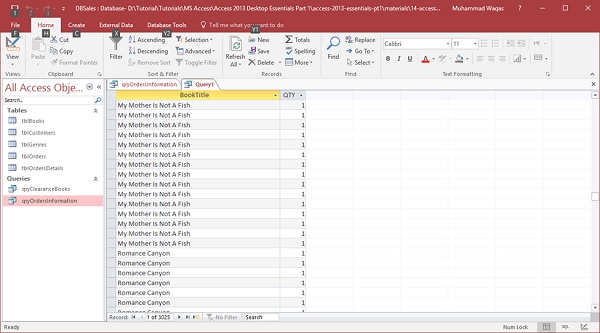
The first screen in the Wizard is going to prompt what table or query contains the fields that you want for your Crosstab Query results. Click on the Queries radio button and select qryOrdersInformation this is the one that we created earlier which contain the subtotal, sales tax etc. Click Next.
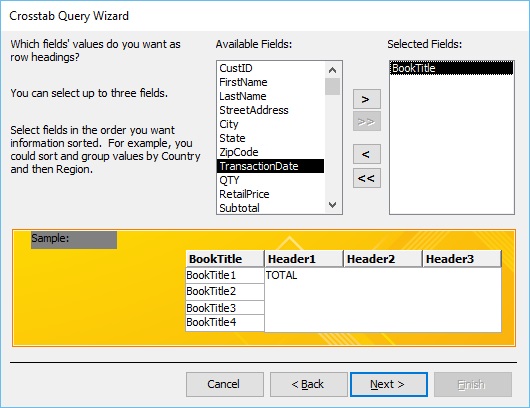
We will now look into the available fields from that query. It will prompt you to enter the field values that you want as row headings. Let us say we want a simple list of all of our different book titles. Now select the book title fields and send that over to your selected field area and click Next.
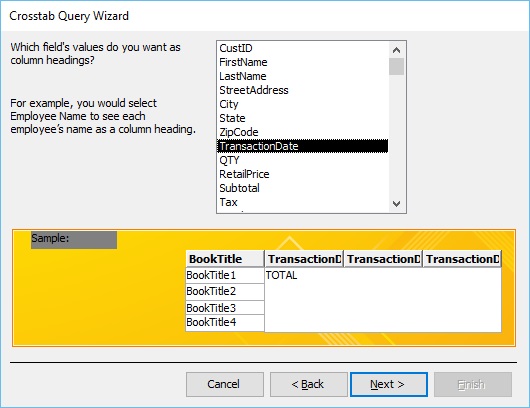
In the above dialog box, the question is what you want to use as column headings and that really depends on what you want to evaluate. Let us assume that you want to view our sales by date, choose TransactionDate and click Next.
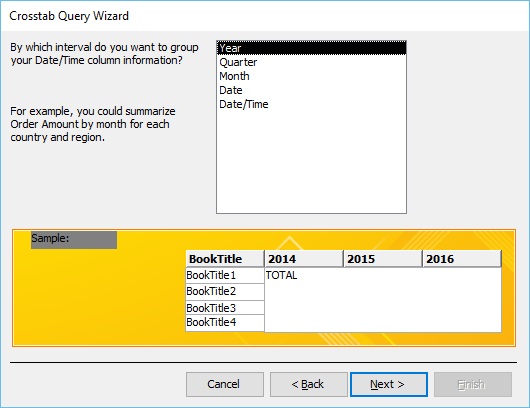
The question in the above dialog box is a specialized one based on the field we previously selected since we chose a date time column. It is asking if we want to group our date time column information by a specific interval. Select the year option and click Next.
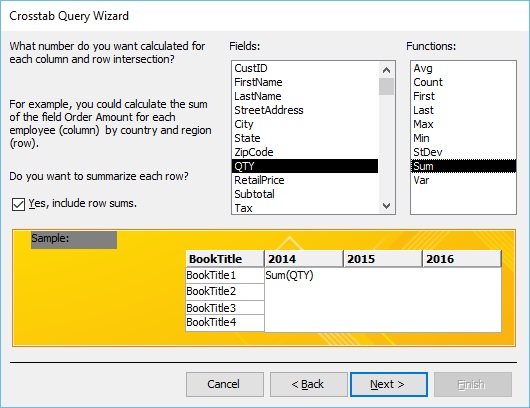
The next question in the above dialog screen asks what number do you want calculated for each column in the row intersection. In this case, we can go by quantity of the books sold by selecting quantity (QTY) and Sum from the functions and click Next.
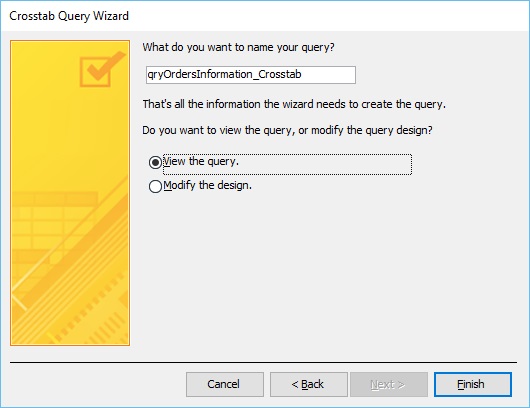
The very last screen of your wizard is going to ask what do you want to name your query and further, click Finish to View that query.
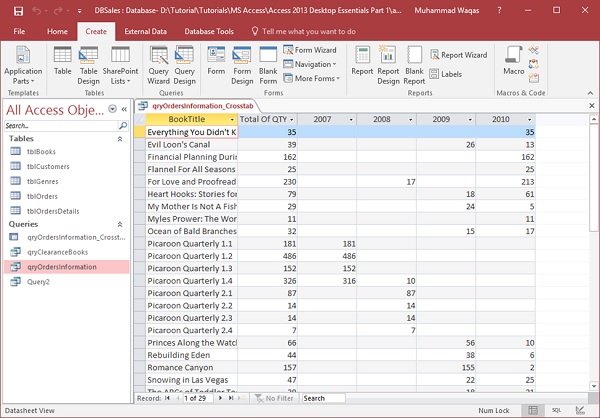
We now have book by book information and also information on the total sales like when each one of those sales occurred.
Ms Access - Joins
A database is a collection of tables of data that allow logical relationships to each other. You use relationships to connect tables by fields that they have in common. A table can be part of any number of relationships, but each relationship always has exactly two tables. In a query, a relationship is represented by a Join.
What is Join
A join specifies how to combine records from two or more tables in a database. Conceptually, a join is very similar to a table relationship. In fact, joins are to queries what relationships are to tables.
The following are the two basic types of joins that we will be discussing in this chapter −
- The inner join
- The outer join
Both of which can easily be created from a queries design view.
Inner Join
Let us now understand Inner Join −
- The most common type of join is an inner join which is also the default join type in Microsoft Access.
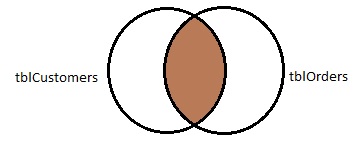
- Inner Join will display only the rows or records where the joined fields from both tables are equal.
- This join type looks at those common fields and the data contained within. It only displays the matches.

Outer Join
Let us now understand what an Outer Join is −
- An outer join displays all rows from one table and only those rows or records from the other table where the joined fields are equal.
- In other words, an outer join shows all rows from one table and only the corresponding rows from the other table.

There are other Join types too −
Left Outer Join & Right Outer Join
Let us now understand Left Outer Join and Right Outer Join −
- You can choose the table that will display all rows.
- You can create a Left Outer Join which will include all the rows from the first table.

- You can create a Right Outer Join that will include all the rows from the second table.

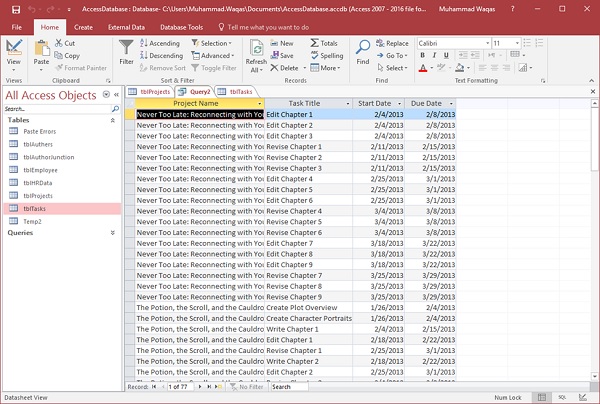
Let us now go to the Create tab and create a query from the Design View. Select tblProjects and tblTasks and close the Show Table dialog box as in the following screenshot.
Add the ProjectName field from tblProjects, and TaskTitle, StartDate and DueDate from tblTasks table.
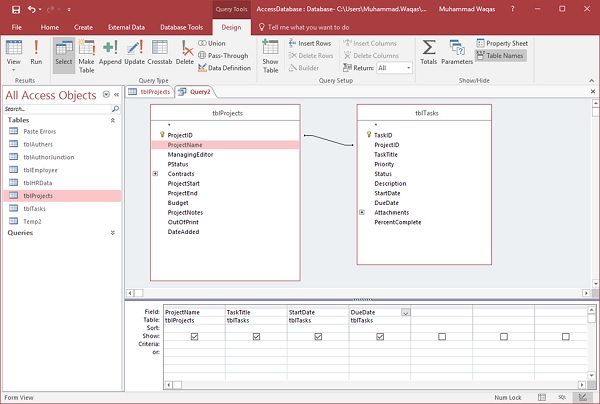
Let us now run the query.

We are only displaying records from a few projects. A couple of these projects have a lot of tasks associated with that project and this information is related through ProjectID field.
When we create this query in Microsoft Access, Access is taking this relationship from the relationships we have created.
By default, it is creating what's known as an Inner Join between these two fields, between these two tables, and that is how it is relating this information together from these two tables.
It is showing us only the matches, so when we run this query, there are a lot of other projects listed in tblProjects that do not appear as part of our records set in this query, and that is because of how these two tables are joined together, through that Inner Join, which is again, that default Join for any query.
However, if you want to alter the relationship, Let us say you want to create an outer join, or in other words, show all of the projects from tblProjects, every single record that is in that table, along with all of the tasks from tblTasks Open join properties; we can do this simply by double-clicking on the relationship line.
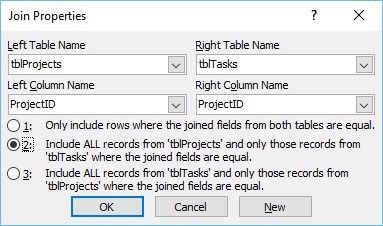
Access will display the left table name and the right table name in Join Properties dialog.
The left column name and the right column name and the first radio button is to only include rows where the join fields from both tables are equal and that is the inner join and that is what is selected by default when creating relationships, when creating a join in the query, but, you can change it.
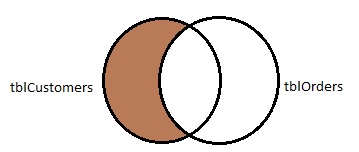
We have two other options as well; we can include all records from tblProjects, and only those records from tblTasks where the joined fields are equal and this one is Left Outer Join.
We have a third option, include all records from tblTasks and only those records from tblProjects where the joined fields are equal and this one is Right Outer Join.
Those are the different types of joins you can create easily from the Design View. Let us select the second option, which is Left Outer Join, and click Ok.
Let us now look into the other steps −
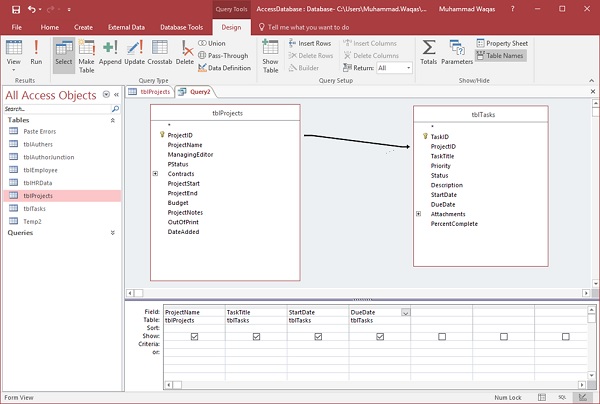
When you look at the relationship line, you will see a little arrow pointing towards ProjectID in tblTasks. When you run this query, you will see the following results.
As you can see that it is showing us every single project name, whether or not it has a related task. You will also see a bunch of null fields. All of this will be blank because there is no related information in tblTasks, where these fields come from. Let us now go to the Design View again and double-click on the relationship line.
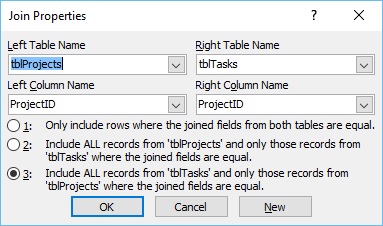
In the Join Properties dialog box, select the third option which is for the Right Outer Join and click Ok.
Now look at our relationship line. You will see that a little arrow is now pointing towards ProjectID in tblProjects. When you run this query you will see the following results.
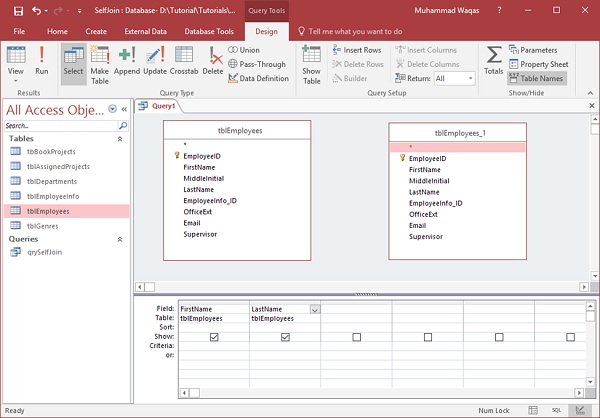
Self-Joins
Self-join is another type of Join. A Self-join relates matching fields from within the same table. For example, look at the employee's table with a supervisor field, which references the same kind of number stored in another field within the same table the employee ID.
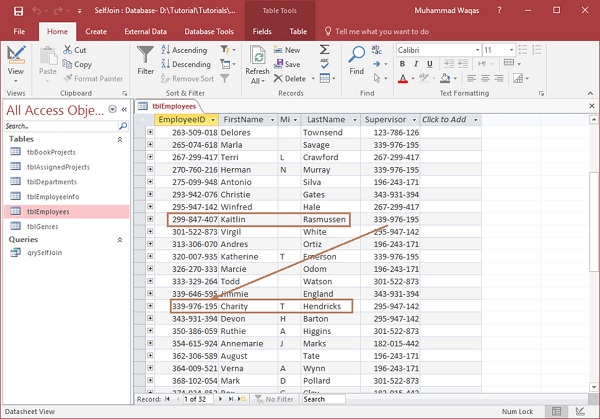
If we wanted to know who Kaitlin Rasmussen's supervisor is, we will have to take the number stored in that supervisor field and look it up within the exact same table in that employee ID field in order to know that Charity Hendricks is the supervisor.
This table is not the ideal structure for a relational database because it's not normalized.
If we have a situation where we want to create a query that just lists the employee names alongside the names of their supervisors, there is no easy way we can query that unless we create a Self-join.
To see a Self-join, create a table with the following fields and enter some data.

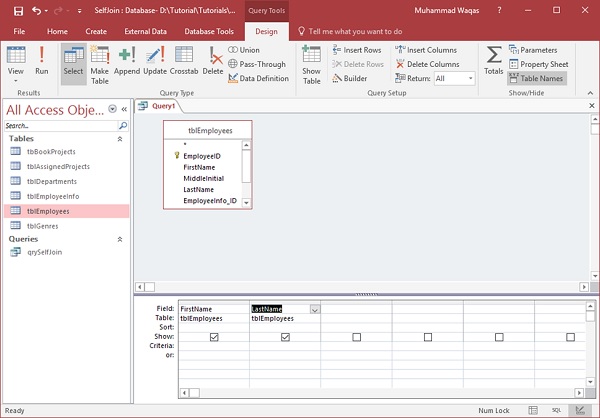
Here we want to create a list again with the first name of the employee and then the name of the supervisor. Let us create a query from the query design view.
Now, add tblEmployees tables.
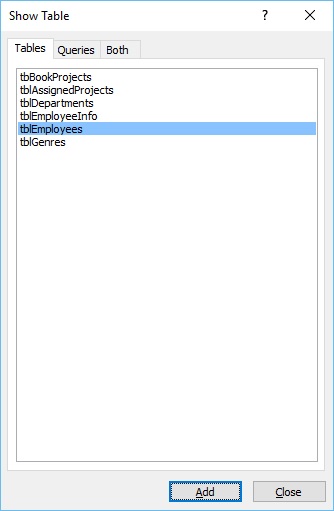
Close this dialog box.
Now, add the first name and last name for our employees.
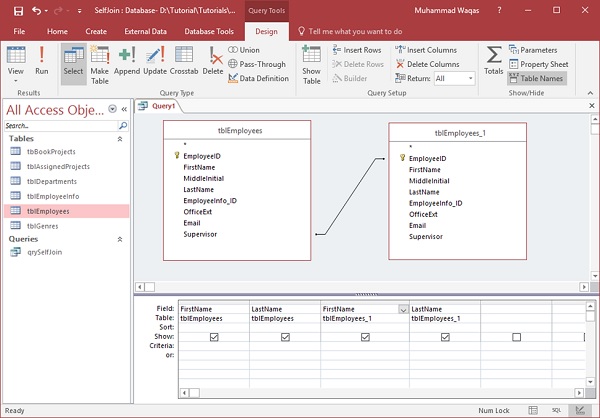
We now need a way to create a relationship between this table and itself. To do that, we need to open the show table dialog box and add tblEmployees one more time.
We have created another copy of the same table in this query view. Now, we need to create Self-join. To do that, click on Supervisor in tblEmployees table and hold the mouse button and drop it right on top of the EmployeeID in that copied table tblEmployees_1. Then, add the first name and last name from that copied table.
Let us now run your query and you will see the following results.
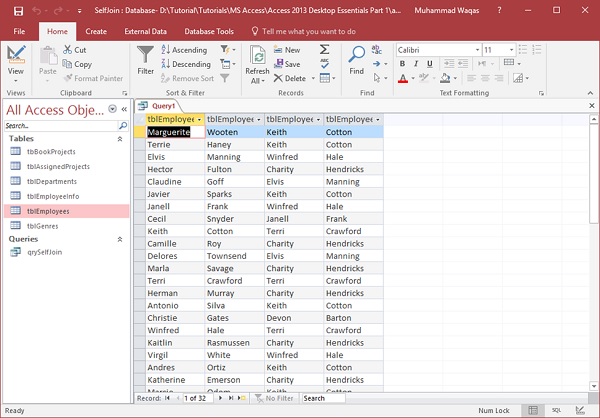
It displays the names of the employees along side the names of their supervisors. And, this is how you create a Self-join in Microsoft Access.
Ms Access - Duplicates Query Wizard
In this tutorial, we have created a variety of select queries, mainly from the Design View. But in Access, we can make use of some special query wizards to create a couple of specific select queries. The first one is Find Duplicates Query wizard. The Find Duplicates Query Wizard will create a query that locates records with duplicate field values in a single table or query.
As we have discussed that relational databases are designed to avoid storing duplicate information. But despite that design, sometimes users accidentally enter duplicate information.
Example
In a customer's table, you can have the same customer accidentally added twice. In such cases, the customer will have the same address, but different customer IDs, which can create problems with reporting. In this situation, you can make use of the duplicates query wizard to quickly locate possible duplicate entries.
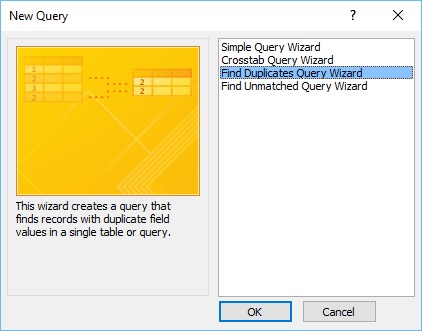
Let us now open our Access database which contains tblAuthers table and go the Create tab and, in the queries group, select query wizard.
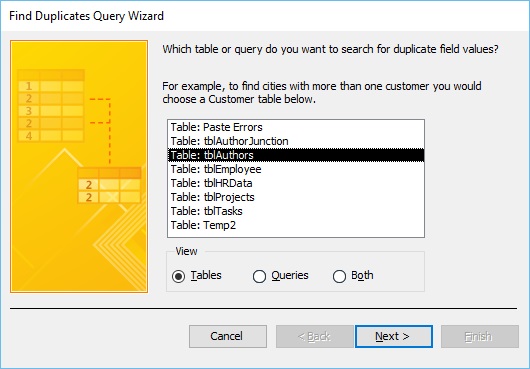
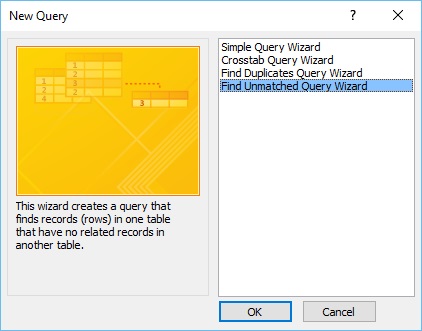
If you see the following screenshot, you have four different wizards to choose from. Select the find duplicates query wizard and click Ok.
The very first screen of the find duplicates query wizard will ask what table or what query you want to search for possible duplicates. Let us say we want to check our author's table to make sure that the same author hasn't accidentally been entered twice. So, select tblAuthors and click Next.
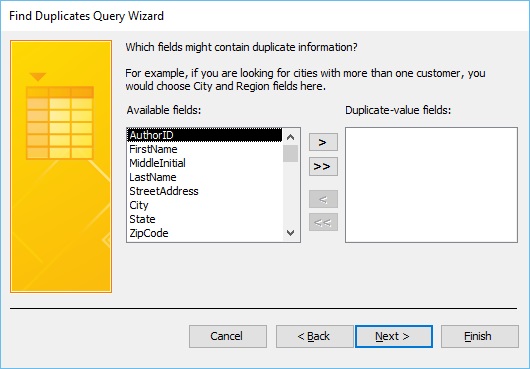
The second screen in the wizard will ask what fields might contain duplicate information.
Typically, you will not be using your primary key field, because, again, when you designate a field in Access as a primary key, Access will not allow duplicates to be entered.
We will look at any other field or a combination of fields.
We can search by the last name or the first name and the last name, or you can search by their street address, or to be more specific with their telephone number or birthday.
Let us now search by the first name, the last name, and birthday and click Next.

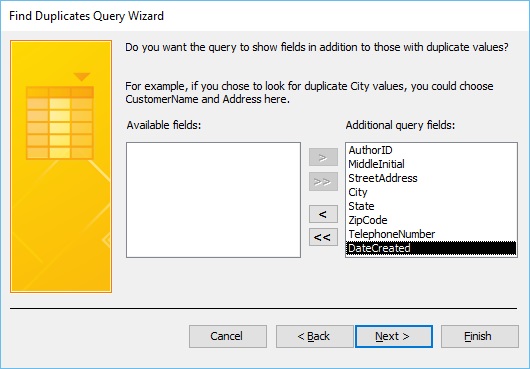
The following screen in this wizard will ask for the fields we want to be displayed in our query. For this, hit the double arrow, all of the fields will move over to the additional query fields area, and will be added to our query results.
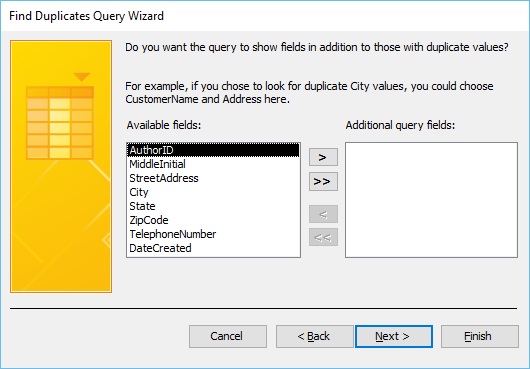
Let us now click Next. It will take us to the last screen in this query wizard.
In the following screen, enter how do you want to name your query.
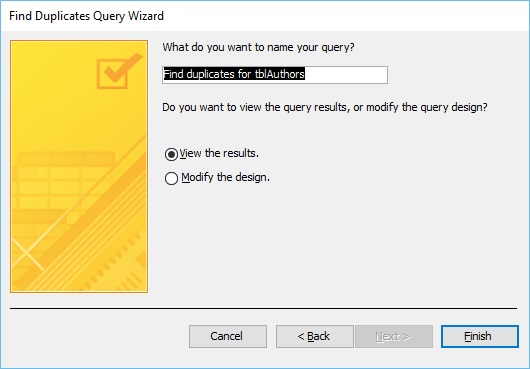
By default, it's going to name it find duplicates for plus whatever the name of the object that you're querying. In this case, tblAuthors, but you can give it any other name too and click finish.
Here, Access has found a possible duplicate, and that's going to be author Jose Caline which has same birthday, same address, same telephone number but different AuthorIDs.
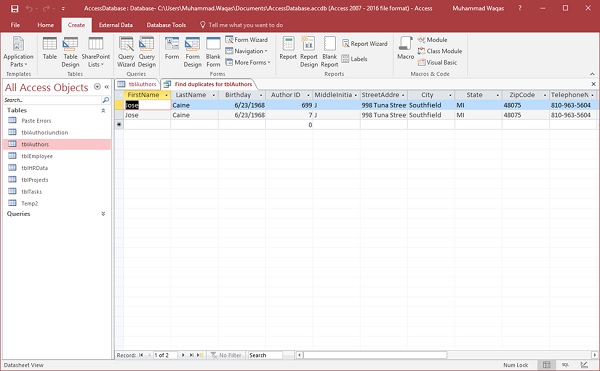
This one has definitely been entered twice by accident. We have now added all of the fields to our query, we could just go and delete the record. We also have to make sure that we don't have any related records in another table.
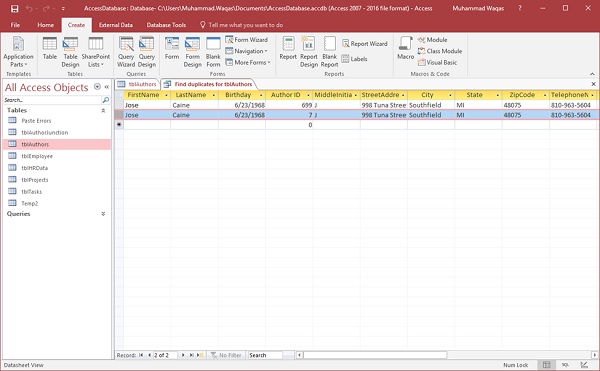
Select any record and choose Delete as in the following dialog box.
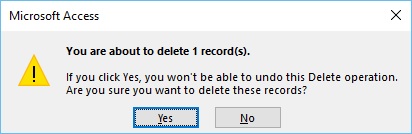
Access gives you a prompt, You are about to delete one record. Click Yes if you want to continue.
If you'd like to see how that wizard has created this query, go into the Design View and see what all has been added to this query.

As you can see in the above screenshot, we have our fields and some specific criteria underneath the first name field.
This is how this wizard is looking for that duplicate information. It is by far the easiest method to find duplicates.
Ms Access - Unmatched Query Wizard
In Access, there is another very useful wizard and that is Find Unmatched Query Wizard. The Find Unmatched Query Wizard creates a query that finds records or rows in one table that have no related records in another table.
As we have already discussed how data joins together in queries, and how most queries are looking for the matches between two or more tables.
This is the default join in Access, for example, if we design a query with two tables, tblCustomers and tblOrders, and join those two tables by the CustomerIDs, this query will return only the results that match. In other words, the customers who have placed orders.
There are times when we don't want to see the matches, for instance, we may not want to see any customer in our database the customers who have not placed orders as yet.
- This is exactly what the find unmatched query does.
There are many other possible uses for this kind of query as well.
In our database, we can use it to see which authors have not yet written a project or you could use it to see which employees have not yet elected any health benefits. Let us now open your database which contains Customers and Orders table; go to the Create tab and click on the query wizard button.
Select the Find Unmatched Query Wizard and click Ok.
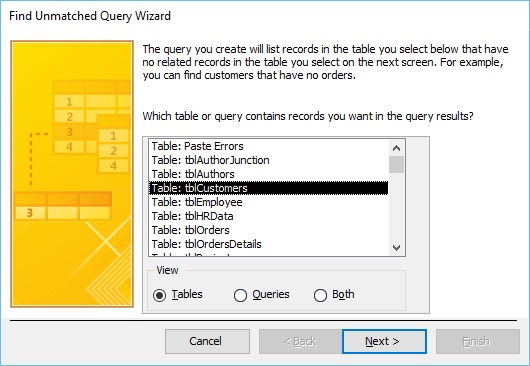
In this scenario, we will look out for those customers who have not placed an order. In the first screen it's asking which table or query contains the records you want in the query results.
We now want a list of customers from tblCustomers. Select that option and click Next.
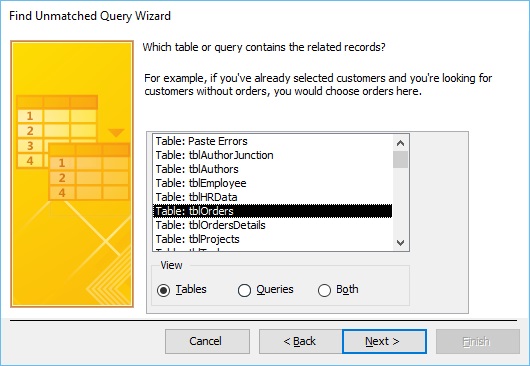
In the following screen, you need to specify which table or query contains the related records. In other words, what table are you using to compare with the first one. For this, we need to find the ones that have not placed orders. We need to select the table that contains information on all orders tblOrders. Now, click Next.
In the following screen, you need to specify which piece of information is in both tables.
- This will typically be some kind of primary key, foreign key, field, or relationship.
- If you have an existing relationship in your database, Access will select and match those fields for you.
- But, if you have other fields that you can join together, contain similar information, you can choose that here as well.
Here, we have CustID selected by default in both Fields in tblCustomers and Fields in tblOrders. Now, click Next.
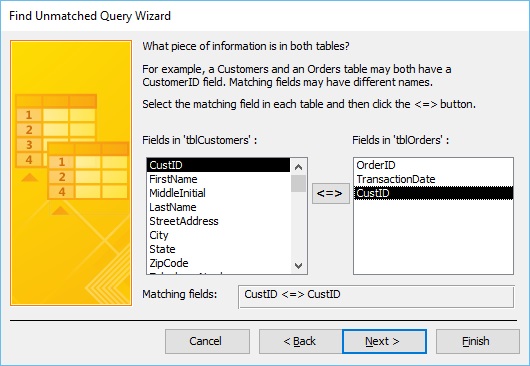
In the following screen, you can pick and choose the fields you want to see displayed in the query results.

Let us now select all the available fields and click on the double-headed arrow. This moves all the available fields over to the selected fields area. Now, click Next.
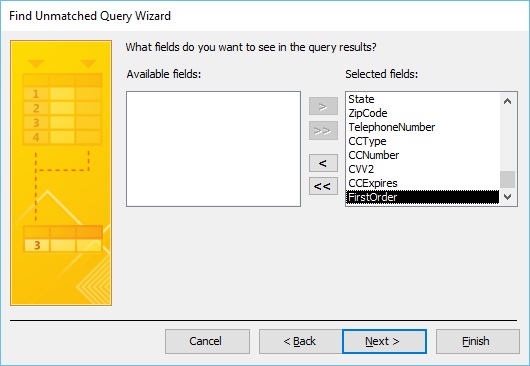
The last screen will allow you to choose a name for your query and click Finish.
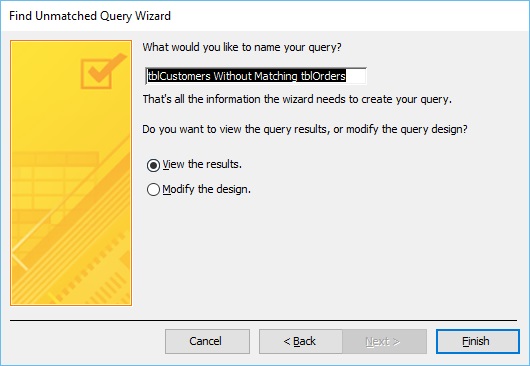
Here we have one customer listed as that customer who has not placed an order with us yet.
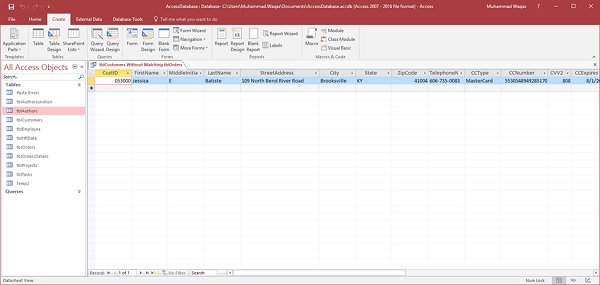
You can also see how that query was created. For this, you need to go back to the Design View.
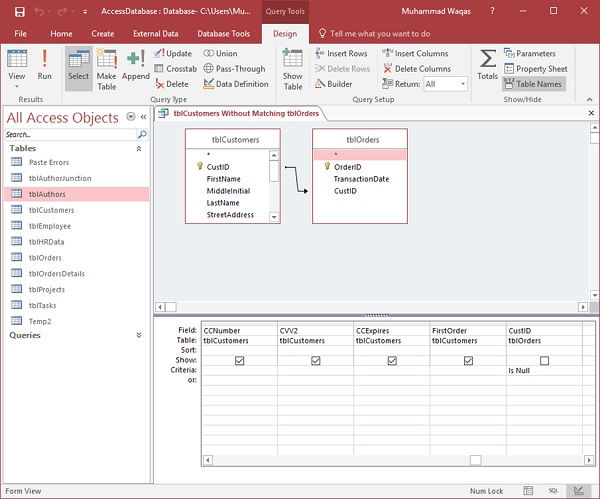
This wizard has created an Outer Join between tblCustomer and tblOrders and the Is Null criteria is added to the CustID from tblORders. This is to exclude certain records. In this case, it is the customers who have placed orders, or who have related information in tblOrders.
Ms Access - Create Form
Forms in Access are like display cases in stores that make it easier to view or get the items that you want. Since forms are objects through which you or other users can add, edit, or display the data stored in your Access desktop database, the design of your form is an important aspect. There's a lot you can do design-wise with forms in Microsoft Access. You can create two basic types of forms −
- Bound forms
- Unbound forms
Bound Forms
Let us now understand what Bound Forms are −
- Bound forms are connected to some underlying data source such as a table, query, or SQL statement.
- Bound forms are what people typically think of when they think of the purpose of a form.
- Forms are to be filled out or used to enter or edit data in a database.
- Examples of bound forms will typically be what users use to enter, view or edit data in a database.
Unbound Forms
Let us look into Unbound Forms −
- These forms are not connected to an underlying record or data source.
- Unbound forms could be dialog boxes, switch boards, or navigation forms.
- In other words, unbound forms are typically used to navigate or interact with the database at large, as opposed to the data itself.
Types of Bound Forms
There are many types of bound forms you can create in Access. Let us understand the types −
Single Item Form
This is the most popular one and this is where the records are displayed one record at a time.
Multiple Item Form
This displays multiple records at a time from that bound data source.
Split Form
The form is divided into halves, either vertically or horizontally. One half displays a single item or record, and the other half displays a list or provides a datasheet view of multiple records from the underlying data source.
Creating Forms
There are a few methods you can use to create forms in Access. For this, open your Database and go to the Create tab. In the Forms group, in the upper right-hand corner you will see the Form Wizard button.
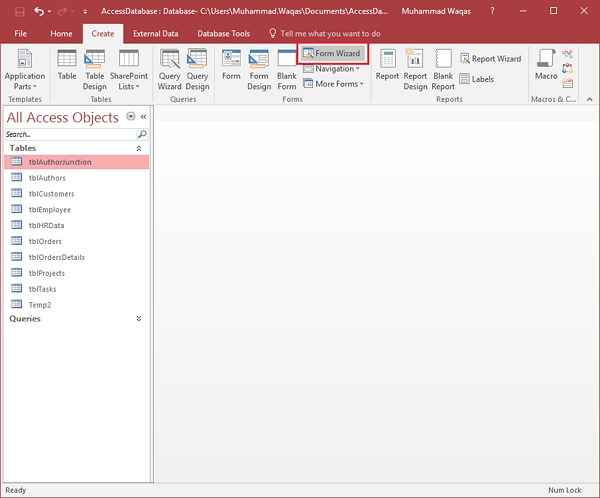
Click on that button to launch the Form Wizard.
On this first screen in the wizard, you can select fields that you want to display on your form, and you can choose from fields from more than one table or a query.
Let us assume we want to simply have a quick form that we are going to use for data entry for our employee information.
From Tables/Queries drop-down list, select tblEmployees table. Click on the double arrow to move all the fields at once.
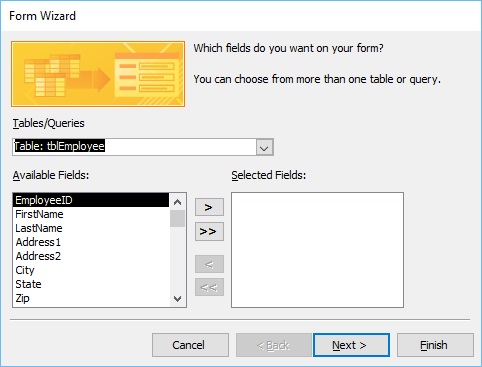
Let us just leave it with that one table, and click Next.
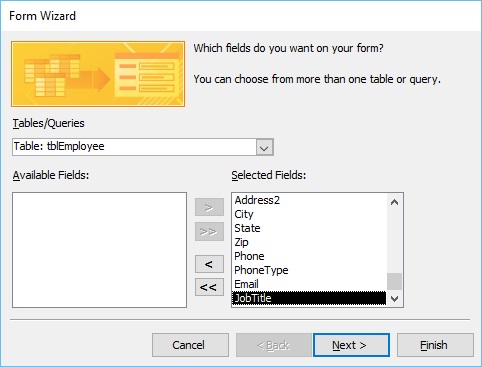
The following screen in the Form Wizard will ask for the layout that we would like for our form. We have columnar, tabular, datasheet and justified layouts. We will choose the columnar layout here and then click Next.
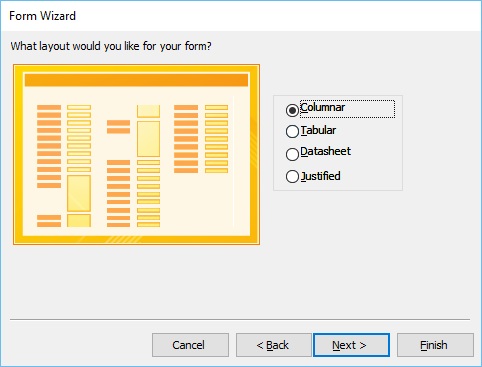
In the following screen, we need to give a title for our form. Let us call it frmEmployees.
Once you have given your form a title, you can open the form to see what that form looks like, or you can begin entering information into your table. Or you can choose the option to modify the form's design. Let us choose the first option to open the form to view or enter information and click Finish.
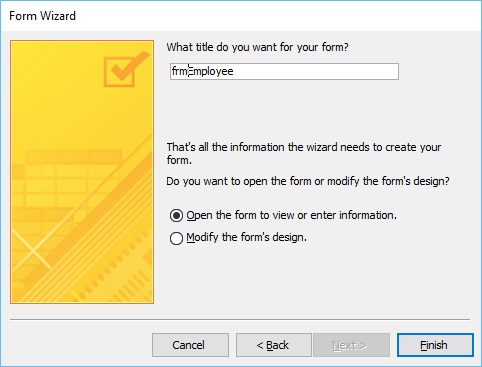
Now, take a look at the following screenshot. This is what your form looks like. This is a single item form, meaning one record is displayed at a time and further down you can see the navigation buttons, which is telling us that this is displaying the record 1 of 9. If you click on that button then, it will move to the next record.

If you want to jump to the very last record in that form or that table, you can use the button right beside that right arrow, the arrow with a line after it, that's the last record button. If you want to add new employee information, go to the end of this records and then after 9 records you will see a blank form where you can begin entering out the new employee's information.
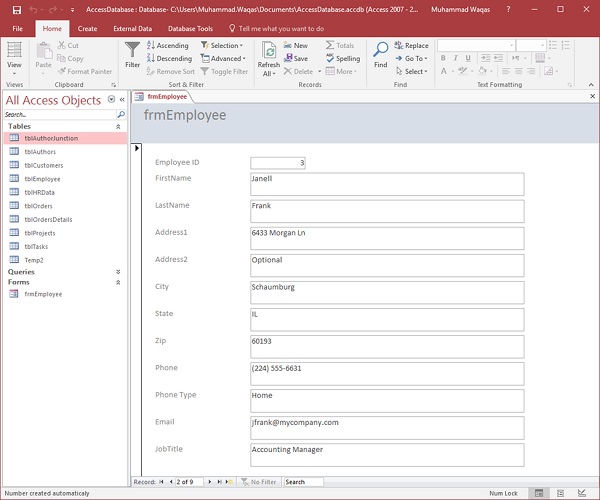
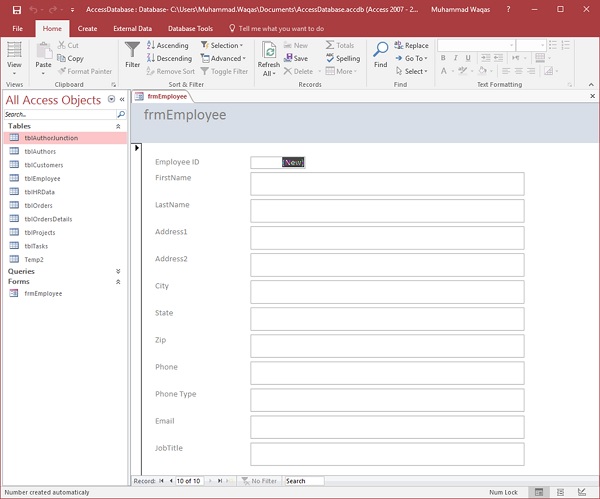
This is one example of how you can create a form using the Form Wizard. Let us now close this form and go to the Create tab. Now we will create a slightly more complicated form using Wizard. Click the Form Wizard and this time, we will choose fields from a couple of different tables.
In this Form Wizard, let us choose tblProjects for Tables/Queries, and select a few Available Fields such as ProjectID, ProjectName, ProjectStart, and ProjectEnd. These fields will now move to Selected Fields.
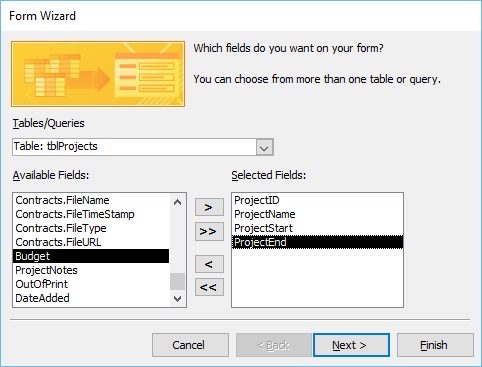
Now select tblTasks for Tables/Queries and send over the TaskID, ProjectID, TaskTitle, StartDate, DueDate and PercentComplete. Click Next.
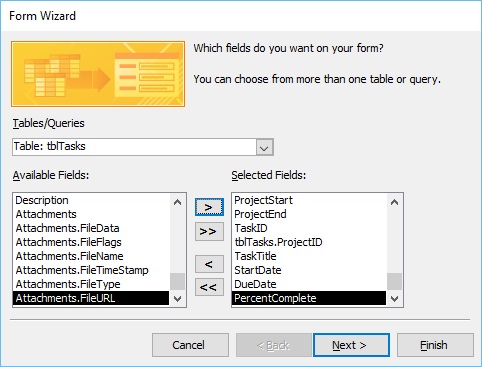
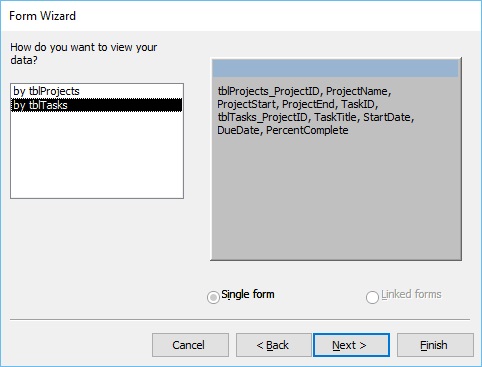
Here, we want to retrieve data from a couple of different objects. We can also choose from options on how we want to arrange our form. If we want to create a flat form, we can choose to arrange by tblTasks, which will create that single form, with all the fields laid out in flat view as shown above.
However, if we want to create a hierarchical form based on that one-to-many relationship, we can choose to arrange our data by tblProjects.
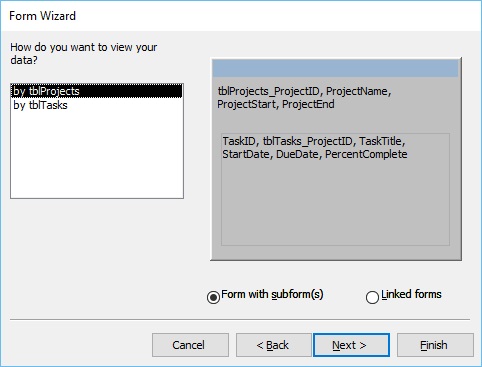
In the above window, we have the option to include a subform for tblTasks, or we can make that a linked form. This linked form is where tblProjects will have a button that will launch that second form filtered to the project that we have selected in that underlying projects form. Let us now select the Form with subform(s), and then click Next.
In the following screen, you can choose a layout for your subform. The Datasheet View gets selected by default. The Datasheet View is similar to Table View. Now, click Next.
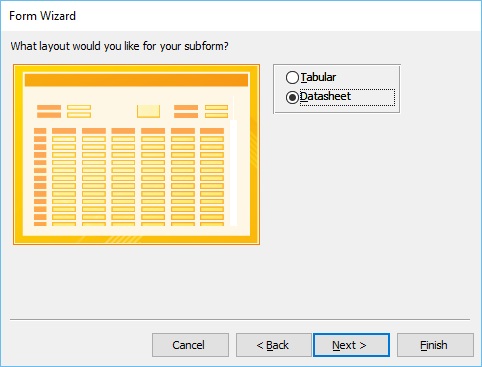
In the following screen, you need to provide a name for your forms. Enter the name you want and click Finish.
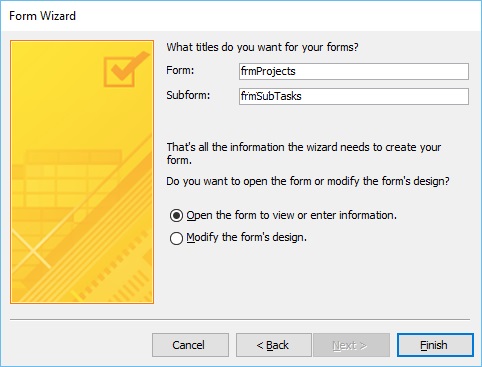
Access will give you a preview of what your form looks like. On top, you have the controls on your main form, which is from our Projects table. As you go down, you will see a subform. It's like a form within a form.
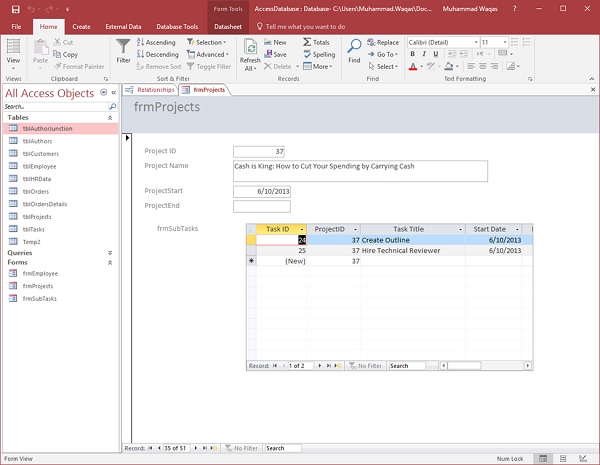
Multiple Item Form
You may also want to create a specific kind of form. For this, you can click on the More Forms drop-down menu.
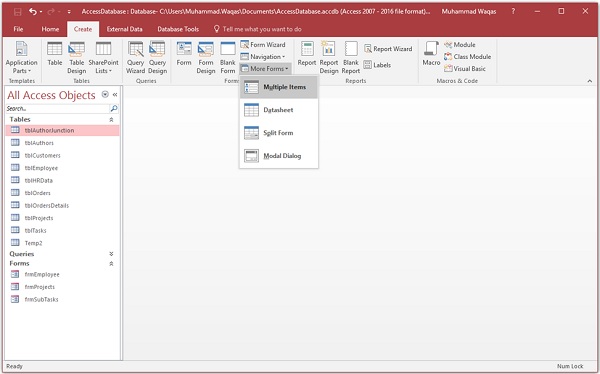
From the menu, you can create a Multiple Items form, a Datasheet form, a Split form, or even a Modal Dialog form. These are typically bound forms; select the object that you would like to be bound to that form. This does not apply to the Modal Dialog forms.
To create this type of form, you will need to select the object in navigation pane first. Let us select tblEmployees here.
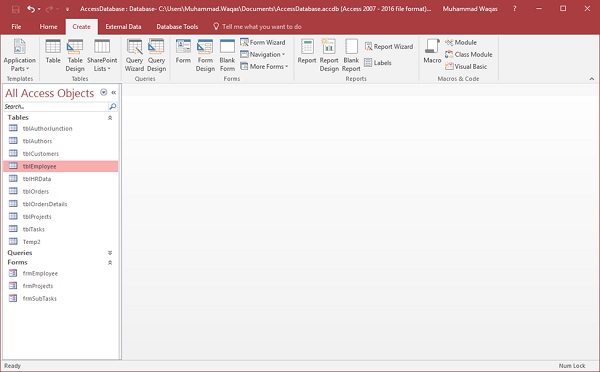
Proceed by clicking on More Forms and Multiple Items.
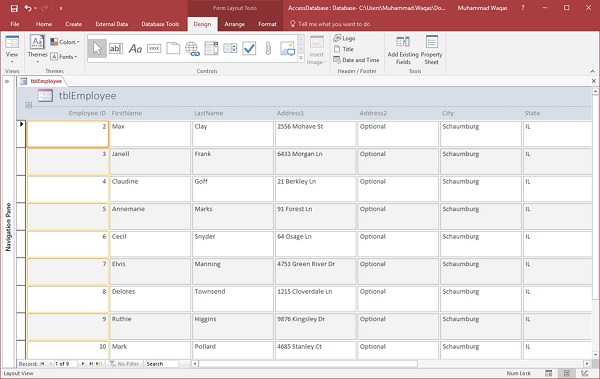
The above step will further create a Multiple Items form, listing out all the employees.
Split Form
This type of form is divided in equal halves, either vertically or horizontally. One half displays a single item or record, and the other half displays a list or a datasheet view of multiple records from the underlying data source.
Let us now select tblEmployees in the navigation pane and then on Create tab. Select Split Form option from More Forms menu and you will see the following form in which the form is divided vertically.
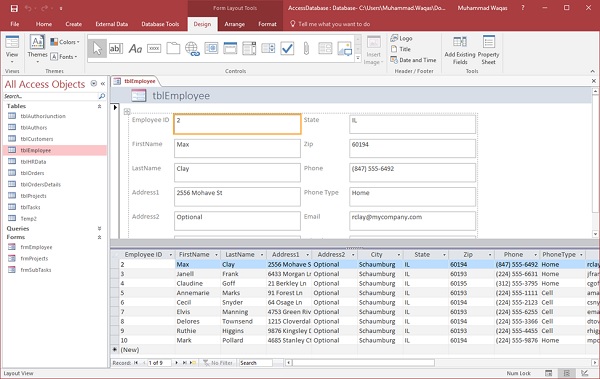
Ms Access - Modify Form
We have learnt several ways to create simple data entry forms. Although the forms ease the process of data entry; these may not serve other purposes that you would want. They may not be catchy or user-friendly for what you have intended.
- Upon creating a form, the first thing you will probably want to do is resize or move the controls around.
- You might also need to add a control or remove a control.
We will now discuss how to modify your form in an easy way.
Controls
It is merely a generic term used to describe any object on a form or report that displays data, performs actions or items used for decorations such as a line. In other words, a control is just about anything that is placed on a form or report.
The following can be considered as controls −
- Objects such as labels.
- Unbound or bound text boxes that you can use to add or edit or even calculate an expression.
- Command buttons that perform actions like Save, Open an e-mail or Print and these buttons are also known as controls.
- It is just a generic term for any object on a form or report.
We will now look at the different aspects of making a form presentable and understand how to edit and modify a form. Let us now open our Multiple Items form which lists out all employees from tnlEmployees.
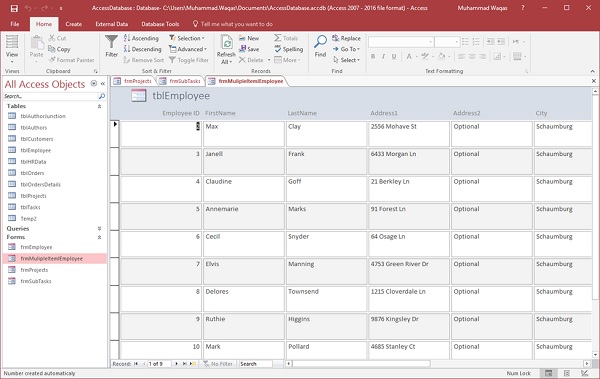
As you can see a list of employees, but doesn't really look like a very user friendly list. Our controls are oversized. They are too big, spaced apart and do not provide a very useful list view.
To edit the appearance of your controls on this form, you have two form views that you can use. In the Home tab, click the View drop-down.
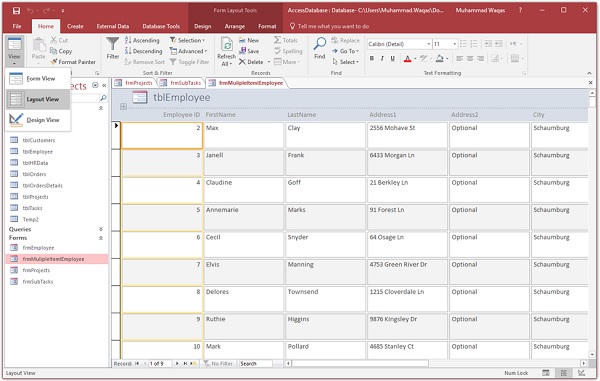
You have the Layout View or the Design View, and both of these views are used to edit your form. The Form View opens up by default; this is the view you will use to interact with or edit the underlying data source.
To edit the appearance of the form itself, we need to go to the Layout View first.
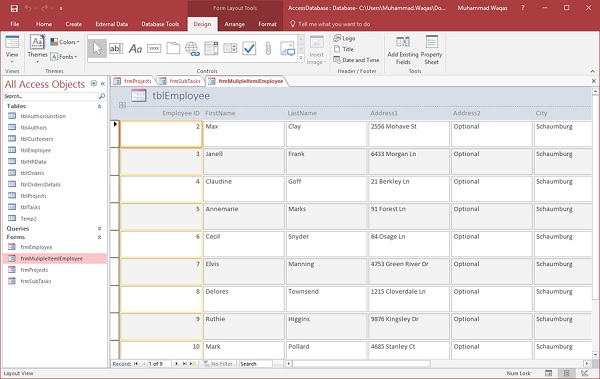
When you switch to the Layout View, you will see a series of contextual tabs appear.
At the top of Access, you will see an area marked Form Layout Tools with three tabs Design tab, an Arrange tab, and a Format tab and each of these tabs have different options for formatting the look or appearance of the form.
When you take your mouse and click on any one of these controls, you will notice that Access will highlight a given area of that form and all controls within that area are shaded a light orange whereas the actual control that you select will be shaded darker than the previous one or have a darker orange border around where you click.
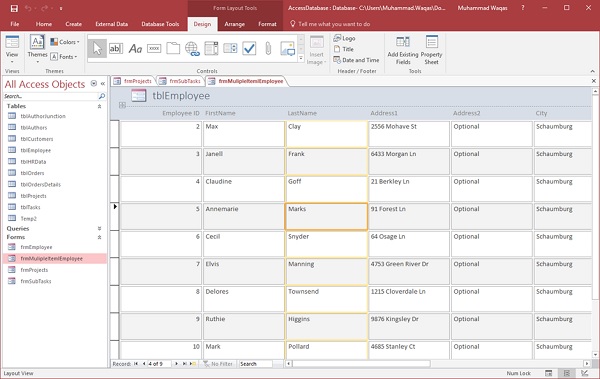
Here you can resize your controls as you want by clicking and dragging your mouse to resize the height or width or both of that one control.
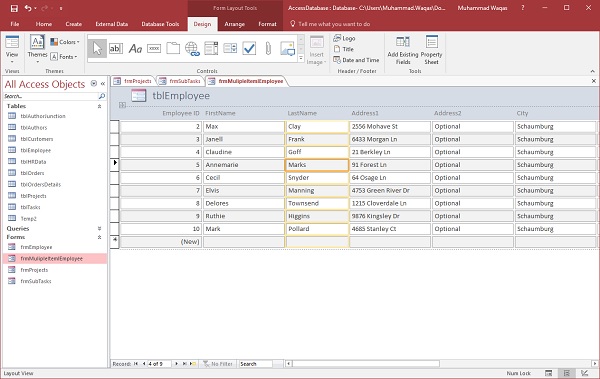
On this particular form, when you resize any single control, you also change the size of the rest of your controls on your form, this is because of how these controls are grouped. Let us now adjust all the fields the way you want by using the click and drag function of the mouse.
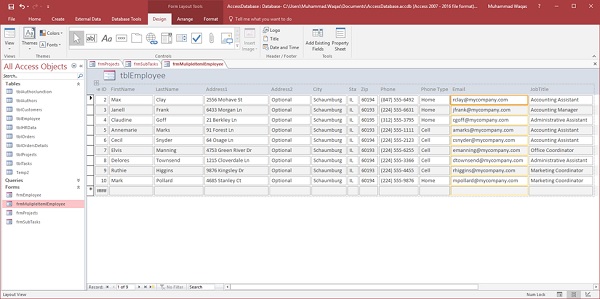
That is one quick way of editing the height and width of controls in your form from this Layout View.
Themes
In Access, there are some basic ways to format your forms by using built-in themes, colors, and font styles, customizing fill colors and shading alternate rows. Let us now open frmEmployees.

The forms that Access creates are plain and simple. They have a blue bar on the top and a white background.
If you want to see how else you can stylize these forms, you can go to the Design View or Layout View and explore some of the options you have on the Design tab in the Themes area.
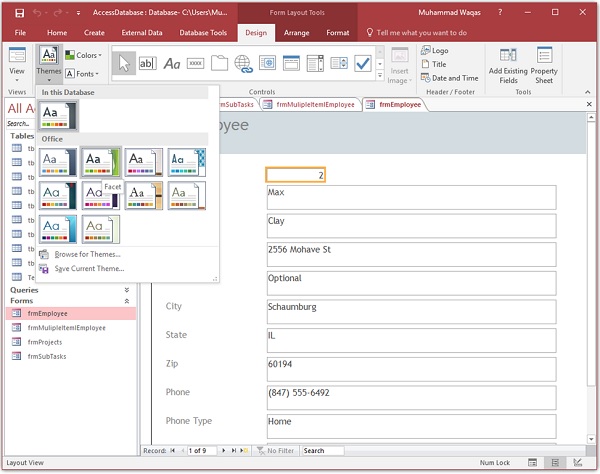
If you click on the Themes' drop-down gallery, you have many pre-created themes to try out from. Hovering your mouse over any one of them will give you a preview of changing things like colors and font sizes and the actual font used. To apply a particular style, simply click your mouse on it and you can see what that looks like.
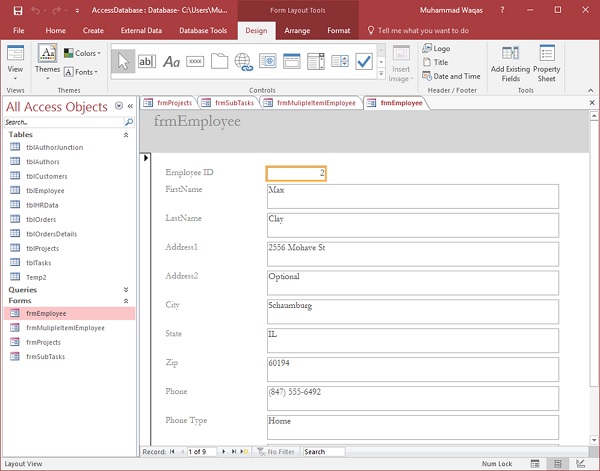
If you like the theme but you want to change the colors, you can adjust the colors by going back to the Themes group on the Design tab and choosing the color you like. You can also create custom colors to match your company's colors.
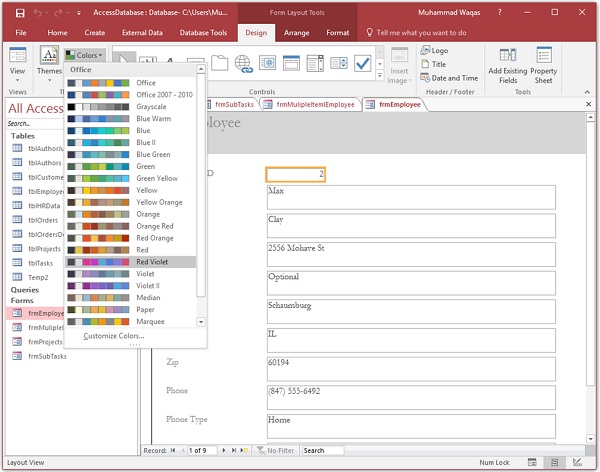
Similarly, you also have a series of font styles to choose from. You can choose one from the many that come prebuilt with the Office Suite or you can customize those fonts, choosing a specific heading font, a body font and even creating a custom name for that font group and saving.
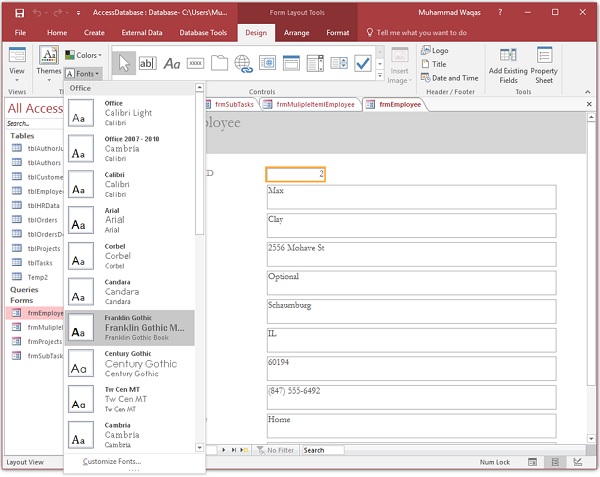
Let us go back to frmEmployees. In this form, you will see that every alternate row is shaded light gray.
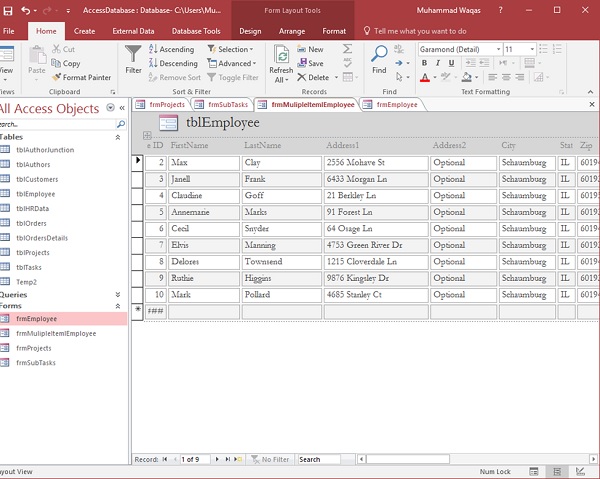
The formatting option is referred to as Alternate Row Color and if you want to adjust that in a multiple form, go to the Design View.
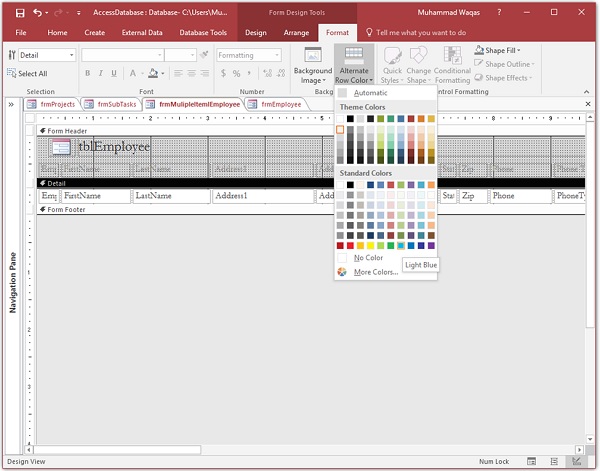
Select that detail section and then go to the Format tab and in background group you should see an option for Alternate Row Color. You can change the colors for alternate rows. To see what that looks like, simply go to the Form View or the Layout View.
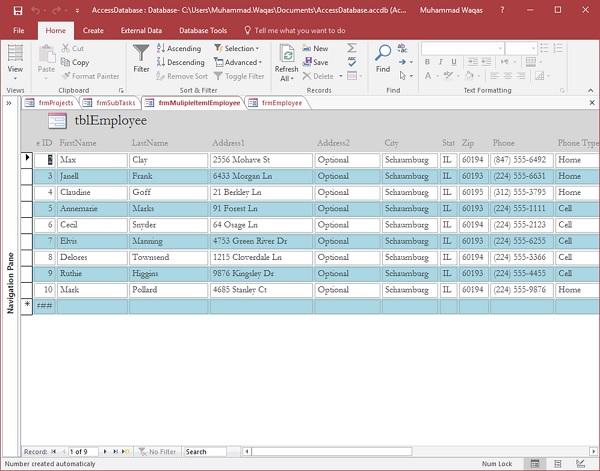
If you don't want any shading at all, you can choose No Color as your Alternate Row Color and that is more the traditional look from earlier versions of Access.
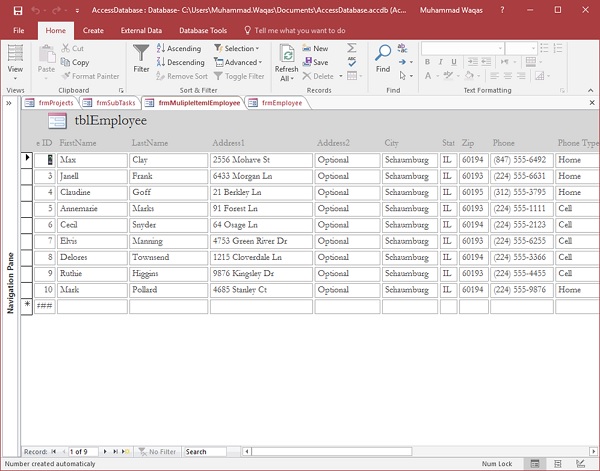
Ms Access - Navigation Form
Access includes a Navigation Control that makes it easy to switch between various forms and reports in your database. A navigation form is simply a form that contains a Navigation Control. Navigation forms are a great addition to any desktop database.
Microsoft Access offers several features for controlling how users navigate the database.
We have already used navigation pane to navigate through all of the Access objects we create, such as forms, queries, tables, etc.
If you want to create your own navigational structure and make it easier for the users to find the specific objects that they really need, you can build navigation form, which is a form that uses a navigation control so users can use or view forms and reports right from within that main navigation form.
Example
Let us now take a simple example in which we will create the navigation form. For this, go to the Create tab; in the Forms group, you will see this navigation drop-down menu.
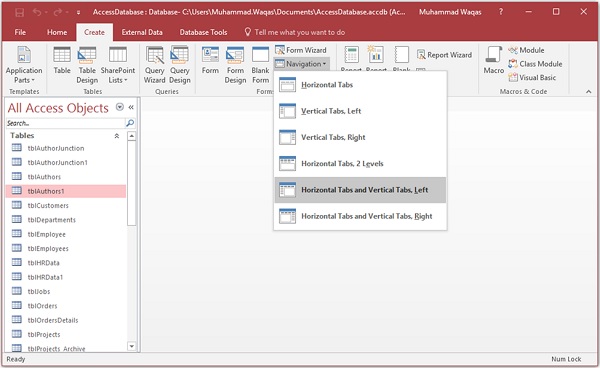
In this menu, you will see different layouts for how to arrange your forms and reports that you would like to embed on this navigation form.
There is one with horizontal tabs, one with vertical tabs where all the tabs are aligned to the left, a vertical tabs layout where all the tabs are aligned to the right.
There is a horizontal tabs layout that has two levels to it, so if you have a lot of objects that you want to display across the top, you can make use of this.
You can have one where you have both horizontal tabs and vertical tabs, either aligned to the left or to the right.
In the following example, we will be using Horizontal Tabs and Vertical Tabs. To create that layout or that navigation form, simply click on it, and Access will create an unbound form, with a navigation control on it.
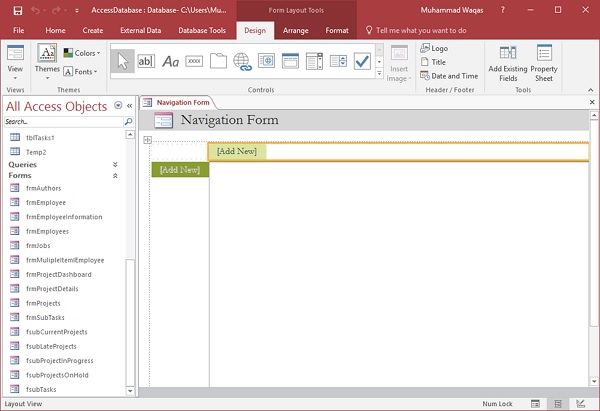
To add objects to this navigation form, the easiest way to do is through your layout view, by simply dragging and dropping objects to where you want them to appear.
Let us now drag frmProjects form from the navigation pane and drop it on the [Add New] on the top.
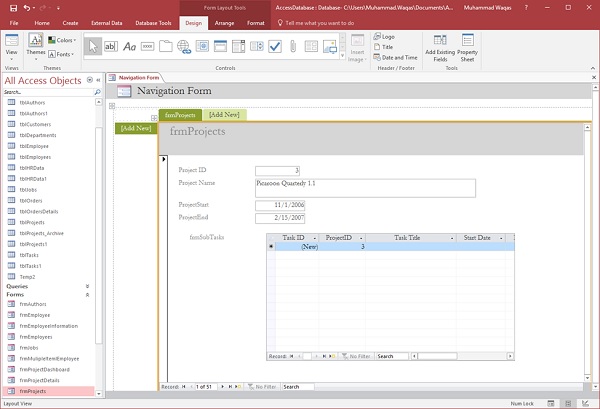
Similarly, drag frmAuthers form from the navigation pane and drop it to the left of the Add New Button.
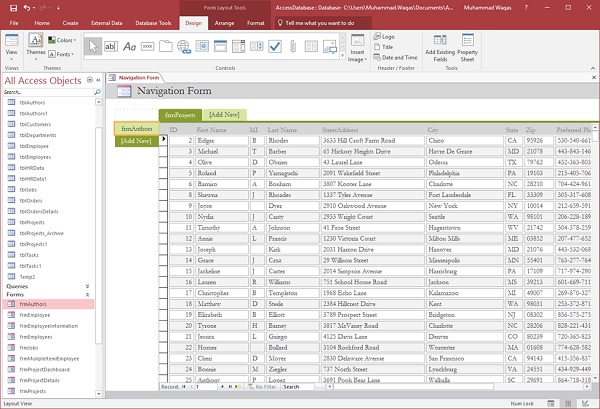
Let us now add other forms related to Projects such as frmSubTasks, frmCurrentProjects etc.
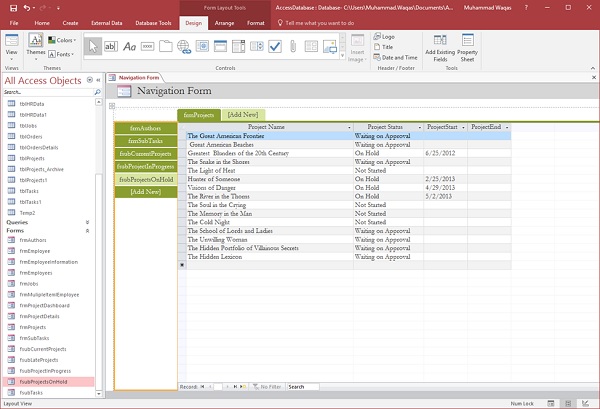
Let us now add additional tabs across the top. We will first add the frmEmployees form.
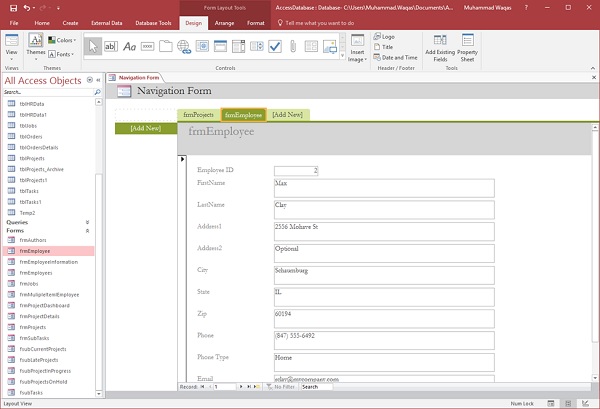
Now, you will see that your other project buttons have disappeared from the left and that is because they are attached to Project tab. All the buttons you view on the left are linked to whatever you have selected up the top. Now with the Employee tab selected, let us drag employees-related information to the left.

Now we have project information on one tab, employee information on the other. Similarly, you can add more tabs as per your requirements. As you can see that the name of the tabs is not appropriate, so let us start renaming some of these tabs to make them more user-friendly. The easiest way is to double-click on any tab or any button on the left and rename it as shown in the following screenshot.
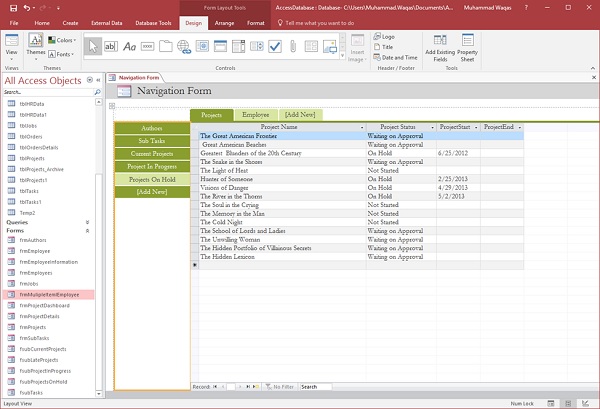
Ms Access - Combo BOx
When you enter data in any form, it can be quicker and easier to select a value from a list than to remember a value to type. A list of choices also helps ensure that the value entered in a field is appropriate. A list control can connect to existing data, or it can display fixed values that you enter when you create the control. In this chapter, we will cover how to create a combo box in Access.
Combo Box
A combo box is an object or control which contains a drop-down list of values that the user can select from.
- The combo box control provides a more compact way to present a list of choices.
- The list is hidden until you click the drop-down arrow.
- A combo box also gives you the ability to enter a value that is not in the list.
- In this way, the combo box control combines the features of a text box and a list box.
Example
Let us now take a simple example of creating a combo box. We have created a form for an employee as shown in the following screenshot.
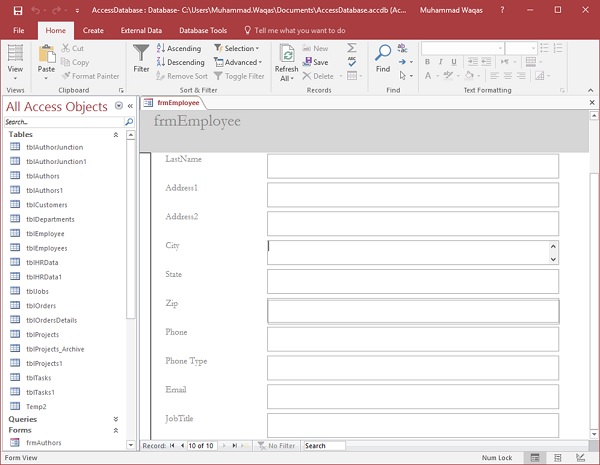
We now want to create a combo box for Phone type because we know that phone type should be either Home, Cell or Work. This information should be available in the dropdown list and the user need not type this information.
Let us now go to the Design View for this form. Select the Phone Type field and press delete.
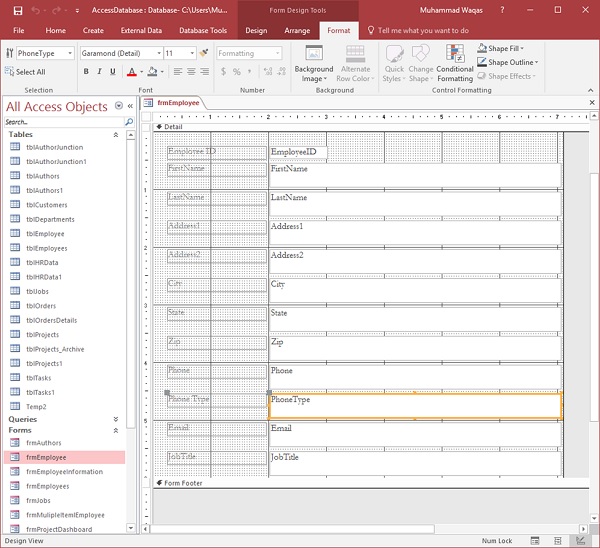
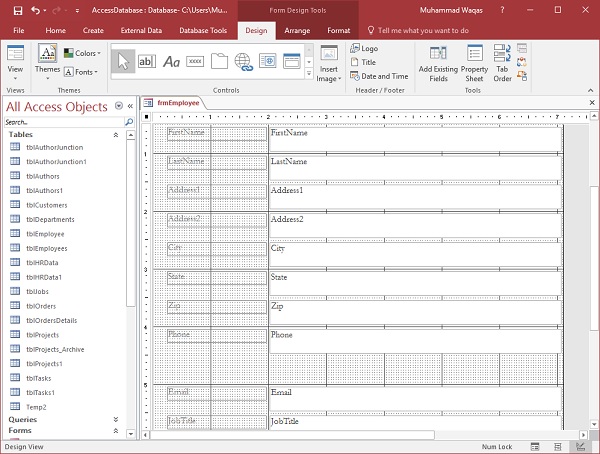
Once the Phone Type field is deleted, go to the Design tab.
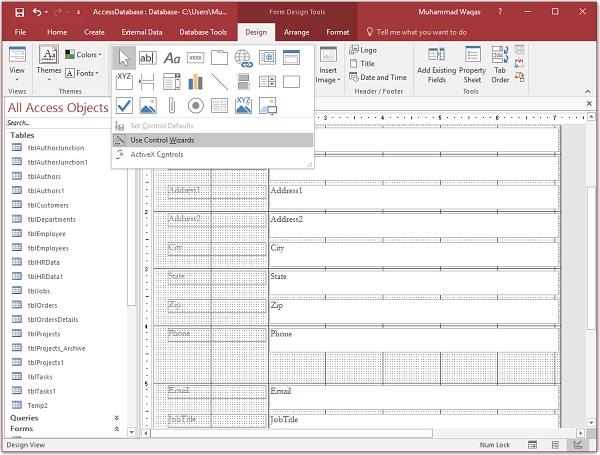
Let us now select Use Control Wizards option from the Controls menu and then Select the Combo Box Control from the menu as shown in the following screenshot.
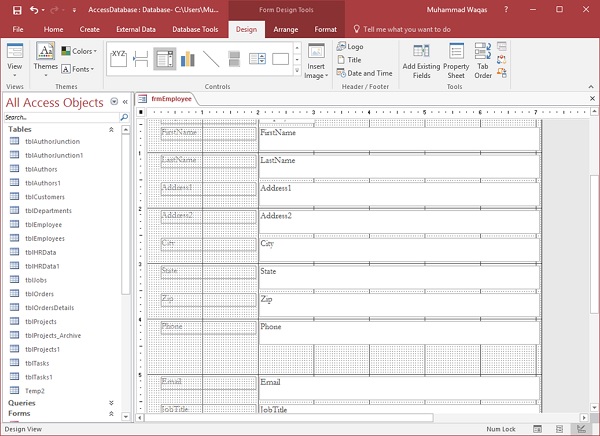
Now, draw the combo box where you want and when you release your mouse then you will see the Combo Box Wizard dialog box.
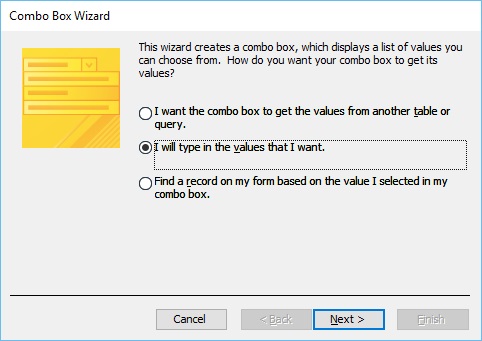
Here you have different option for data; let us select the 2nd option wherein, we will add the values and click Next.
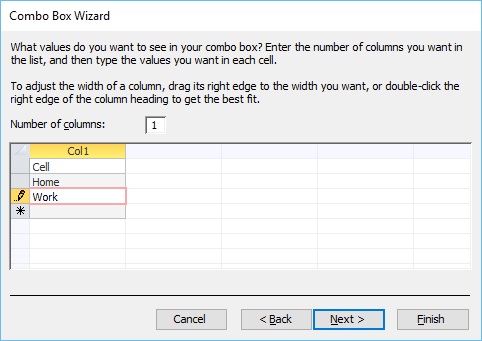
Enter the values you want to be displayed in the drop-down list and click Next.
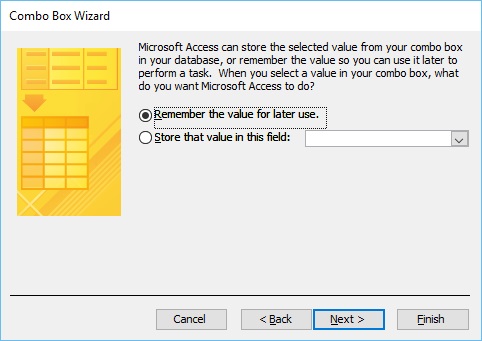
Click Next again.
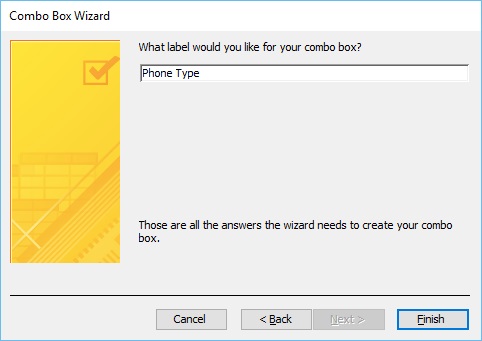
Enter the label for your combo box and click Finish.
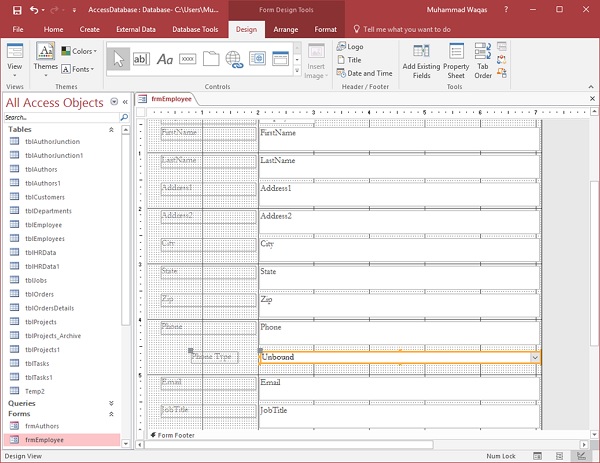
You can see that combo box is created but it is not aligned to other field. Let us do that first by selecting all fields and then go to the Arrange tab.

To the left, you will see the Stacked option. Click this button.
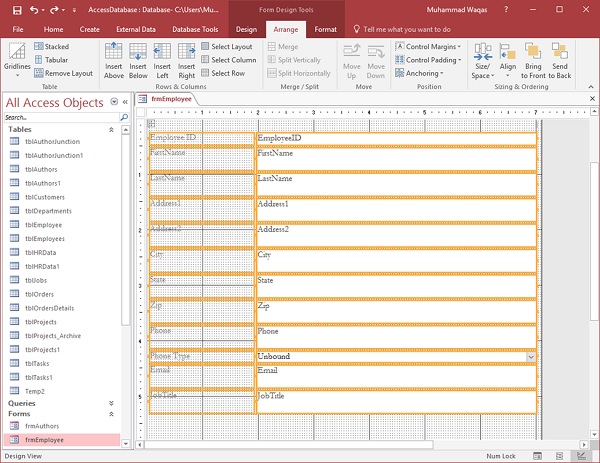
You can now see the fields are aligned.
To make the size of each field same we have different options, let us click the Size/Space button.
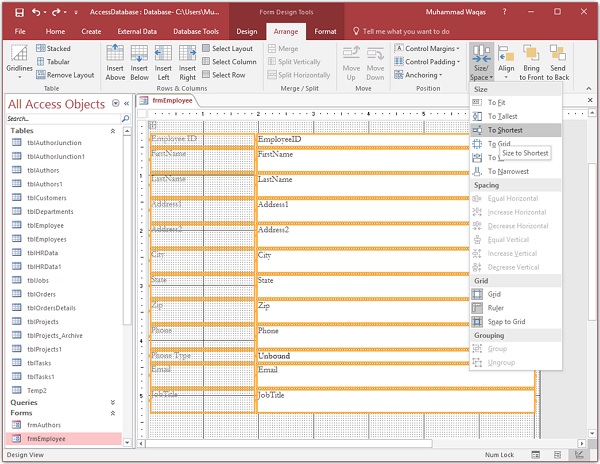
From the drop-down list, click To Shortest.
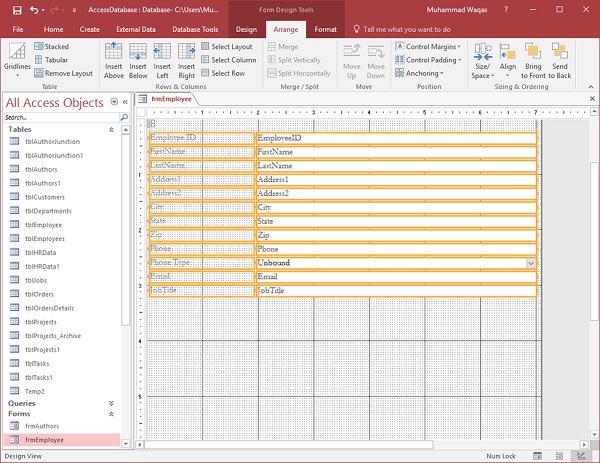
Now go to the Form view.
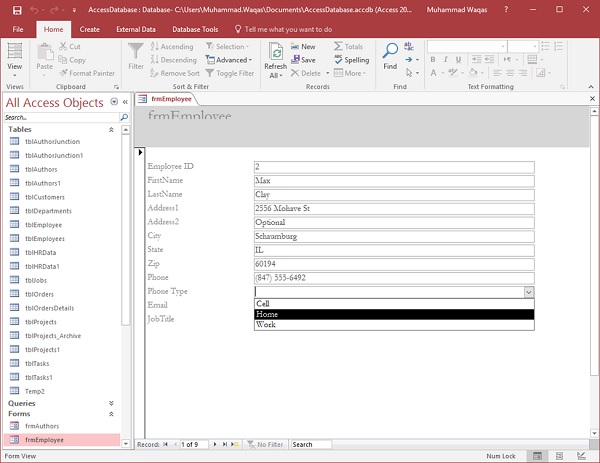
A user can now easily select any option for the Phone type.
Ms Access - SQL View
In this chapter, we will be covering the SQL view. Whenever you create a query in query design, Access automatically creates the SQL query for you. This actually retrieves data from the tables. To see how your query is created in sql when you create it in query design, let us open your database.
Select the Query Design from the Create tab and add the tblEmployees table.
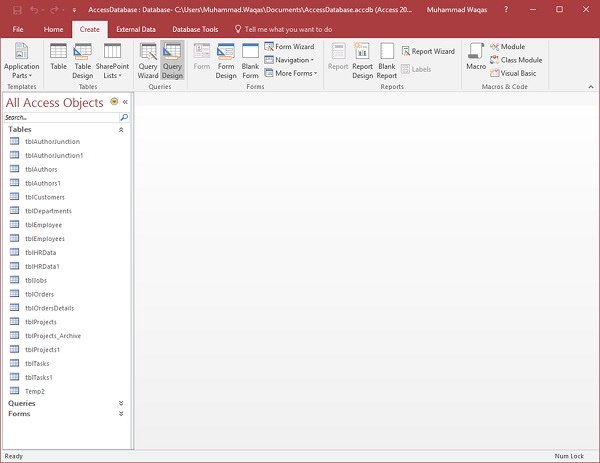
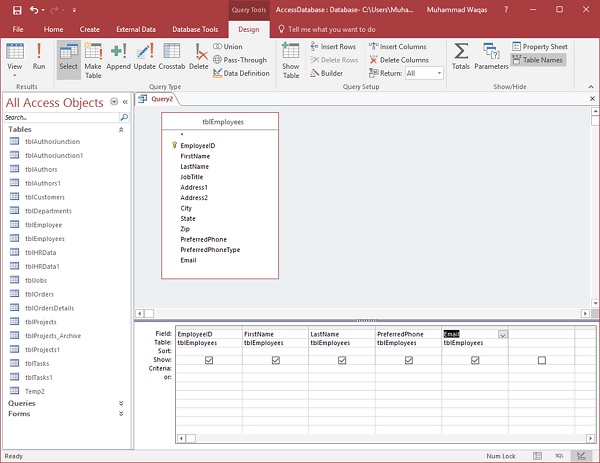
Select the field you want to see as query result and then run your query.
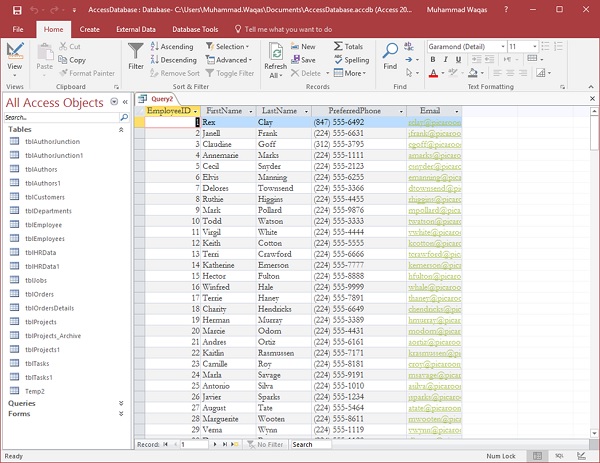
You can now see all the employee information as query result. You have selected certain fields in the Query Grid; at the same time, MS Access has also created an SQL Query with the results obtained from your Query Grid.
To view the SQL, go to the Home tab. Select SQL View from the View menu and you will see the SQL of your query.
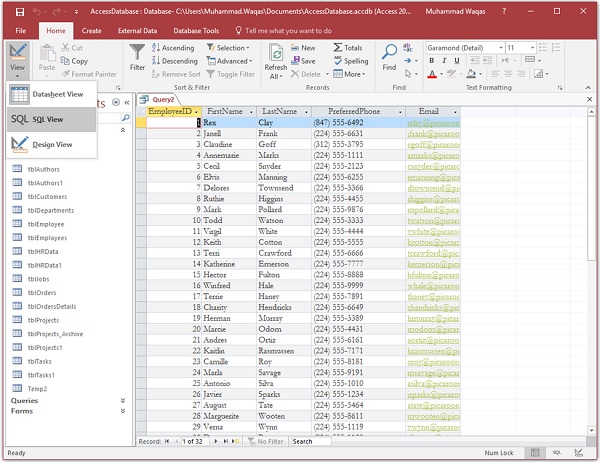
Example
The following is another example wherein, we will see the projects in progress.
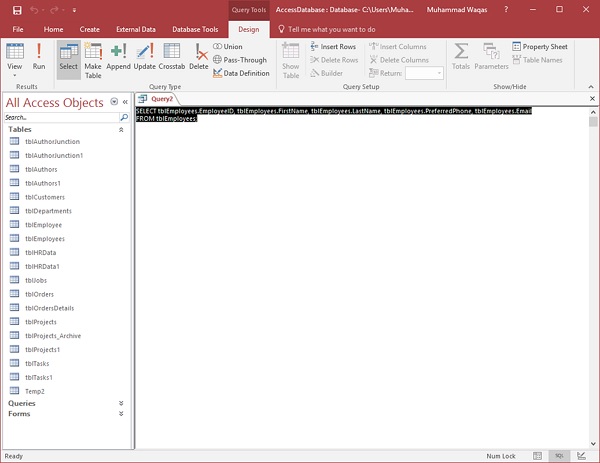
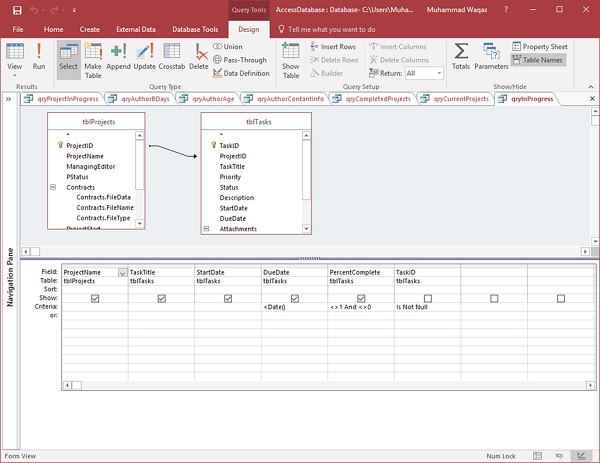
Let us now run your query.
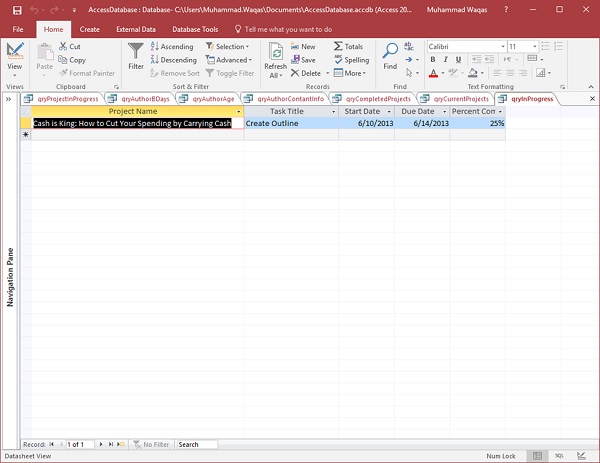
To see the SQL, select the SQL View from the View menu.
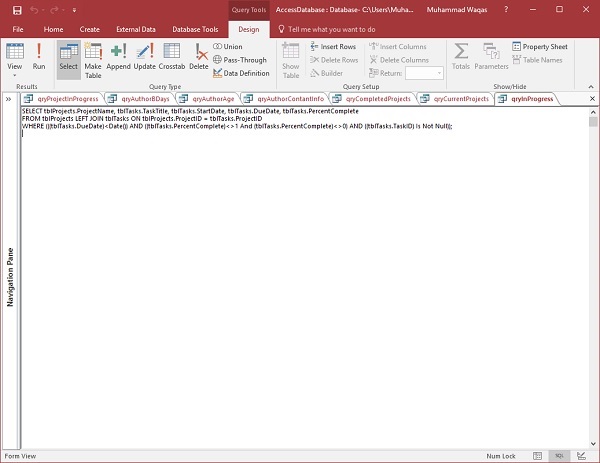
You can see the SQL query which is generated by Access automatically. This helps retrieve data from two tables.
Ms Access - Formatting
One especially useful formatting tool in Access is the ability to apply Conditional Formatting to highlight specific data. Let us take a simple example of conditional formatting.
Example
In this example, we will be using a form fSubCurrentProjects in our database.

We have a list of all of the projects in this database and we have also got a couple of new fields like the On Time Status and the Number of Late Tasks. This form is created from another query.

In this query, we have a join between a table and a query that will display the count of due dates or how many projects have tasks that are overdue. We also have a calculated field here that uses the IF function to determine whether or not the count of the due date is greater than zero. It will then display the words Late if the project is late or On Time if that specific project does not have any overdue tasks.
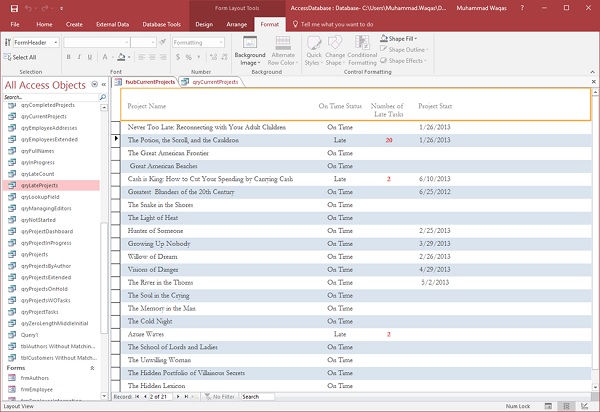
Example 1
In this example, we will be using the above form to understand how you can use Conditional Formatting to highlight specific pieces of information. We will now highlight every single project that is currently running late. To apply Conditional Formatting to one field or more than one field, we will need to switch over to the Layout view.
Now, select the On Time Status field.

Now, go to the Format tab.
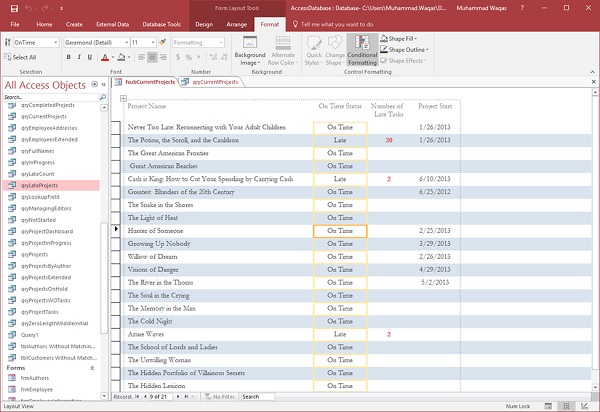
On that Format tab, you should see a group called Control Formatting and a special button for Conditional Formatting. Let us now click on Conditional Formatting.
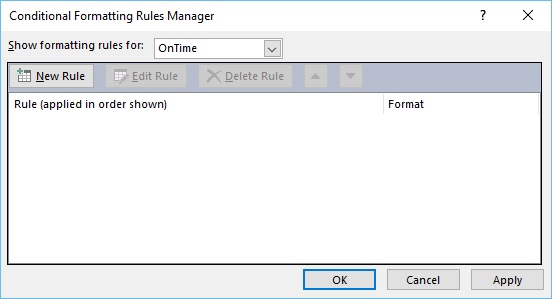
You will now see a Conditional Formatting Rules Manager and currently we have no rules applied to this control. Let us now create a new rule by clicking on the New Rule button.
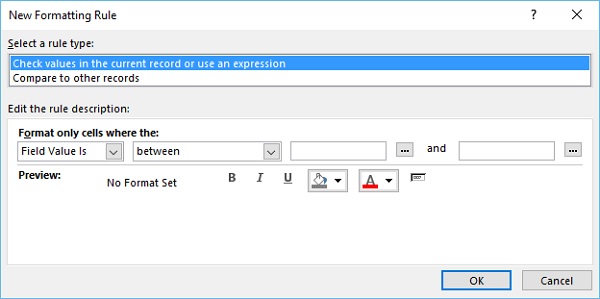
You will now see a New Formatting Rule dialog box. We will first specify the type of rule we will be creating and here we have two options. The first option is to check the values in the current record or to use an expression, and the second option is to compare this record with the other records.
We now have only one of two values in our form; either On Time or the word Late and that is from the given query. Let us now select the Field Value Is from the first combo box and then select equal to from the second combo box. Now, type the word Late in quotation marks.
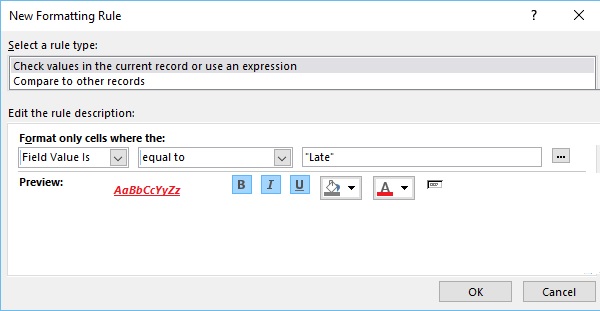
We can now set our Conditional Formatting, how we want this field to look like if the word Late appears in that field. Let us now change the font color to red and make it bold, italic and underline, and that's our conditional rule. Let us now click Ok and then click Apply, and Ok again.
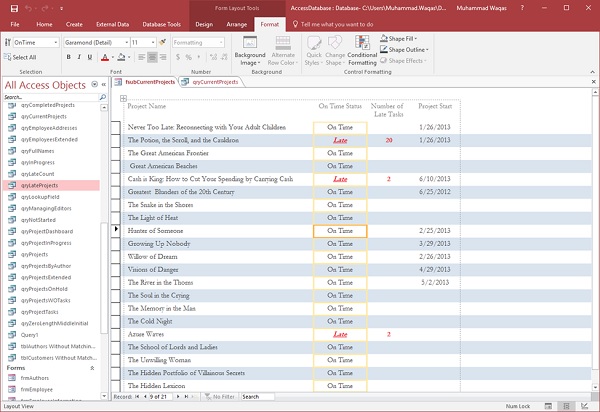
You can see that the word Late is formatted now. This is one example of how to create a very basic conditional format rule.
Example 2
Let us take another example. Here, we will make the title or the name of the project red and bold, italic and underline. Select the project name control on your form.
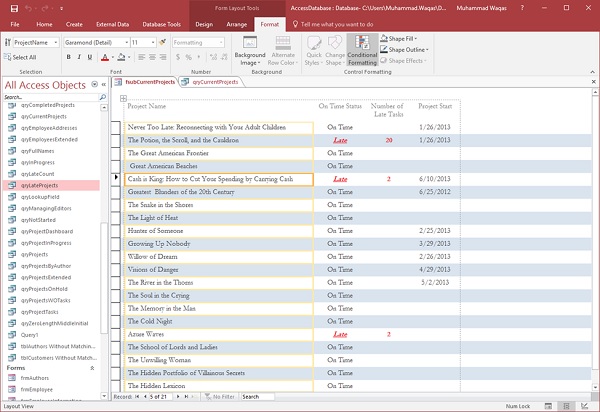
We will now go back to our Format tab and click on Conditional Formatting and create a new rule for that specific control as shown in the above screenshot.
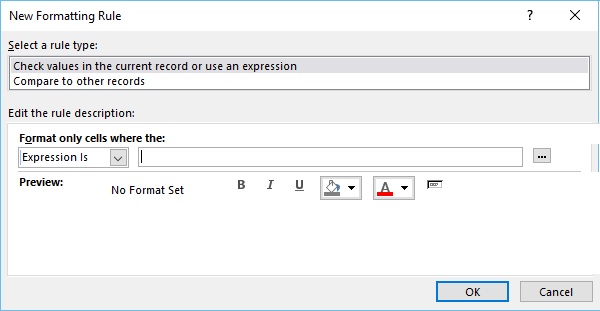
Here, we will not be checking the value of the current field we have selected, but we will be checking it against another field on this form. Select Expression Is in the first combo box and then click on button at the end as in the above screenshot.
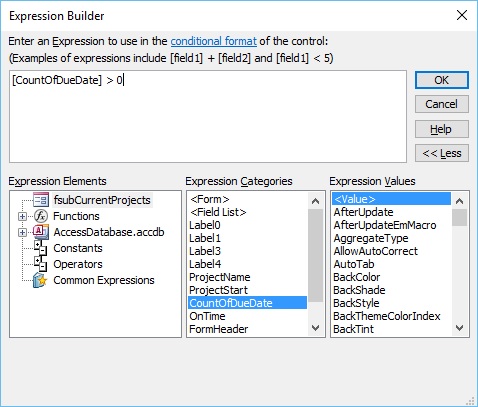
In the Expression Categories, you have every single object that is on this form. Doubleclick on CountofDueDate. This will send the reference to that control or that field up to our expression builder and condition if it is greater than zero. Now, click Ok.
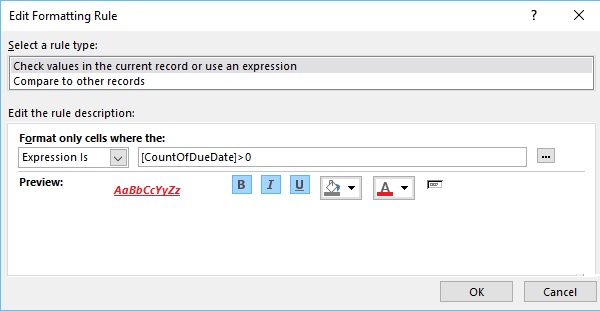
Let us now click Ok and then, click Apply and Ok again.
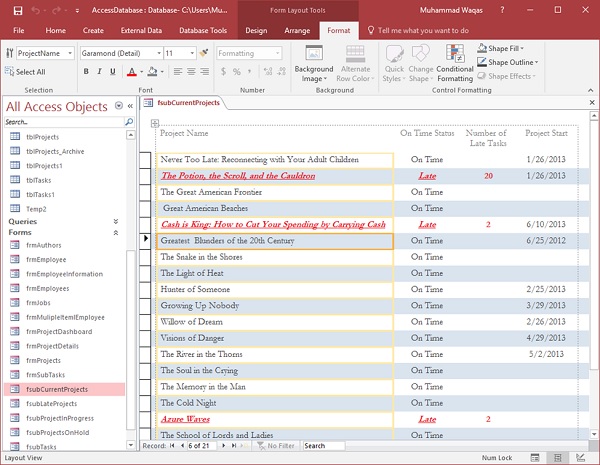
That was an example of Conditional Formatting on a field based on values in another field.
Example 3
Let us now look at another example of conditional formatting. Let us assume, we want to see which projects are more late or have more late tasks than other late projects. Select the Conditional Formatting option.
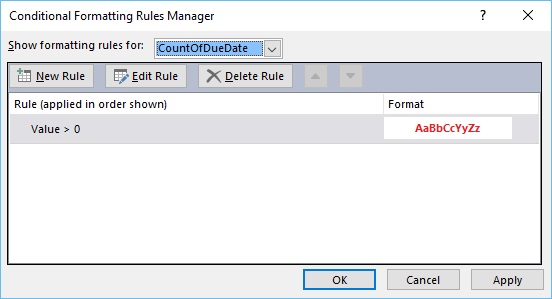
Click on the New Rule button to create a new rule and then click Ok as in the above screenshot.
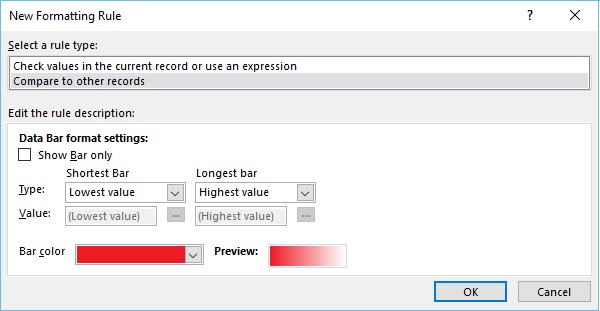
In the New Formatting Rule, we will now select a rule type Compare to other records. Let us further change the Bar color to red. We want our shortest bar to represent the lowest value and the longest bar to represent the highest value. Let us now click Ok and then, click Apply and Ok again.
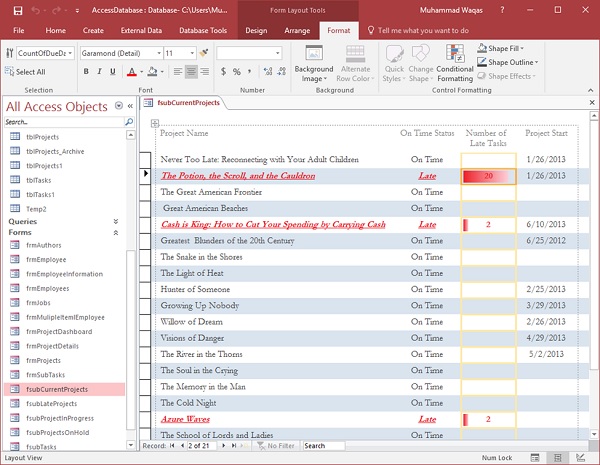
You can now see Conditional Shading applied as in the above screenshot. Let us now go to the Form view.
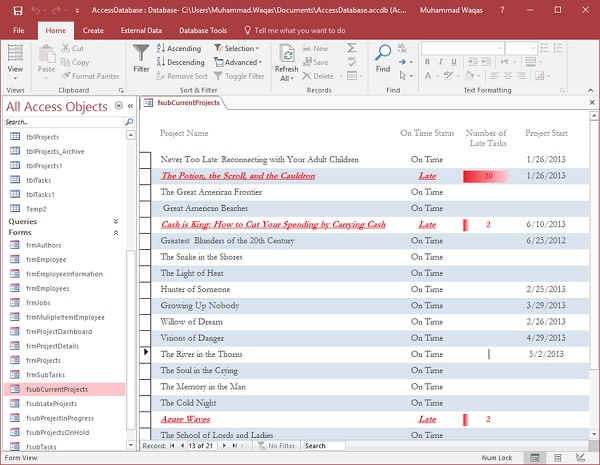
Ms Access - Controls & Properties
In this chapter, we will be covering Controls and Properties available in Access. We will also learn how to add controls to forms. Controls are the parts of a form or report that you use to enter, edit, or display data. Controls let you view and work with data in your database application.
The most frequently used control is the text box, but other controls include command buttons, labels, check boxes, and subform/subreport controls.
There are different kinds and types of controls you can create, but all of which will fall into one of the two categories bound or unbound.
Bound Controls
Let us now understand what Bound Controls are −
- Bound controls are ones that are tied to a specific data source within your database such as a field and a table or a query.
- Values can be either text, dates, number, check boxes, pictures or even graphs.
- You use bound controls to display values that come from fields in your database.
Unbound Controls
Let us now understand what Unbound Controls are −
- Unbound controls on the other hand are not tied to a data source, and they exist only in the form itself.
- These can be text, pictures or shapes such as lines or rectangles.
Control Types
You can create different types of controls in Access. Here, we will discuss a few common ones such as Text box, Label, Button Tab Controls etc.
Text Box
Typically, anything that is in a text box will be bound, but not always.
You can use these controls to interact with the data stored in your database, but you can also have unbound text boxes.
Calculated controls will perform some kind of calculation based on an expression that you write and that data is not stored anywhere in your database.
It is calculated on the fly and live just on that one form.
Labels
- Labels will always be text and unbound.
- Normally, labels are not connected to any source in your database.
- Labels are used to label other controls on your form such as text boxes.
Button
- This is another type of popular control; these command buttons usually perform a macro or module.
- Buttons are usually used to interact with the data or objects within your database.
Tab Controls
- Tab controls give you a tabbed view of controls or other controls in your form.
- Adding tabs to a form can make it more organized and easy to use, especially if the form contains many controls.
- By placing related controls on separate pages of the tab control, you can reduce clutter and ease your work with data.
Hyperlink
Hyperlink creates a hyperlink on your form to something else. It can either be a web page or even another object or place within your database.
Some Other Controls
Let us now look into some other controls −
You can also create a web browser control and navigation control, groups, page breaks, combo boxes.
You can create charts, lines, toggle buttons, list boxes, rectangles, check boxes, unbound object frames, attachments, option buttons, subforms and subreports, bound object frames and even place images on your form.
Example
Let us now look at a simple example of some of these controls by creating a new blank form. Go to the Create tab in the forms group and click on Blank Form.
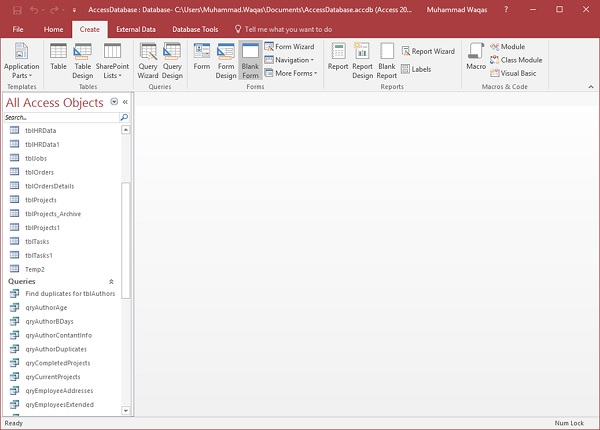
The above step will open an unbound form, which is not attached yet to any item in our database.
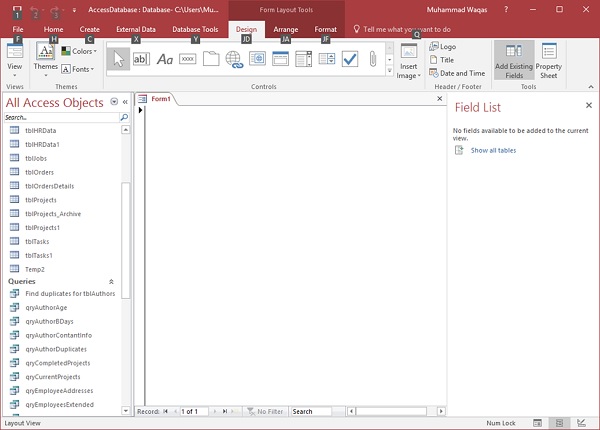
By default, it will open in layout view as shown in the above screenshot.
Let us now go to the Design View to add fields.
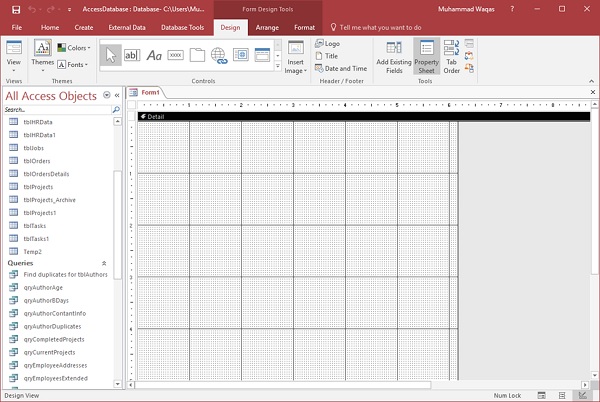
On the Design tab, click on the Property Sheet.
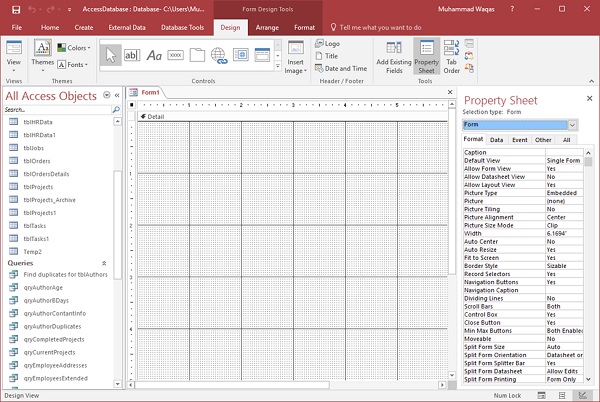
On the Property Sheet, click on the drop-down arrow and make sure Form is selected, and then go to the Data tab.
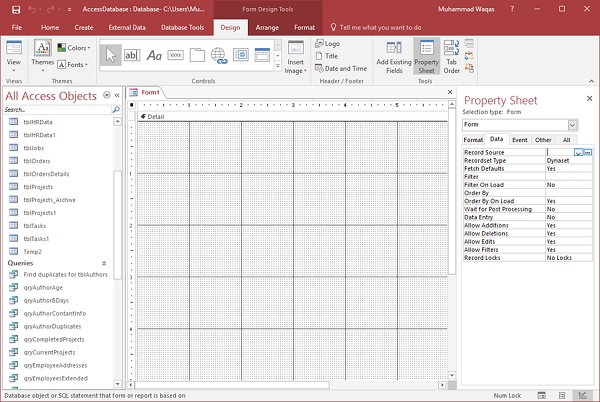
On the Data tab, you will see that the Record Source remains blank. Let us assume, we want to create a form that's going to be tied to two different tables in our database. Now click on button. It will further open its own query builder.
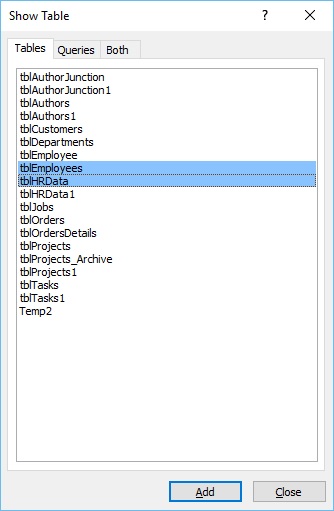
Select the tables that contain the data you want to display; click on the Add button and then close this dialog box.
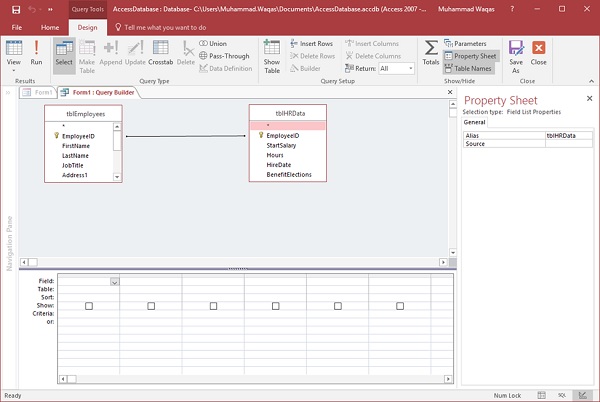
Let us now select all the fields from tblEmployees and drag to query grid, and similarly add all the fields from tblHRData.
Now, click Save As and give this query a name.
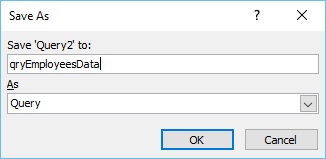
Let us call it qryEmployeesData and click Ok and then close the query builder.
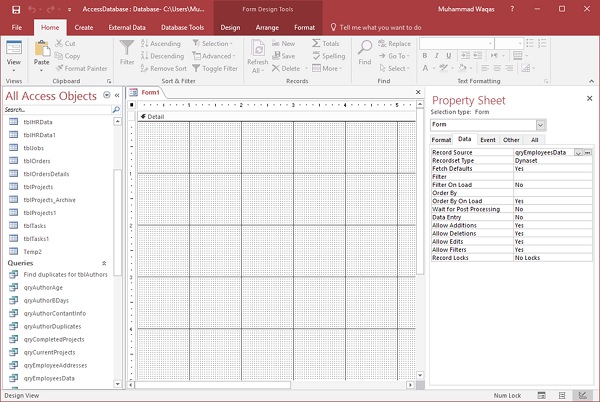
You can now see the query as its Record Source. We have now bound this form to an object in our database, in this case qryEmployeesData. We can now start by adding some controls to this form and to add any one of the controls, go to the Design tab and view your options from the controls group.
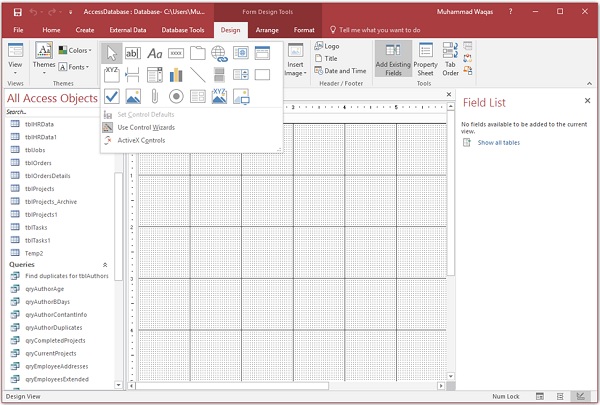
From the Controls menu, you will see that the Use Control Wizard is highlighted as in the above screenshot. This little button has that highlighted box around it by default. This means that the control wizards are turned on. This is like a toggle switch. When you click on the toggle switch the wizards turn off. Clicking it again will turn the wizards on.
Let us now click on the Label and drag this label and enter Employee Information and then go to the Format tab to format it as in the following screenshot.
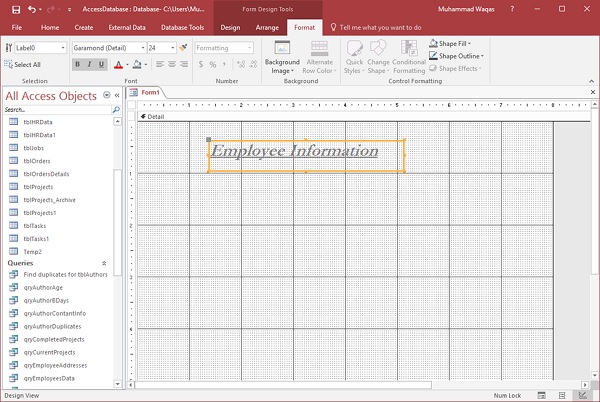
You can choose to apply a bold style or change the font size of text inside that label etc. This control appears inside the detail section of your form. It makes more sense to position this label inside the form header section, which is not visible yet.
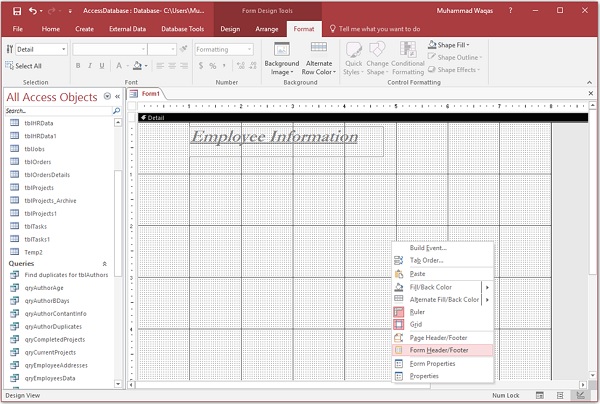
Right click anywhere in the background of that form and choose Form Header as in the above screenshot.
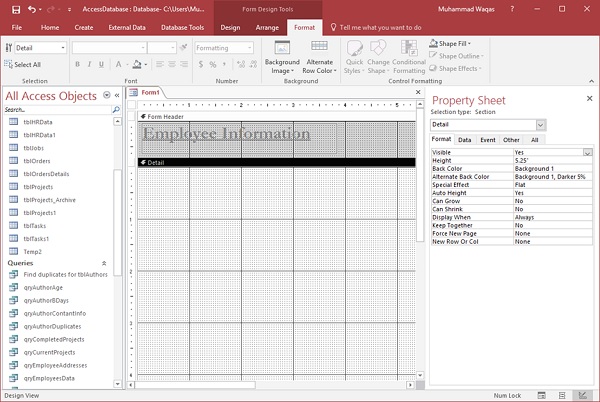
Move this control into the Form Header area. Let us now create some other controls from the Design tab. At this point, Let us say, we want to distribute all our fields into two different tabs.
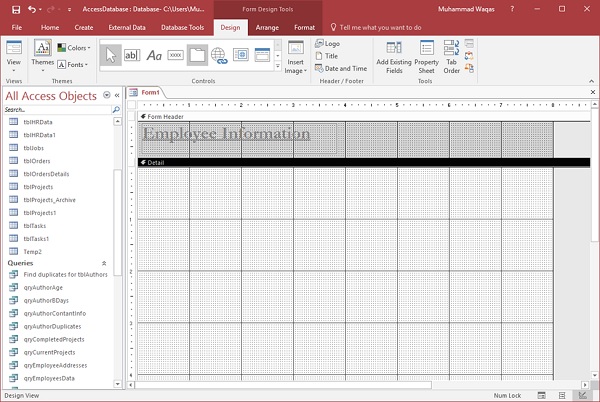
From the control menu, you can see the Tab Control which will create tabs on your form. Click on the tab control and draw it on your form in the detail section as in the above screenshot.
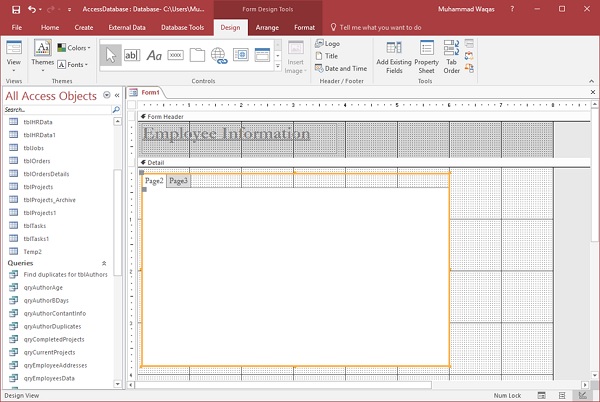
It will create two tabs page 2 and page 3 as in the above screenshot.
Let us now start by adding some controls to this tab control.
If we want to view some information that's stored in our underlying query, click on the Add Existing Fields option from the Ribbon in Tools group to view all the available fields from our underlying query.
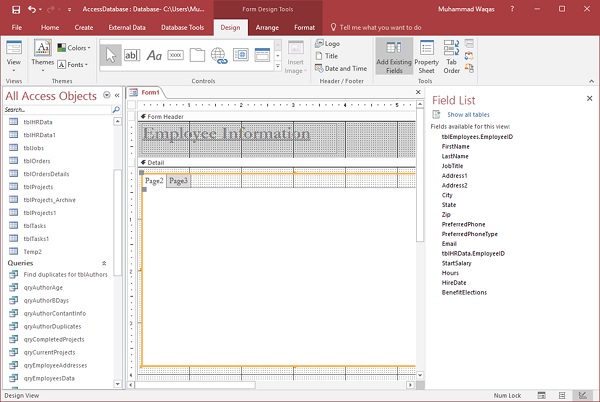
To bring the existing fields to the page, select all the fields available in the Field List as in the following screenshot.
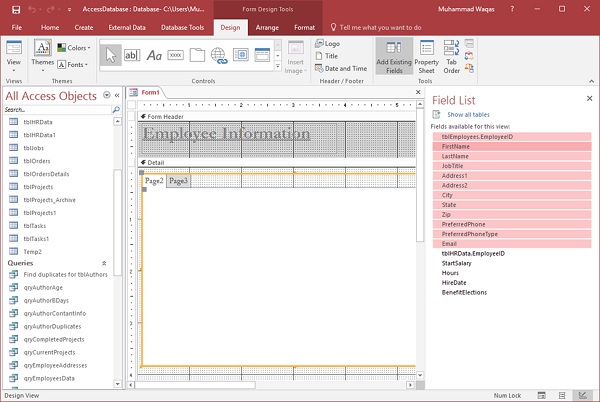
Now, drag the fields to Page2 of the tab control as in the following screenshot.
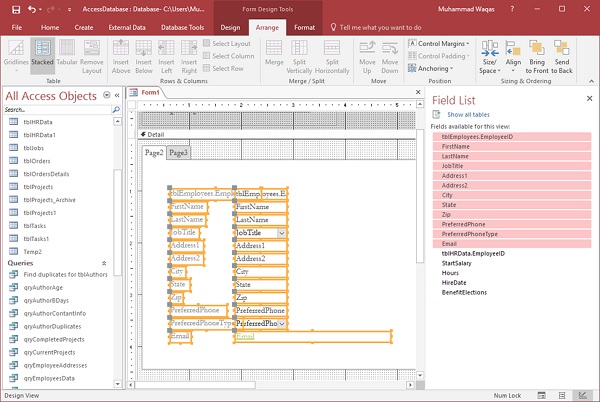
Now, go the Arrange tab and select the Stacked layout.
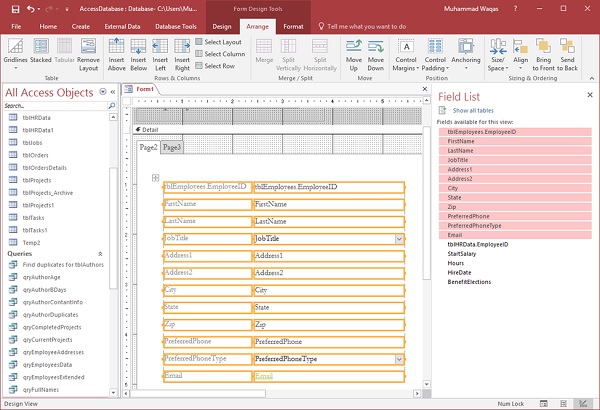
On the second page, let us now add the remaining fields from this query.
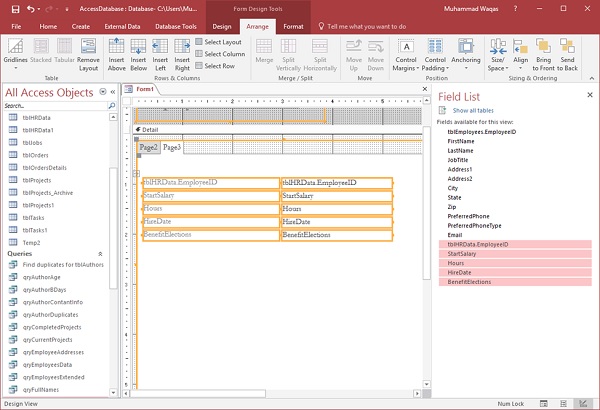
You can go through and make any adjustments to the size and width of these controls to get it looking the way you like.
Once you are done with formatting click on the Save As icon to save the form with the name you want.
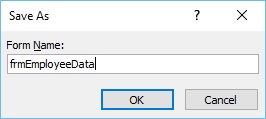
Click Ok and go to the Form view to view all the information in that form.

The tab control is breaking up our controls or our fields into two screens to make viewing and adding information easier.
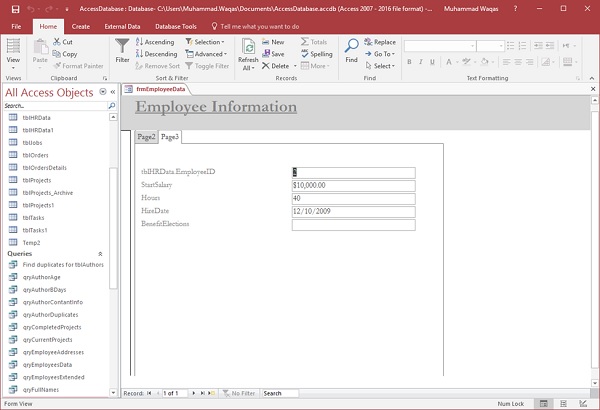
Ms Access - Reports Basics
In this chapter, we will be covering the basics of reports and how to create reports. Reports offer a way to view, format, and summarize the information in your Microsoft Access database. For example, you can create a simple report of phone numbers for all your contacts.
A report consists of information that is pulled from tables or queries, as well as information that is stored with the report design, such as labels, headings, and graphics.
The tables or queries that provide the underlying data are also known as the report's record source.
If the fields that you want to include all exist in a single table, use that table as the record source.
If the fields are contained in more than one table, you need to use one or more queries as the record source.
Example
We will now take a simple example to understand the process of creating a very simple report. For this, we need to go to the Create tab.
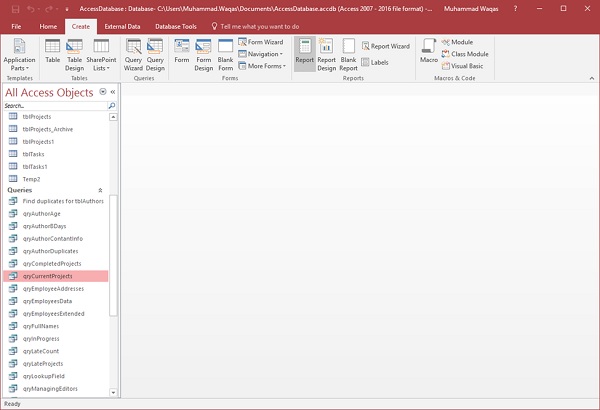
Before clicking on the Report button to create a basic report, make sure the proper query is selected. In this case, qryCurrentProjects is selected in your navigation pane. Now click on the Report button, which will generate a report based on that query.
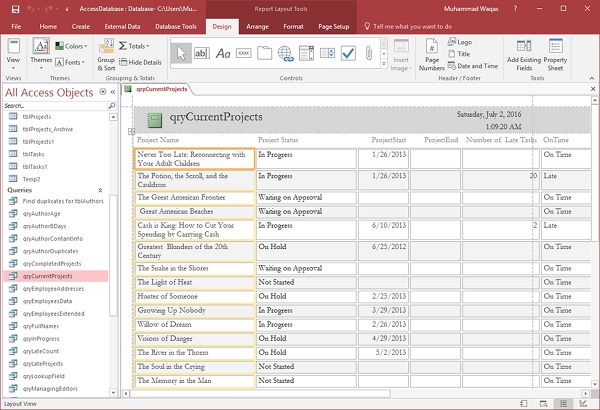
You will see that the report is open in Layout view. This provides a quick way to adjust the size or width of any of your fields that you see on the report. Let us now adjust the column widths to make everything fit in a better way.
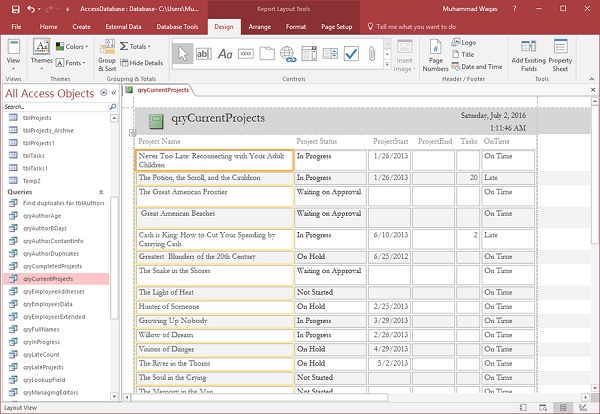
Scroll down and adjust the page control at the bottom.
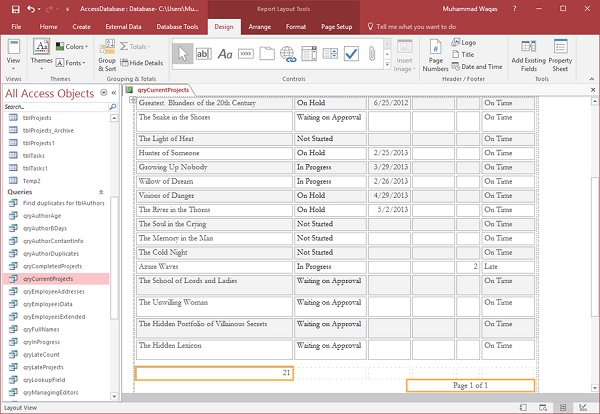
This was a very quick way to create a very simple report. You could also make minor changes and adjustments from the report design view.
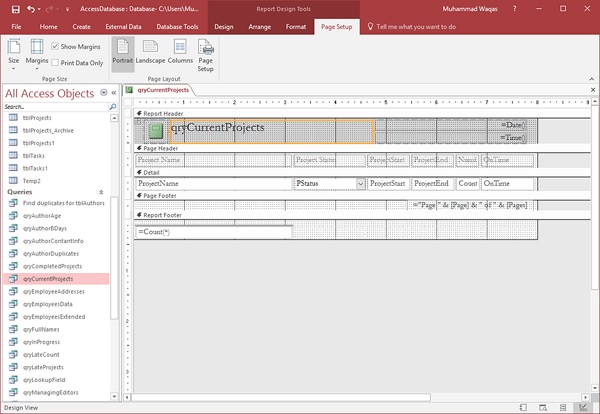
- Just like forms, a report is made up of a variety of different sections.
- You have the detail section, which is where all of your data lives for the most part.
- You also will see a page header and a page footer section; these appear at the top and at the bottom of every single page in your report.
Let us now change the Title of the report and give it another name.

Click on the save icon to save your report.
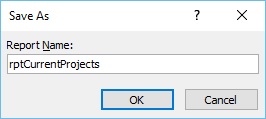
You will get the above dialog box.
Enter a name for your report and click Ok. If you want to view what this report will actually look like, in Print Preview, you can go back to the View button and click on Print Preview to see what this report would look like when printed either on paper or as a PDF.
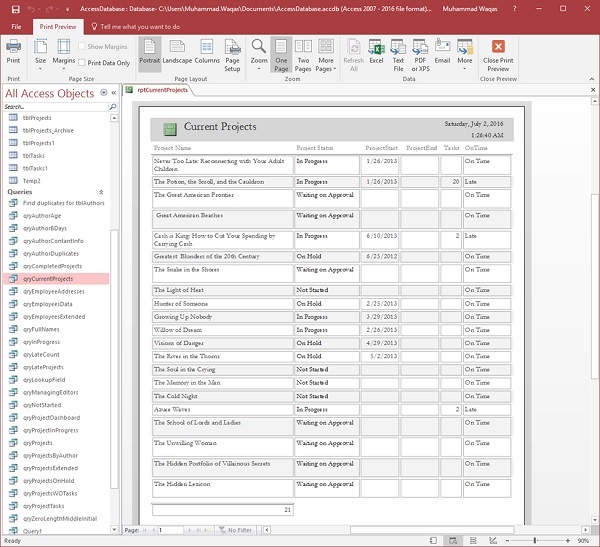
Using the tools on the lower right-hand corner, you can zoom in or zoom out. You also have some buttons on the Print Preview tab that appear automatically when you switch to Print Preview. In the zoom section, you've got a view for one page, two pages; or if you have a longer report, you can view four pages at once, eight pages or twelve pages. You can also adjust simple things such as the size of the paper that you are using to print, the margins for your report, the orientation, the number of columns, page set up, etc. And that is how you can create a very quick simple report using the Report button on the Create tab.
Create a Report Using Report Design
Report Design is another method for creating a quick report in Access. For this, we need to use the Report Design View button, which is like the Form Design button. This will create a blank report and open it directly to the Design View, allowing you to change the control source and add fields directly to the Design View of the report.
Let us now go to the Create tab and click on the Report Design button.
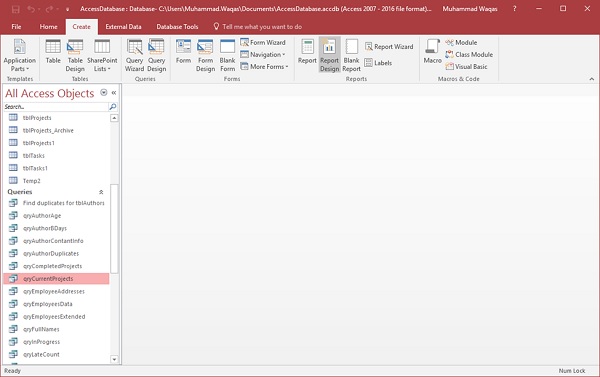
It will open a blank report or an unbound report, meaning this report is connected to no other object in our database.
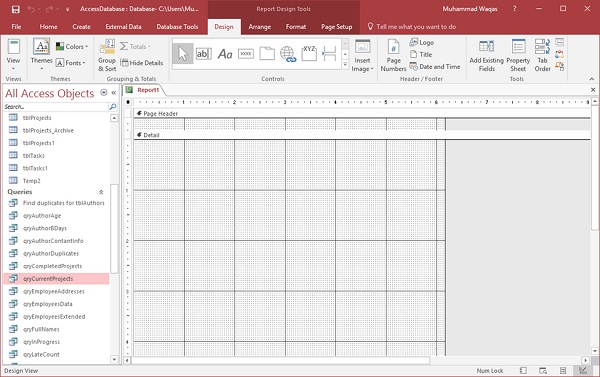
On the Design tab in the Tools group, select the Property Sheet. This will open up the Property pane.
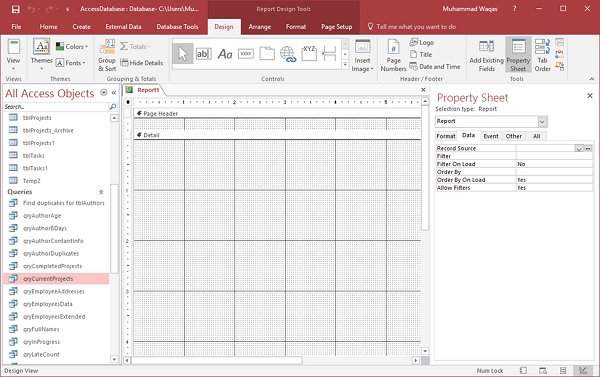
On the Data tab, assign a record source to this report, to connect it to a database object as in the following screenshot.
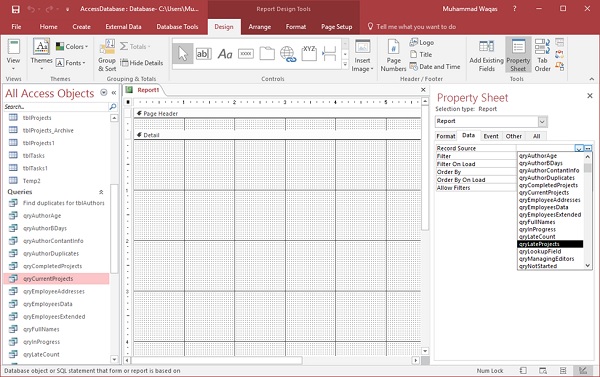
Select qryLateProjects from the drop-down and now, the next step is to go through and add some fields to this report by clicking on Add Existing Fields list button on the Design tab.
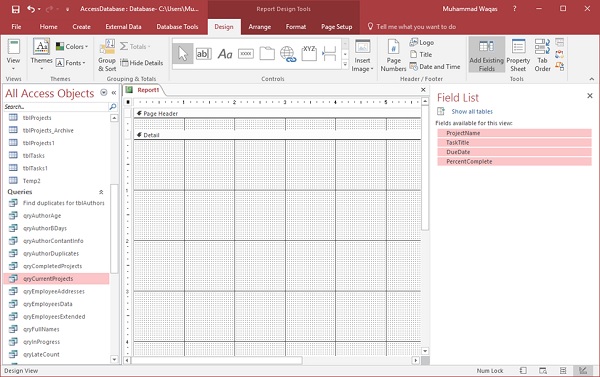
Select the fields as in the above screenshot.
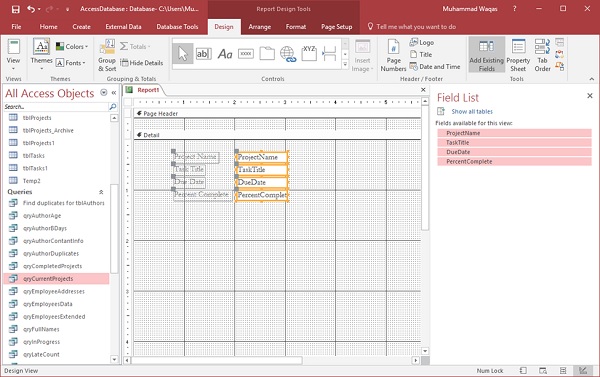
Drag the fields to you report as in the above screenshot. Go the Arrange tab, and in the Table group, you have a couple of options to choose from.
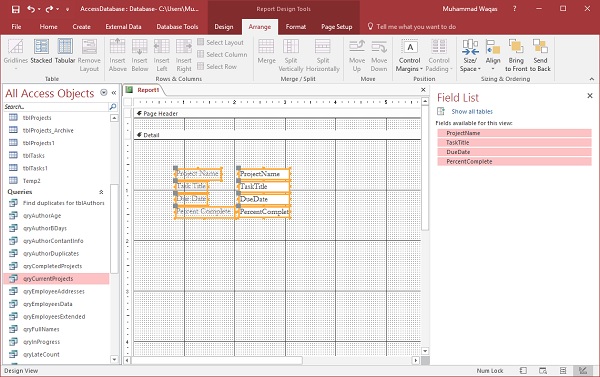
There is a stacked layout and a tabular layout, which is a layout that is very similar to a spreadsheet. Let us select the tabular layout.
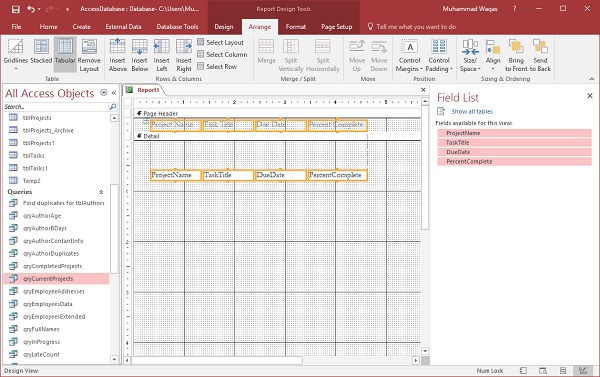
You can see that it moves all of the labels up to the page header area. These labels will appear only once at the top of every page and the data query will repeat for every record in the Details section. Now, you can go through and make some adjustments to make your ProjectName field wider.
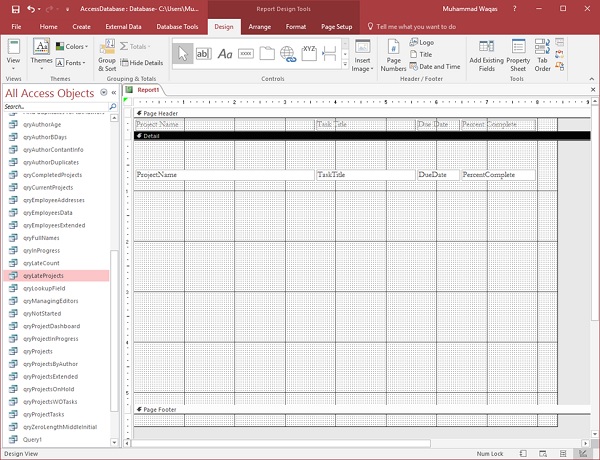
As you can see in the above screenshot, there is a lot of space between Detail section and Page Footer.
Let us drag the Page Footer up to reduce the space as in the following screenshot. We will now go to the Design tab and click on the View button and choose Report View.
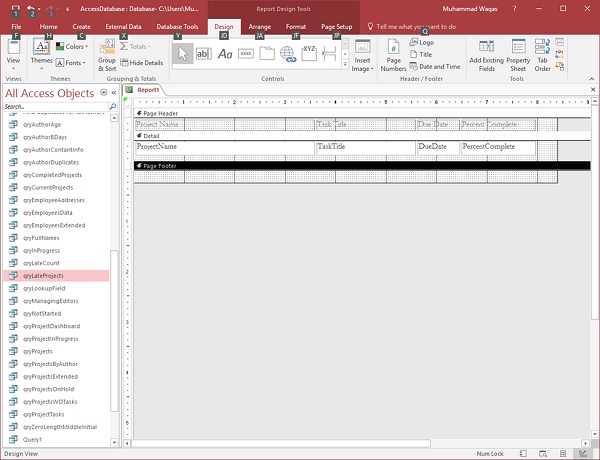
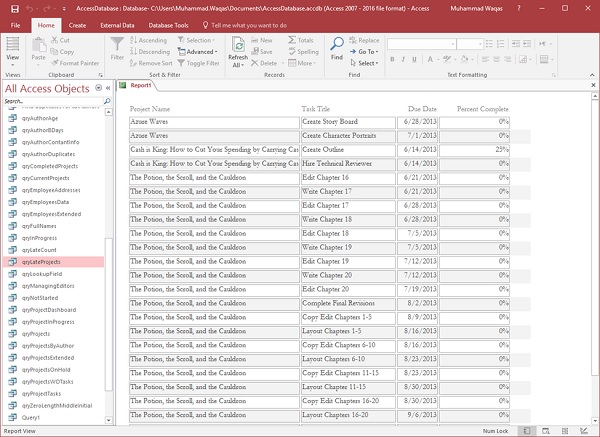
You can now see that some project names are not complete; you can adjust this with either the design view, or you can use the layout view to do that.
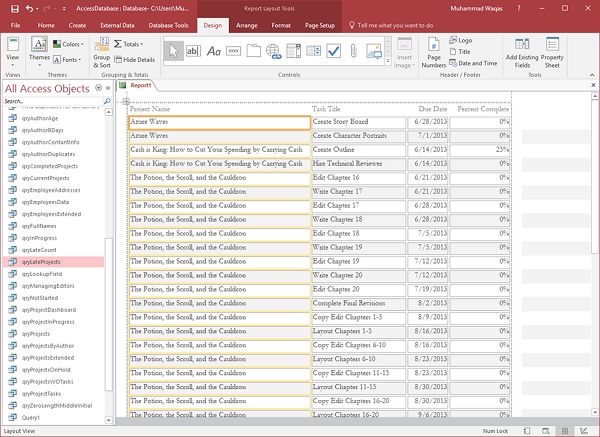
That is how we create a simple report just from the Design View.
Ms Access - Formatting Reports
In this chapter, we will learn how to format reports. You will find that there are a lot of similarities between formatting reports and formatting forms but there are a few tools and tricks that are specific to reports. Let us now look into the concept of report sections and grouping.
For this, we need to open a report that we created in the last chapter. Here, we will see how some of this information is displayed on the report.

Here, we will start with the report section and grouping.
Let us now go to the Design view of this report.

You can see that there's not a lot to look and here only page header, details section, and page footer are visible. You can add an additional couple of sections very easily.
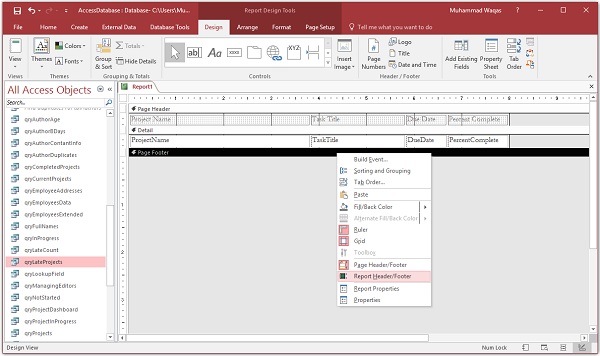
Right click anywhere on that report and you will see Page Header/Footer and Report Header/Footer. This particular report does not have that Report Header/Footer visible. Let us select that option and go back to the Report View.
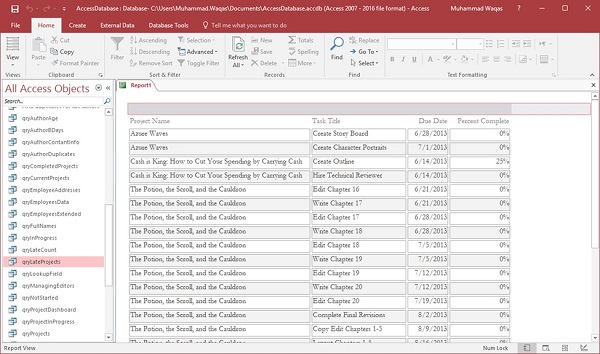
You can see it just adds a little colored area at the very top of the report. In the Design View, expand that area by hovering the mouse right at the top of that page header divider, clicking and dragging down. This will add more area to the report header.
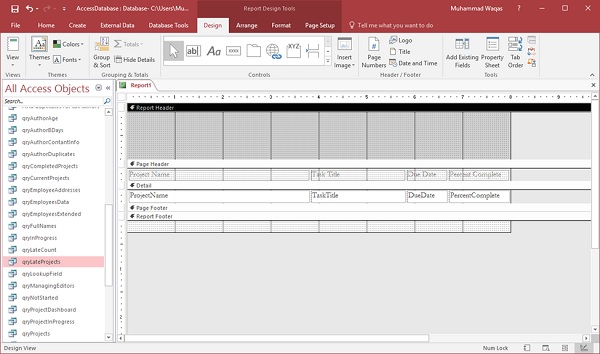
In the Report View, you will now see more area at the very top of the report as in the following screenshot.
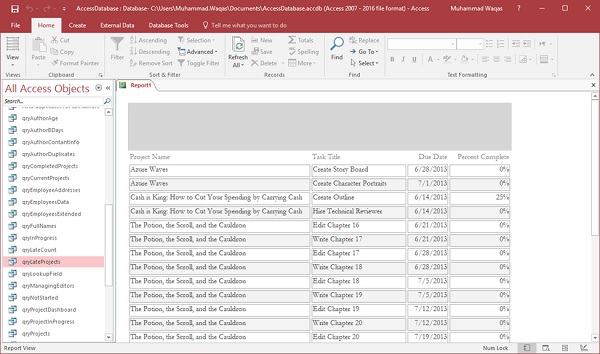
The Report Header and Footer controls appear at the top of the first page of that report. The report footer controls what you see at the very last page at the bottom of the report.

The Report Header and Footer is different from your Page Header and Page Footer. Anything that is placed in the Page Header will appear at the top of every page. Likewise, anything that is placed in the Page Footer will repeat at the bottom of every page.
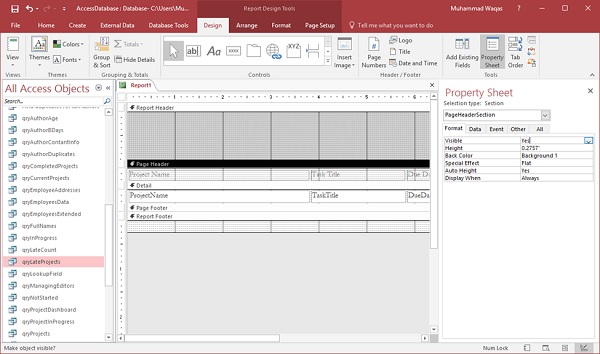
Now you can add additional grouping levels, and to do that, you want to make sure you have the group sort and total area turned on.
In the Grouping and Totals section of the Design tab, click on the Group and Sort button which will open Group, Sort, and Total area at the bottom as shown in the following screenshot.
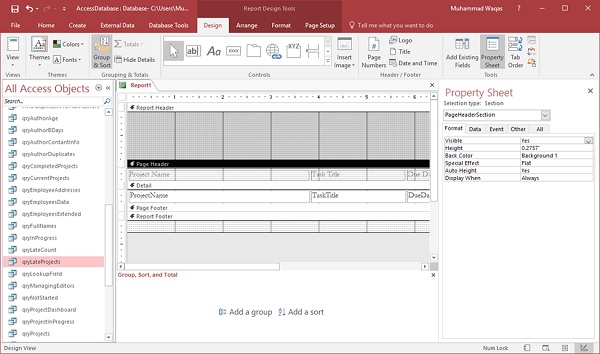
You can now add additional groups or grouping on any control that you have in your report. Let us now click on Add a Group.
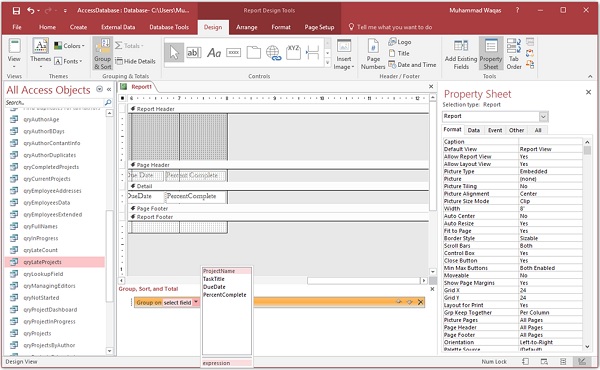
In the above screenshot, you can see the underlying control source for report with the project name, task title, due date and percent complete. Let us now say we want to group all of our late tasks by project, so select Project Name from the list.
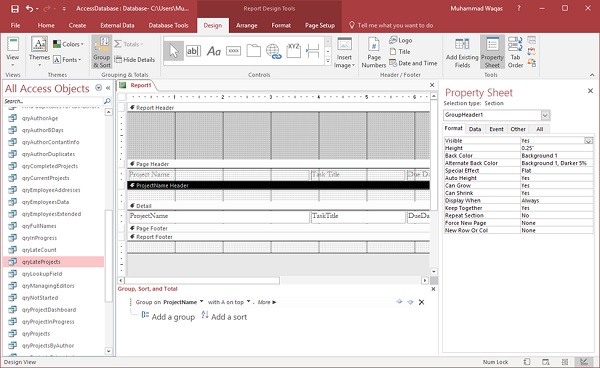
Now you will see an additional grouping level ProjectName Header above your details section. Instead of the project name appearing alongside each individual task that is late, we can now move this control up to this project name header. You can select it, and then press Ctrl + X on your keyboard to cut that from that details section and click anywhere in the background of that project name header, and then press Ctrl + V to paste that control in that project name header.
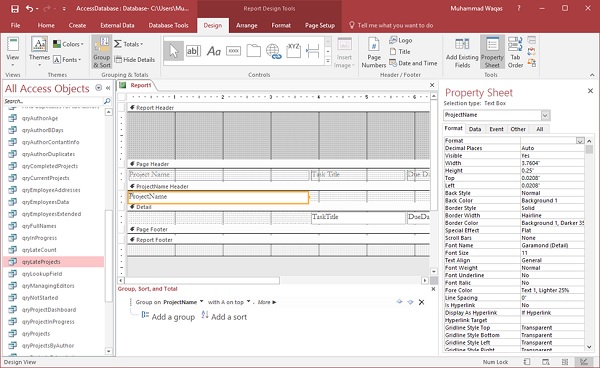
You can now go to the Report View and see the adjustments made to group the things in the report as in the following screenshot.
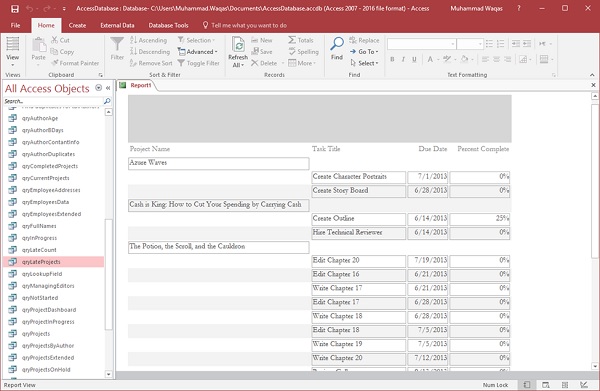
Every single project has its own little level on its own line, and then underneath that area you will see all of the tasks that are late for the above project. With that changed now, you can go through and start formatting your report in the Layout View.
If you want to make the project name bigger, then drag the line below and change the font size to 20 in the Format Tab.
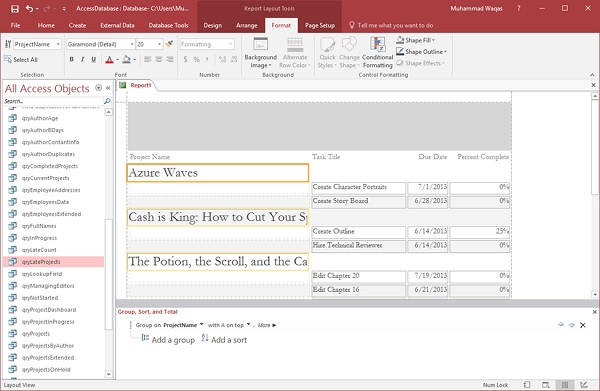
You can increase the width of the control to cover the entire width of the page.
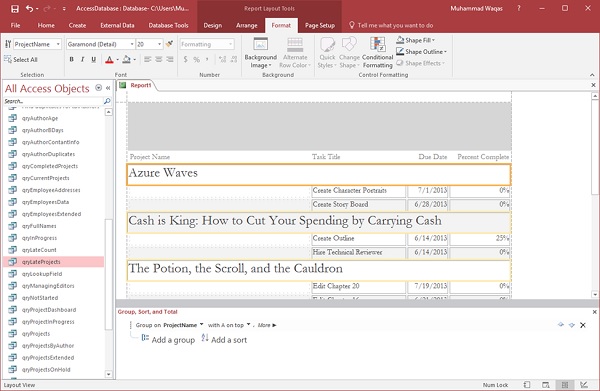
To remove the border around the control, click on the Shape Outline in the Format tab as in the following screenshot.
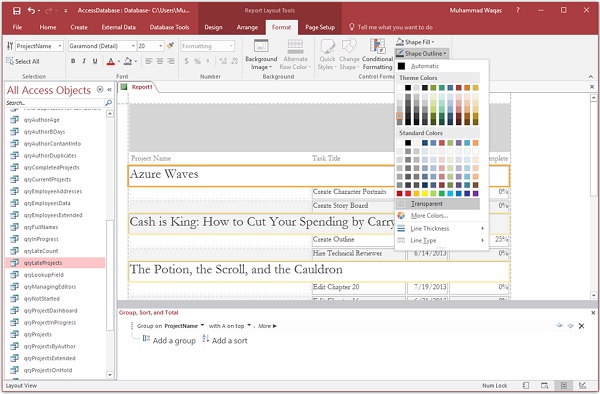
Select the Transparent option.
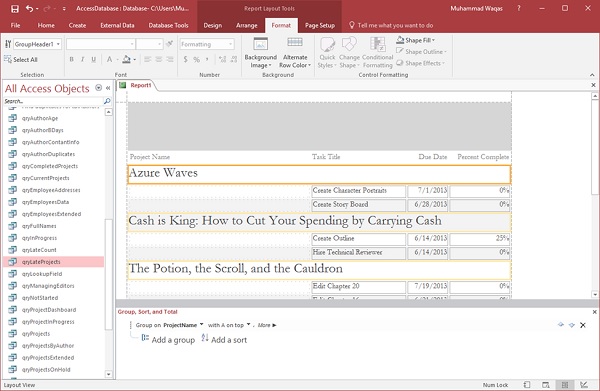
Let us now go to the Design View as in the following screenshot.
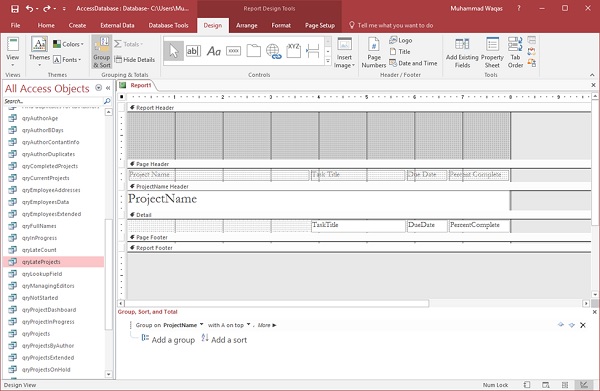
Adjust the task title to the left of your page as in the following screenshot.
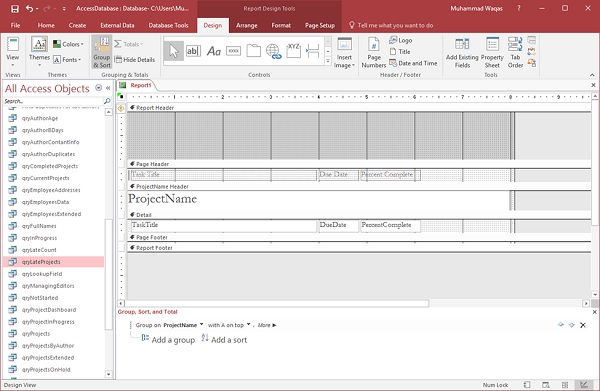
Let us now bring the data from the Page Header section to the ProjectName header section using Ctrl+X and Ctrl+V.
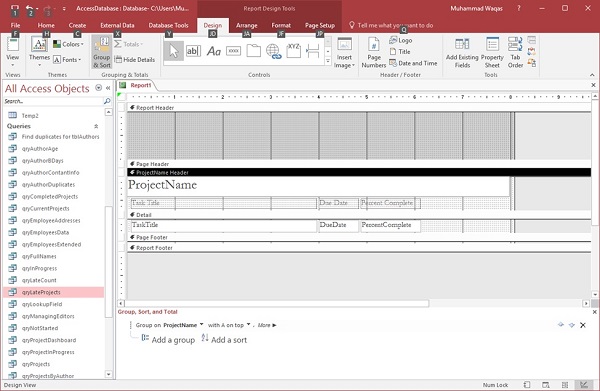
Let us now go back to the Report View. You will now see that the labels appear directly above the controls that they describe.
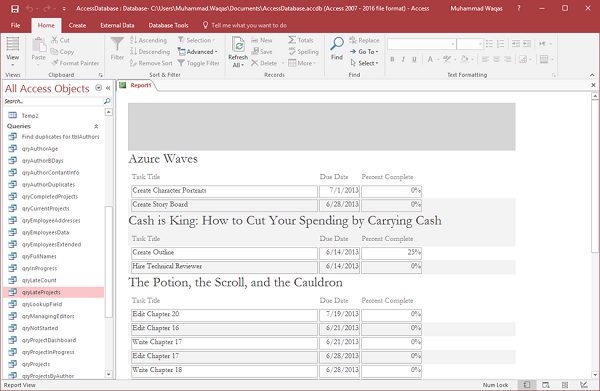
If you notice, you will see that there is no space between the tasks and the next project name. There should be additional space in between. For that, we need to add ProjectName Footer.
Now, go to the Design View.
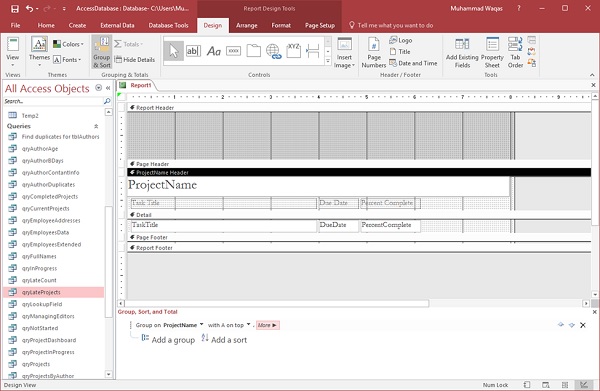
In the Group, Sort and Total area click on the More button next to the project name.
You will now find all the options for how to group and sort by project name as in the following screenshot.

Here, we have a property called Without a Footer Section. Let us change that option by clicking on that little arrow next to the words Without a Footer Section.
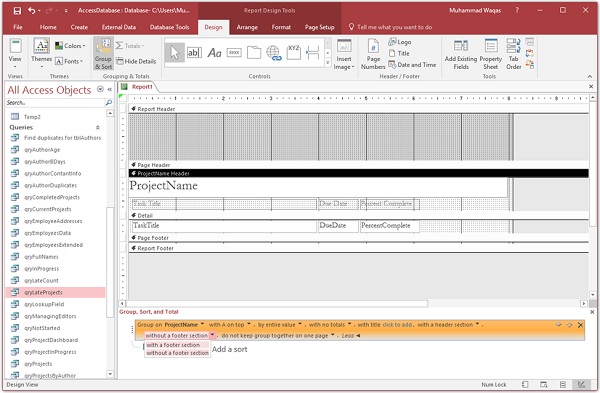
Change it to With a Footer Section.
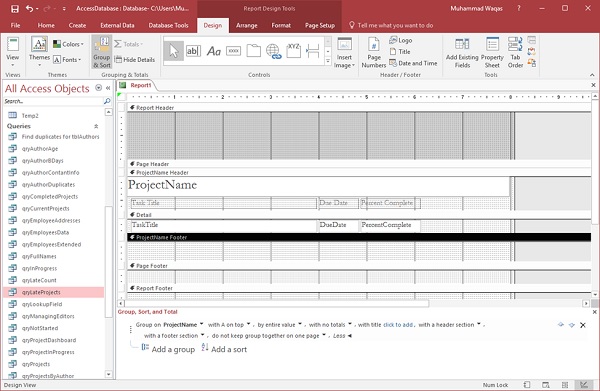
As you can see in the above screenshot that the ProjectName Footer section beneath the Details section is added. This will act as the footer for that project name group.
Let us now go back to the Report View.
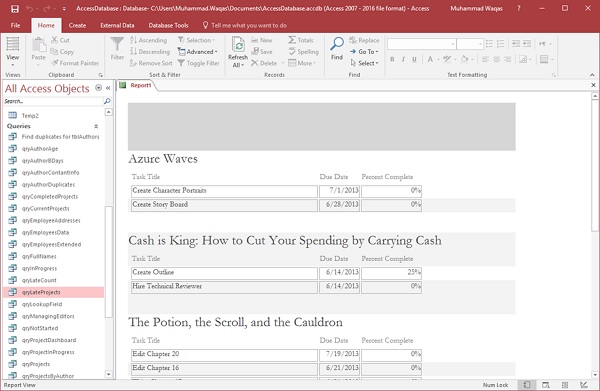
To remove shading or the appearance of background for alternating areas in both the Details section and in the Project Name area, go to the Design View again.
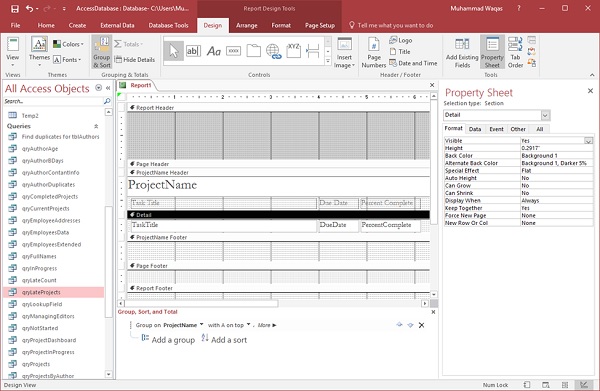
Let us change the Details section first by clicking on the detail divider and then open Properties sheet.
On the Format tab, change the Alternate Back Color to No Color as in the following screenshot.
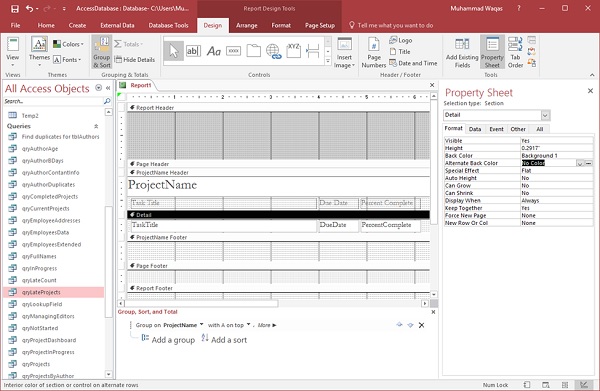
Similarly change the Alternate Back Color to No Color for both ProjectName Header and ProjectName Footer and go to Report View.
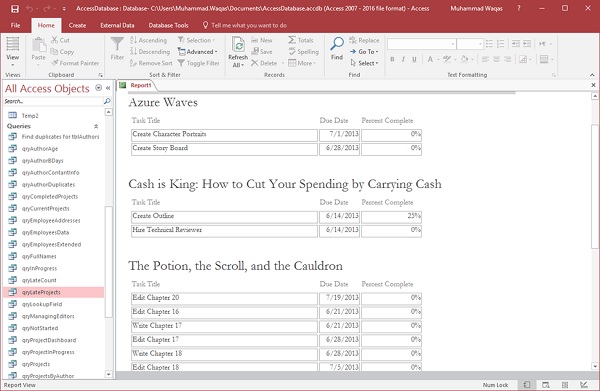
You can now see how the report looks. To see how your data will print page by page, let us go to the Print Preview.
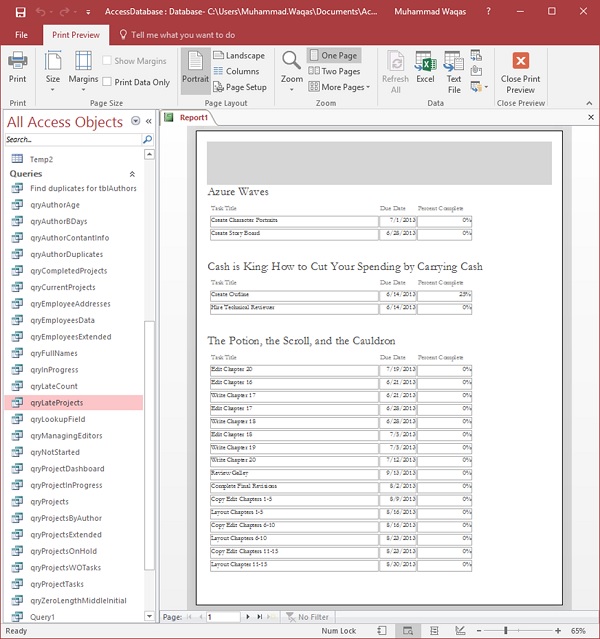
This is how it will look like when you print it.
Ms Access - Built-In Functions
In this chapter, we will be working with Built-in Functions. In Access, there are close to a hundred built-in functions and it is almost impossible to cover every single one of them. In this chapter, we will cover the basic structure, syntax, and use some of the more popular functions, and also the pitfalls, so that you can go exploring some of the other functions on your own.
Functions
A function is a VBA procedure that performs a task, or calculation, and returns a result. Functions can generally be used in queries, but there are other places that you can use functions.
You can use functions in table properties, for example, if you want to specify a default value for a date/time field, you can use the date or the Now function to call up the current date/time information from your system, and input that value automatically.
You can also use functions in an expression when you create a calculated field, or use the functions inside form or report controls. You can use functions even in macro arguments.
Functions can be quite simple, requiring no other information to be called, or, simply reference one field from a table or query.
On the other hand, they can also get quite complicated, with multiple arguments, field references, and even other functions nested inside another function.
Let us now look into some examples of using built-in functions.
Date & Time Functions
Let us now understand the Date and Time functions −
The Date() function is designed to return the current system date. This function does not require any function arguments or additional information. All you have to do is write the name of the function and those open and close parentheses.
There are two very similar built-in functions Time() and Now().
The Time() Function returns the current system time only and the Now() Function returns both the current system date and time.
Depending on the data that you want to track, or store, or query, you have three built-in, easy-to-use functions to help with that task.
Let us now open your database and create a new query using query design and add tblProjects and tblTasks.
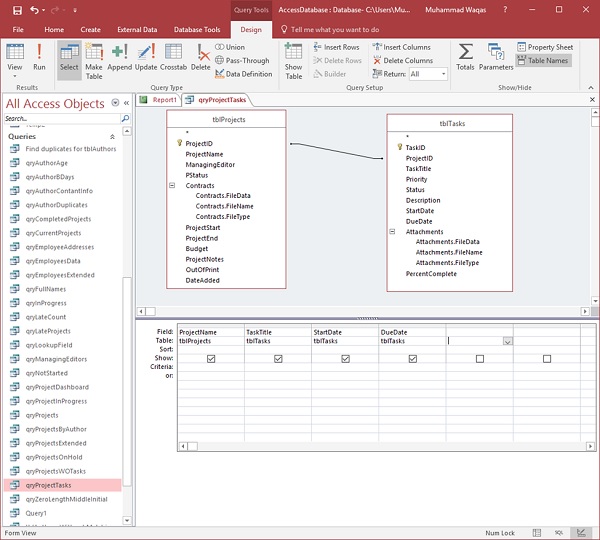
Add ProjectName from tblProjects and TaskTitle, StartDate and DueDate from tblTasks and run your query.
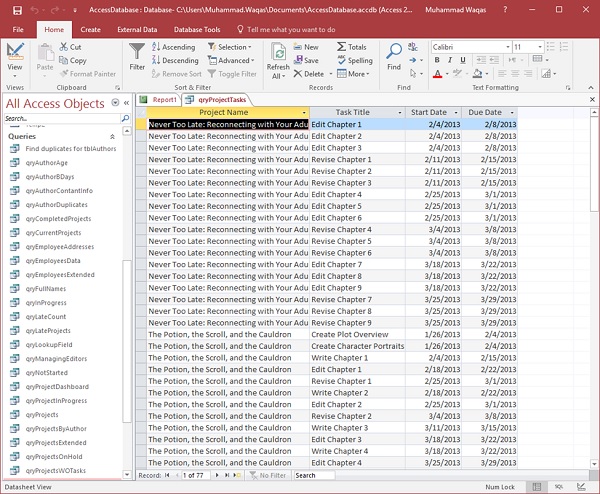
You can now see all the different tasks from all projects. If you want to view the project tasks that are in progress as on todays date, then we have to specify a criterion using a Date() Function to look at projects that start on or after today's date.
Let us now specify the criteria underneath the StartDate.

The criteria starts with an operator greater than symbol, followed by an equal to symbol and then Date Function.
When we run this query, all the tasks will occur either on today's date or in the future as in the following screenshot.
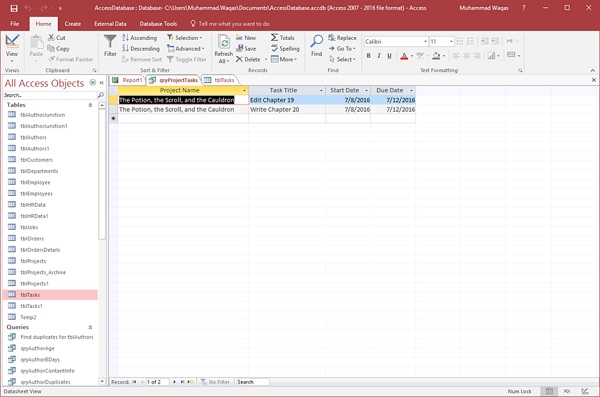
This was an example of how you can use the Date() function as query criteria.
Let us now say this query needs to be more flexible in terms of the dates it is pulling starting this week.
We do have a couple of different tasks that began this week, that are not showing up in this current list, because of our criteria. It's looking at start dates that are equal to today or above.
If we want to view the tasks that started this week, that have not yet completed or should complete today, let us go back to the Design View.
Here, we will add some additional information to these criteria. In fact, we want it greater than or equal to today's date minus seven days.
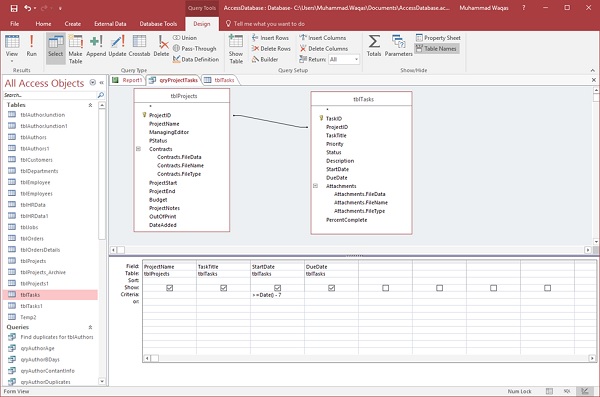
If we type minus seven and run the query, you can see the tasks that started this week as well.
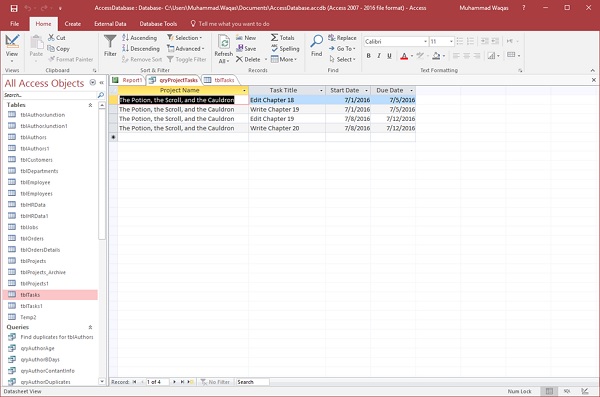
DateDiff() Function
The DateDiff() Function is another very popular date/time function. The DateDiff Function returns a Variant (long), specifying the number of time intervals between two specified dates. In other words, it calculates the difference between two dates, and you get to pick the interval by which the function calculates that difference.
Let us now say we want to calculate our authors' age. For this, we first we need to create a new query and add our authors table and then add FirstName, LastName, and the BirthDay fields.
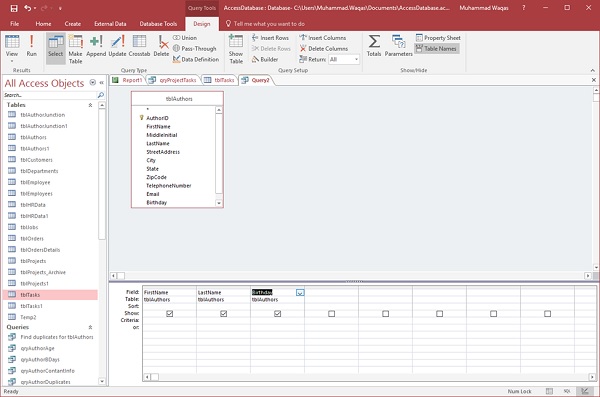
We can calculate people's age by calculating the difference between their date of birth, or birthday and whatever today's date is.
Let us try using the DateDiff Function in a new field.
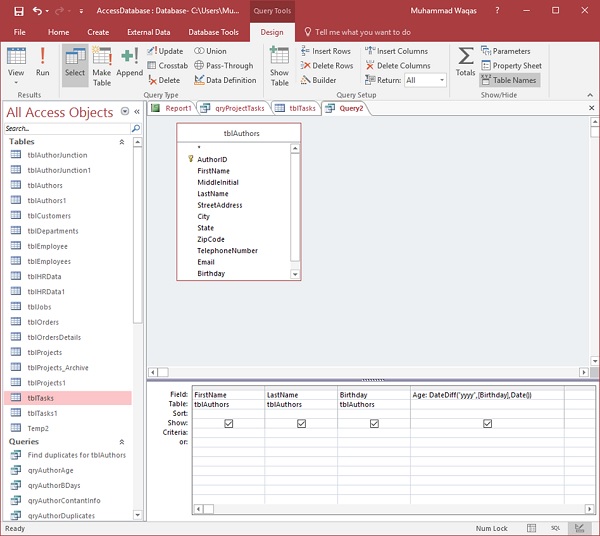
Let us call it Age followed by a colon, and then write DateDiff Function.
- The first function argument for the DateDiff function is the interval, so type yyyy.
- The next function argument is the first date that we want to calculate by, which, in this case, will be the Birthday field.
- The third function argument is whatever today's date is.
Now, run your query and you will see the new field which shows the age of each author.
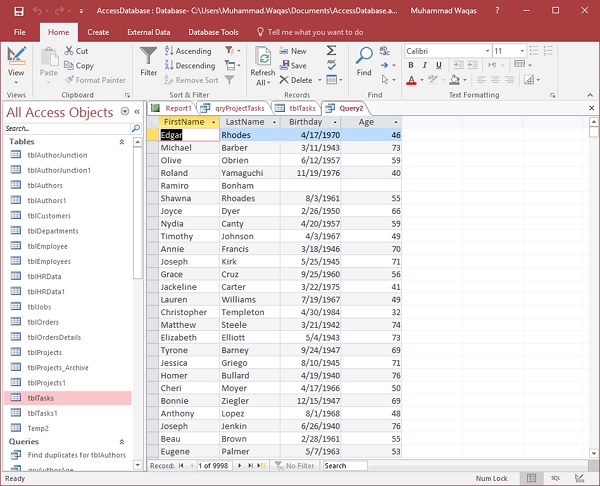
Format() Function
The Format() Function returns a string, containing an expression formatted according to instructions contained in a format expression. Here is the list of user-defined formats which can be used in Format() function.ss
| Setting | Description |
|---|---|
| yyyy | Year |
| q | Quarter |
| m | Month |
| y | Day of year |
| d | Day |
| w | Weekday |
| ww | Week |
| h | Hour |
| n | Minute |
| s | Second |
Let us now go back to your query and add more fields in the same using the Format() function.
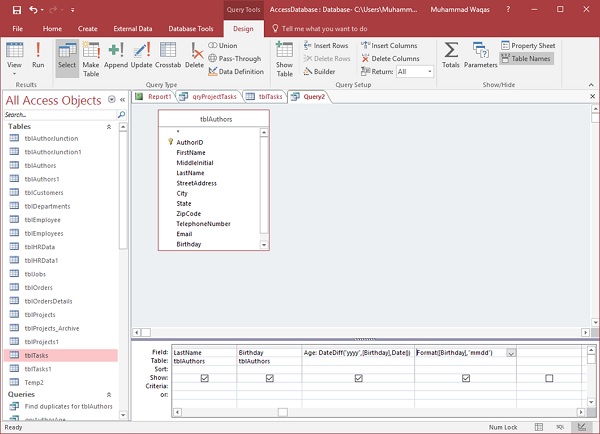
Type the Format Function. The first function argument will be an expression, which can be almost anything. Let us now have the birthday field as the first and the next thing is to write our format. In this case, we need month, month, day, day. Write mmdd in quotes and then, run your query.
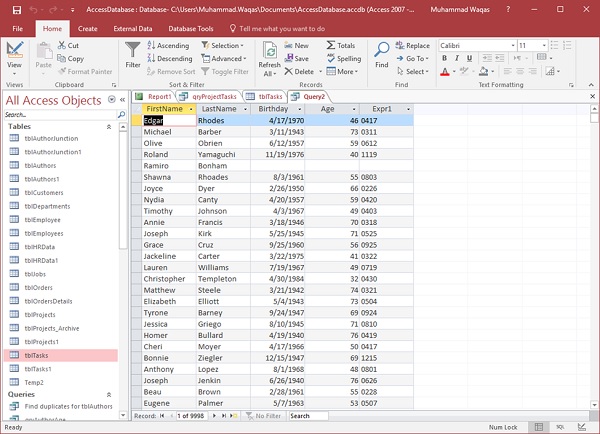
It is now taking the date from the birthday field, 4 is the month and 17 is the day.
Let us add mmm and mmmm instead of mmdd in the next fields as in the following screenshot.
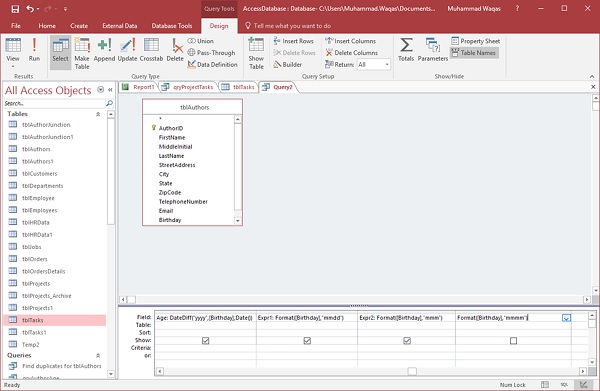
Run your query and you will see the results as in the following screenshot.
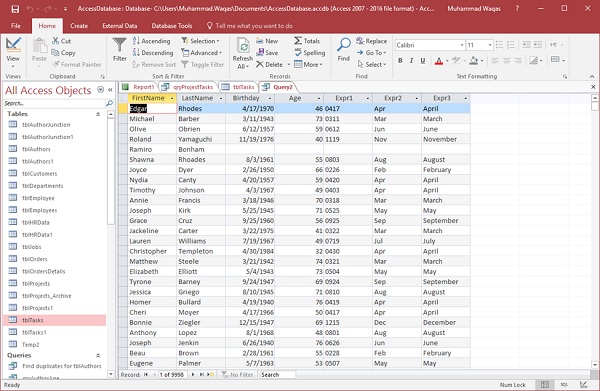
In the next field, it is returning the first 3 character from the name of the month for that birthday and in the last field you will get the full month name.
To see the month followed by year from birthday, let us add the yyyy as well as shown in the following screenshot.
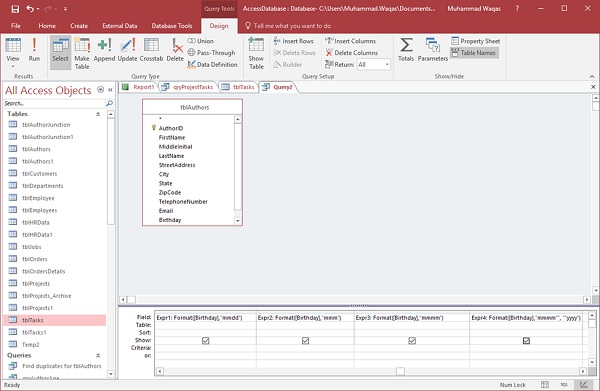
Let us run your query again.
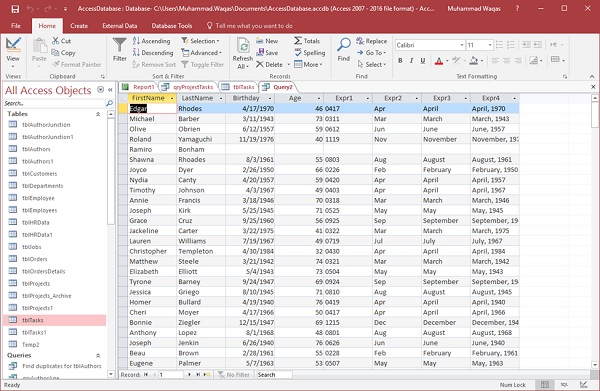
You will now see the month followed by a comma and then the year.
IIf() Function
The IIf() Function is an abbreviation for Immediate If and this function evaluates an expression as either true or false and returns a value for each. It has up to three function arguments, all of which are required.
- The first argument is any expression that you want to evaluate.
- The next argument stands for the true part, which can be a value or an expression returned if your first expression is true.
- The last argument is what you want returned if your expression is false.
Example
Let us take a simple example. We will create a new query using query design and add tblAuthors table and then add the following fields.
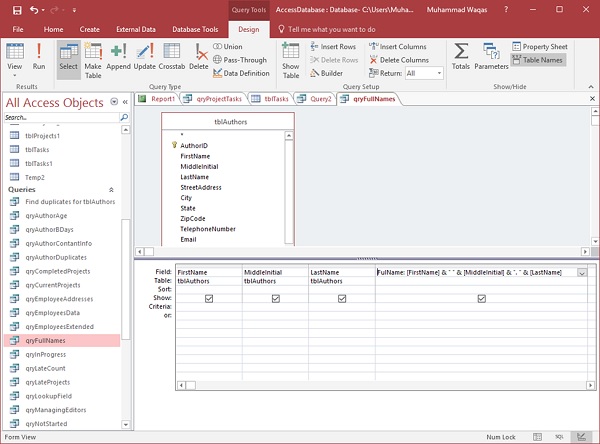
You can now see we have three fields FirstName, MiddleInitial, LastName, and then this concatenated field, which is pulling all three fields together. Let us run your query to see the result of this query.
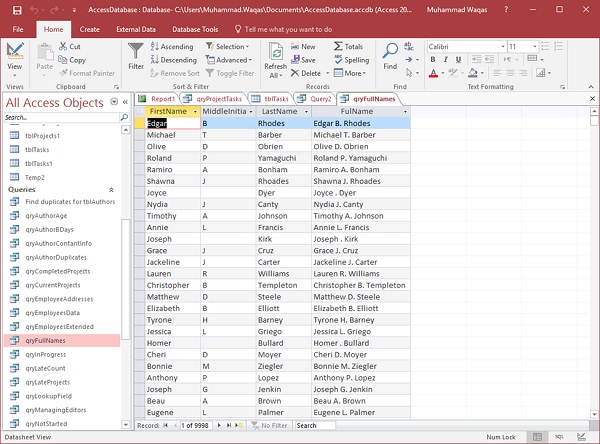
Now, you can see the result of the query, but you will also notice that some records do not have a middle initial. For example, the Joyce Dyer record does not have a middle initial, but in the FullName field you will see the period that really doesn't need to be there. So, go back to the Design View. Here, we will concatenate the name in a different way using the IIf Function.
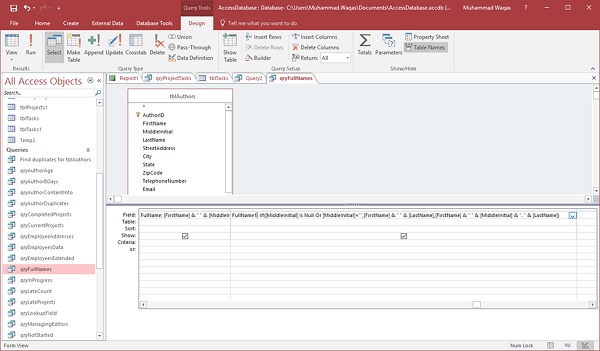
Let us write the name in another field and call it FullName1 and then type the IIf function.
The first function argument for the Immediate If function is going to be your expression. In the expression, we will see if the middle initial field is blank or is null.
The next argument is the true part. So, if the middle initial is null then we would want to display the FirstName and the LastName.
Now, for our false part if the MiddleInitial is not null, then we would want to display the FirstName, MiddleInitial, and LastName.
Let us now run your query and you will see the results as in the following screenshot.
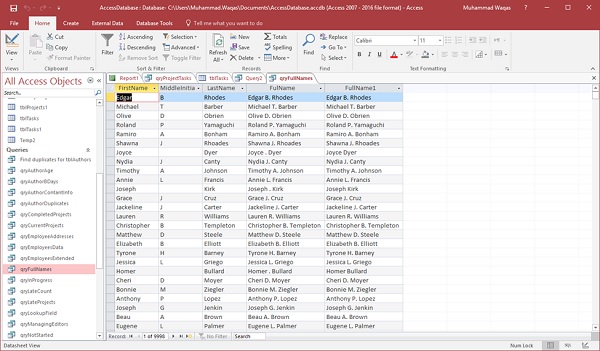
Ms Access - Macros
In this chapter, we will cover the basics of Macros in Access. A Macro is a tool that allows you to automate tasks and add functionality to your forms, reports, and controls.
Macros in Access work a bit different from Macros in Word or Excel, where you essentially record a series of keystrokes and play them back later.
Access Macros are built from a set of predefined actions, allowing you to automate common tasks, and add functionality to controls or objects.
Macros can be standalone objects viewable from the Navigation pane, or embedded directly into a Form or Report. Once you have created database objects like tables, forms and reports, Macros can provide a quick and easy way to tie all those objects together to create a simple database application that anyone can use or even modify, with relatively little training.
Macros provide a way to run commands without the need to write or even know VBA code, and there is a lot that you could achieve just with Macros.
Creating a Macro
Let us start be creating a very simple Macro that opens a form when a command button is clicked. For this, we need to open your database and frmEmployeeData form in which we have created two tabs.
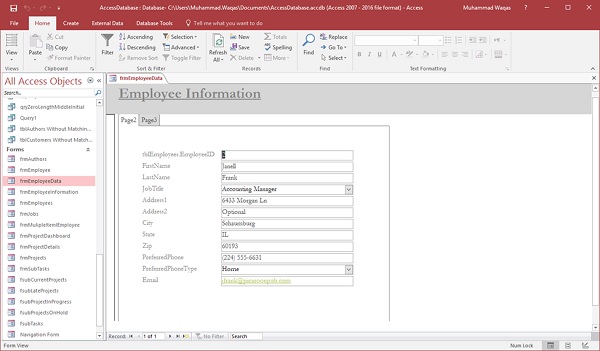
In this form, we can add a button allowing users to open up all of the job information.
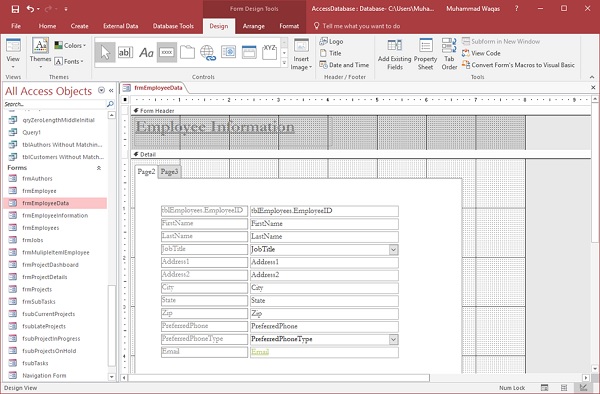
Let us now go to the Design View of this form and add button form the Controls menu. When you release your mouse, you will see the Command Button Wizard dialog box.
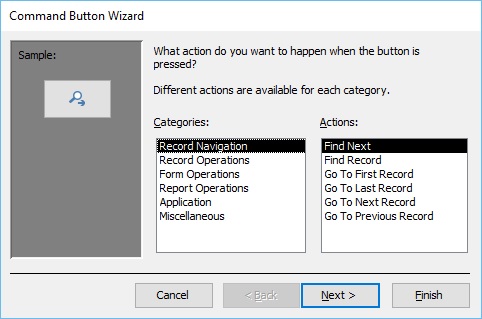
There is a couple of ways to build that Macro action, but the simplest way is to simply use the Command Button Wizard.
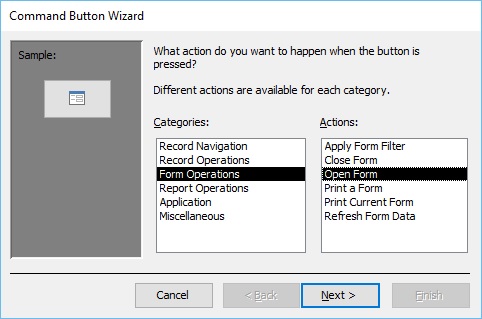
For common actions like opening a form, select Form Operations from the Categories list and then select Open Form from the Actions list and click Next as in the above screenshot.
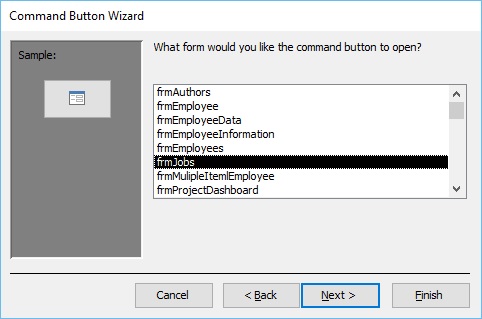
You need to specify which form you would like to open with the command button. For now, let us select frmJobs and click Next.
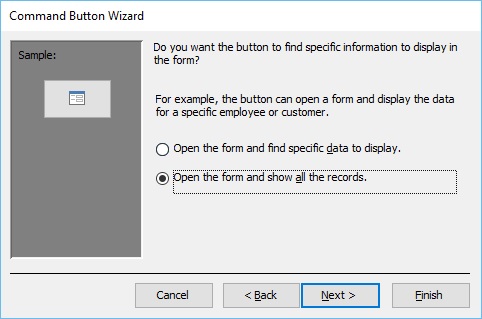
In this screen we have two options, we can open the form and display a very specific record, or we can open the form and show all the records. Let us select the second option and click Next as in the above screenshot.
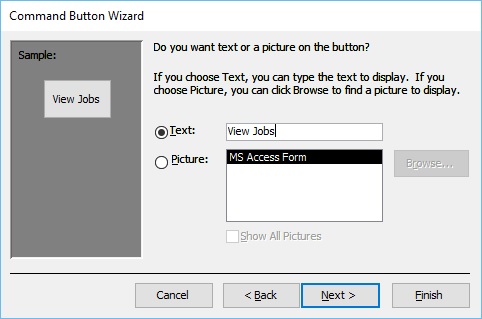
We could have the command button itself display a picture or you can select the Display Text. Here, we want the text View Jobs to display and now click Next.
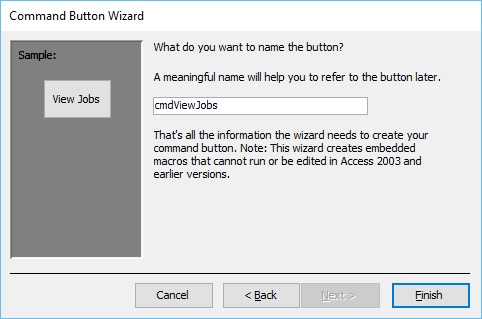
You can now provide a meaningful name to your command button as in the above screenshot. This can be used in other codes or other Macros. Let us call this cmdViewJobs and click Finish.
Now go to the Form View.
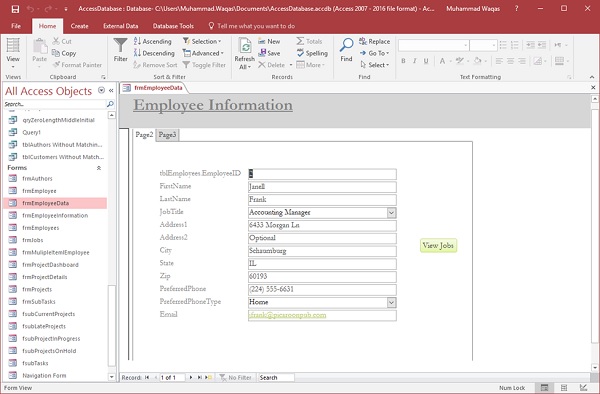
You will now see a View Jobs button on your form. Let us click on it.
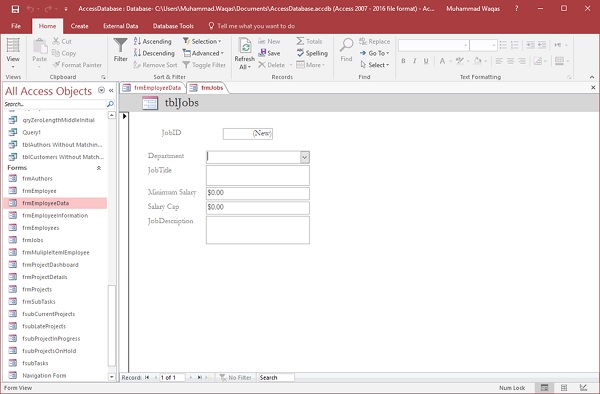
Now you have a form open, but you will not be viewing any information. Let us go back to the frmEmployeeData form Design view. Make sure that the command button is selected and click on the Event tab on the Property Sheet.
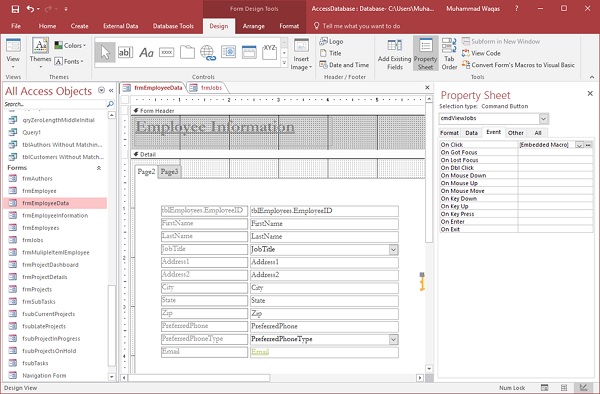
Upon clicking, you will see an embedded Macro created by the Wizard. If you now want to modify this Macro, click on the button to open up the Macro generated by the Wizard.
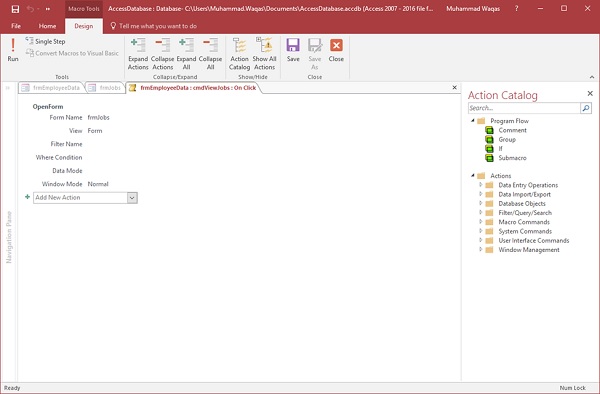
This is the Macro Designer and on the right you will see the Action Catalog. This is where all of your actions will live in folders. You have the Data Entry options, Data Import/Export and so on, and on the left in the main area you have another Macro. It only contains one action, and clicking on that one action you can view other properties for that specific action.

You will see the form name and you can hit that drop-down arrow to view the forms available in your database. You can change how that form is viewed, you can have it open to Form view, Design view, Print Preview at your choice. You can apply a filter name or a Where condition. Here we want to change the Data Mode because frmJobs is set to the Add Mode which only allows the addition of new records. We can override this here in this Macro by changing it to the Edit Mode.
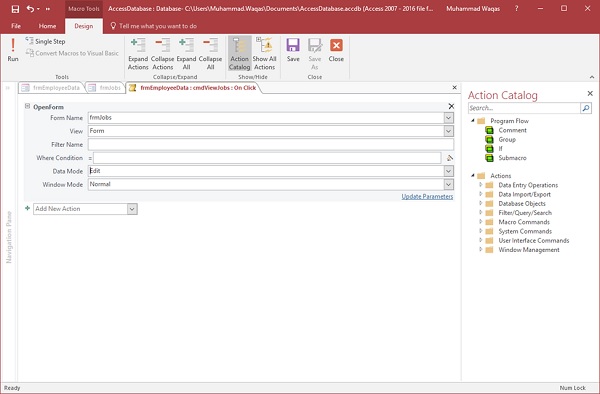
Now save your Macro, and then close the Macro Designer and go back to the Form View.
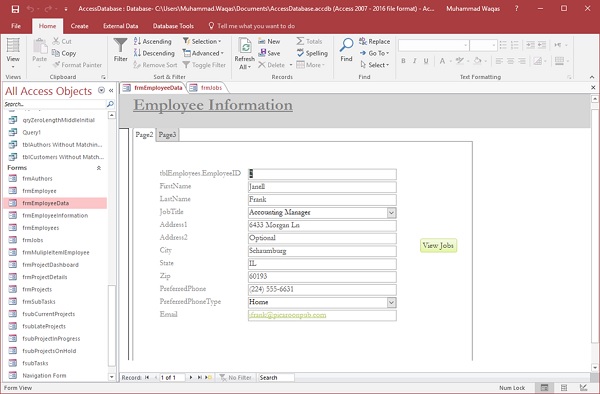
Let us click on View Jobs again.
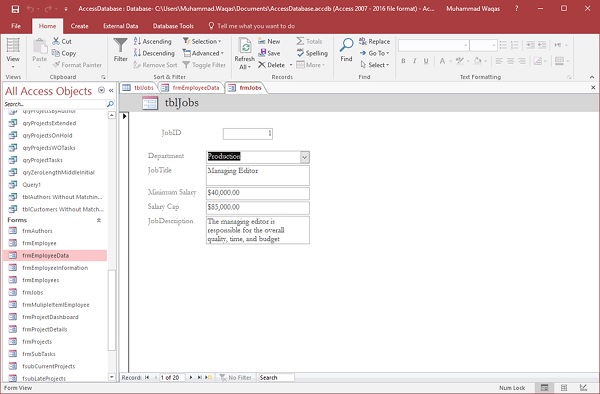
You can now see that it opens your frmJobs form and allows you to scroll through all of the available jobs in our database.
Ms Access - Data Import
In this chapter, we will be talking about importing data in Access and what kinds of data you can import using Access. Normally data is stored in various formats, files, and locations, which makes it hard to get and use it. If you have data in a spreadsheet, a SharePoint list, or some other format, you can import it into an Access database with just a few steps, making it much more, easily available in Access.
The Save As command is generally used to save a document in another format, so that you can open it in another program.
In Access you cant use the Save As command in the same way, you can save Access objects as other Access objects, but you cannot save an Access database as a spreadsheet file.
To save Access as a spreadsheet file, you will need to use the import feature on the External Data tab.
Different Types of Data Access Can Import
To understand what kind of data you can import in the Access data, let us open your database and go to the External Data tab.
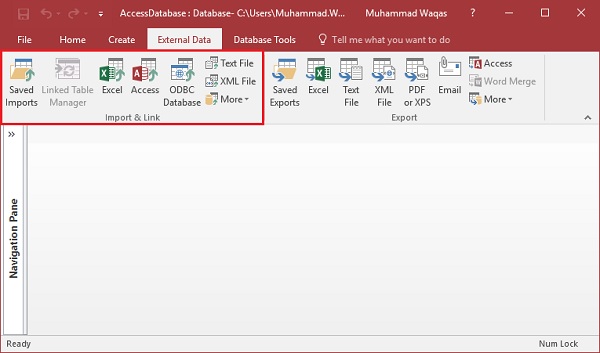
In the import & Link group, you can see the different kind of options available for data import in Access. Following are the most commonly used data import formats.
- Microsoft Office Excel
- Microsoft Office Access
- ODBC Databases (For example, SQL Server)
- Text files (delimited or fixed-width)
- XML Files
Example
Let us look at a simple example of data importing from an Excel file. Here is the data in Access file.
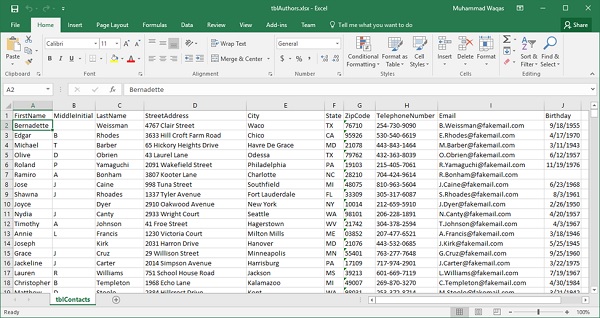
To import the data in Access, we first need to open the Access database and then go to the External Data tab as in the following screenshot.
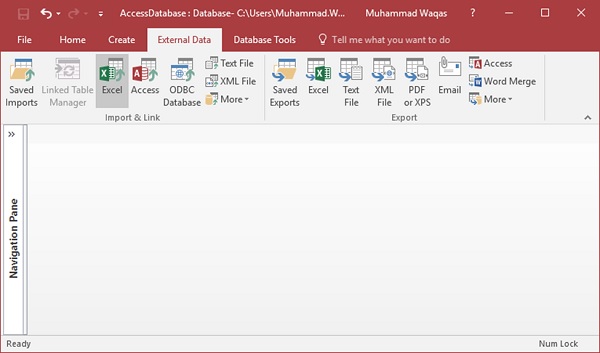
In Import & Link group, you will see an option Excel. Let us click on that option.
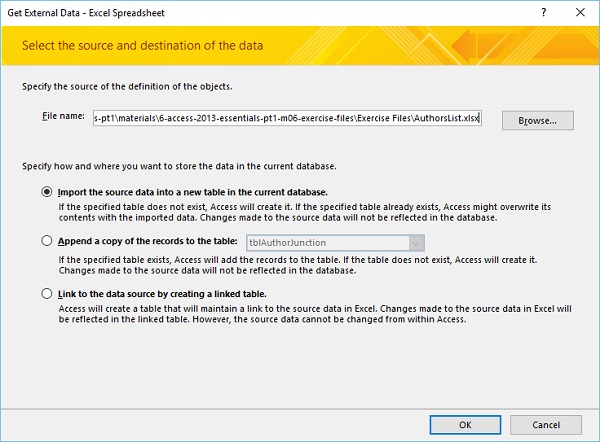
Browse the Excel file from which you want to import data and the then we have different options to store data. Let us select the first option and click Ok.
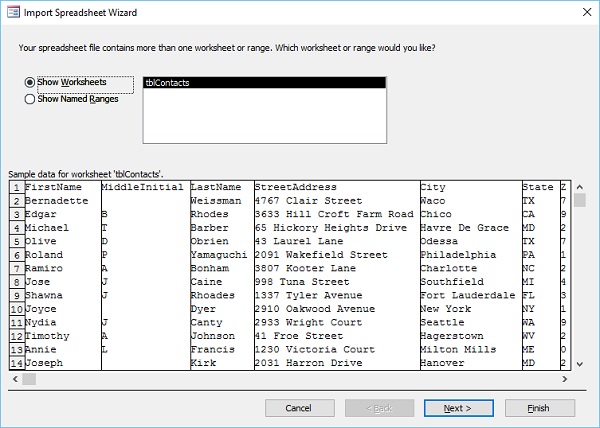
Here you will see the preview of your data. Now, click Next.
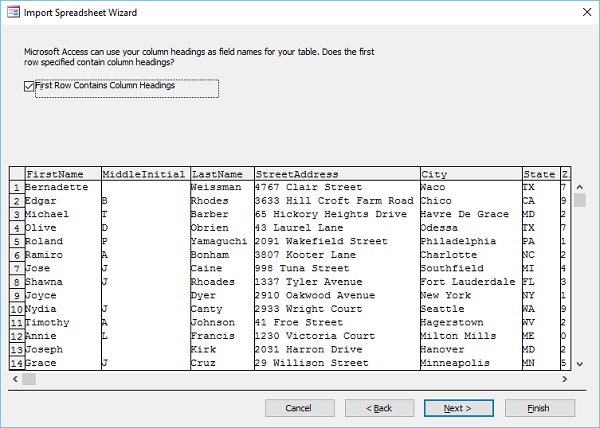
In the Preview, you can now see that the first row contains the column headings. Let us now check the check box and click Next.
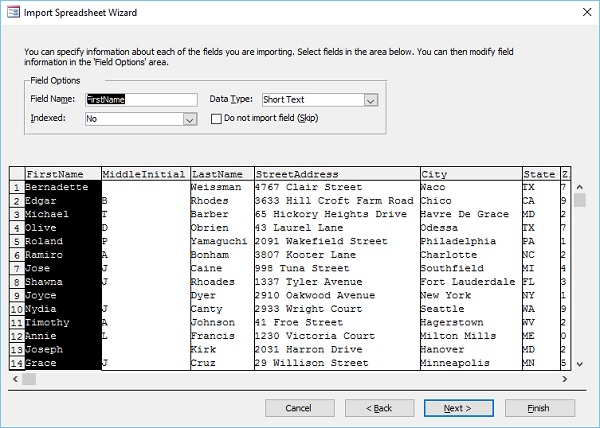
You will now see a dialog box where you can set the data type for each column/field. If you dont want to import any field, just check the check box which says do not import field. Once you are done with the FirstName field, just click on the MiddleInitial field.
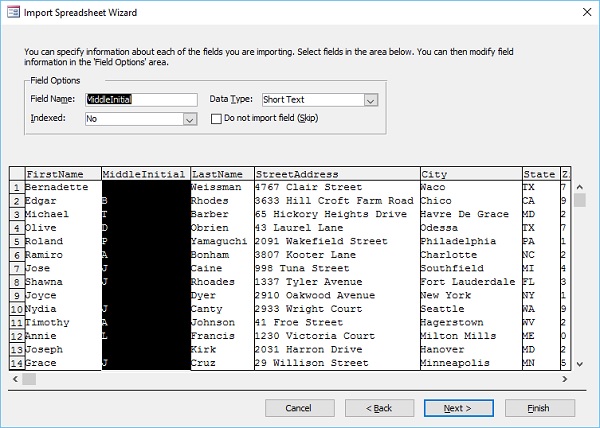
Let us now go through all the fields and then, click Next.
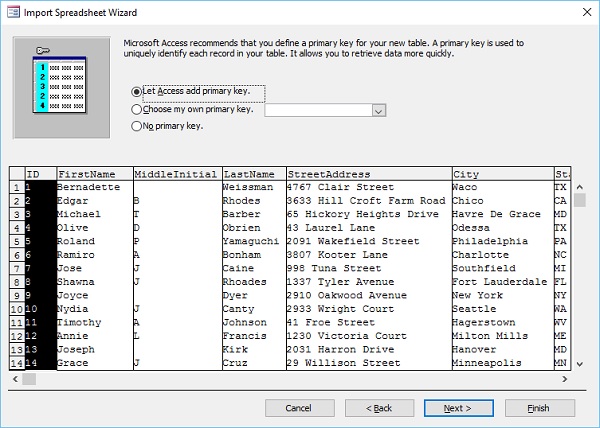
Here are the different options for primary key. Let us select the first option and click Next.
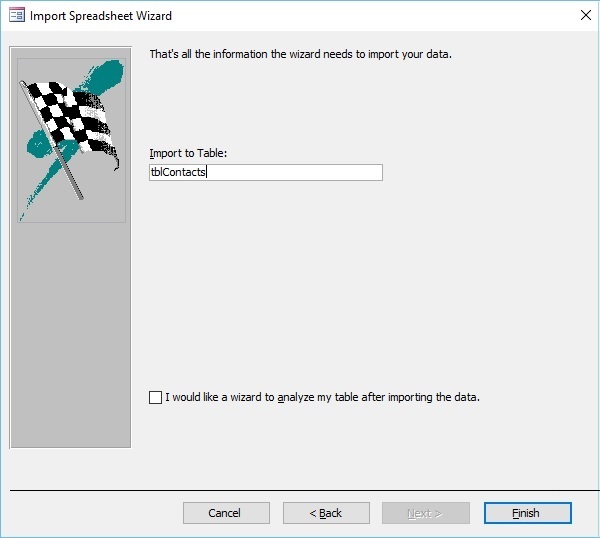
In the last dialog box, you can enter the table name of your choice and click Finish.
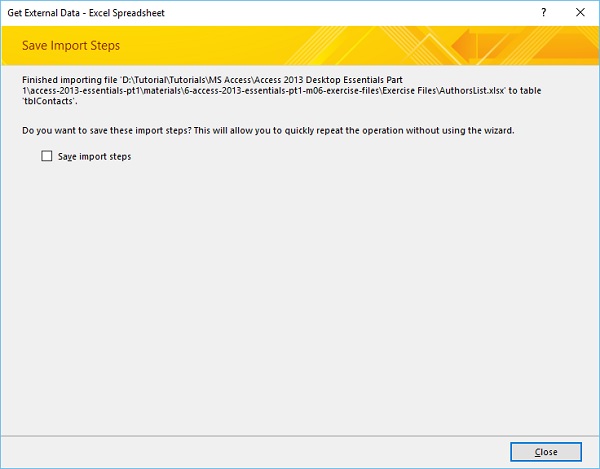
If you want to save all these steps, then check the checkbox and close the dialog box.
Let us now go to the Navigation pane. You will see a new table is added here and when you open the newly added table you will see all of your data in Access.
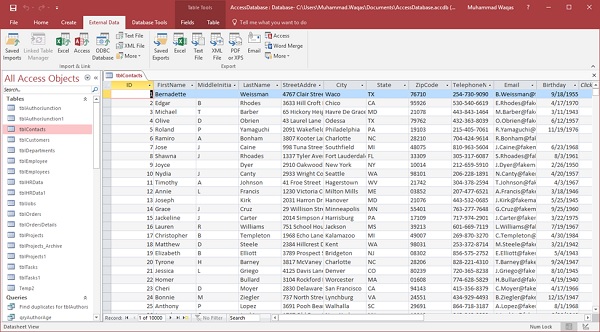
Example
Let us now look at another example of importing data from the Access database. Let us go to the External Tab again.
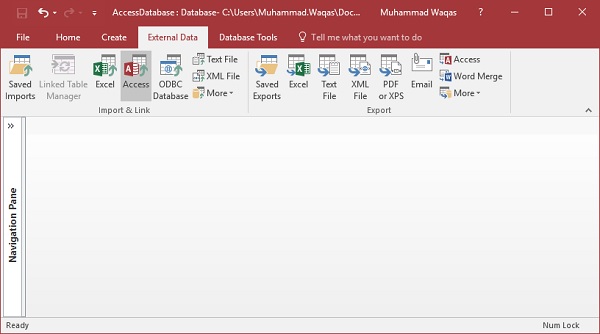
In Import & Link group, click on the Access option.
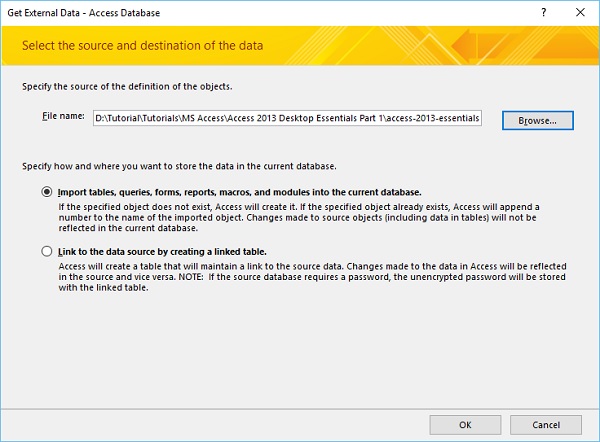
Browse the Access database from which you want to import the data and then select the first option which says Import tables, queries, form etc. Now, click Ok.
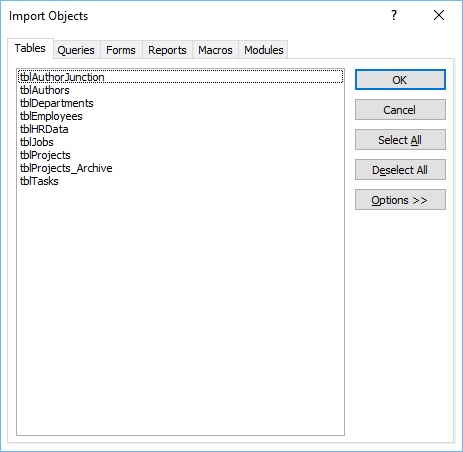
In the above dialog box, you can see different tabs for Tables, Queries, Forms etc. from where you can select what kind of data you want to import.
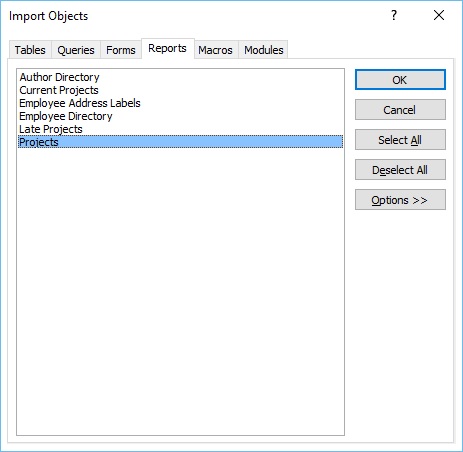
Let us go to the Reports tab and select any report you want to import; you can also select all the data by clicking on the Select All button. Let us select Projects and click Ok.
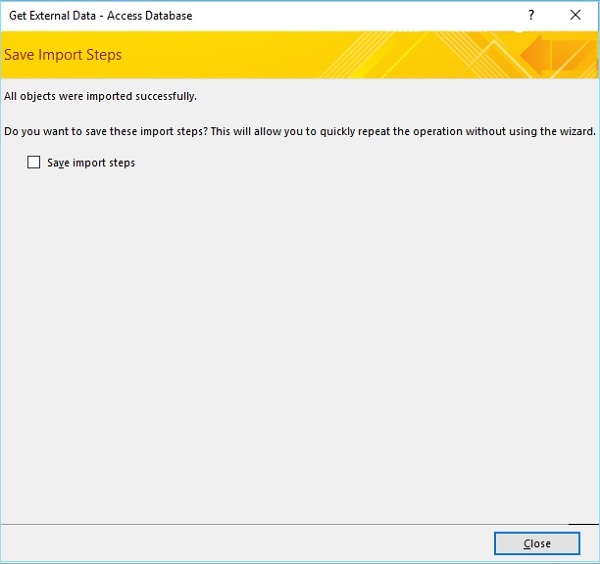
Now, close the dialog box. In the navigation pane, you will see that a new report is added. Let us open this report and you will see all the data in that report.
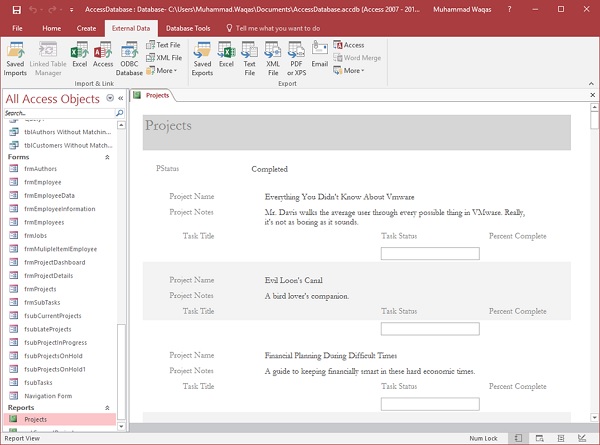
Ms Access - Data Export
In this chapter, we will understand how to export data from Access. Data export is actually the opposite of importing data. In importing data, we bring data from other formats in Access, while in exporting we save the data in other formats.
To understand what kind of data you can export from Access data, let us open your database and go to the External Data tab.
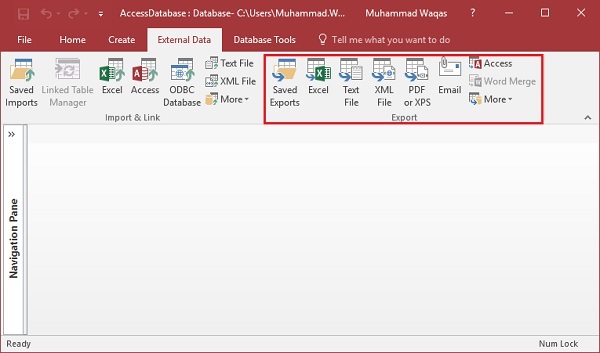
In the Export group, you can see the different kind of options available for data export from Access. Following are the most commonly used data export formats −
- Microsoft Office Excel
- Microsoft Office Access
- ODBC Databases (For example, SQL Server)
- Text files (delimited or fixed-width)
- XML Files
Example
Let us look at a simple example of data export from Access. Open your database where you want to export the data from. In the Navigation Pane, select the object that you want to export the data from.
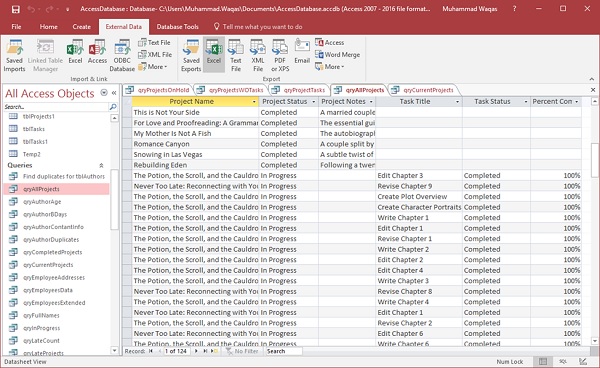
You can export the data from table, query, form, and report objects etc. Let us select the qryAllProjects and then, go to the External Data tab.
On the External Data tab, click on the type of data that you want to export to. For example, to export data in a format that can be opened by Microsoft Excel, click Excel.
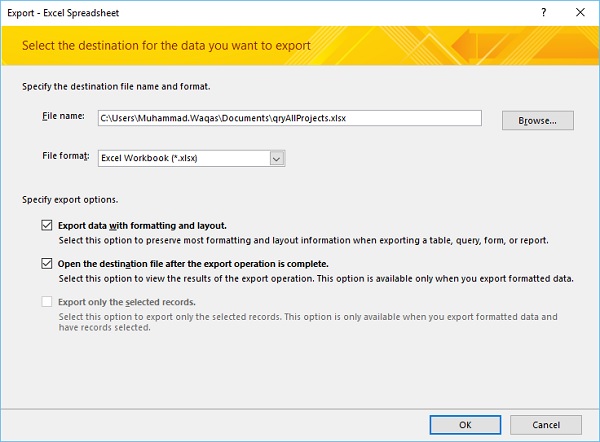
Access starts the Export wizard. In the wizard, you can set the information such as the destination file name and format, whether to include formatting and the layout, which records to export. Once you are done with the required information, click Ok.
On this screen of the Wizard, Access usually asks you if you want to save the details of the export operation. If you think you will need to perform the same operation on a recurring basis, select the Save export steps check box and close the dialog box.
The following Excel file opens up.
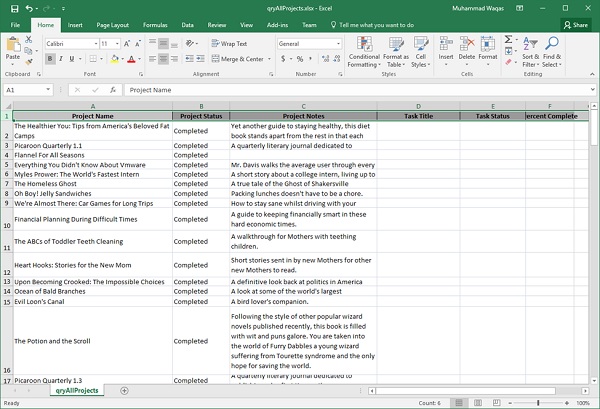
Let us now suppose you want to export data to a text file, on the External Data tab, click on the Text File.
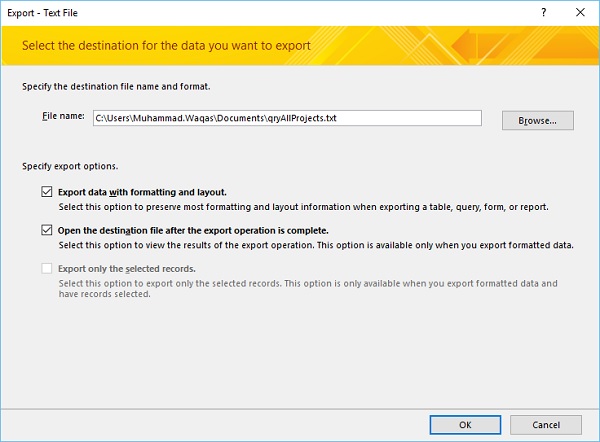
Specify the export options and click Ok. You will see the Encode dialog box, wherein we want to export the data in default encoding.
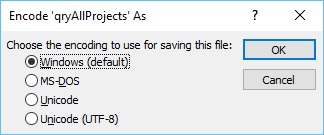
Select the first option and click Ok.
On this screen of the wizard, Access usually asks you if you want to save the details of the export operation. If you think you will need to perform the same operation on a recurring basis, select the Save export steps check box and close the dialog box.
You will now see that the Text file is open.
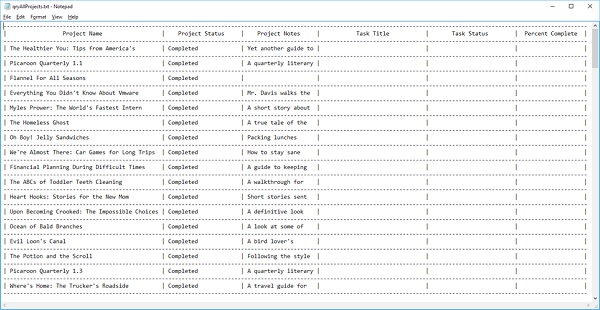
Similarly, you can explore other options as well. Thus, it is highly recommended to play with other import export features too.
