- jMeter - Home
- jMeter - Overview
- jMeter - Environment
- jMeter - Build Test Plan
- jMeter - Test Plan Elements
- jMeter - Web Test Plan
- jMeter - Database Test Plan
- jMeter - FTP Test Plan
- jMeter - JMS Test Plan
- jMeter - Monitor Test Plan
- jMeter - Listeners
- jMeter - Functions
- jMeter - Regular Expressions
- jMeter - Best Practices
jMeter Resources
jMeter - JMS Topic Test Plan
Building a JMS Topic Test Plan
Now let us write a JMeter test plan to test a JMS Provider. We will create one subscriber and one publisher. We will create one thread group and set each one to two iterations
First let us start the JMeter from D:\Projects\jmeter\apache-jmeter-5.6.3\bin\jmeter.bat.
Add Users
Now create a Thread group as follows −
Right-click the Test Plan
Select Add → Threads (Users) → Thread Group. Thread Group will get added under the Test Plan node.
Rename this Thread Group as JMS pub-sub user.
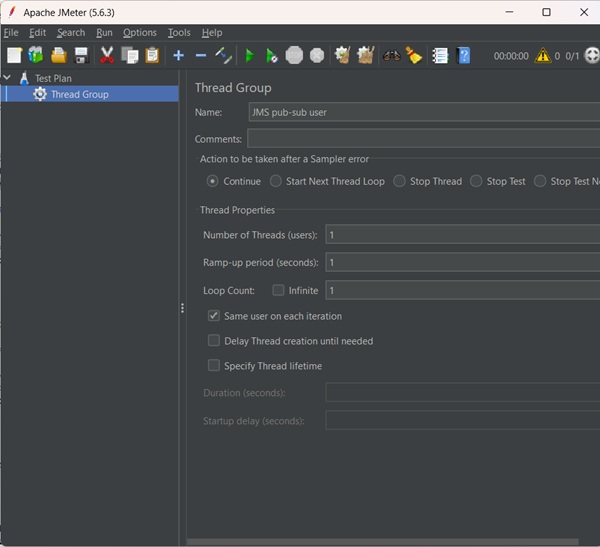
We will change the Loop Count to two. Rest of the default properties of the Thread Group are retained. It means one thread group with one thread or one user sends two messages each through a request queue.
Adding JMS Subscriber and Publisher
Let us see how to add subscribers and publishers −
Add Publisher
Add the sampler JMS Publisher to the Publisher element by selecting Add → Sampler → JMS Publisher.
Select the JMS Publisher element in the tree.
Edit the following properties −
| Property | Value | Description |
|---|---|---|
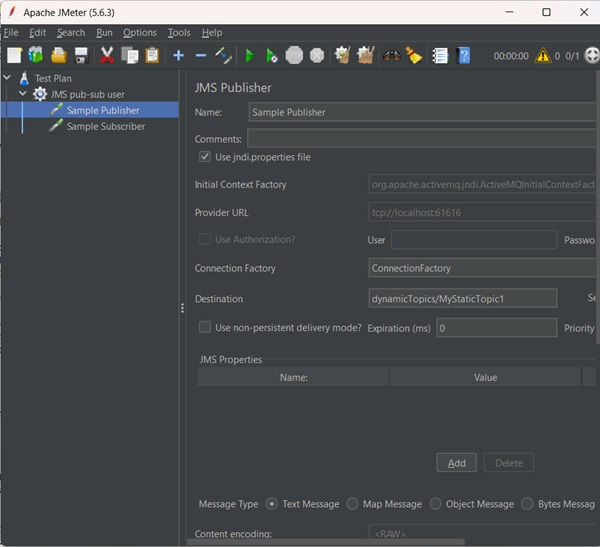
| Name | Sample Publisher | Descriptive name for this element that is shown in the tree. |
| If the JMS provider uses the jndi.properties file | check the box | Use jndi.properties. Note that the file must be on the classpath − e.g. by updating the user.classpath JMeter property. If this option is not selected, JMeter uses the "JNDI Initial Context Factory" and "Provider URL" fields to create the connection. |
| InitialContextFactory | org.apache.activemq.jndi.ActiveMQInitialContextFactory | Name of the context factory. |
| Provider URL | tcp://localhost:61616 | The URL for the jms provider. |
| Connection Factory | ConnectionFactory | The URL for the JMS provider. |
| Destination | dynamicTopics/MyStaticTopic1 | The name of the message topic. For ActiveMQ Dynamic Topics (create topics dynamically). |
| Number of samples to aggregate | 2 | Number of samples to aggregate. |
| Message source | Textarea | Where to obtain the message −
From File − means the referenced file will be read and reused by all samples. Random File from folder − means a random file will be selected from the folder specified, this folder must contain either files with extension .dat for Bytes Messages, or files with extension .txt or .obj for Object or Text messages Text area − The Message to use either for Text or Object message |
| Message type | Text | Text, Map, Object message or Bytes Message |
Rest of properties are retained with the default values. The following screenshot shows the above configurations −
Add Subscriber
Now that we have defined our users, it is time to define the tasks that they will be performing.
Add the sampler JMS Subscriber to the Subscribers element by selecting Add → Sampler → JMS Subscriber.
Select the JMS Subscriber element in the tree
Edit the following properties −
| Property | Value | Description |
|---|---|---|
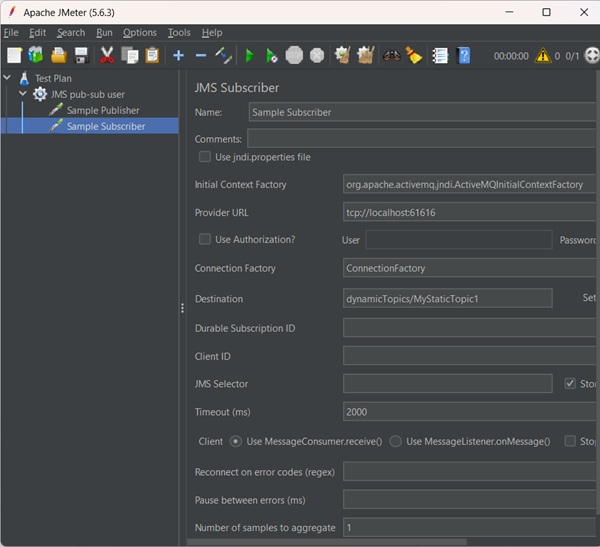
| Name | Sample Subscriber | Descriptive name for this element that is shown in the tree. |
| If the JMS provider uses the jndi.properties file | check the box | Use jndi.properties. Note that the file must be on the classpath − e.g. by updating the user.classpath JMeter property. If this option is not selected, JMeter uses the "JNDI Initial Context Factory" and "Provider URL" fields to create the connection. |
| InitialContextFactory | org.apache.activemq.jndi.ActiveMQInitialContextFactory | Name of the context factory. |
| Provider URL | tcp://localhost:61616 | The URL for the JMS provider. |
| Connection Factory | ConnectionFactory | The URL for the JMS provider. |
| Destination | dynamicTopics/MyStaticTopic1 | The name of the message topic. For ActiveMQ Dynamic Topics (create topics dynamically). |
| Read response | Check Box | The sampler should read the response. If not, only the response length is returned. |
| Timeout | 2000 | The timeout to be applied, in milliseconds. 0=none. This is the overall aggregate timeout, not per sample. |
Rest of the properties are retained with the default values. The following screenshot shows the above configurations −
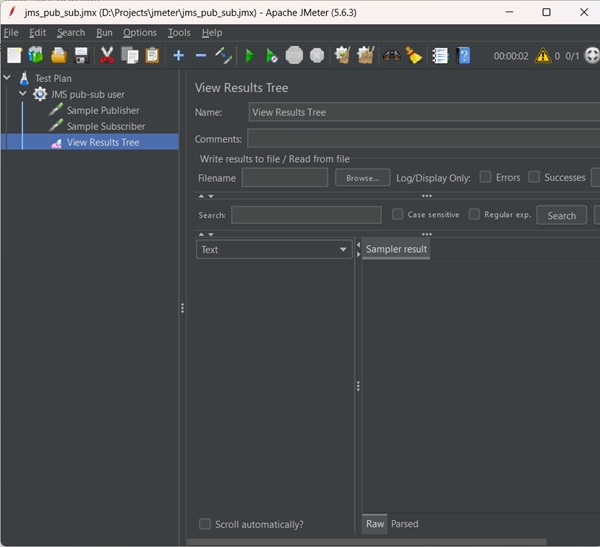
Create Listener
Now add the Listener element. This element is responsible for storing all the results of your JMS requests in a file and presenting a visual model of the data.
Select the Thread Group element.
Add a View Results Tree listener by selecting Add > Listener > View Results Tree.
Save and Execute Test Plan
Now save the above test plan as jms_pub_sub.jmx. Execute this test plan using Run → Start option.
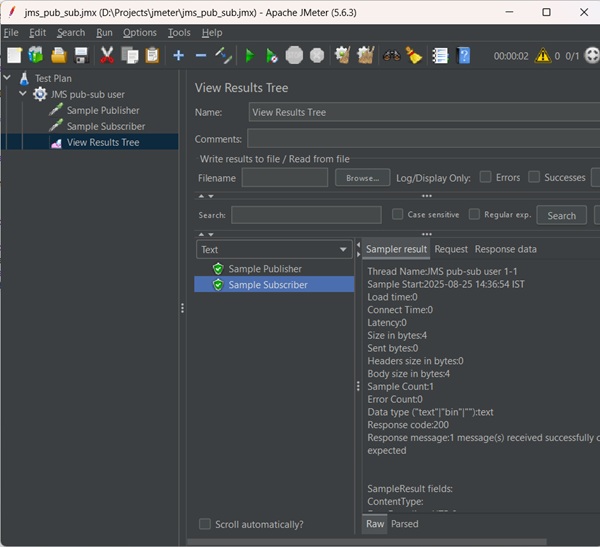
Verify the Output
Output for Publisher

Output for Subscriber
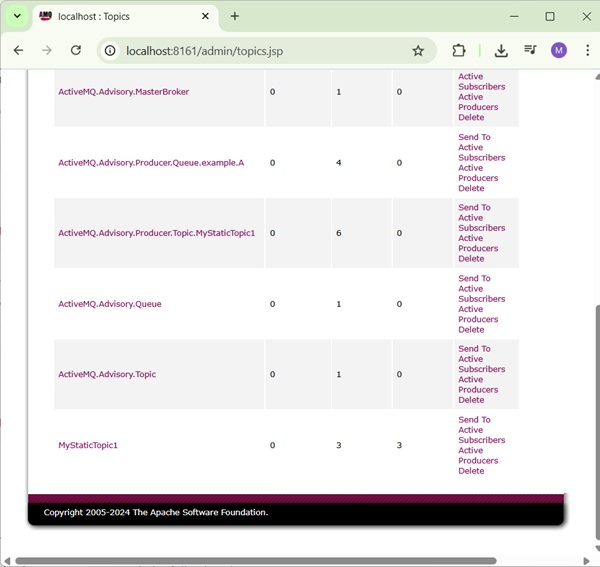
Return to the admin console of ActiveMQ. Here we can see the message status in the topics.