- jBPM5 - Home
- jBPM5 - Overview
- jBPM5 - Eclipse Plugin
- jBPM5 - Hello World!
- jBPM5 - Components
- jBPM5 - Workflow Components
- Draw & Validate a Workflow
- jBPM5 - Example
jBPM5 - Quick Guide
jBPM5 - Overview
JBPM stands for "Java Business Process Management". It is a JBoss product which is an open source framework. Before moving further, let us first define a business process.
What is a Business Process?
By definition, a business process is a sequence of tasks that takes place in a repeatable order, executed by humans and/or systems to achieve a business goal. It describes the order (using a flowchart) in which a series of steps needs to be executed. A business process can significantly improve the visibility and agility of a business logic.
Let us take an example. The following screenshot depicts a workflow/flowchart that most IT professionals can relate to. It is a common process that is followed in most organizations to appraise the employees based on their performance.
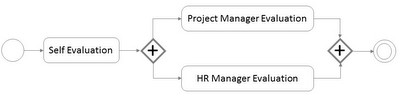
The process takes place in the following order −
Employees self-evaluate themselves and submit the report to their Project Managers.
Your performance is then evaluated by the Project Manager and the HR Manager. Based on the evaluation, they give the employees a rating.
The final rating or performance feedback is then relayed back to the employees.
This process is applicable for almost all the employees and hence, it is a very good example to understand a business process. It is a sequence of tasks and it happens in a particular order.
What is jBPM?
Business process is a key concept to understand any organizational framework. A technology like jBPM helps in managing complex business processes in an efficient way. JBPM is a tool that can orchestrate a business process effectively. Generally, every enterprise-level application will have a sequence of tasks which are executed in a specific order and those processes can be orchestrated with the help of jBPM.
The beauty of jBPM is that it is similar to a flowchart. It can be easily understood by business analysts as well. jBPM can be embedded in a Java application and run as a service.
Features of JBPM
jBPM is a lightweight, open source, fully embeddable process engine written in Java. Its most notable features are listed below −
jBPM executes business processes which are designed using the BPMN 2.0 specifications.
jBPM can be fully integrated with Eclipse and similar IDEs to provide drag and drop support to create a workflow.
jBPM has UI tools available to involve business analysts and users right from the design phase.
jBPM supports persistence and transaction management with the help of JPA and JTA.
One can define custom work item handlers to create a user-defined task which can be used as a component later on for other workflows.
jBPM5 - Eclipse Plugin
The following are the Prerequisites to install jBPM Plugin −
- Java 1.5 (or higher) SE JDK
- Eclipse 4.2 or any version and the jBPM plugin
As jBPM is written in Java, we will be covering how to add the desired plugins in this section. Considering maximum Java users use Eclipse, let us see how to add the jBPM plugin in Eclipse.
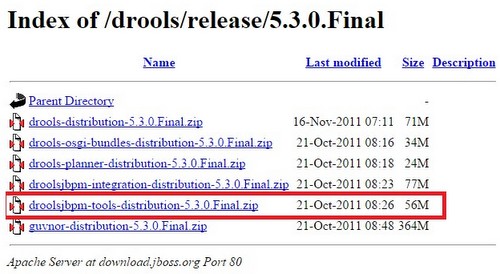
Download the binaries from the following link − http://download.jboss.org/drools/release/5.3.0.Final/
Don't be confused on seeing Drools here. The same plugins are used for jBPM. If you already have installed Drools plugin, then you can skip the installation steps.
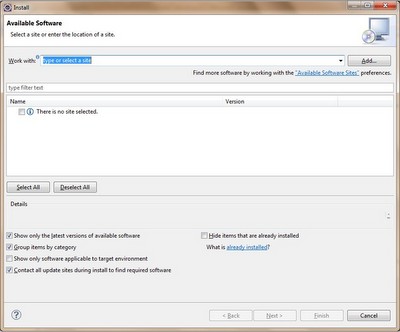
Extract it to your hard disk. Then, launch Eclipse and go to Help → Install New Software.
Click Add Repository −
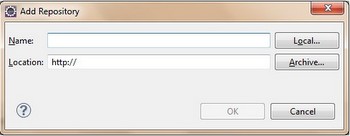
Click the Local button and then select ".../binaries/org.drools.updatesite" (where you downloaded on your machine)
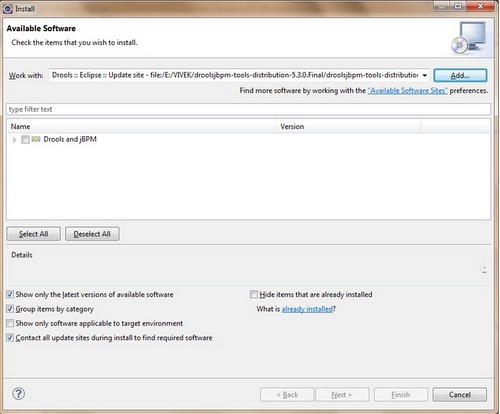
Select Drools and jBPM and then click the Next button.

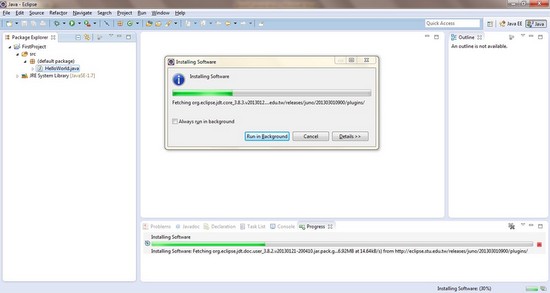
Again Click Next and select I accept the terms of license agreement and then click Finish. The software installation starts −
Post successful installation, you will get the following dialog box −
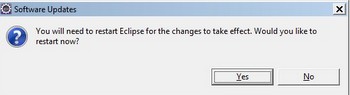
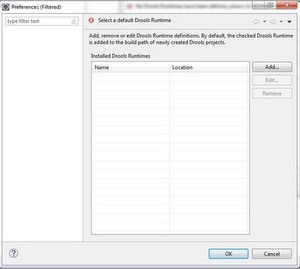
Click Yes. Eclipse restarts. Now, go to Windows → Preferences → Drools → Drools Flow Nodes

If you are able to see the nodes as shown in the above screenshot, it proves that the plugins were successfully installed. Now we are ready to write our first jBPM program.
jBPM5 - Hello World!
Here in this chapter, we will write our first program "Hello World" using jBPM. Follow the steps given below −
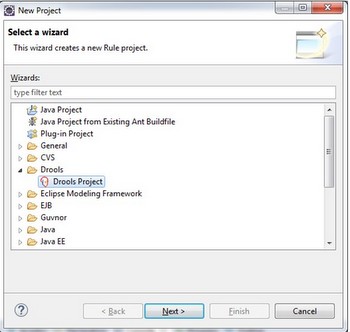
Go to File → New → Drools Project −
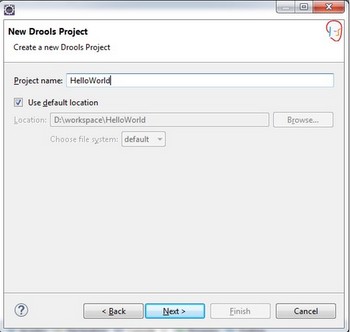
Click Next. Give an appropriate name for the first project : "HelloWorld" in our case.
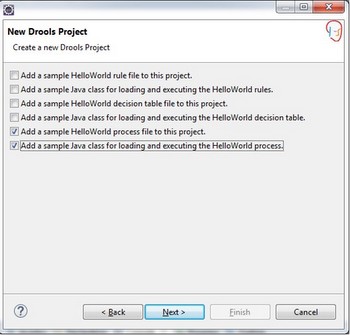
Click Next. Select the bottom two checkboxes, viz −
- Add a sample HelloWorld process file to this project
- Add a sample class for loading and executing HelloWorld process
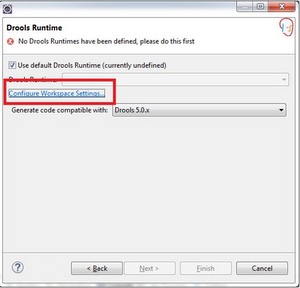
Click Next. Click Configure Workspace Settings (marked red in the following screenshot) −
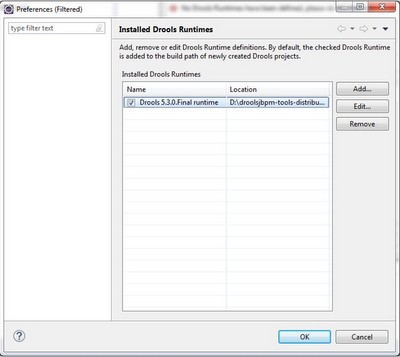
Click the Add button −
Once you click the Add button, the following screen appears. Click "Create a new Drools5 Runtime"

Give the path till the binaries folder where you have downloaded the droolsjbpm-tools-distribution-5.3.0.Final.zip
Then, select the Installed Drools Runtimes and click OK.
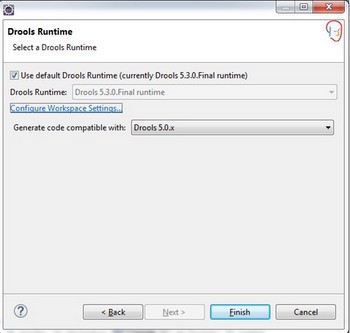
The following screen appears. Click the Finish button.
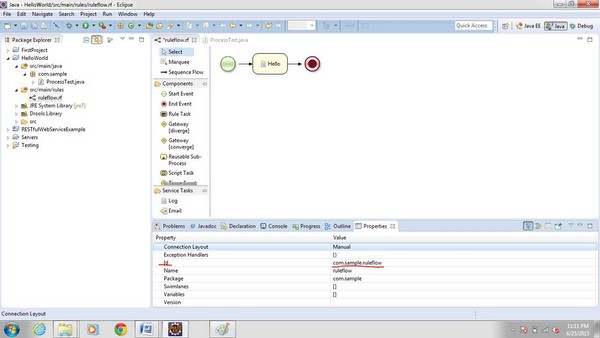
Now, open the Package Explorer view in Eclipse. You will get to see the following screen −
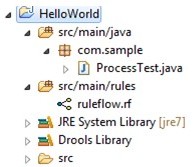
The ProcessTest.java class is the class to load the ruleflow(rf) file and ruleflow.rf is the basic rule flow created for the HelloWorld project.
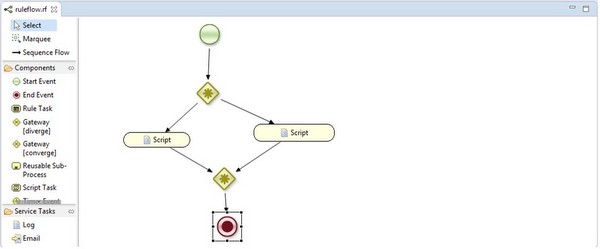
Double click on the ruleflow.rf file and you would see the following ruleflow −
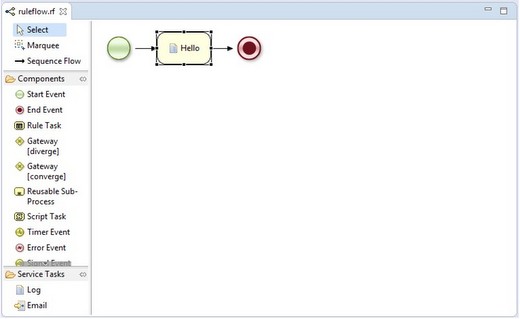
The GREEN circle depicts the start of the workflow, whereas the RED circle is the end of workflow.
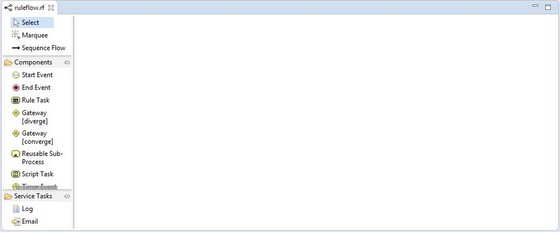
The panel depicted on the left-hand side has different components listed which are used in the workflow. Apart from START and END, there are a lot of components which can be used in the workflow and we would be covering them in the next section.
The Hello in between the START and END event is a script task and the name of the script task is Hello. To see what code is written in the script task "Hello", go to Windows → Show View → Other → Properties.
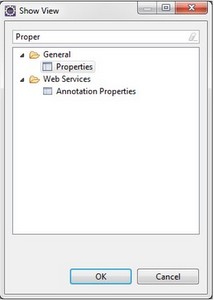
Note − While working on jBPM, please keep the Properties view open at all times because all the configurations are visible in the properties view only.
Click the OK button. Now, select Hello and you can see the properties of "Hello" event −
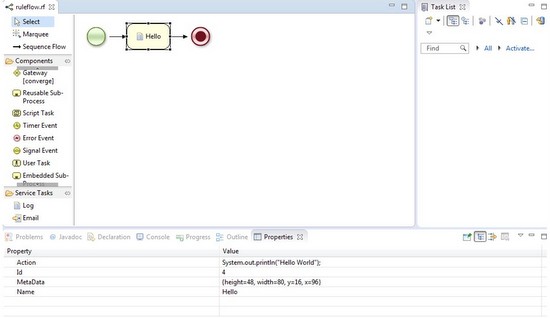
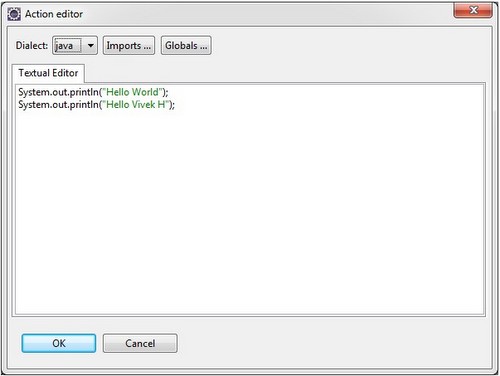
To see the entire code written inside the "Hello" event, select the Action property.

The circle marked in red is the edit of the action property. Once you click on Edit −
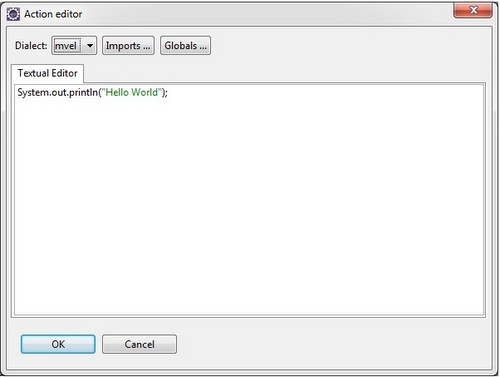
You can edit this and write the code which you want to execute inside the "Hello" script task. Let us edit it −
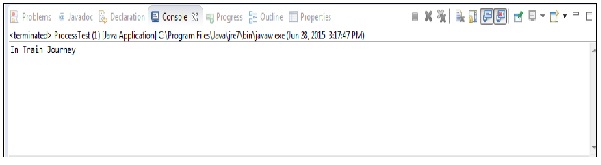
Click OK. Now open the ProcessTest.java class and run it as a Java Application. Given below is its output −

The terms used in the ProcessTest.java class are the same used for Drools. The point to note in ProcessTest.java class is −
ksession.startProcess("com.sample.ruleflow");
When you write the code for starting the process, the string passed to startProcess method is the id property when we open the workflow.
jBPM5 - Components
BPMS core is the heart of the BPM. The following illustration depicts the BPMS core and its components.
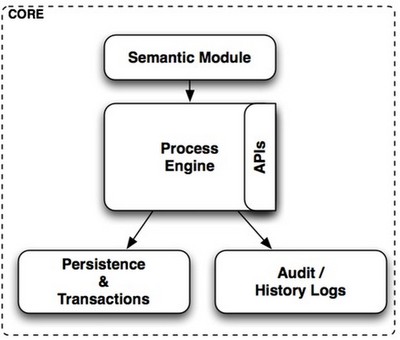
The Semantic Module
The semantic module defines the language semantic (what each word means) and how it will be translated for the process engine's internal structures that are ready to be executed. This module basically contains the essentials to understand the BPMN2 language.
The Process Engine
The process engine is the one responsible for actually executing our business processes. The process engine is in charge of creating new process instances and keeping the state for each of them. Inside the process engine code, the internal structures are defined to represent each activity that is in our process definitions. All the mechanisms that are being used to instantiate these process definitions will execute them as defined in the process engine.
Persistence and Transactions
In most enterprise applications, all the interactions must run inside a transaction boundary, and we must deal with different systems, APIs, and designs. Also, we must have a flexible mechanism to define −
How to handle long-running processes
How and when we can we store information about the process status and the information that the process is handling
How and when we need to create, commit, or roll back the process engine transactions
Which business exceptions can roll back or compensate already executed business actions
All the above points are covered by persistance and transactions component inside the jBPM.
Audit/History Logs
This module is in charge of giving the user a way to query about how our processes are being executed. This information includes historic information about processes that have already ended and the latest information about the processes that are being executed.
Business Activity Monitoring (BAM) tools and information dashboards are some of the most common clients for the information generated by this module. The Audit/History Logs module is commonly used to extract useful information and metrics that will collaborate with different tools designed to display this information accordingly.
jBPM5 - Workflow Components
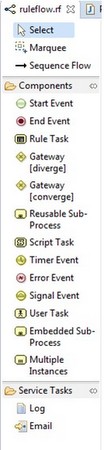
The following screenshot show the various workflow components available in jBPM 5. Using these components, you can create a workflow to orchestrate your process.
You can create your custom tasks as well but that will be covered later. In addition, there are service tasks available that can be used to orchestrate a process.
Start Event − This is the first node executed in every process. There can be only one start node in your process.
End Event − This node signals the end of the process. There can be more than one occurence of this type of node in a process.
Rule Task − It is a node that evaluates a RuleFlow group, that is a group of Drools Rules under the same named scope.
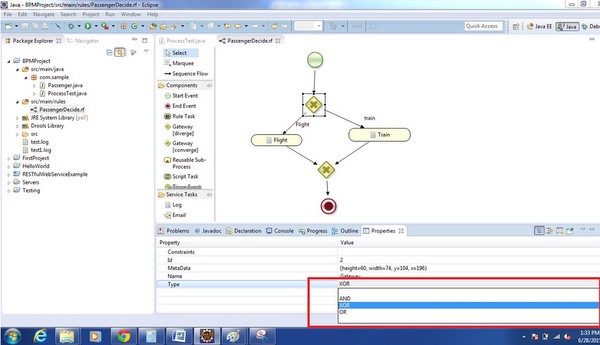
Gateway (diverge) aka Split − This particular node creates new paths/ways in the process. It has two or more outgoing connections. You can choose between three different types of Splits/Gates available.
AND GATE − Where the flow of the process continues to all outgoing connections at the same time.
XOR GATE − Which goes to one only outgoing path according to some predefined constraints defined in the workflow.
OR GATE − Where the flow proceeds based on evaluation of all outgoing constraints and that path is enabled where the constraint is evaluated to true.
Gateway (converge) aka Join − This join is the reverse of the split. It joins multiple paths into one. There can be four different types of Joins/gates −
AND − The flow continues when all the branches are complete.
XOR − The flow continues when at least one branch is complete.
Discriminator − Like XOR, it continues if one of its branches has been completed. But unlike XOR, it registers the completions of the other branches until all connections have completed. When it happens, the node resets and it can be entered again when an incoming branch activates and the cycle starts all over again.
N-of-M − The flow continues when n number of m branches completes. You need to specify the n (number) while configuring the gate as to how many branches should complete before the flow exits.
Reusable Sub-Process − Calls another process. This is very useful to compose several smaller process into a larger one. This larger one can be a coordinating process. You can configure the calling process to wait for the callee to complete and also to have an indepedent lifecycle of its parent.
Script Task − A node that can execute a simple piece of code.
Timer Event − This type of node starts a timer and triggers when the timer expires. Enables time-related process and repetitive tasks.
Error Event − This kind of node signals an error condition in the process. It has no outgoing connections. It specifies a FaultName and a FaultVariable. The engine will search for an exception handler that matches the FaultName and stores the Fault information in the variable defined by the FaultVariable.
Message Event − It triggers when an event of a predefined type is emitted. It can be either an internal event (signaled inside the process) or external (signaled by an external entity other than the process engine).
User Task − A node that creates a Human Task. This Human Task is an activity that must be completed by a human actor.
Embedded Sub-Process − Helps to create a subprocess within a parent process. It can have its own scope. This is useful for larger process where you want to keep some complex branches isolated. It can have its own variables and exception handlers
Multiple Instances aka for Each − It allows a collection of elements to be fed into a subprocess. Very useful when combined with a Reusable Subprocess to compose and coordinate smaller processes.
jBPM5 - Draw & Validate a Workflow
To draw a workflow, you can use any of the components available in the palette as described in above article. All the workflow will have one start but it can have multiple end.
With the help of screenshots, I will depict you how to create a workflow.
Here, Ive opened the blank rf or bpmn file
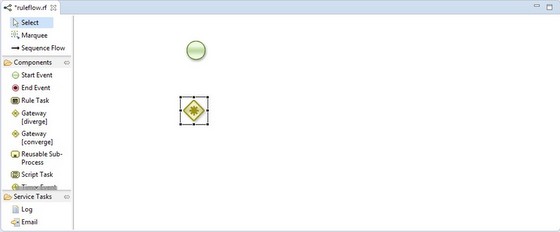
To add any event, select the particular event from Components Palette and drag and drop to right hand side. For example, I selected the start event and dragged it to right hand side and also a diverge gateway.
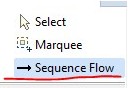
Now, one needs to connect the two components. Select the Sequence flow and connect the two components.
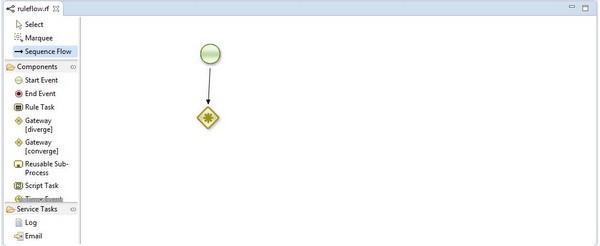
This way you can drag the components to the editor and use the sequence flow to join the different components. One just needs to take care that some components will have one incoming and one outgoing connection only and needs to set the sequence flow accordingly to create a meaningful flow.
One needs to set some properties as well while we draw the workflow. Will post all the properties to set here. I have just created a flow but it won't be very meaningful to look at it at first instant as I haven't set any properties in the workflow created.
As you can see above, it's a blank workflow without any description as such and one cannot make out anything from the workflow created.
However, to explain further, I have a start component and then a diverge gateway and depending on the condition of the diverge gateway, I will choose one way and execute some code in the script task and then end the workflow. So I need to set properties for the diverge gateway, then the script task and the converge gateway.
At this stage i will also show you that my workflow has some errors and later will show you once I set the properties there would be no errors in my workflow, Hence showing you how to VALIDATE the workflow created.
Tip − Remember that validator's are on under Windows → Preferences → Validation
Below screenshot shows the settings in eclipse.


As per the screenshot, you can see that there are 4 errors. The first error says script has no action and then another error is the gateway's defined have no type defined. Hence, we need to remove these errors to be able to run the workflow.
We will now set properties one by one and see the errors fading away.
Select the first gateway(diverge) and click on properties, then click on type and select the gate as per your requirement.
Once you have selected the gateway then you need to select a constraint.
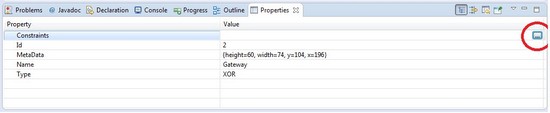
Click on the circle marked red, you will see below screenshot
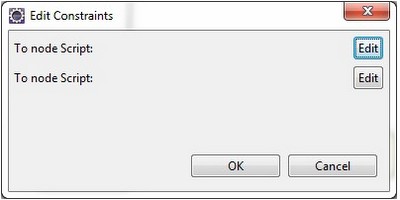
Click on edit and fill the details as per the screenshot −
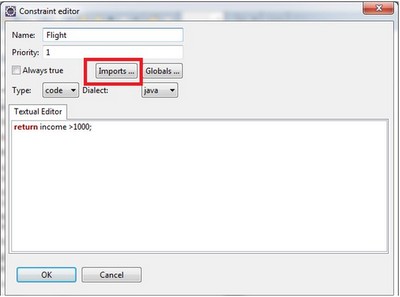

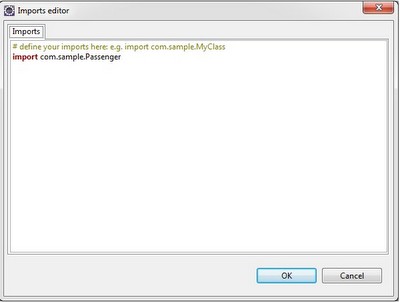
Click on Import and import the class on which we would be performing any operation. In the screenshot, we have imported passenger POJO which we will be using in our example.
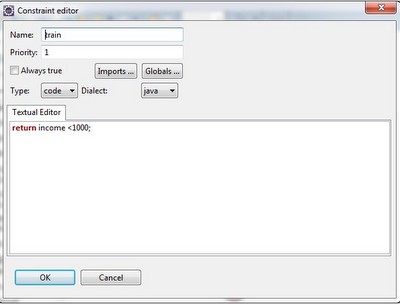
Similarly, fill the details for another constraint −
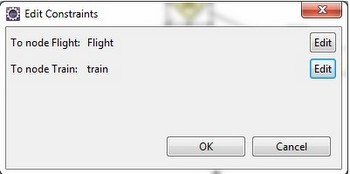
Now, click the OK button.
Again click OK. Now, select the script task and do the same process as you did for diverge gateway.
We have just added a SOP (print statement) to show the flow. Any java or mvel code can be written in the script task.
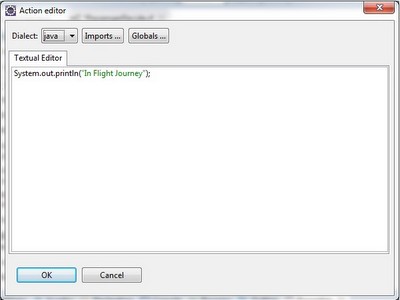
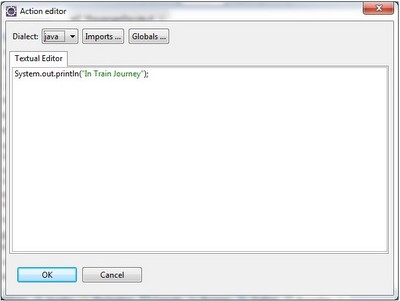
Similarly add the code for second constraint −
Finally, you need to add the gateway type for the diverge gateway.
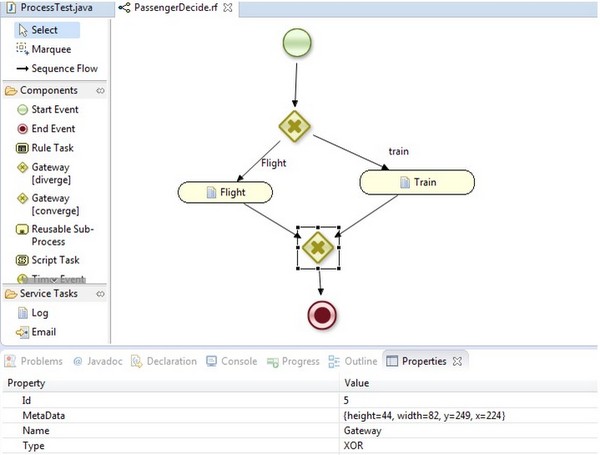
Now, save the workflow file and go to problems view. All the problems will be resolved.

No errors in the problem view suggests that, there is no error in the workflow created. This is how a workflow is created as well as validated in jBPM.
jBPM5 - Example
We will take an example in this chapter to explain how to put jBPM into practice. The task at hand is to use jBPM to decide whether a passenger will board a flight or a train, depending upon his income.
Steps to create the project remains the same as that of "Hello World" project. Open the .rf file in the editor, and see the changes as marked in red −
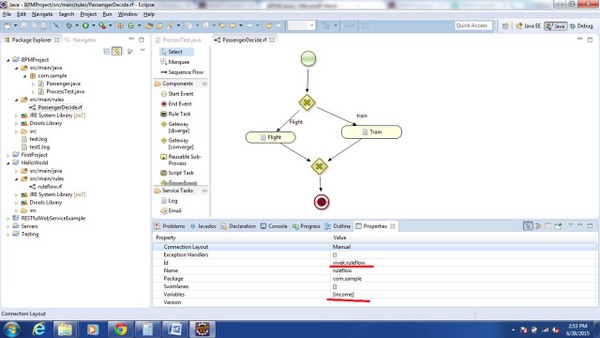
Here, we have changed the ruleflow id (unique) and added a variable income, as we will be deciding the route based on the income of the passenger.
How to set variable − Select the edit button marked in red.

Click the Add button −
The following screen pops up −
Put name as income and type as Integer.
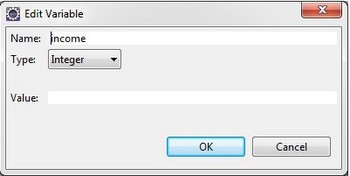
Click OK. You will see the income variable defined now.

Changes to be done in ProcessTest.java class (Class to load and run your process) −

Map<String, Object> params = new HashMap<String, Object>();
params.put("income", 1200);

// start a new process instance
ksession.startProcess("vivek.ruleflow", params);
You need to create a MAP and set the value in MAP and pass this value to the startProcess overloaded method. As depicted, we have changed the ruleflow id and hence used the same id (vivek.ruleflow) in the startProcess method.
Before running the ProcessTest.java class, create a POJO Passenger.java in the same package as ProcessTest.java
public class Passenger {
   private String name;
   private int income;
   Getters and setters here
}
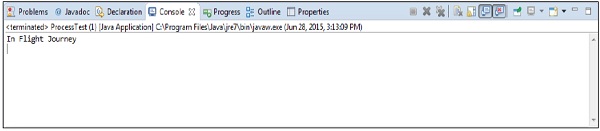
Now run the ProcessTest.java class as a Java Application and see the output −
Change the value − params.put("income", 900); and re-run the class and see the change in output.