- Grunt - Home
- Grunt - Overview
- Grunt - Features
- Grunt - Installing
- Grunt - Getting started
- Grunt - Configuring Tasks
- Grunt - Sample File
- Grunt - Creating Tasks
Grunt - Installing
This chapter provides a step-by-step procedure of how to install Grunt on your system.
System Requirements for Grunt
Operating System − Cross-platform
Browser Support − IE (Internet Explorer 8+), Firefox, Google Chrome, Safari, Opera
Installation of Grunt
Step 1 − We need NodeJs to run Grunt. To download NodeJs, open the link https://nodejs.org/en/,you will see a screen as shown below −
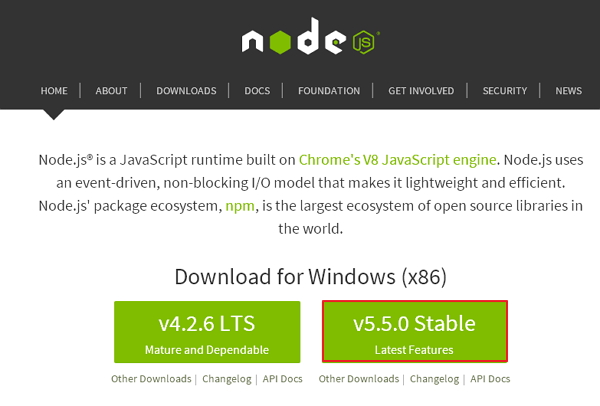
Download the Latest Features version of the zip file.
Step 2 − Next, run the setup to install the NodeJs on your computer.
Step 3 − Next, you need to set environment variables.
Path User Variable
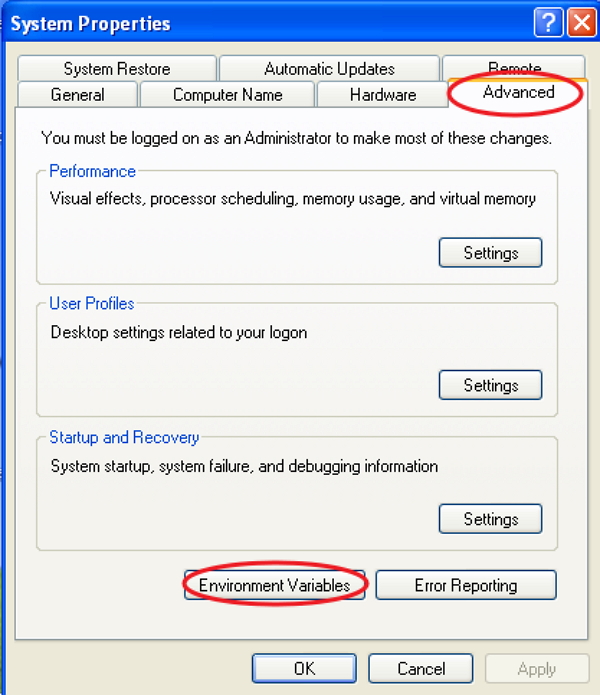
- Right click on My Computer.
- Select Properties.
- Next, select Advanced tab and click on Environment Variables.
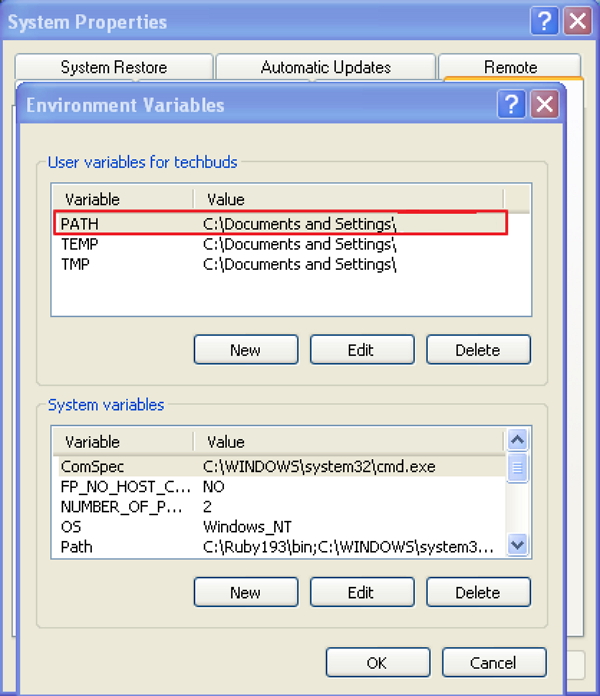
Under Environment Variables window, double click on the PATH as shown in the screen.
You will get an Edit User Variable window as shown. Add NodeJs folder path in the Variable Value field as C:\Program Files\nodejs\node_modules\npm. If the path is set already for other files, then you need to put a semicolon(;) after that and add the NodeJs path as shown below −
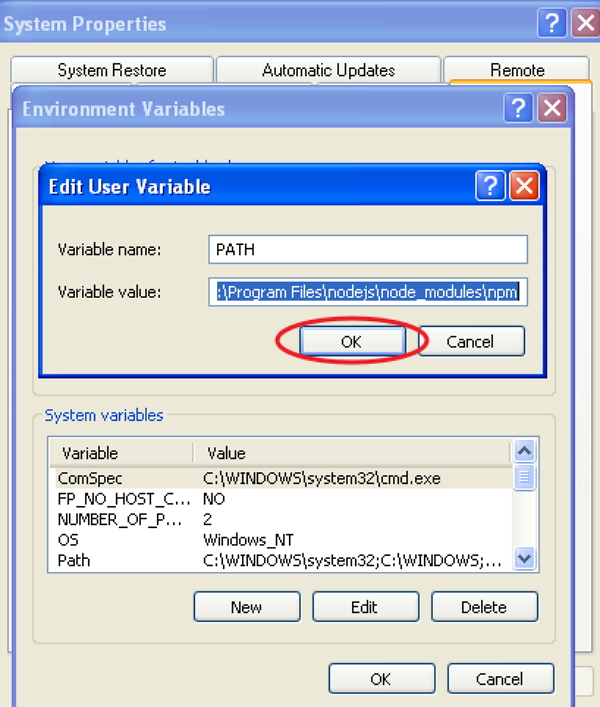
At the end, click the OK button.
System Variable
Under System variables, double click on Path as shown in the following screen.
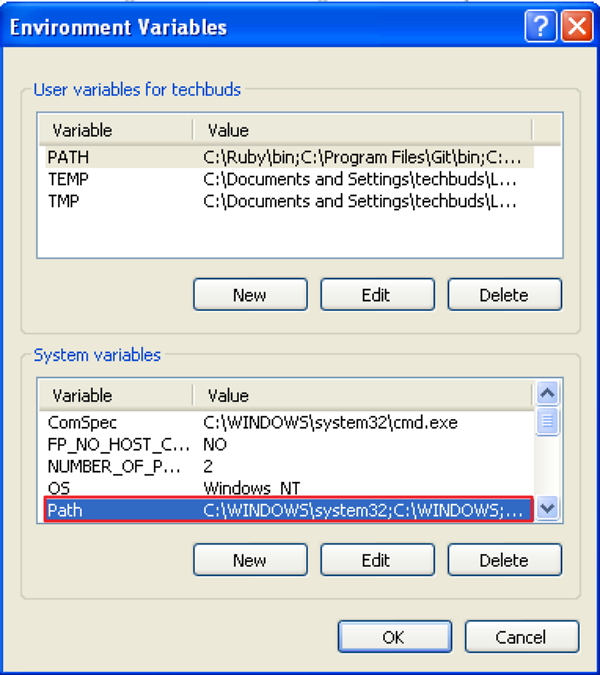
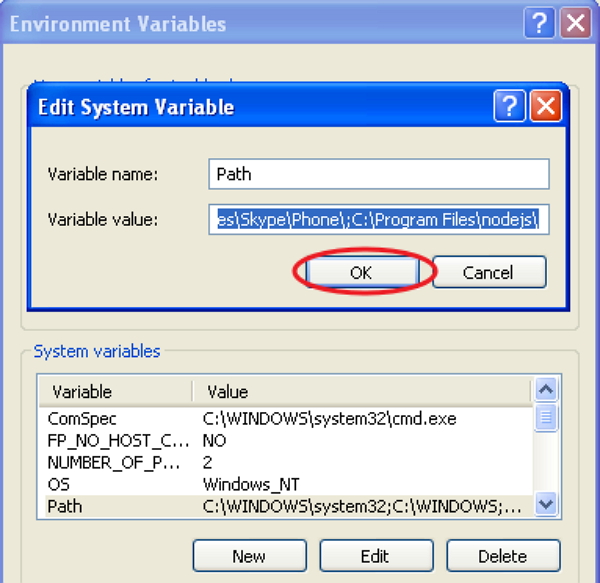
You will get an Edit System Variable window as shown. Add NodeJs folder path in the Variable Value field as C:\Program Files\nodejs\ and click OK as shown below −
Step 4 − To install grunt on your system you need to install Grunt's command line interface (CLI) globally as shown below −
npm install -g grunt-cli
Running the above command will put the grunt command in your system path, which makes it to run from any directory.
Installing the grunt-cli does not install Grunt task runner. The role of the grunt-cli is to run the version of Grunt which has been installed next to a Gruntfile. It allows a machine to install multiple versions of Grunt simultaneously.
Step 5 − Now, we shall create configuration files in order to run Grunt.
package.json
The package.json file is placed in the root directory of the project, beside to the Gruntfile. The package.json is used to correctly run each listed dependency whenever you run the command npm install in the same folder as package.json.
TThe basic package.json can be created by typing the following command in the command prompt −
npm init
The basic package.json file will be as shown below −
{
   "name": "tutorialspoint",
   "version": "0.1.0",
   "devDependencies": {
      "grunt-contrib-jshint": "~0.10.0",
      "grunt-contrib-nodeunit": "~0.4.1",
      "grunt-contrib-uglify": "~0.5.0"
   }
}
You can add Grunt and gruntplugins into an existing pacakge.json file through the following command −
npm install <module> --save-dev
In the above command, <module> represents the module to be installed locally. The above command will also add the <module> to devDependencies automatically.
For instance, the following command will install latest the latest version of Grunt and adds it to your devDependencies −
npm install grunt --save-dev
Gruntfile.js
The Gruntfile.js file is used to define our configuration for Grunt. It is the place where our settings will be written. The basic Gruntfile.js file is as shown below −
// our wrapper function (required by grunt and its plugins)
// all configuration goes inside this function
module.exports = function(grunt) {
   // CONFIGURE GRUNT
   grunt.initConfig({
      // get the configuration info from package.json file
      // this way we can use things like name and version (pkg.name)
      pkg: grunt.file.readJSON('package.json'),

      // all of our configuration goes here
      uglify: {
         // uglify task configuration
         options: {},
         build: {}
      }
   });

   // log something
   grunt.log.write('Hello world! Welcome to Tutorialspoint!!\n');

   // Load the plugin that provides the "uglify" task.
   grunt.loadNpmTasks('grunt-contrib-uglify');

   // Default task(s).
   grunt.registerTask('default', ['uglify']);
};
