- DocumentDB - Home
- DocumentDB - Introduction
- DocumentDB - Advantages
- DocumentDB - Environment Setup
- DocumentDB - Create Account
- DocumentDB - Connect Account
- DocumentDB - Create Database
- DocumentDB - List Databases
- DocumentDB - Drop Databases
- DocumentDB - Create Collection
- DocumentDB - Delete Collection
- DocumentDB - Insert Document
- DocumentDB - Query Document
- DocumentDB - Update Document
- DocumentDB - Delete Document
- DocumentDB - Data Modeling
- DocumentDB - Data Types
- DocumentDB - Limiting Records
- DocumentDB - Sorting Records
- DocumentDB - Indexing Records
- DocumentDB - Geospatial Data
- DocumentDB - Partitioning
- DocumentDB - Data Migration
- DocumentDB - Access Control
- DocumentDB - Visualize Data
DocumentDB - SQL Server
The JSON files are a natural fit, and they may just be able to be imported as is to DocumentDB. However, importing from a relational database like SQL Server is going to require some sort of transformation, meaning we need to somehow bridge the gap between the normalized data in SQL Server and its denormalized representation in DocumentDB.
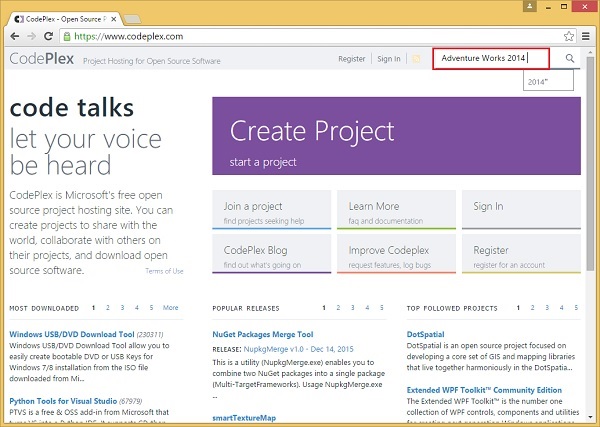
Lets take a look at a simple example in which we will see how the Migration Tool can import from a SQL Server database. In this example, we will import data from the AdventureWorks 2014 database. AdventureWorks is a popular sample database that you can download from CodePlex using the following steps.
Step 1 − Go to https://www.codeplex.com/
Step 2 − Search for the AdventureWorks 2014 in the search box.
Step 3 − Pick the recommended release for the sample databases.
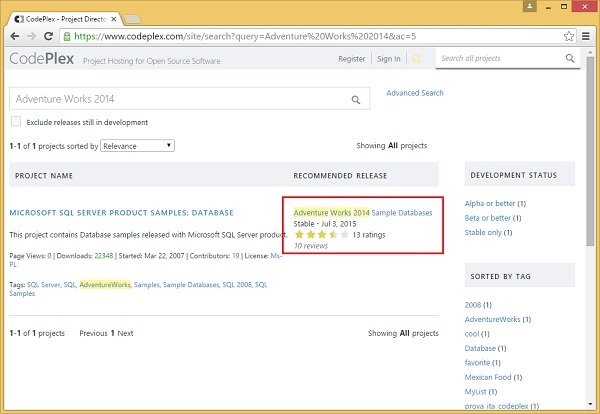
The easiest download to choose is the recommended one, which is the Full Database Backup.
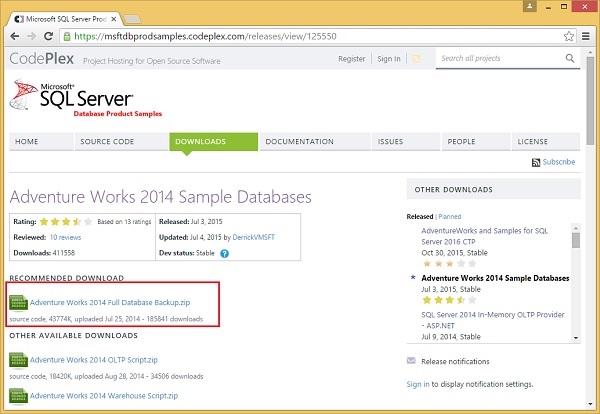
Step 4 − Click and save the zip file to any folder and extract the zip file which contains Database Backup file.
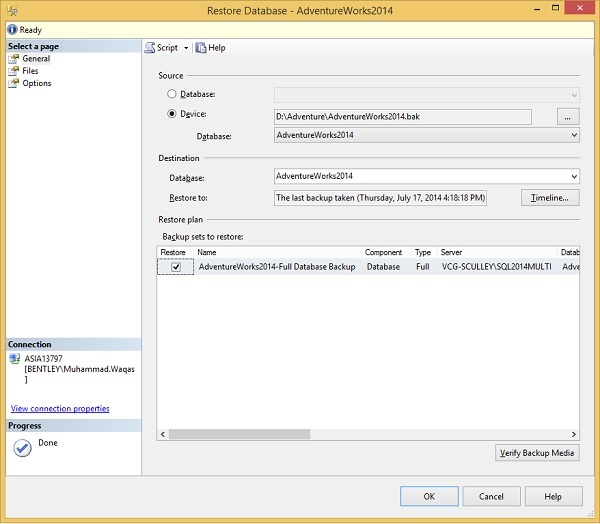
Step 5 − Open SQL Server Management Studio, connect to my local SQL Server instance and restore the backup.
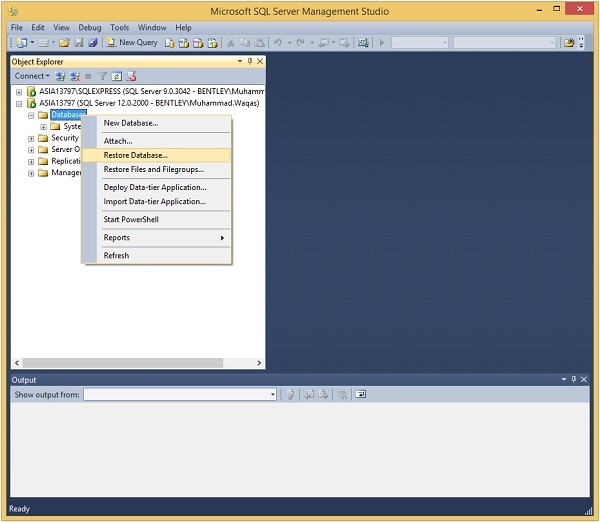
Step 6 − Right-click Databases → Restore Database. Click browse button.
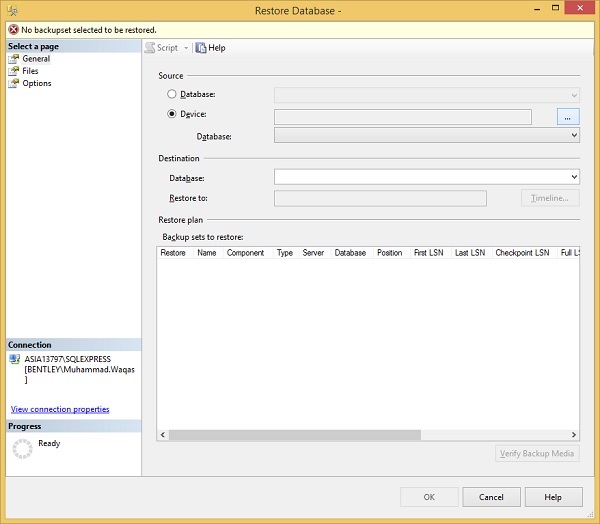
You will see the following window.
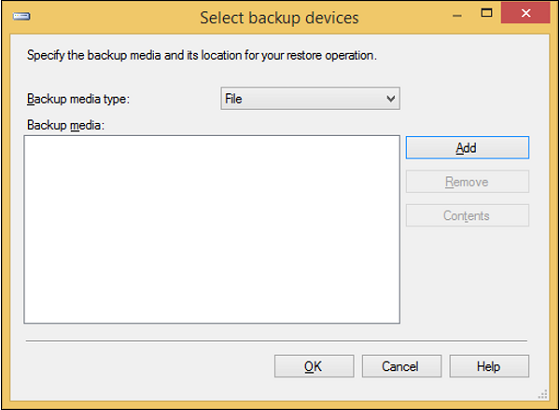
Step 7 − Click the Add button.
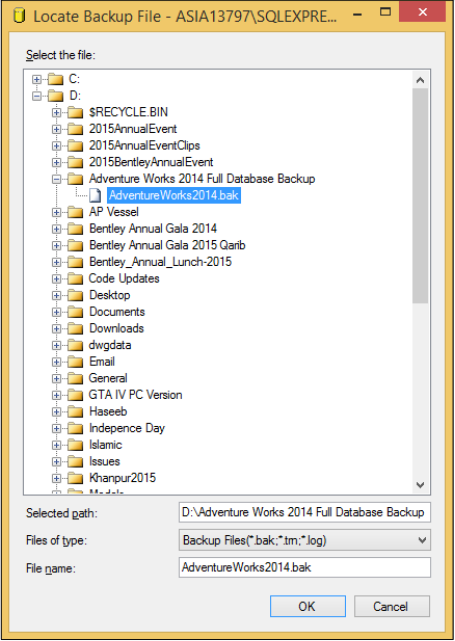
Step 8 − Browse the database backup file and click OK. Then OK one more time, and off goes the restore.
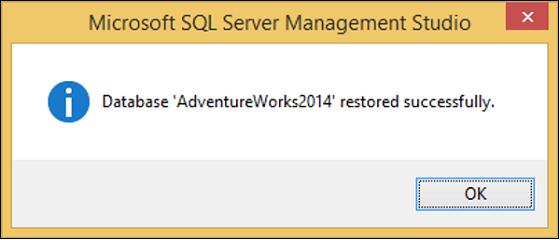
We've got a successful restore.
Well, this is a large database, and there sure are a lot of tables, so lets take a look at the Views instead.
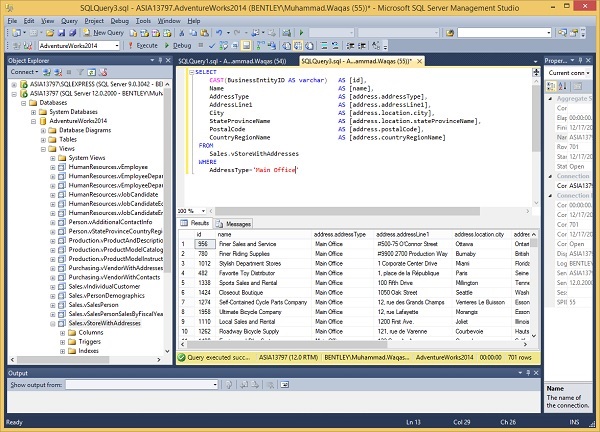
This looks a bit more manageable, and most of these views work by joining multiple related tables together, so lets have a look at this one called vStoreWithAddresses, which is defined in the Sales schema.

We're selecting from the view, which joins all the tables, and we're filtering on AddressType, which gives us only the Main Offices.
SELECT
   CAST(BusinessEntityID AS varchar) AS [id],
   Name AS [name],
   AddressType AS [address.addressType],
   AddressLine1 AS [address.addressLine1],
   City AS [address.location.city],
   StateProvinceName AS [address.location.stateProvinceName],
   PostalCode AS [address.postalCode],
   CountryRegionName AS [address.countryRegionName]
FROM
   Sales.vStoreWithAddresses
WHERE
   AddressType='Main Office'
When the above query is executed, you will receive the following output.
Let's launch the GUI version Migration tool.
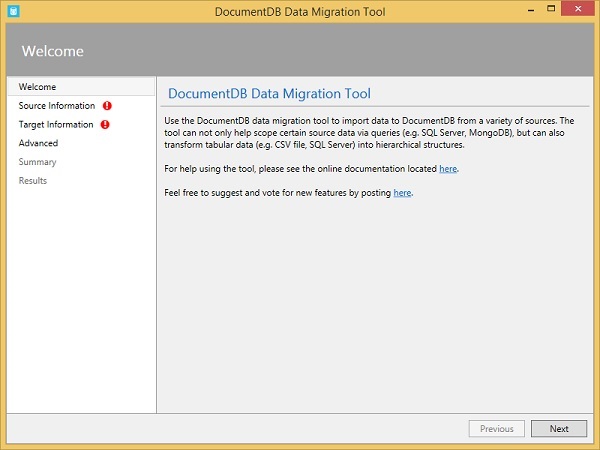
Step 1 − On the Welcome page, click Next for the Source Information page.
Step 2 − Select the SQL from dropdown menu and specify the database connection string.
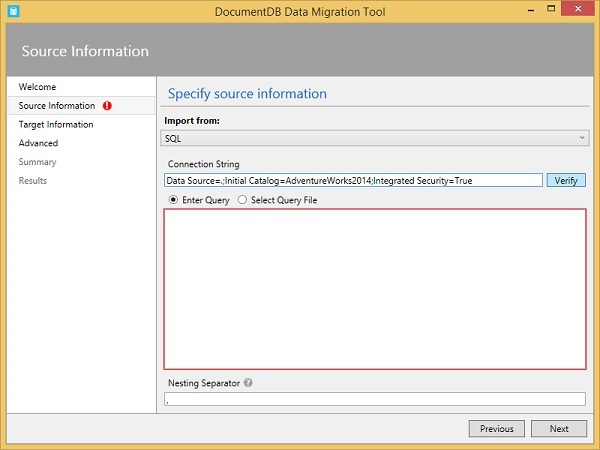
Step 3 − Click Verify button.
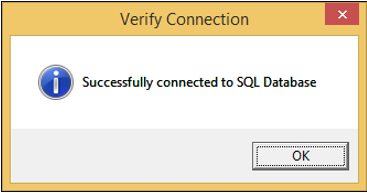
If you specify the correct connection string, then it will display the successful message.
Step 4 − Enter the query which you want to import.

Step 5 − Click Next.
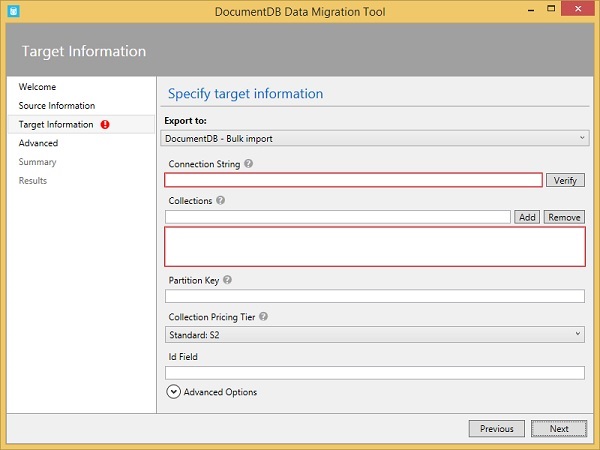
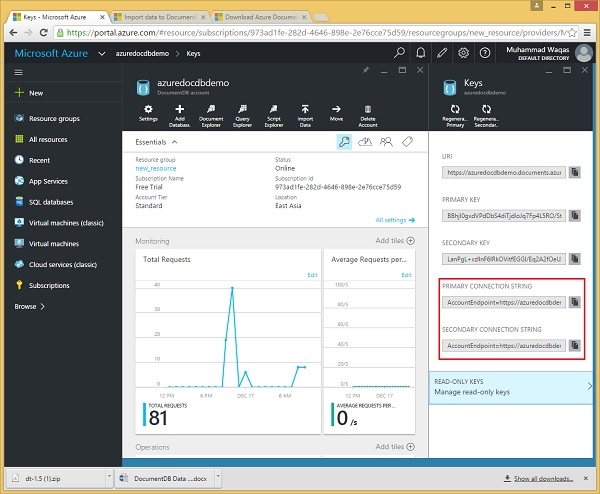
Step 6 − Specify the Connection String from your DocumentDB account which can be found from the Azure Portal.
Step 7 − Specify the Primary Connection String and dont forget to add the database name at the end of connection string.
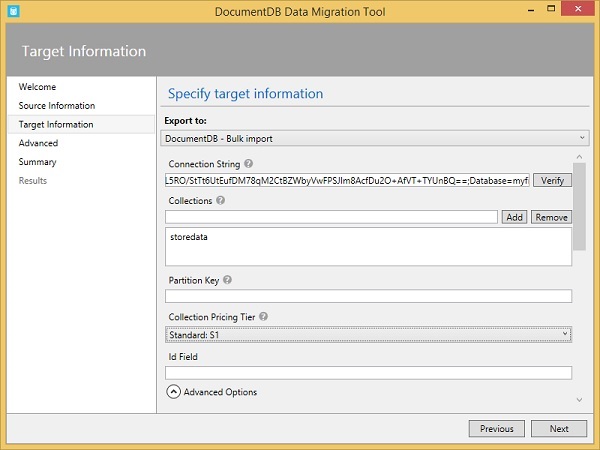
Step 8 − Specify the Collections to which you want to add the JSON files.
Step 9 − Click on the Advanced Options and scroll down the page.
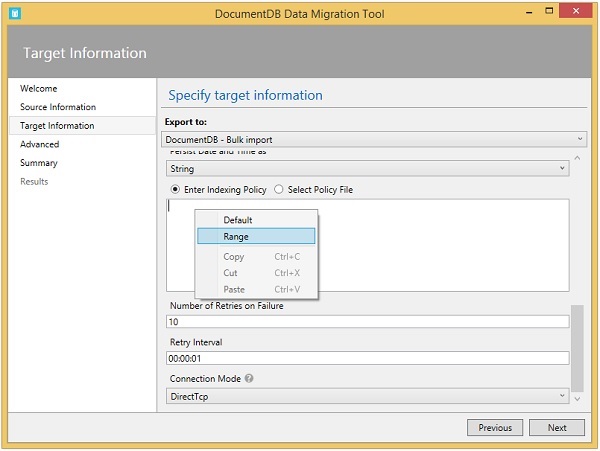
Step 10 − Specify the indexing policy, lets say Range indexing policy.
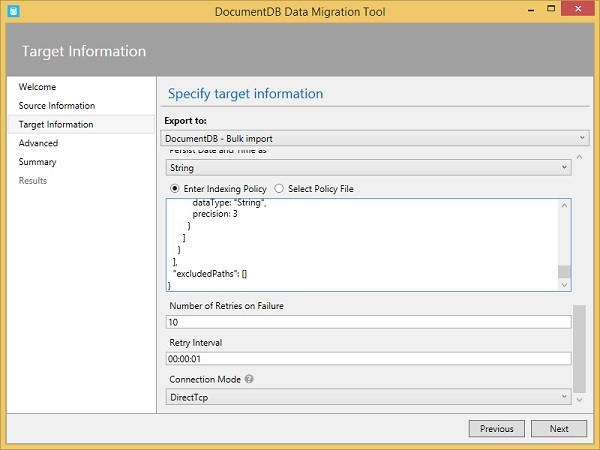
Step 11 − Click Next to Continue.
Step 12 − Click Next again to continue.
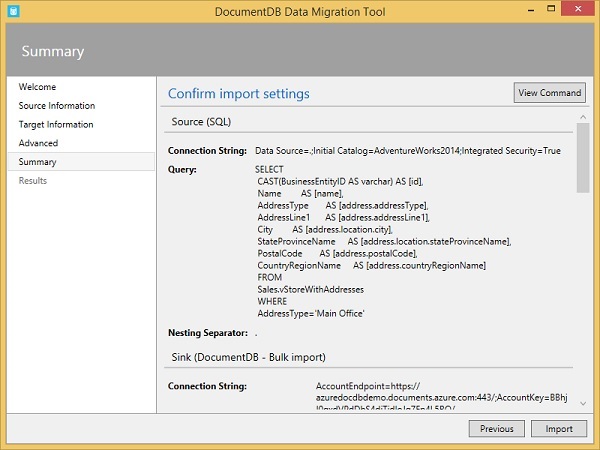
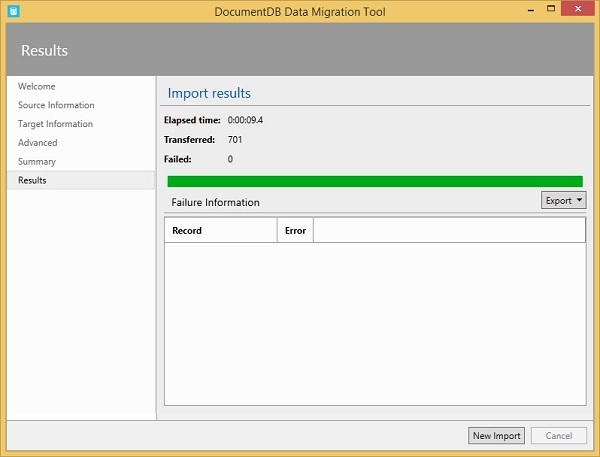
Step 13 − Here you can see the summary, now click the Import button.
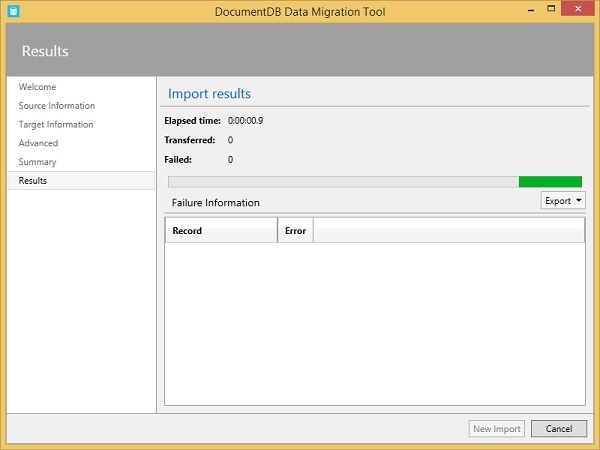
It will start importing data. Once it is completed, you can see on Azure Portal.