
Article Categories
- All Categories
-
 Data Structure
-
 Networking
-
 RDBMS
RDBMS
-
 Operating System
-
 Java
Java
-
 MS Excel
-
 iOS
iOS
-
 HTML
HTML
-
 CSS
CSS
-
 Android
-
 Python
-
 C Programming
-
 C++
C++
-
 C#
C#
-
 MongoDB
-
 MySQL
MySQL
-
 Javascript
-
 PHP
PHP
-
 Economics & Finance
Postman with Newman & Jenkins
We can integrate Postman with Newman and Jenkins. Newman is used to verify and execute a Collection. To integrate Newman and Jenkins, we have to follow the below steps −
Step1 − We have to complete the installation and configuration of Jenkins. The steps to perform this task is discussed in details in the below link −
https://www.tutorialspoint.com/jenkins/jenkins_installation.htm
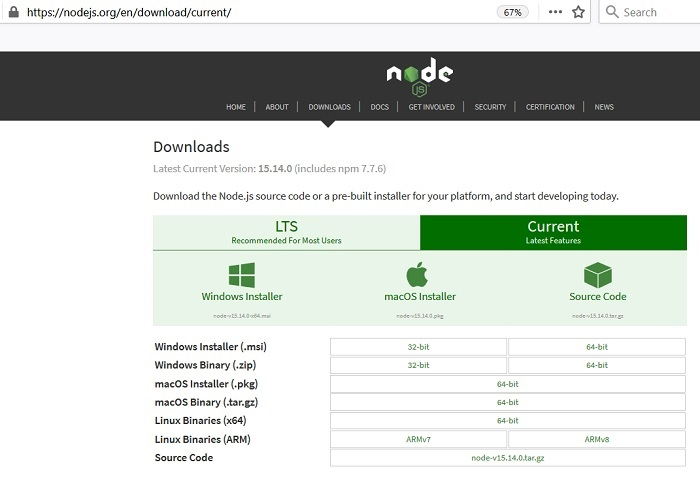
Step2 − We have to install npm and Nodejs. For installation of Nodejs can be done from the below link −
https://nodejs.org/en/download/current/
Step3 − The npm is allocated with Nodejs so once we download the Nodejs, the npm gets downloaded automatically.
Step4 − We have to install Newman with the help of the command: npm install -g newman.
Step5 − Open Terminal, navigate to the directory where the Collection is stored. Then run the command: newman run . (The file name should always be in inverted quotes).
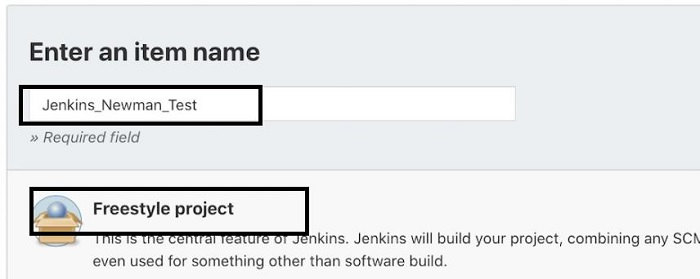
Step6 − Once Jenkins is up and running, it provides an interface: https://localhost:8080. Then click on New Item in the top left corner of the Postman application.

Step7 − Choose the option Freestyle Project, enter a project name then click on the OK button.
Step8 − Click on the Source Code Management tab and move to the Build section. Select the option Execute shell from the Add build step up dropdown.
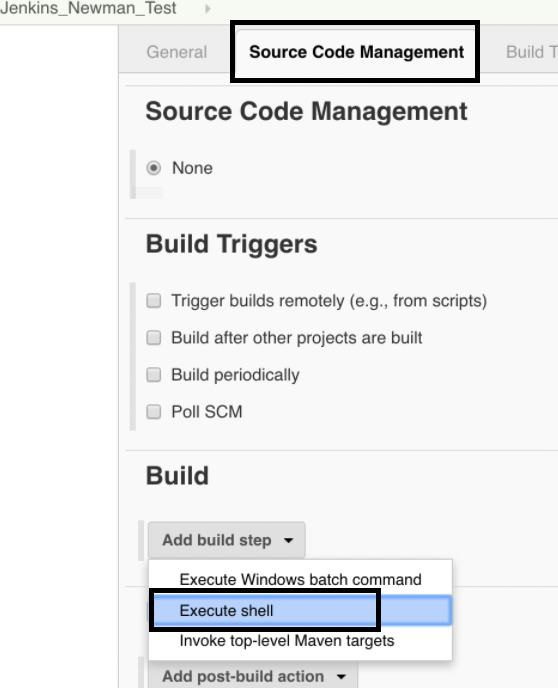
Step9 − Add the below command in the Execute Shell edit box under the Build tab.
newman run <file name> --supress-exit-code 1
The exit code means that Newman execution shall get stopped if any errors are encountered. Finally click on Save.
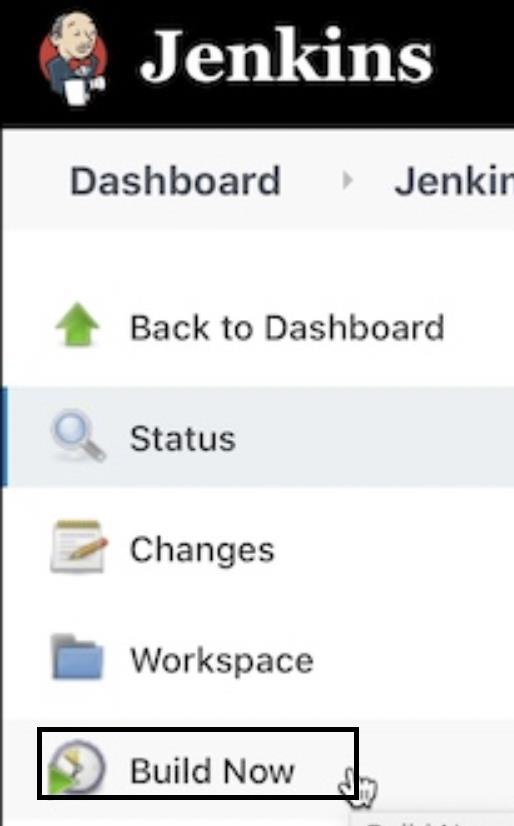
Step10 − Click on Build Now from the left of the Jenkins application.
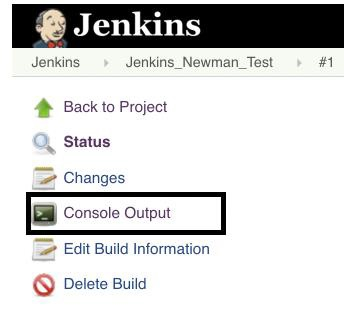
Step11 − After the Build has completed, click on the Console Output link in the sidebar from the Build details screen to get the details of the Newman output.

562 Views
