- GitLab Tutorial
- GitLab - Home
- GitLab Basics
- GitLab - Introduction
- GitLab - Installation
- GitLab - Git Commands
- GitLab - SSH Key Setup
- GitLab - Create Project
- GitLab - Fork a Project
- GitLab - Create a Branch
- GitLab - Add a File
- GitLab - Rebase Operation
- GitLab - Squashing Commits
- GitLab Users and Groups
- GitLab - Adding Users
- GitLab - Create Groups
- GitLab - Remove Users
- GitLab - User Permissions
- GitLab Issue Tracker
- GitLab - Create Issue
- GitLab - Merge Requests
- GitLab - Referencing Issues
- GitLab - Milestones
- GitLab - Wiki Pages
- GitLab Instance Management
- GitLab - Create Backup
- GitLab - Restore Backup
- GitLab - Import Repository
GitLab - Add a File
In this chapter, we will discuss about how to add a file to a project in the GitLab. We can add file in two ways −
- Using Command Line Interface
- Using Web Interface
Creating a file using Command Line Interface
Step 1 − To create a file by using command line interface, type the below command in your project directory −

Step 2 − Now go to your project directory and you will see the created file −

Creating a file using Web Interface
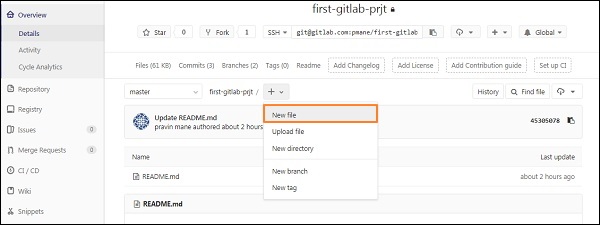
Step 1 − You can create a new file, by clicking on the '+' button which is at the right side of the branch selector in the dashboard −
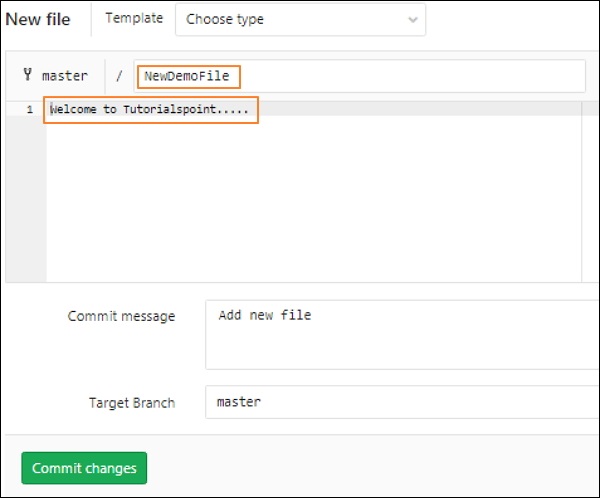
Step 2 − Enter the file name, add some content in the editor section and click on the Commit changes button to create the file.
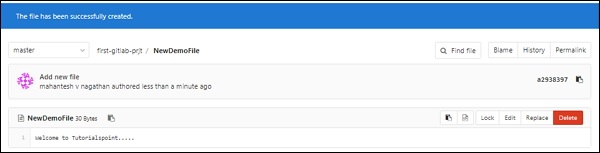
Step 3 − Now you will get a successful message after creating the file as shown below −
Advertisements
To Continue Learning Please Login