Whiteboard
Whiteboard Overview
Tutorialspoint whiteboard is a virtual whiteboard which can be used to teach online. This whiteboard provides built-in functionality for freehand drawing, writing, inserting text, shapes, images and even presentation from PPT, PDF or any word document.
Whiteboard Mode Buttons
Current version of whiteboard comes with 10 modes and every time you need a different operation, you will have to select that mode. For example if you want to insert a shape then you will have to select Shape mode button, if you want to start drawing then you will have to select Drawing mode button.
Background Colors
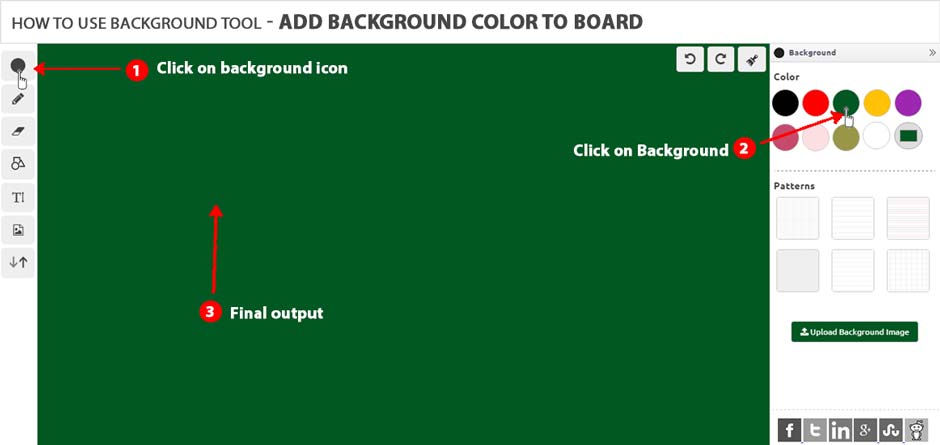
How I can change whiteboard background colors.
A. By default whiteboard comes with white background but you can change whiteboard background by selecting the given options. Either you can select a color from the given set of colors or you can choose a color using color dialogue box.
Background Image
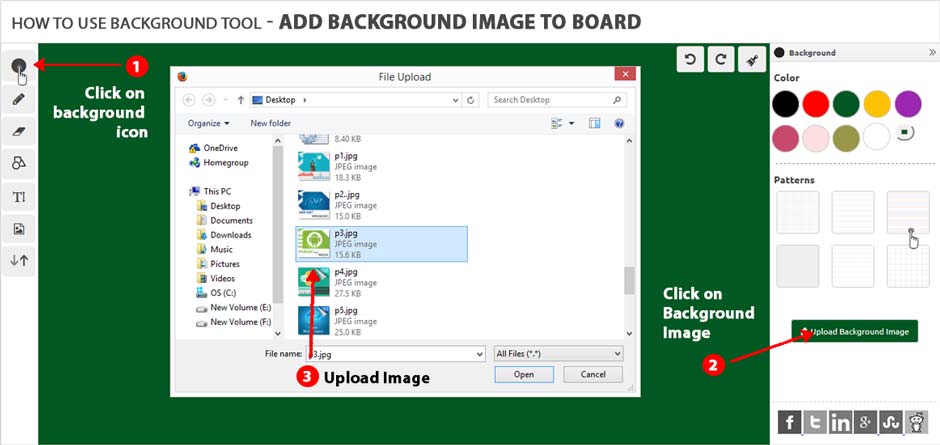
Its very easy to set whiteboard background image. Whiteboard provides the most frequently used backgrounds, so either you can select one of them or you can upload your own background image using given option.
Pencil
To start drawing first you will have to click on pencil icon, which provides a pencil in black color. You can use either mouse or any other device like digital graphics drawing tablet (Wacom Intuos Pro Pen) to draw or write any content on the whiteboard. You can change pencil color and its thickness using pen properties.
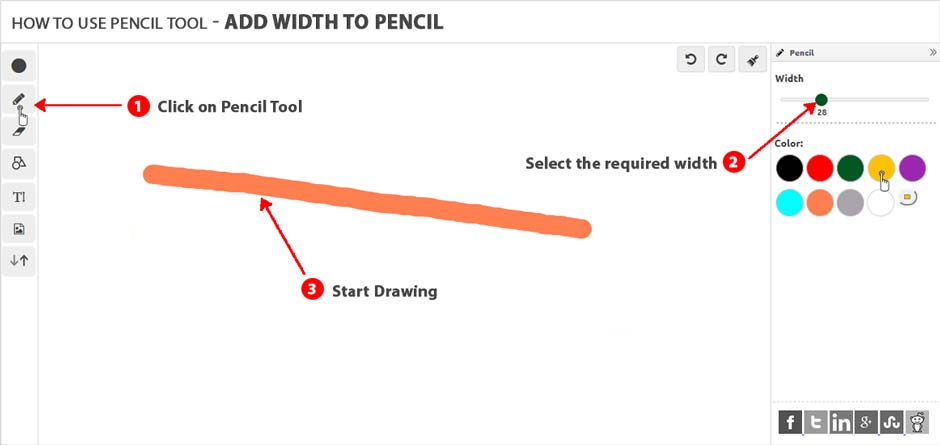
You can use Ctrl + to increase pen thickness and Ctrl - to decrease pencil thickness when you are in drawing mode. This feature will be useful when you will work in full screen mode.
Eraser
Whiteboard provides a nice eraser to erase your content from the whiteboard. You just need to select eraser option and use mouse to erase required content from the whiteboard. You can use eraser with different thickness using provided option.
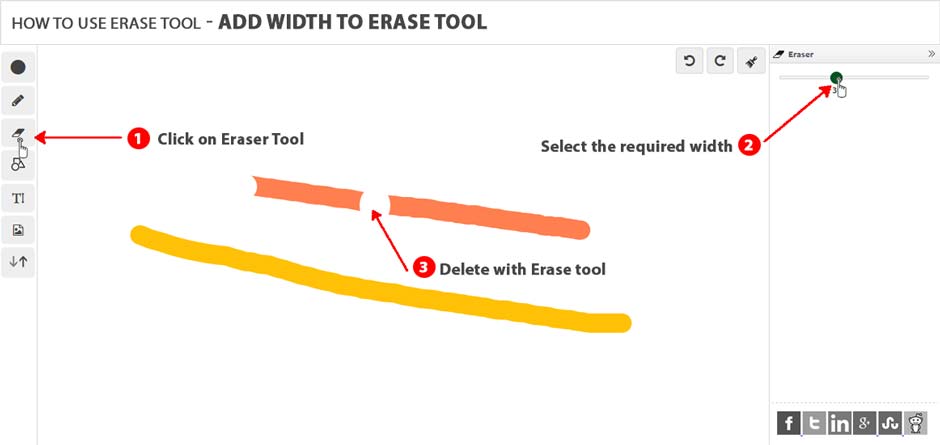
You can use Ctrl + to increase eraser thickness and Ctrl - to decrease eraser thickness when you are in Eraser mode. This feature will be useful when you will work in full screen mode.
Shapes
Whiteboard provides you all the basic shapes like line, rectangle, circle, square, triangle and eclipse. You can insert either of these shapes wherever you need them while using whiteboard. To insert a shape, first click on the Shape mode button and then select the shape from the given options.
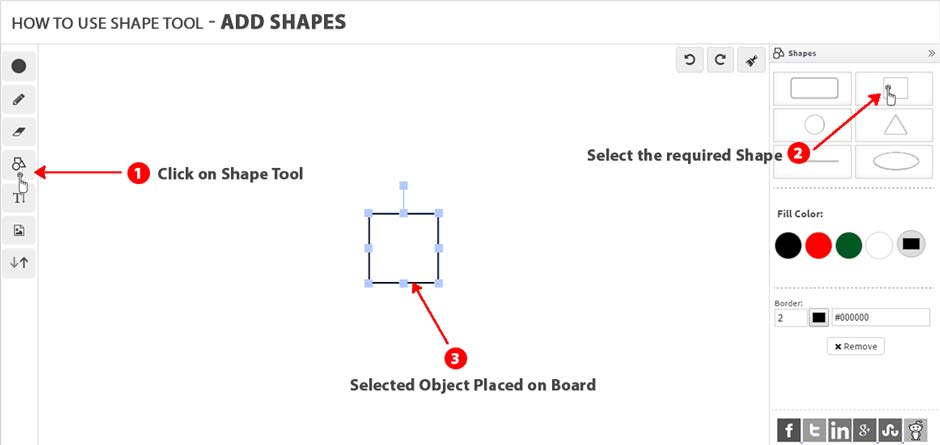
By default all the shapes will be filled with white color but you can fill a shape with different color of your choice. To fill a different color inside a shape, select the inserted shape and then select a color to be filled.
You can delete any inserted shape if it is not required anymore. To delete an inserted shape, activate it by clicking over it and then use delete option to delete activated shape.
Text
You can use Text mode to insert a text into the whiteboard and use keyboard to write your text.
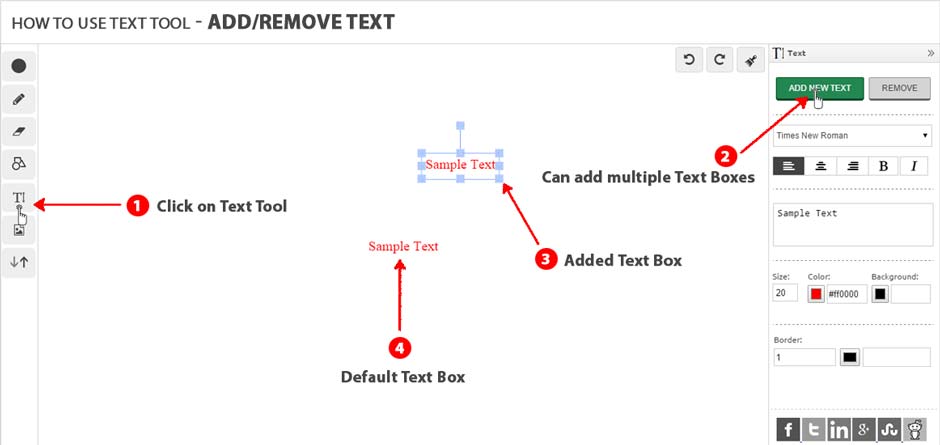
By default all the text will be inserted with red color and font size 20 but you can change these properties using text properties dialog box
You can delete any inserted text if it is not required anymore. To delete an inserted text, activate it by clicking over the text when mouse shows you move icon and then use delete option to delete activated text.
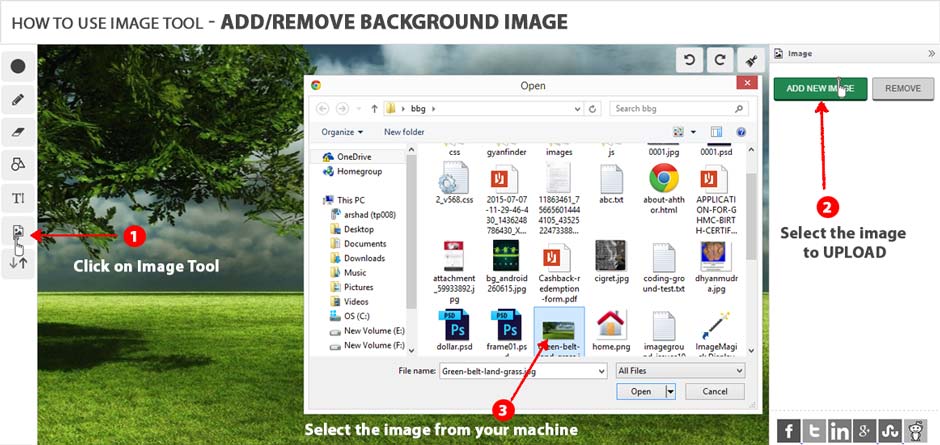
Images
You can insert a JPEG or PNG image into the whiteboard as an object. These images are different from whiteboard background. You can insert multiple images in your whiteboard based on your requirement. You will also be able to resize or rotate inserted image objects and place them at any point within the whiteboard.
Presentation
This is one of the most important feature of the whiteboard. You can upload your presentation and use its slides very similar to Microsoft Powerpoint. Additionally you will be able to perform all the operations, like drawing, inserting text, images etc., on the presentation slides. To upload your presentation you click on Presentation button and then choose any PPT, PDF or any other file, which you want to use for your presentation.
It will take a little while (1 to 2 minutes) in uploading and processing your presentation before you can use them as slides. Once processing is done, you will get a list of slides as below −
Now you can click on any of the presentation slides and it will be set as your whiteboards background. You can use arrow keys to navigate slides in forward and backward direction. You can use hide & show button to hide and show your presentation slides area.
Meeting
The most important feature of the whiteboard is that you can collaborate with your peers in real time. You can share your whiteboard with one or more participants provided your internet connection has a good bandwidth.
Starting a Meeting
To start a meeting click on the Meeting button which displays you following dialog box −
Now simply you need to enter a Unique Room ID, which could be 12345 or ABCDE or could be anything and then enter your name in the given text box. Finally use Create Meeting Room button to start a meeting. Your meeting will start and you will get your chat window as follows −
Following is the description of the different options available in Chat Window −
Video Sharing − You can use this button to start video sharing with other participants. Same button will be used to stop video sharing. By default video sharing will be disabled.
Audio Sharing − You can use this button to start audio sharing with other participants. Same button will be used to stop audio sharing. By default audio sharing will be disabled.
Send Invite − You can use this button to send meeting invite to your participants. You can provide email IDs separated by comma to send invitation to multiple participants.
Mute All − If you starting a meeting then you become the Admin of the meeting and you will have a right to mute all the participants any time. So use this button in case you want to mute all the participants.
Full Screen − You can use this button if you want to enlarge selected video of any of the participants.
Participant Area − This area will be filled with the participants as soon as they will join the meeting. If your participant enabled video sharing then this area will have video of the participant. You can click over the video to bring that participant in bigger video area.
Text Chat − You will use Text Chat box to have text chat with all the participants. Messages sent through this box will be shared with all the participants of the meeting.
Joining a Meeting
To join a meeting click on the Meeting button, which displays you following dialog box −
Now enter a Unique Room ID provided the meeting admin who already must have started a meeting and finally click on Join Meeting Room. Once you joined the meeting, you will have following participant window which provides you almost similar options as we described above. You can enable disable your video, audio etc.
Raising a Hand
A participant will have additional option to raise hand during the meeting. To raise your hand simply click on hand button available in your chat window and a message will be sent to the admin about the same. A raised hand indicates that you are trying to say something so an attention should be given to you.
Full Screen Mode
You can switch on full screen mode anytime using the given icon. Once you are in full screen mode, then you can come back using Esc key.
