
Article Categories
- All Categories
-
 Data Structure
-
 Networking
-
 RDBMS
RDBMS
-
 Operating System
-
 Java
Java
-
 MS Excel
-
 iOS
iOS
-
 HTML
HTML
-
 CSS
CSS
-
 Android
-
 Python
-
 C Programming
-
 C++
C++
-
 C#
C#
-
 MongoDB
-
 MySQL
MySQL
-
 Javascript
-
 PHP
PHP
Selected Reading
Set Border for an ImageView in iOS?
Setting border for image view is easy, In this post we will see how to set Border for an Image View in iOS.
Let’s get started.
Step 1 − Open Xcode → New Project → Single View Application → Let’s name it “BorderToImage”
We will create an image view and a button in our storyboard on tap of button we will add border to image view. We could do the same in viewDidLoad but to see the difference we’re doing this.
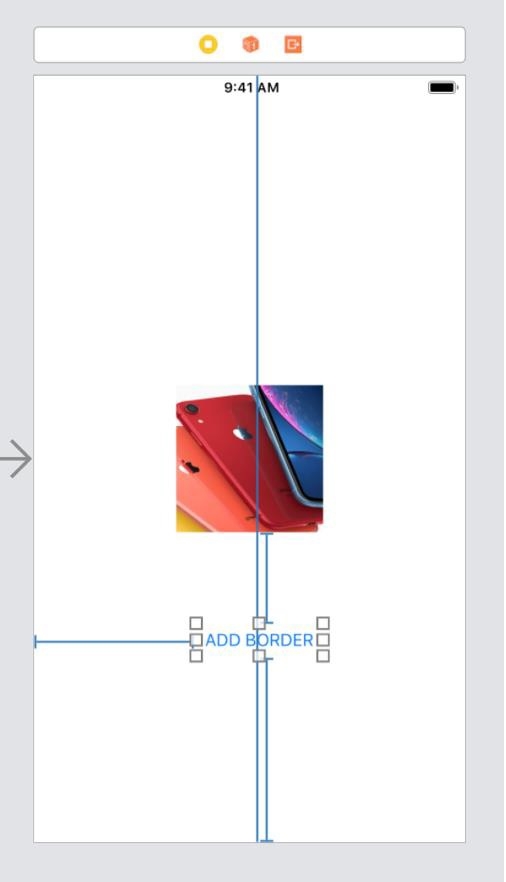
Step 2 − In Main.storyboard add an image view and a button as shown below.
Step 3 − Create @IBOutlet for image and name it imgView and create for button and name it btnAddBorder.
Step 4 − Add below code in btnAddBorder function
@IBAction func btnAddBorder(_ sender: Any) {
   imgView.layer.borderColor = UIColor(red: 0.5, green: 0.5, blue: 0.5, alpha: 1.0).cgColor
   imgView.layer.masksToBounds = true
   imgView.contentMode = .scaleToFill
   imgView.layer.borderWidth = 5
}
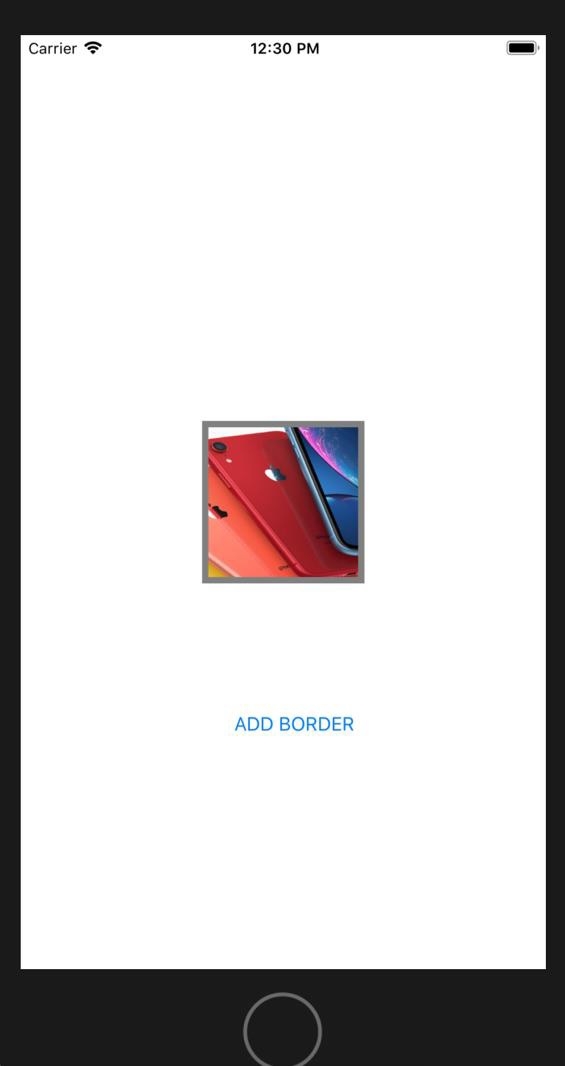
And you’re done run the code to see output.
Example
import UIKit
class ViewController: UIViewController {
   @IBOutlet var imgView: UIImageView!
   override func viewDidLoad() {
      super.viewDidLoad()
   }
   @IBAction func btnAddBorder(_ sender: Any) {
      imgView.layer.borderColor = UIColor(red: 0.5, green: 0.5, blue: 0.5, alpha: 1.0).cgColor
      imgView.layer.masksToBounds = true
      imgView.contentMode = .scaleToFill
      imgView.layer.borderWidth = 5
   }
}
Output

Updated on: 2019-07-30T22:30:26+05:30
1K+ Views

Advertisements