
Article Categories
- All Categories
-
 Data Structure
-
 Networking
-
 RDBMS
RDBMS
-
 Operating System
-
 Java
Java
-
 MS Excel
-
 iOS
iOS
-
 HTML
HTML
-
 CSS
CSS
-
 Android
-
 Python
-
 C Programming
-
 C++
C++
-
 C#
C#
-
 MongoDB
-
 MySQL
MySQL
-
 Javascript
-
 PHP
PHP
-
 Economics & Finance
Selected Reading
How to write files to the assets folder in android using Kotlin?
This example demonstrates how to write files to the assets folder in android using Kotlin.
Step 1 − Create a new project in Android Studio, go to File ⇒ New Project and fill all required details to create a new project.
Step 2 − Add the following code to res/layout/activity_main.xml.
<?xml version="1.0" encoding="utf-8"?>
<RelativeLayout xmlns:android="http://schemas.android.com/apk/res/android"
   xmlns:tools="http://schemas.android.com/tools"
   android:layout_width="match_parent"
   android:layout_height="match_parent"
   android:padding="4dp"
   tools:context=".MainActivity">
   <TextView
      android:id="@+id/text2"
      android:layout_width="wrap_content"
      android:layout_height="wrap_content"
      android:layout_centerHorizontal="true"
      android:layout_marginTop="70dp"
      android:background="#008080"
      android:padding="5dp"
      android:text="TutorialsPoint"
      android:textColor="#fff"
      android:textSize="24sp"
      android:textStyle="bold" />
   <Button
      android:id="@+id/btnReadFile"
      android:layout_width="wrap_content"
      android:layout_height="wrap_content"
      android:layout_above="@id/textView"
      android:layout_centerInParent="true"
      android:layout_marginBottom="15dp"
      android:text="Read File" />
   <TextView
      android:id="@+id/textView"
      android:layout_width="wrap_content"
      android:layout_height="wrap_content"
      android:layout_centerInParent="true"
      android:textColor="@android:color/background_dark"
      android:textSize="16sp"
      android:textStyle="bold|italic" />
</RelativeLayout>
Step 3 − Add the following code to src/MainActivity.kt
import android.os.Bundle
import android.widget.Button
import android.widget.TextView
import androidx.appcompat.app.AppCompatActivity
import java.io.IOException
import java.io.InputStream
class MainActivity : AppCompatActivity() {
   lateinit var textView: TextView
   lateinit var button: Button
   override fun onCreate(savedInstanceState: Bundle?) {
      super.onCreate(savedInstanceState)
      setContentView(R.layout.activity_main)
      title = "KotlinApp"
      textView = findViewById(R.id.textView)
      button = findViewById(R.id.btnReadFile)
      button.setOnClickListener {
         var string: String? = ""
         var inputStream: InputStream? = null
         try {
            inputStream = assets.open("text.txt")
            val size: Int = inputStream.available()
            val buffer = ByteArray(size)
            inputStream.read(buffer)
            string = String(buffer)
         }
         catch (e: IOException) {
            e.printStackTrace()
         }
         textView.text = string
      }
   }
}
Step 4 − Add the following code to androidManifest.xml
<?xml version="1.0" encoding="utf-8"?>
<manifest xmlns:android="http://schemas.android.com/apk/res/android"
   package="com.example.q11">
   <application
      android:allowBackup="true"
      android:icon="@mipmap/ic_launcher"
      android:label="@string/app_name"
      android:roundIcon="@mipmap/ic_launcher_round"
      android:supportsRtl="true"
      android:theme="@style/AppTheme">
      <activity android:name=".MainActivity">
         <intent-filter>
            <action android:name="android.intent.action.MAIN" />
            <category android:name="android.intent.category.LAUNCHER" />
         </intent-filter>
      </activity>
   </application>
</manifest>
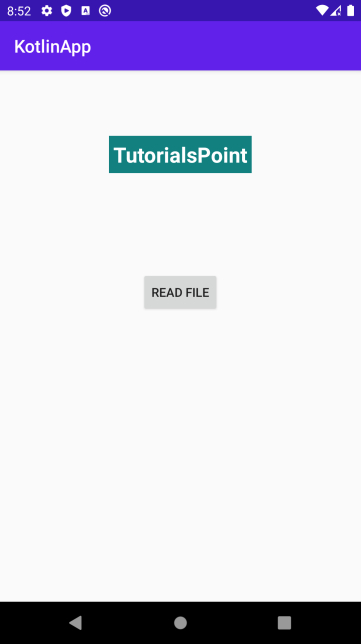
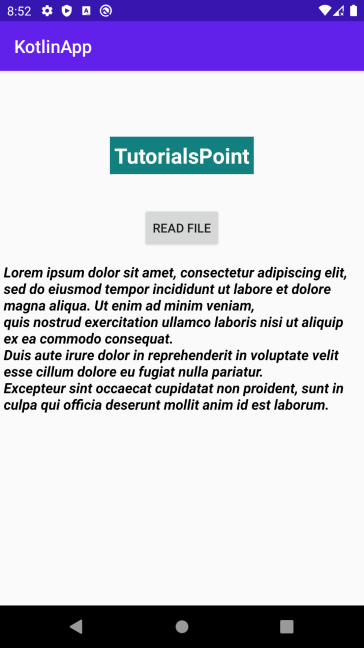
Let's try to run your application. I assume you have connected your actual Android Mobile device with your computer. To run the app from android studio, open one of your project's activity files and click the Run icon![]() from the toolbar. Select your mobile device as an option and then check your mobile device which will display your default screen.
from the toolbar. Select your mobile device as an option and then check your mobile device which will display your default screen.

Updated on: 2020-12-01T04:58:07+05:30
1K+ Views

Advertisements